Easter and Spring Crafts with Toddlers
Easter is a wonderful opportunity to get creative with your children. Even as young as 1 or 2 years old, children can join in on crafts—especially when it comes to gluing, stamping, tearing, dabbing, or painting.
On this page, you’ll find simple Easter and spring craft ideas for toddlers. All projects are designed to be easily done with children under 3 and can be prepared quickly. You’ll also find matching templates in our collection that you can print out and use right away.
Crafting safely with toddlers (under 3)
Use only non-toxic materials suitable for children
Avoid small parts (or use them only under supervision)
Keep craft time short: 5–15 minutes
Protect the table and clothing (protective covering [e.g., newspaper, oilcloth, or craft mat], smock / old shirt)
Always stay close by
You can also find an overview of our tried-and-true basic craft supplies here.
Note:
When crafting with children under 3 years old, the focus is on participating. Small and large imperfections are part of the process and make every artwork unique.
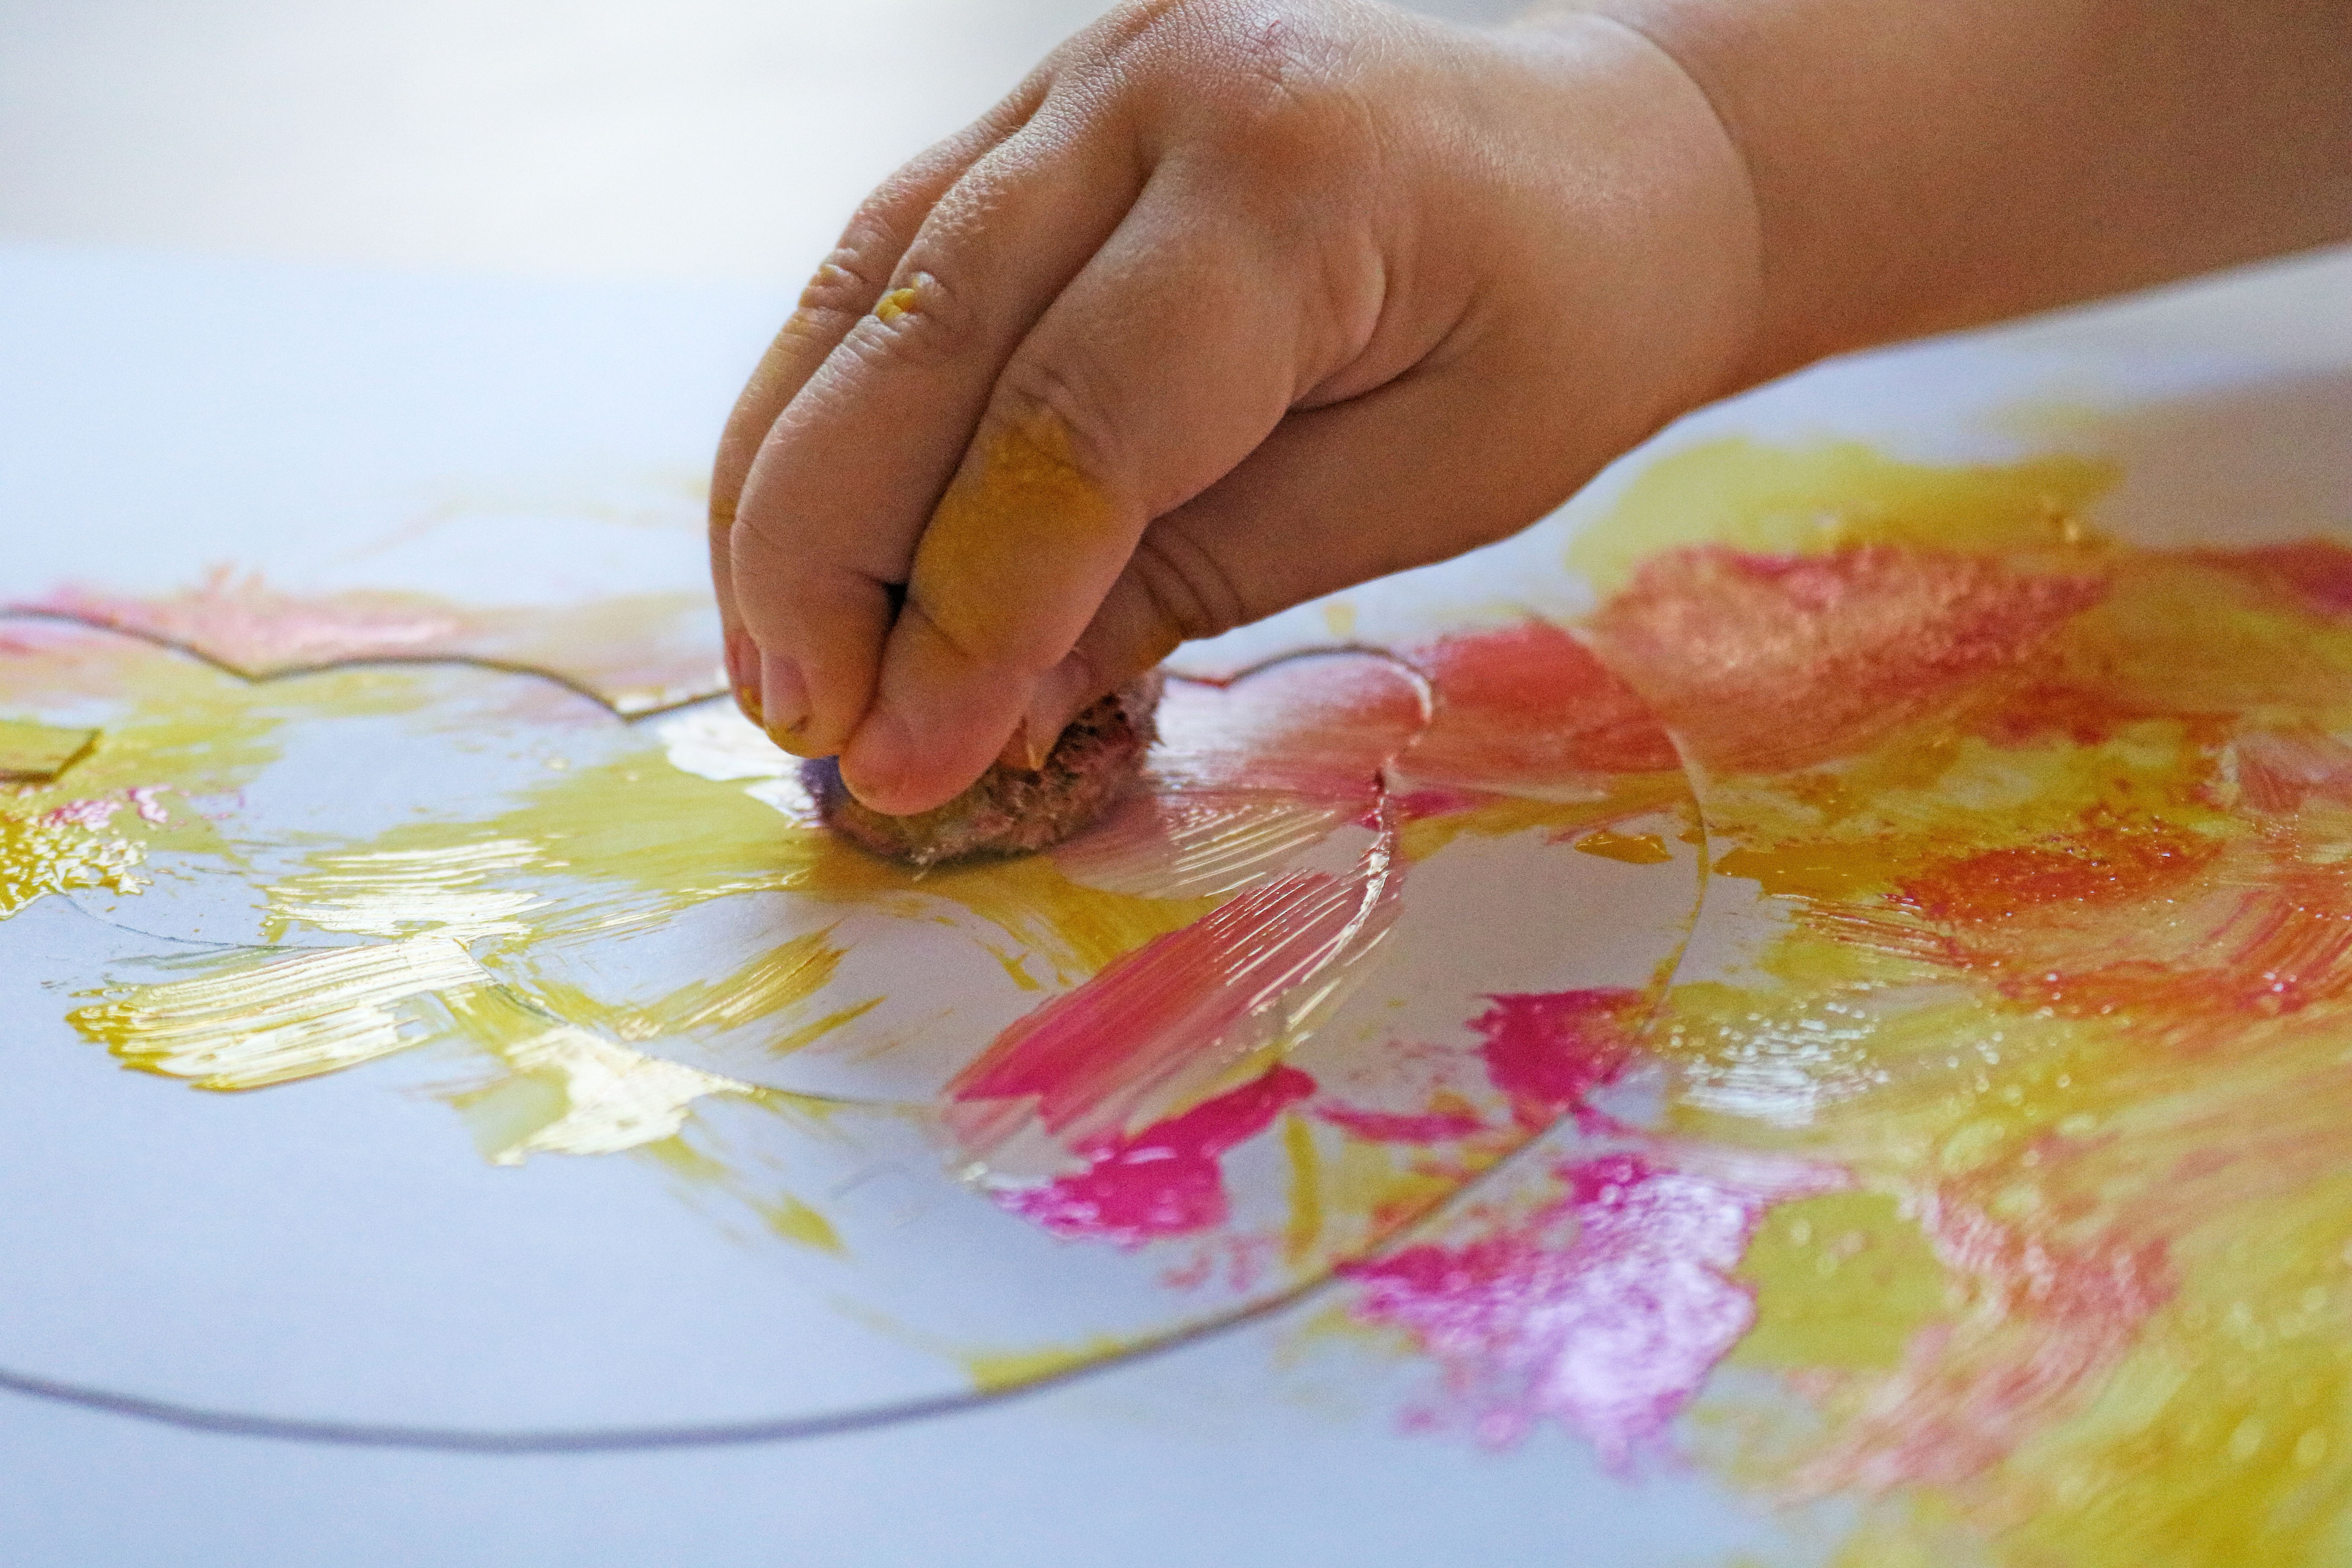
1. Finger-paint Easter eggs – A true Easter classic

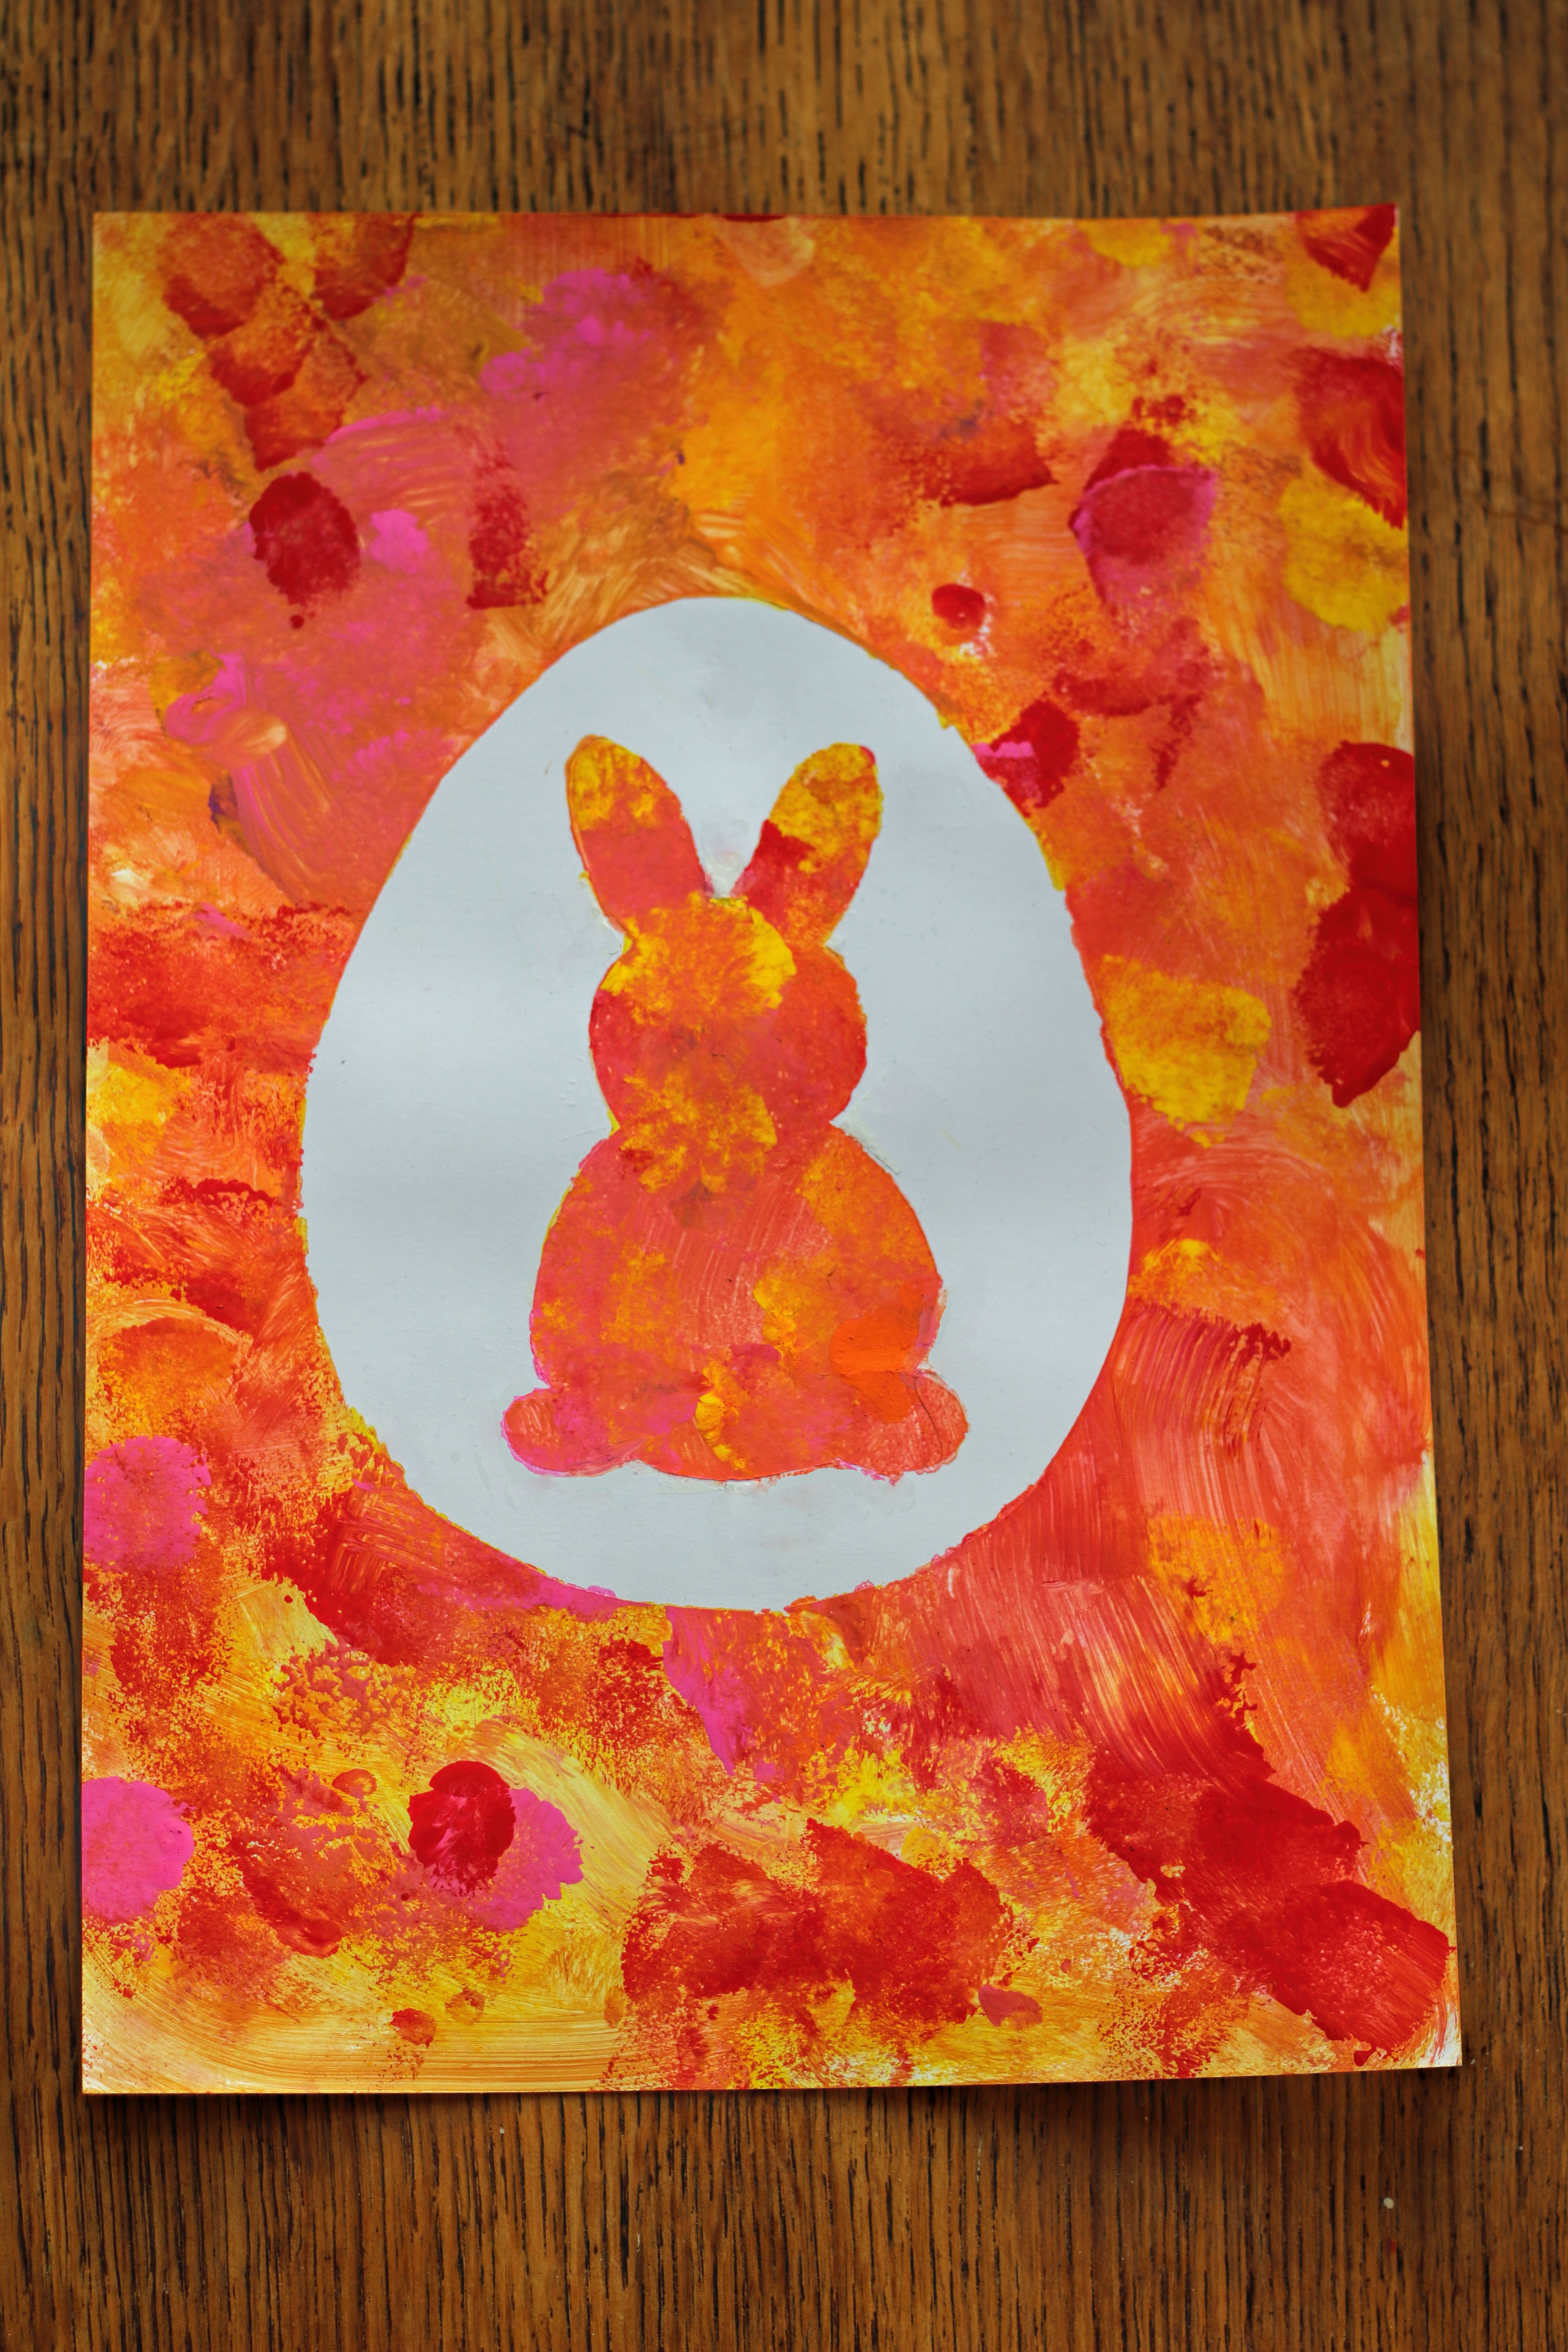
Finger paints and Easter eggs simply go hand in hand. This craft idea is a classic and perfect for little hands—dabbing, wiping, and clapping are all allowed here. Whether using hands, sponges, or pom-poms—there are no limits to your imagination.
You can use our egg templates as outlines to get started quickly, or you can make it a bit more elaborate by using a stencil.
Here's what you'll need:
- Cut-out eggs or a stencil made of sturdy paper or cardstock
- construction paper
- Finger paints:
- from 1 to 2 years
- ages 2 and up Most colors are permitted
- Double-sided tape – depending on your craft project
- We use a food-safe baking mat on the table.
- Protection for your child's clothes
- Wet wipes or a bowl of water for washing your hands
 construction paper
Affiliate links — we may receive a small commission, your price stays the same.


Here's how it works:
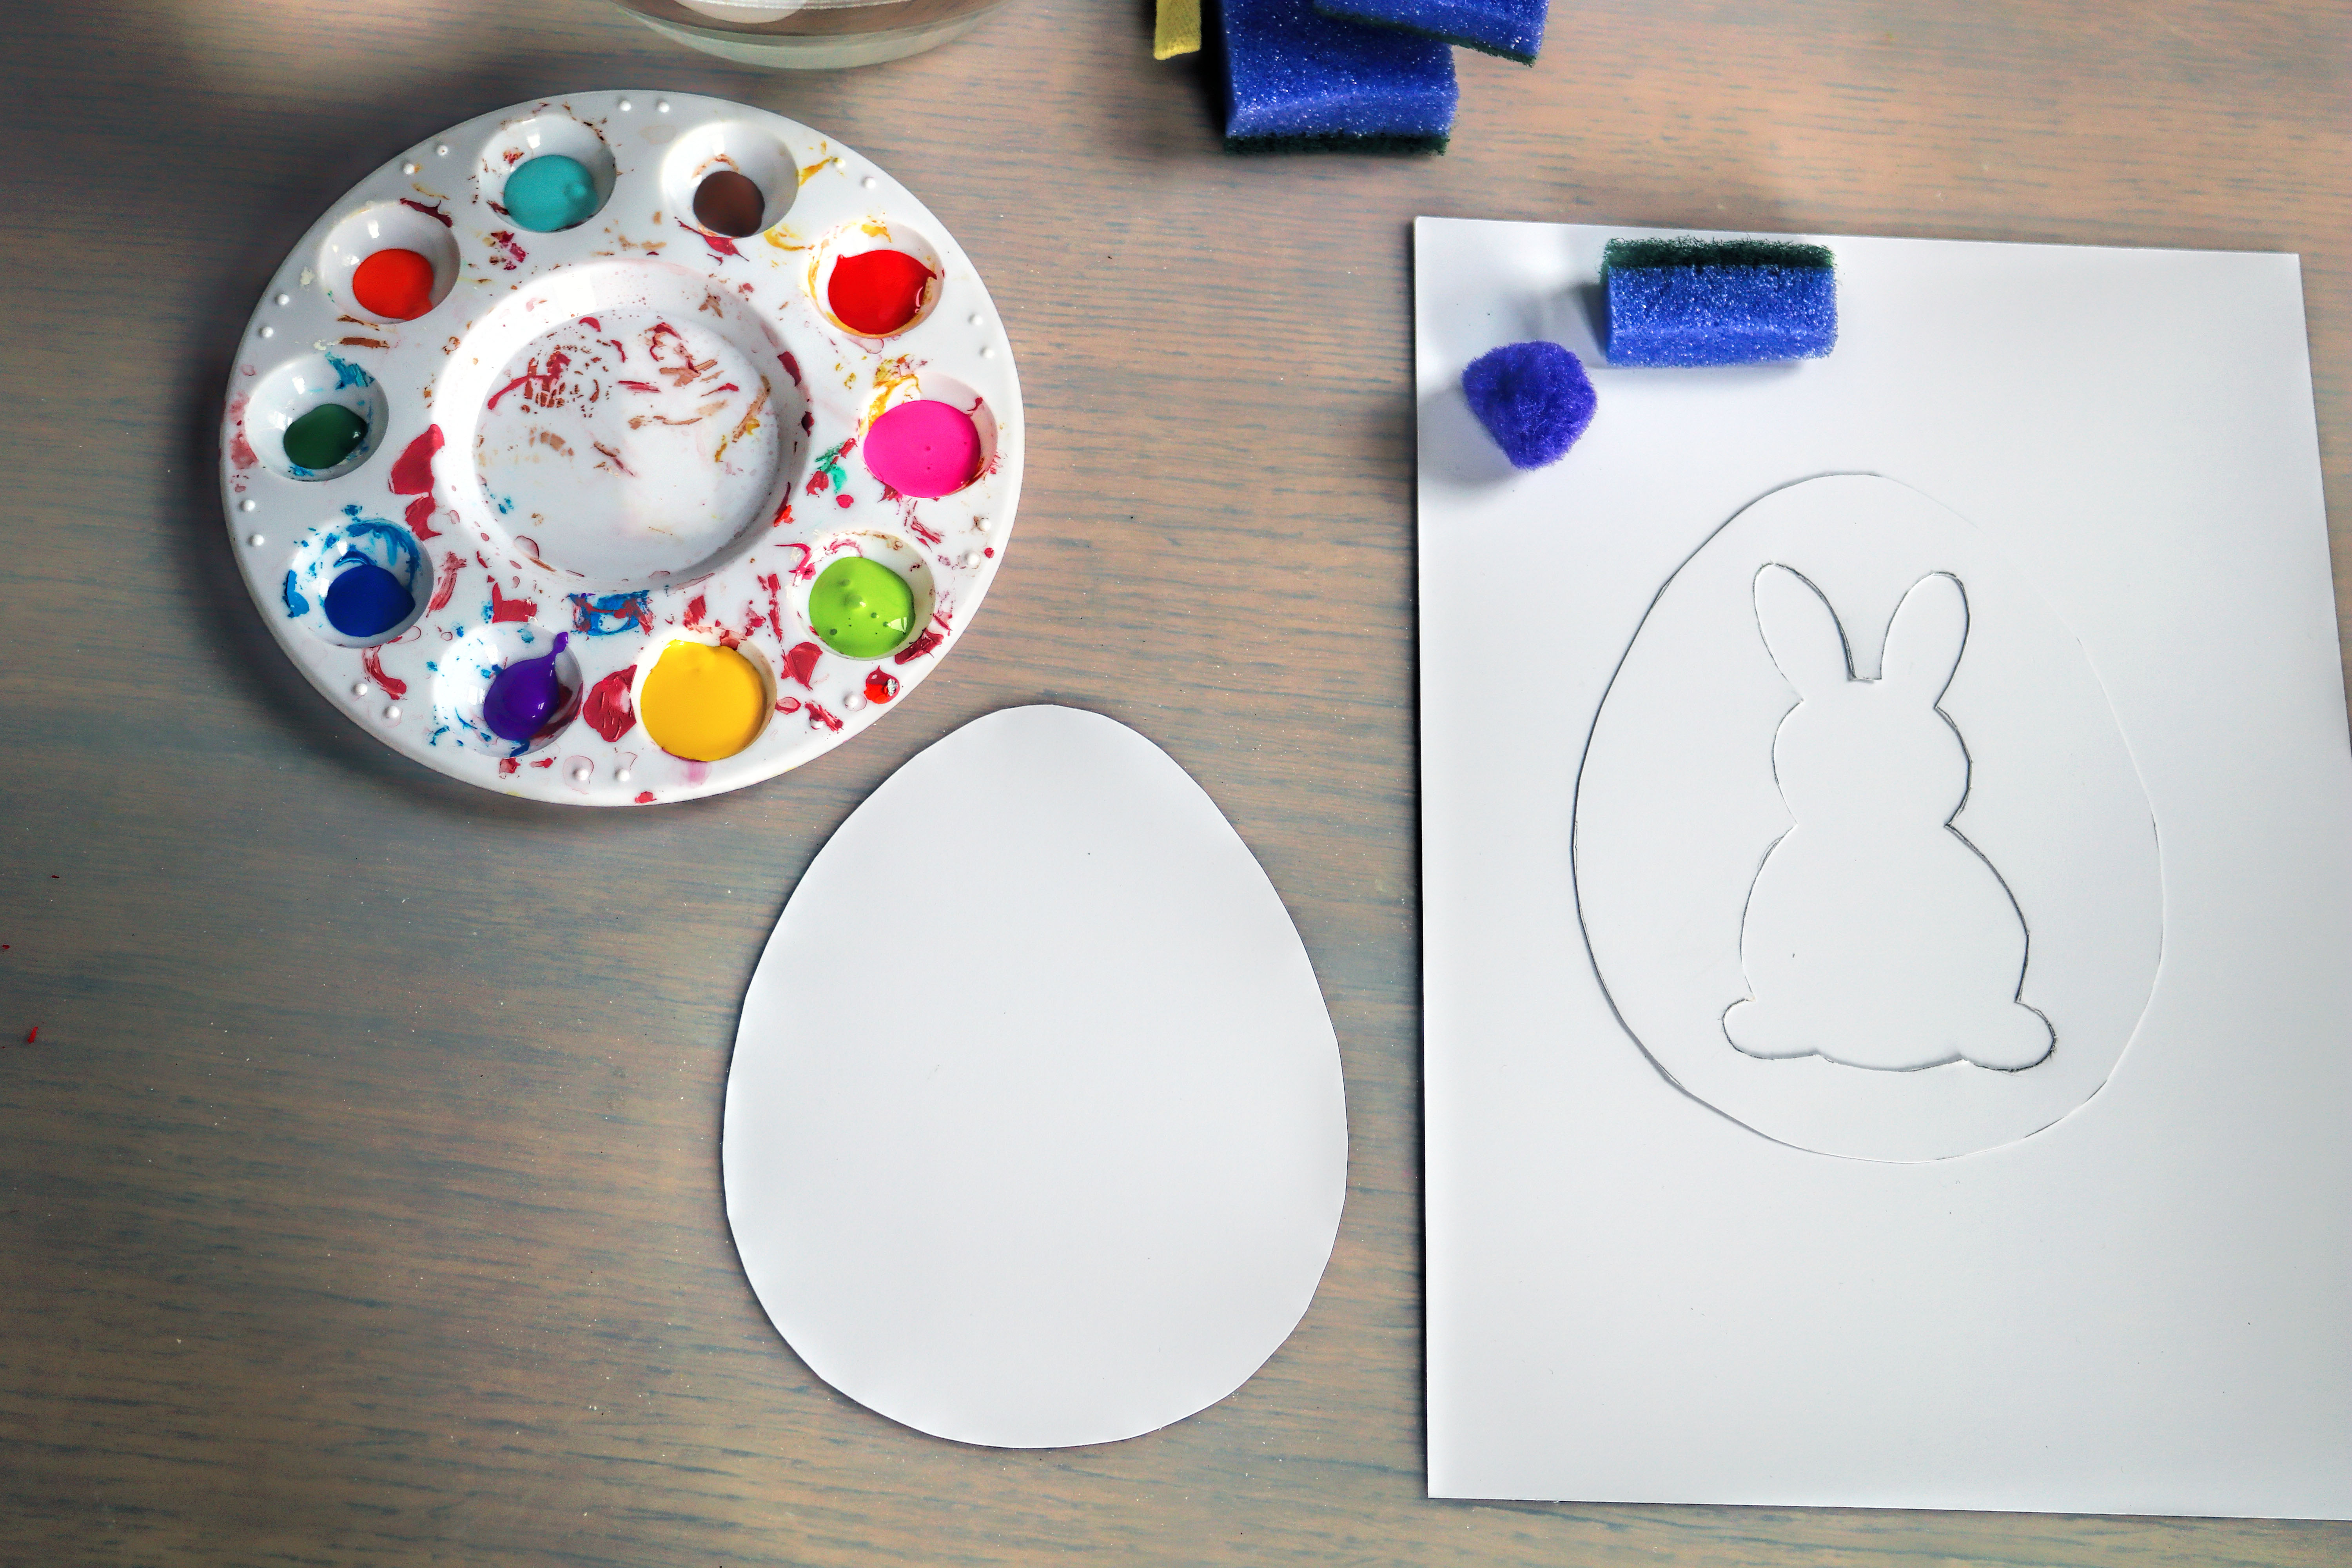
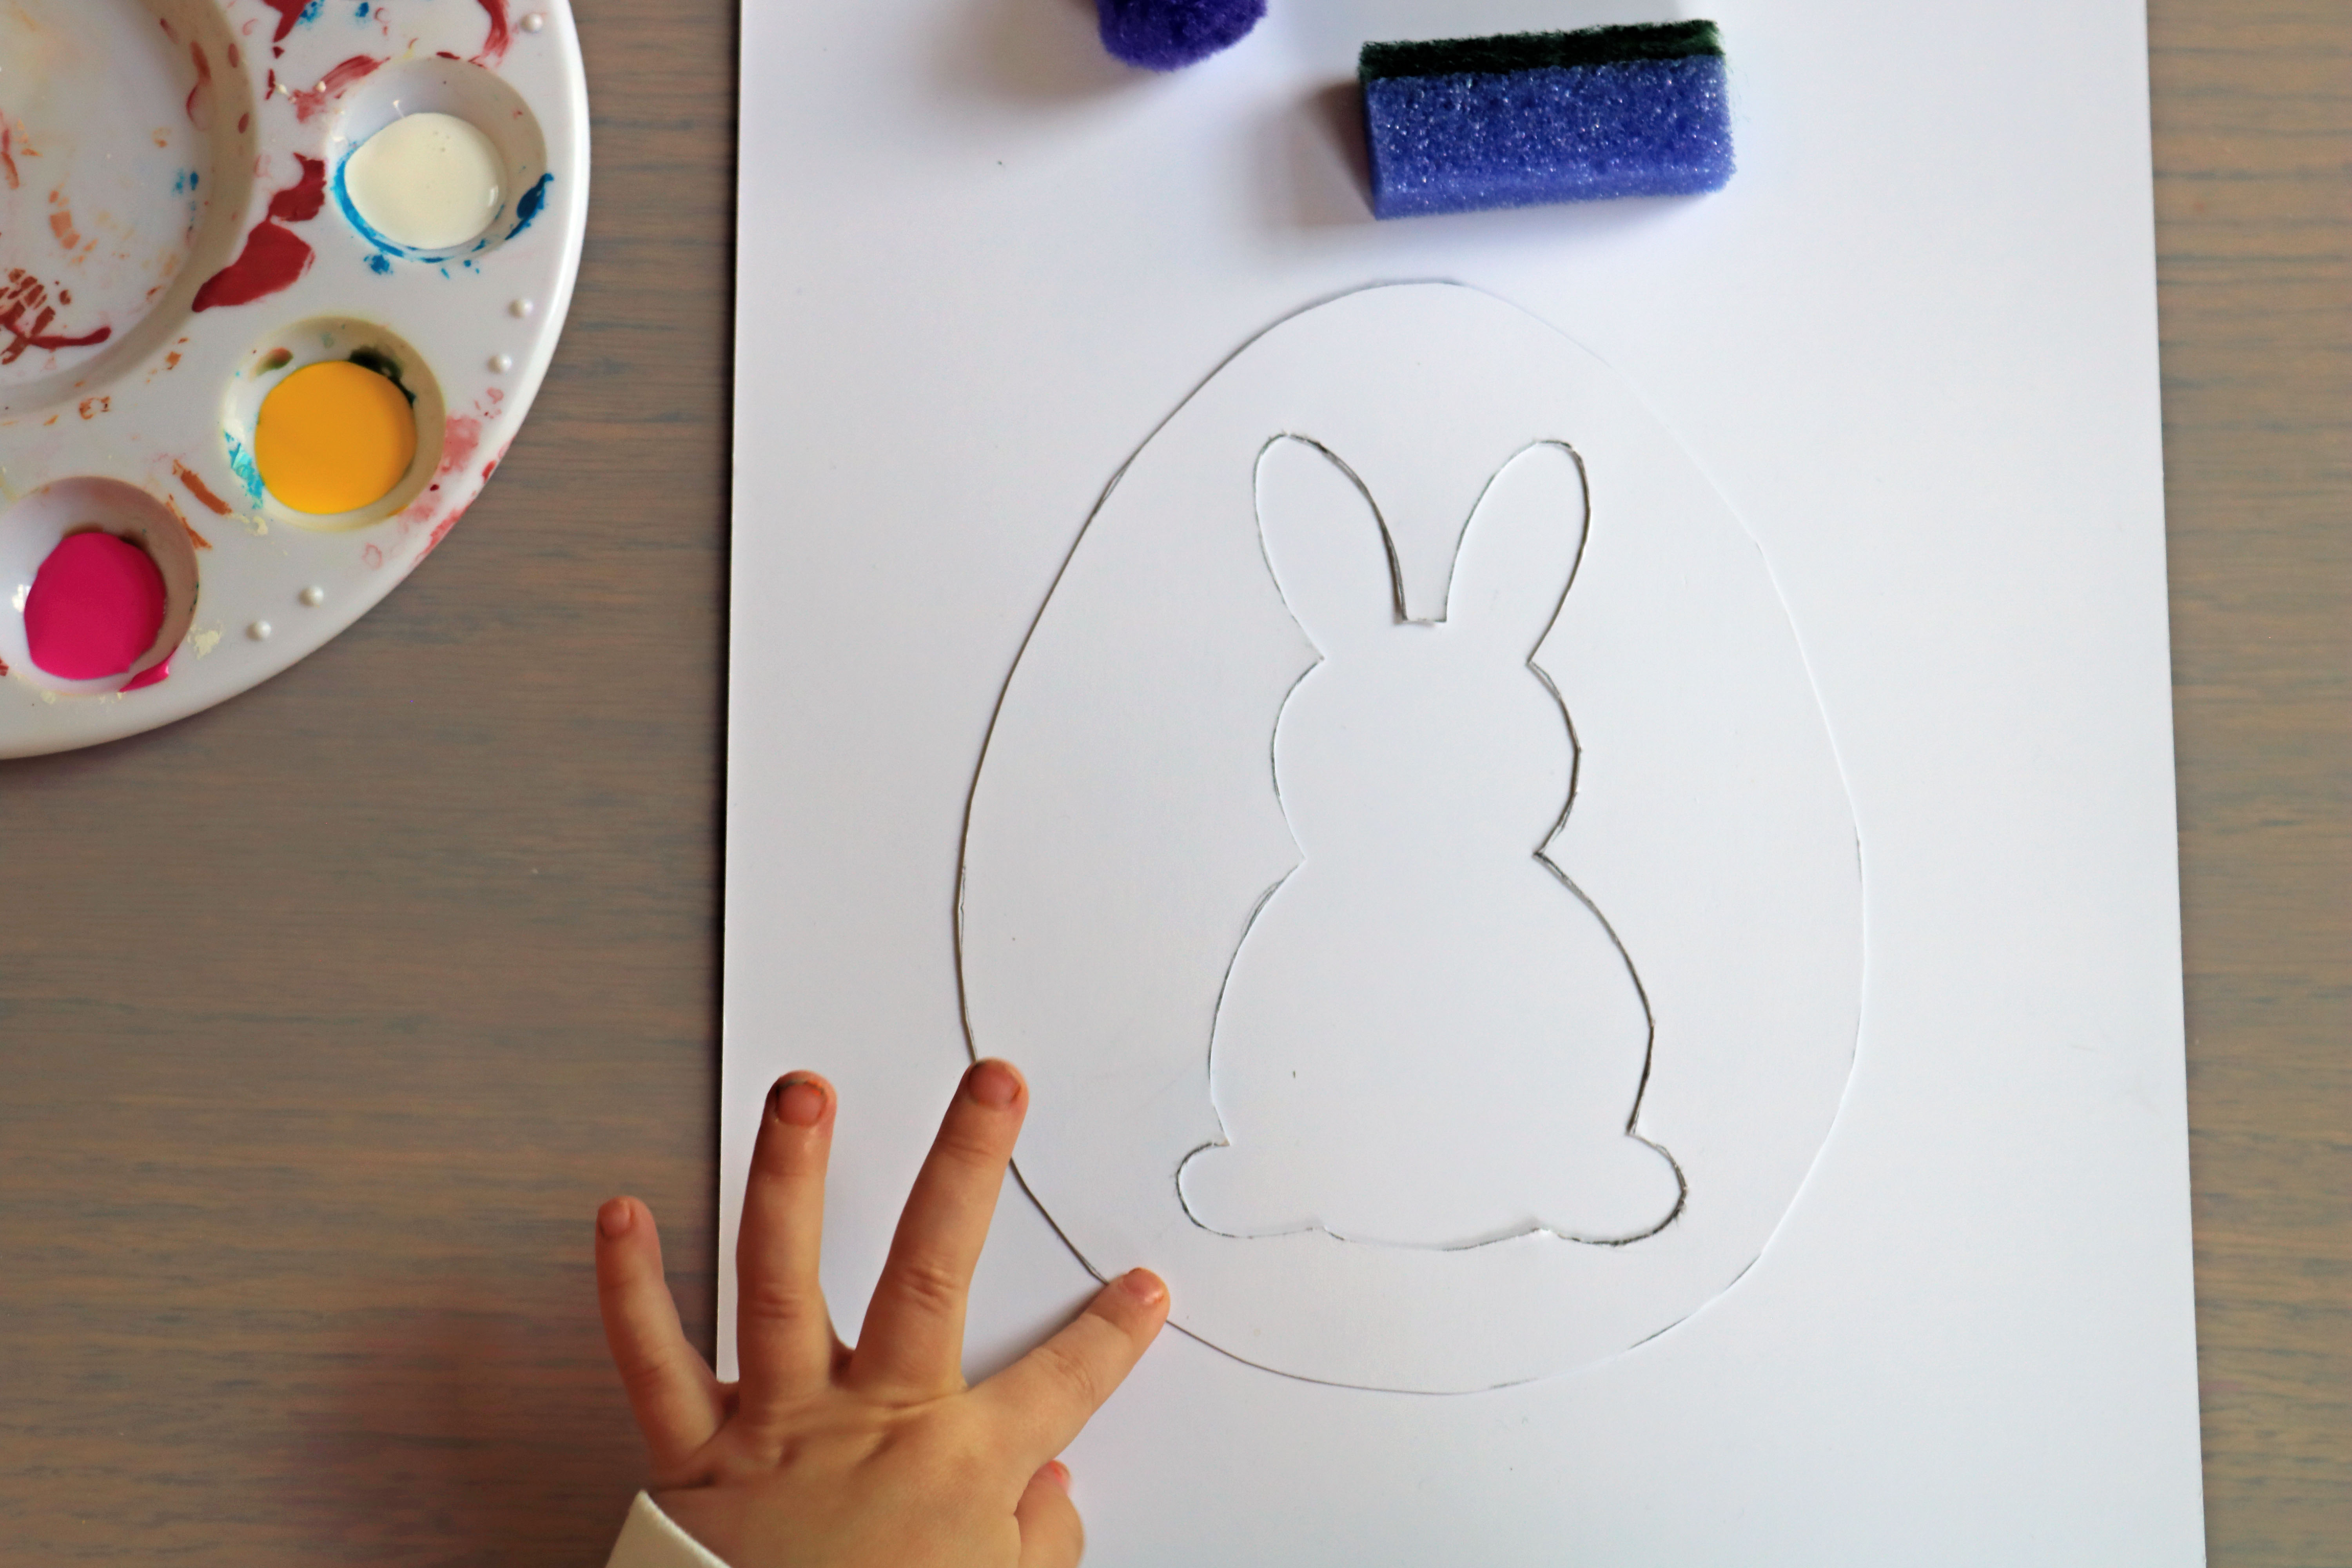
1. Prepare the template:
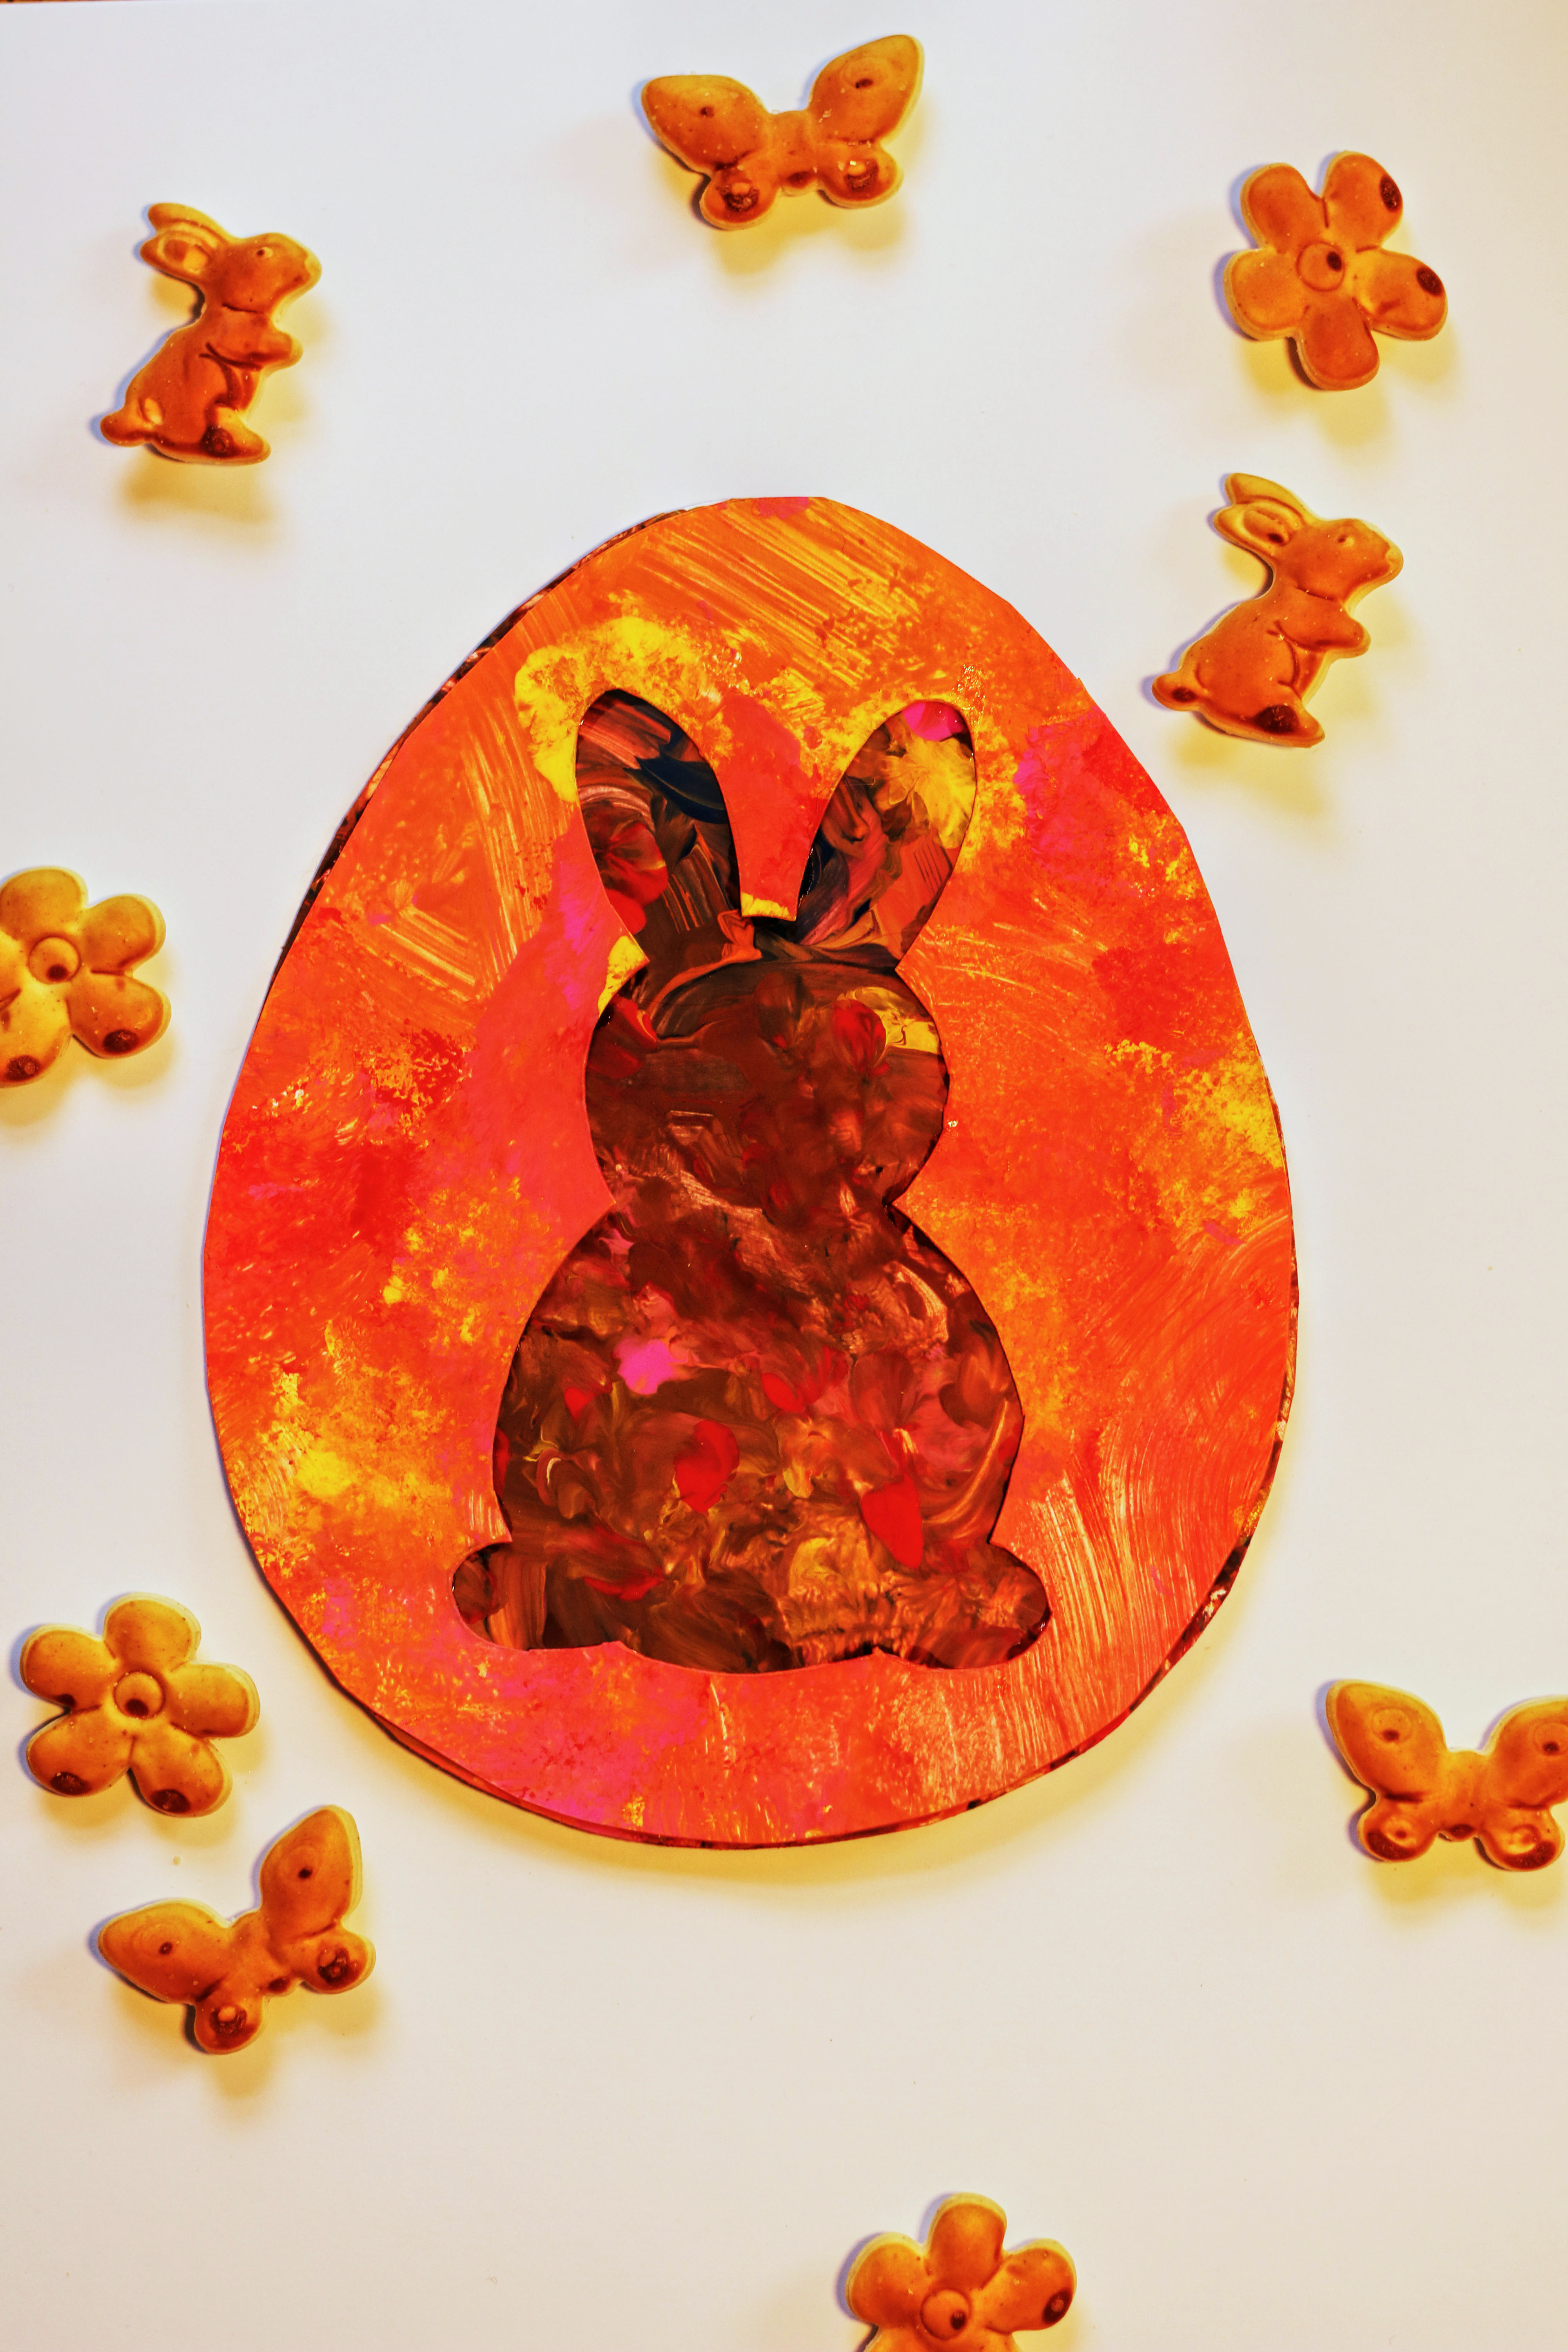
Print out one of our egg templates and cut it out. Optionally, you can glue the egg onto thick cardboard beforehand to make it more sturdy. In the photo tutorial, we used an egg and an egg with a cut-out bunny.
2. Set up your workspace:
Place a drop cloth on the table and put a smock or an old T-shirt on your child.
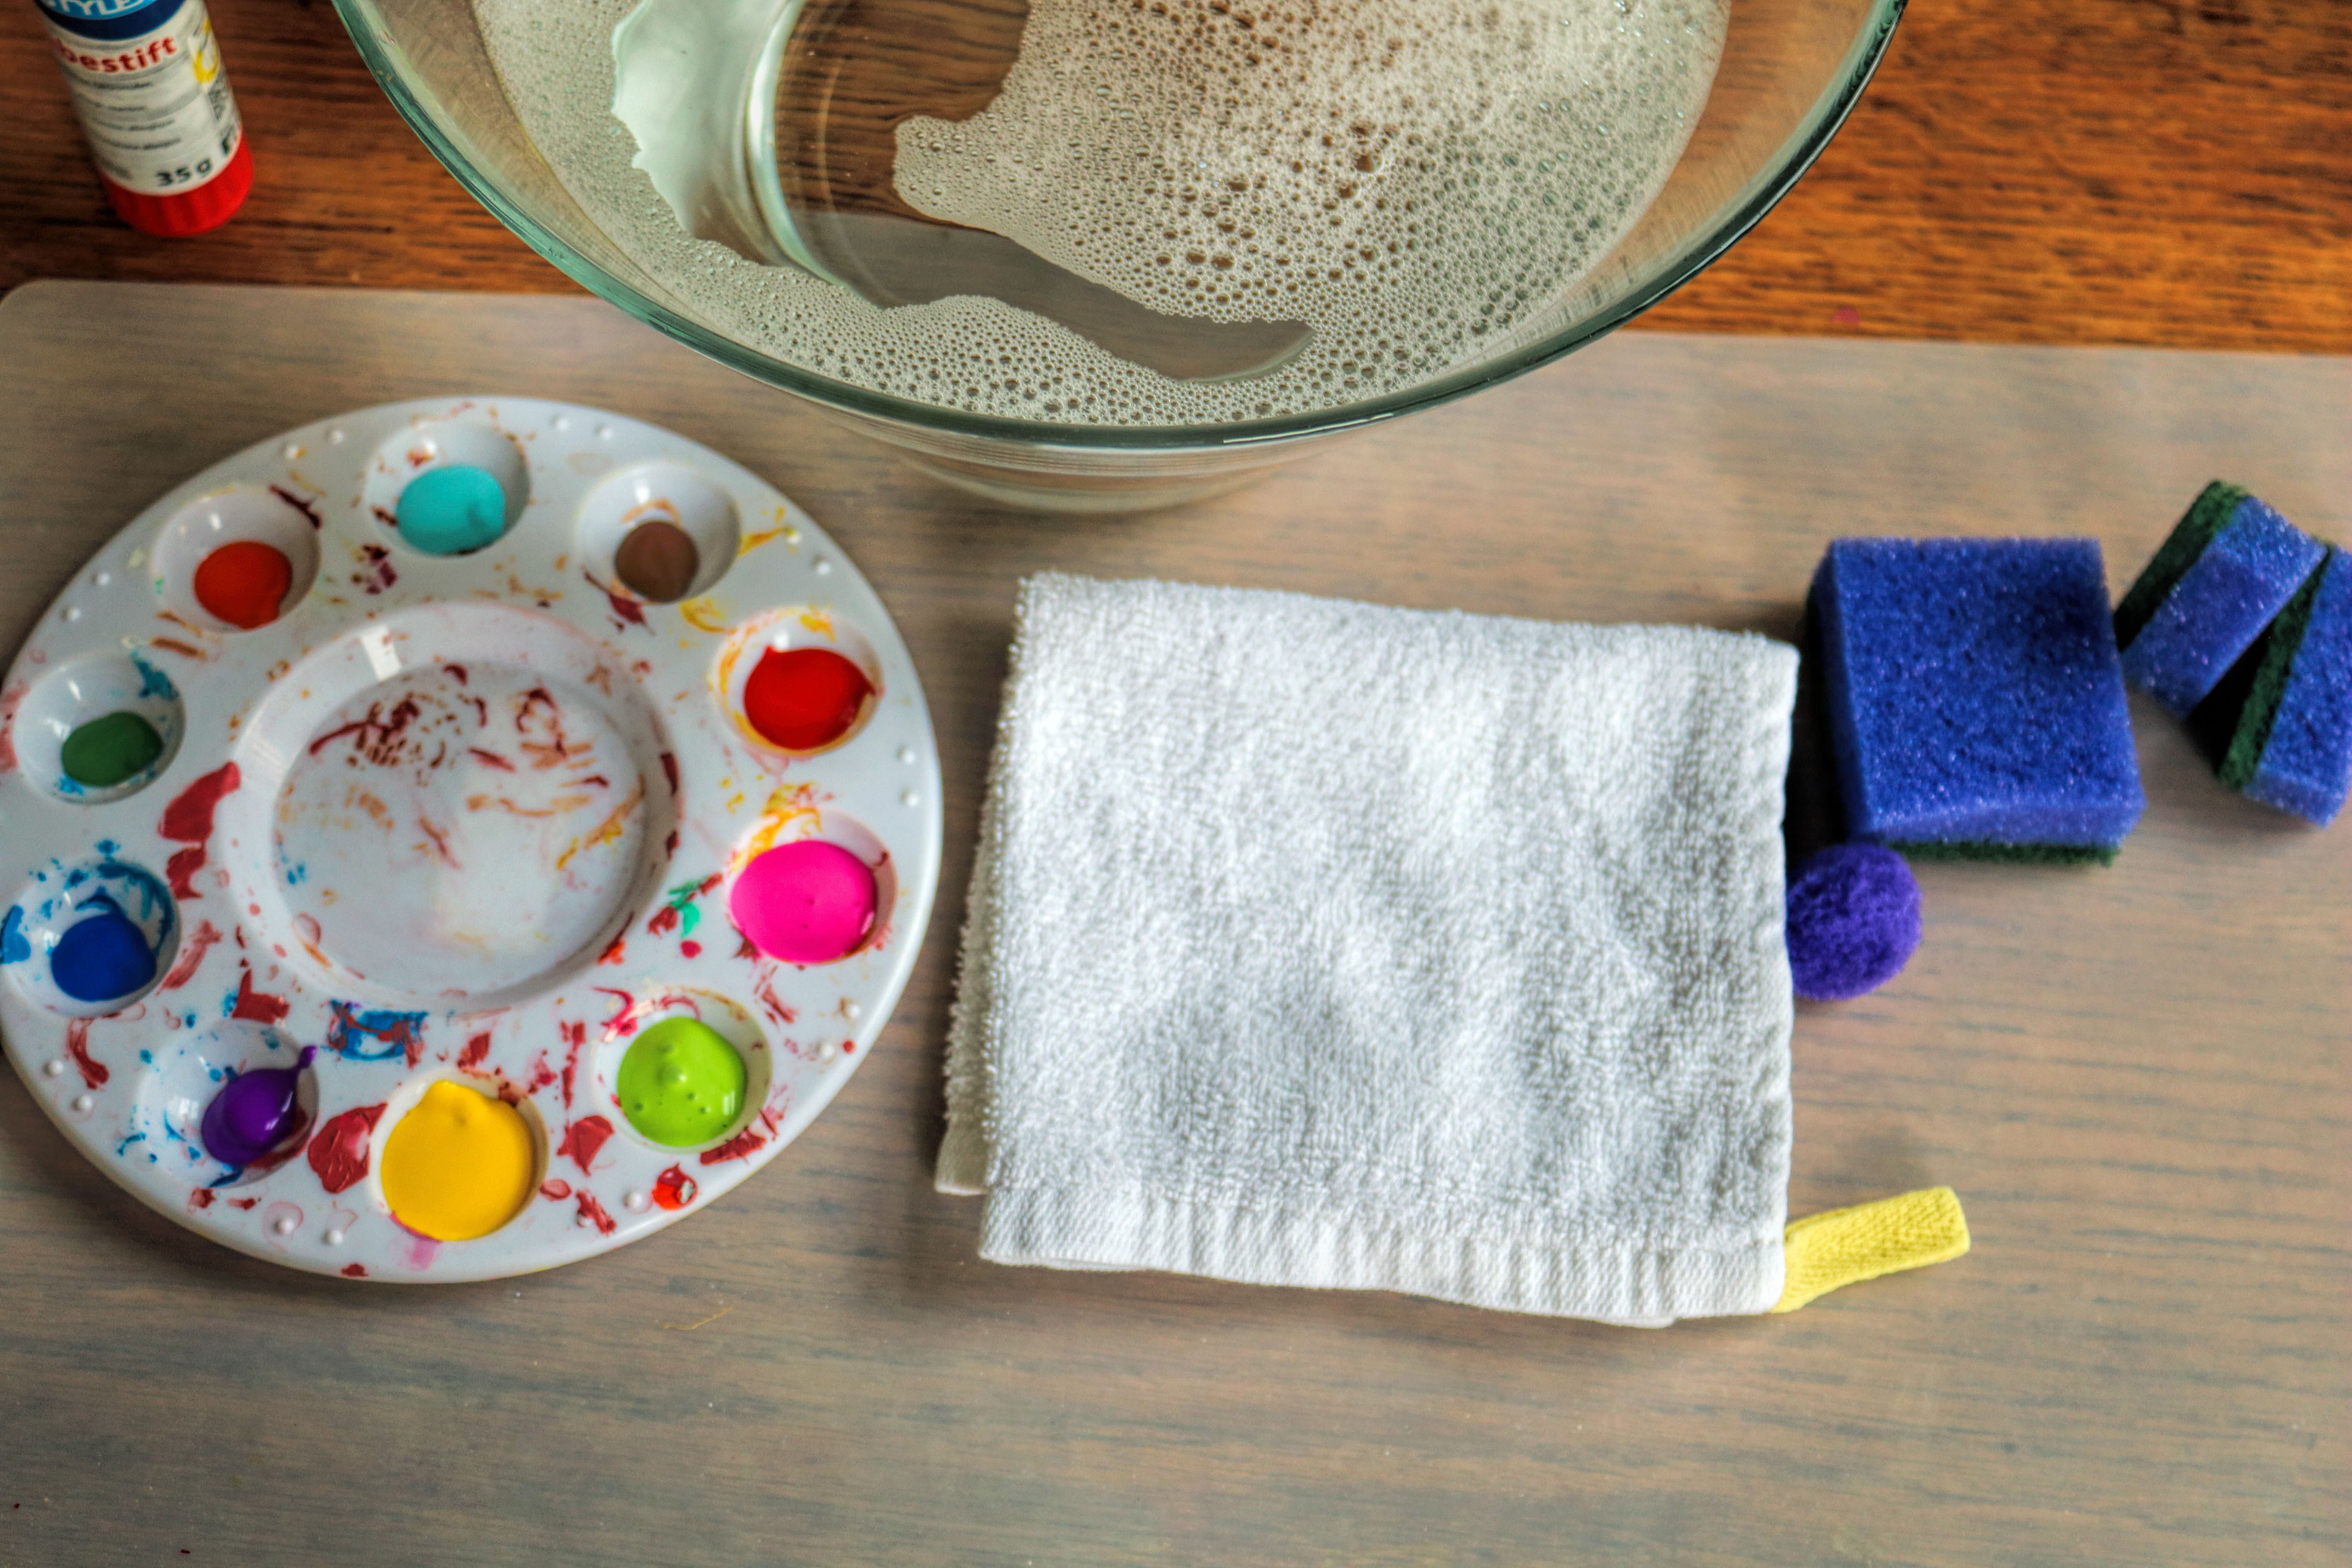
3. Get the paints ready:
Put small amounts of finger paint on a plate or in shallow bowls. It’s best to use only about 4 colors—if there are too many colors, the egg often ends up brown. Choose the colors together. You can also cut sponges into small pieces or have pom-poms ready.
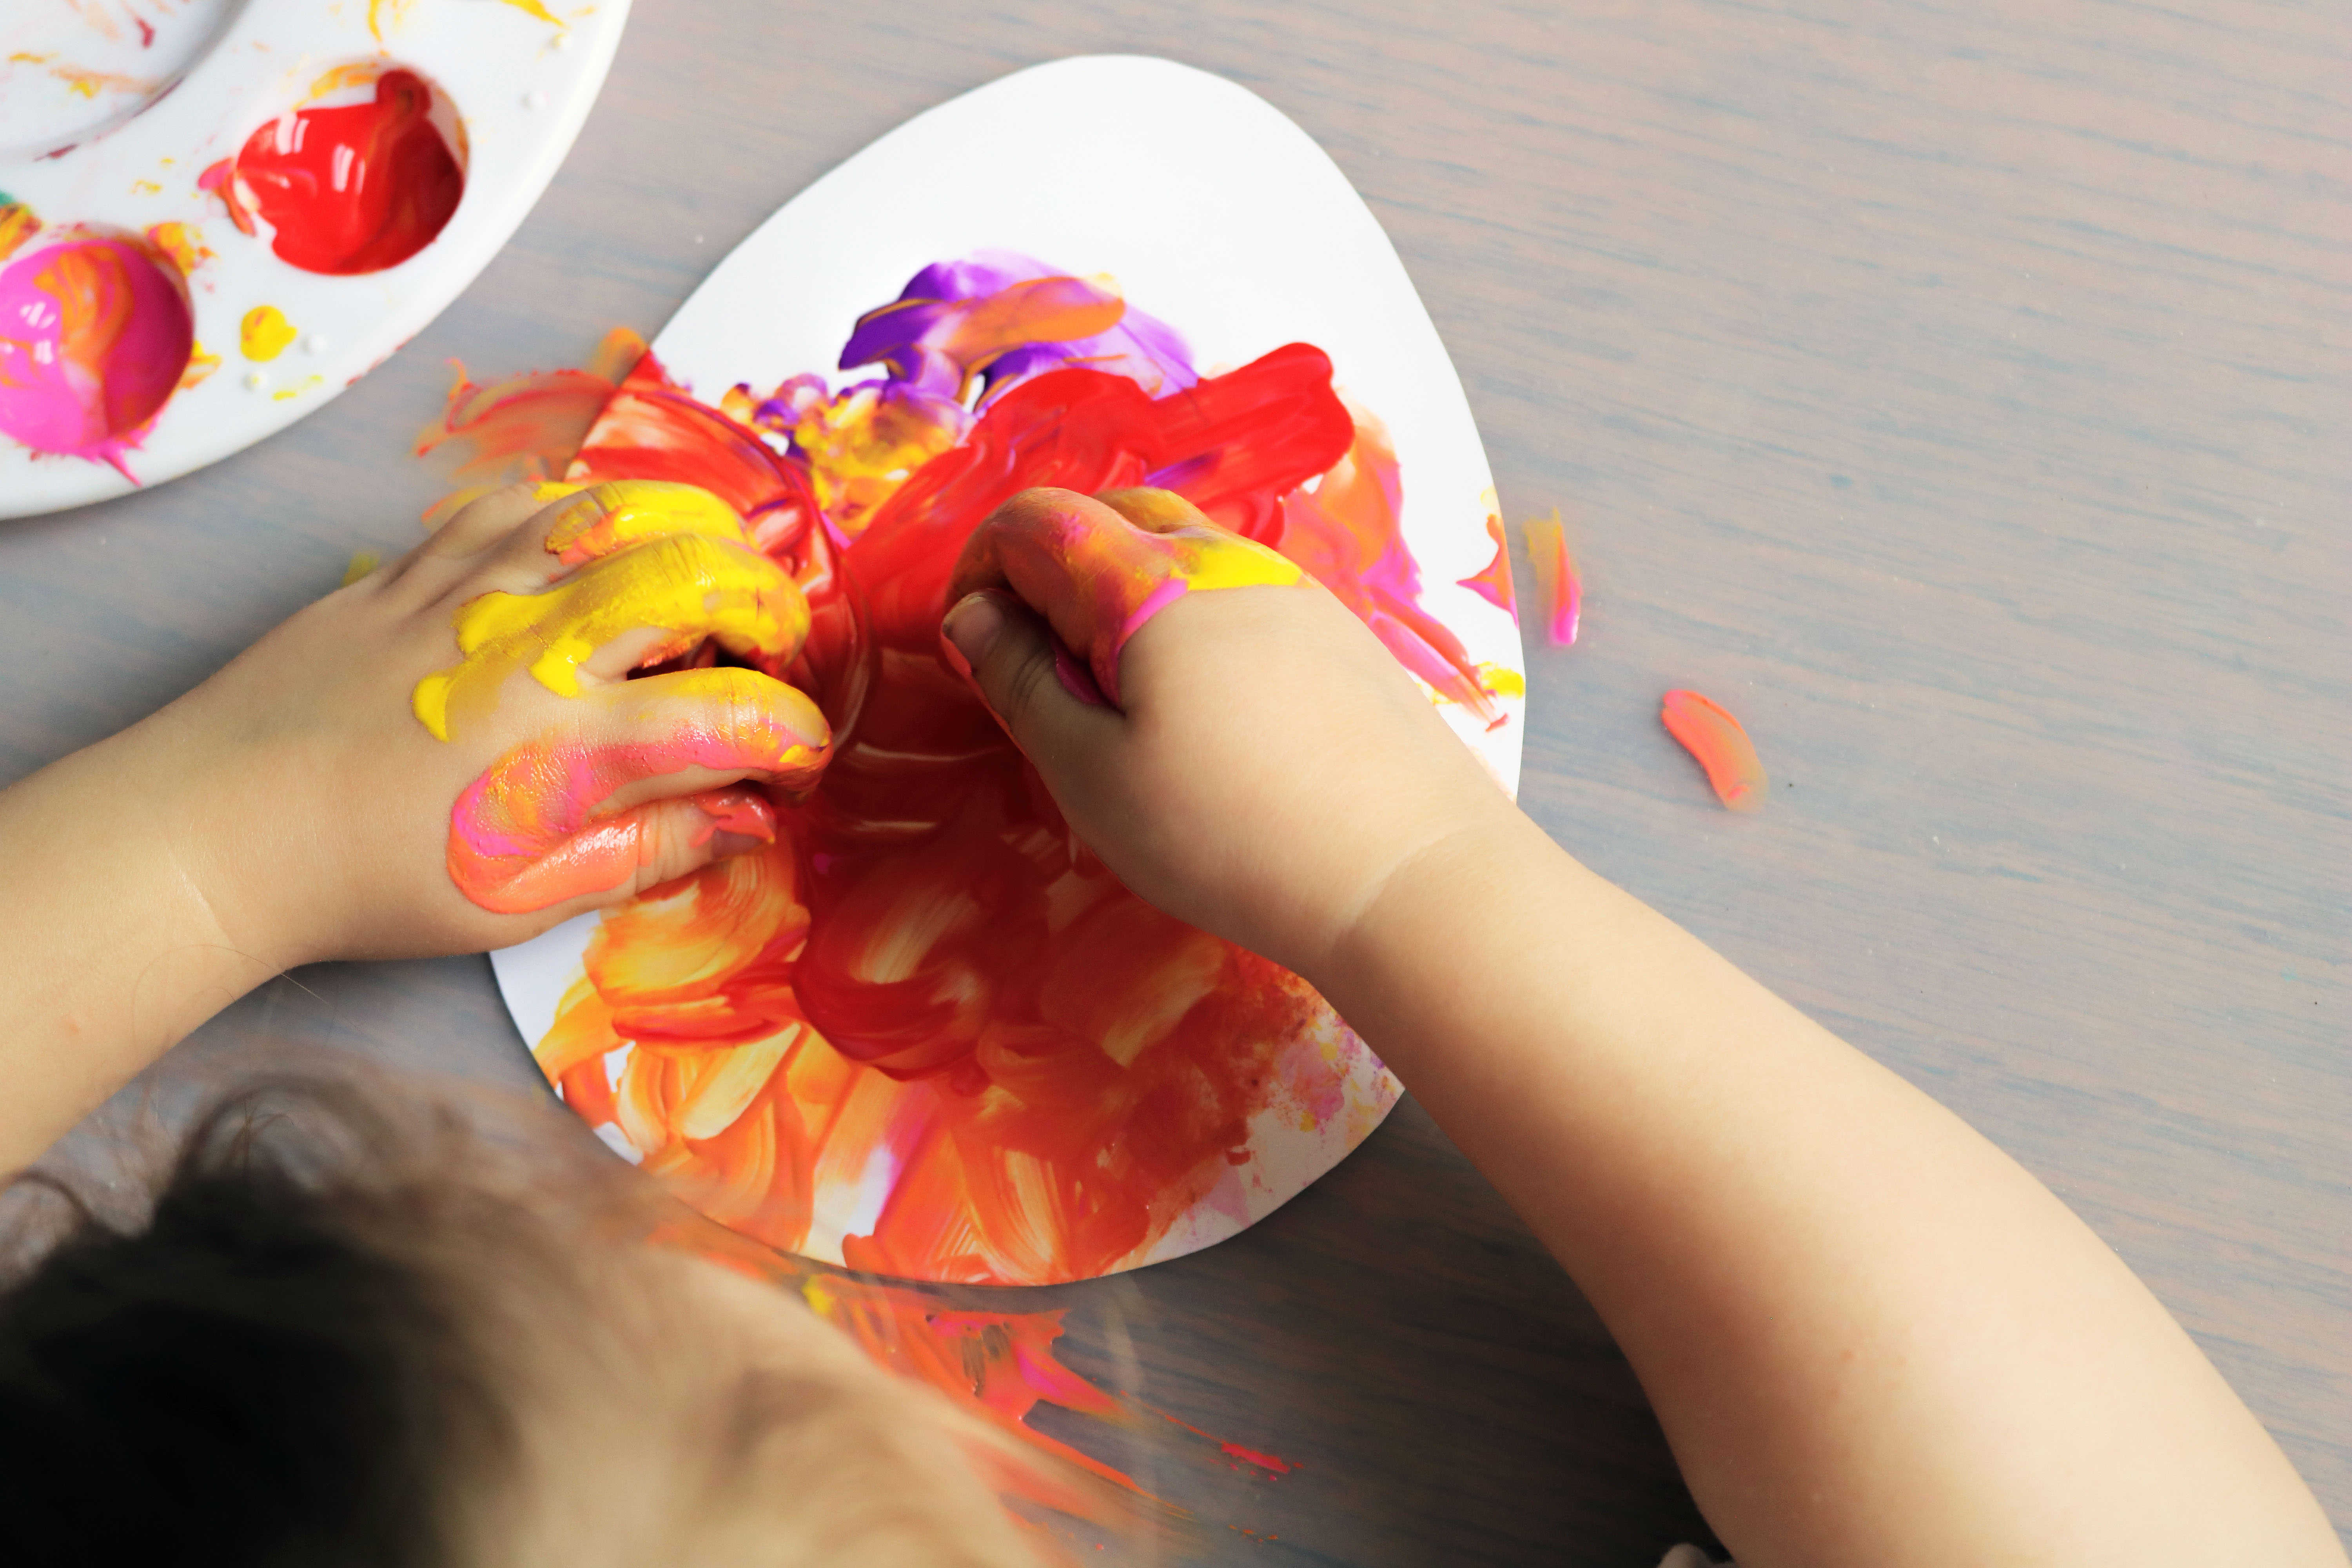
4. Start painting:
Let’s get started! Your child can paint the egg with their hands and fingers. Dabbing, wiping, clapping—anything goes.
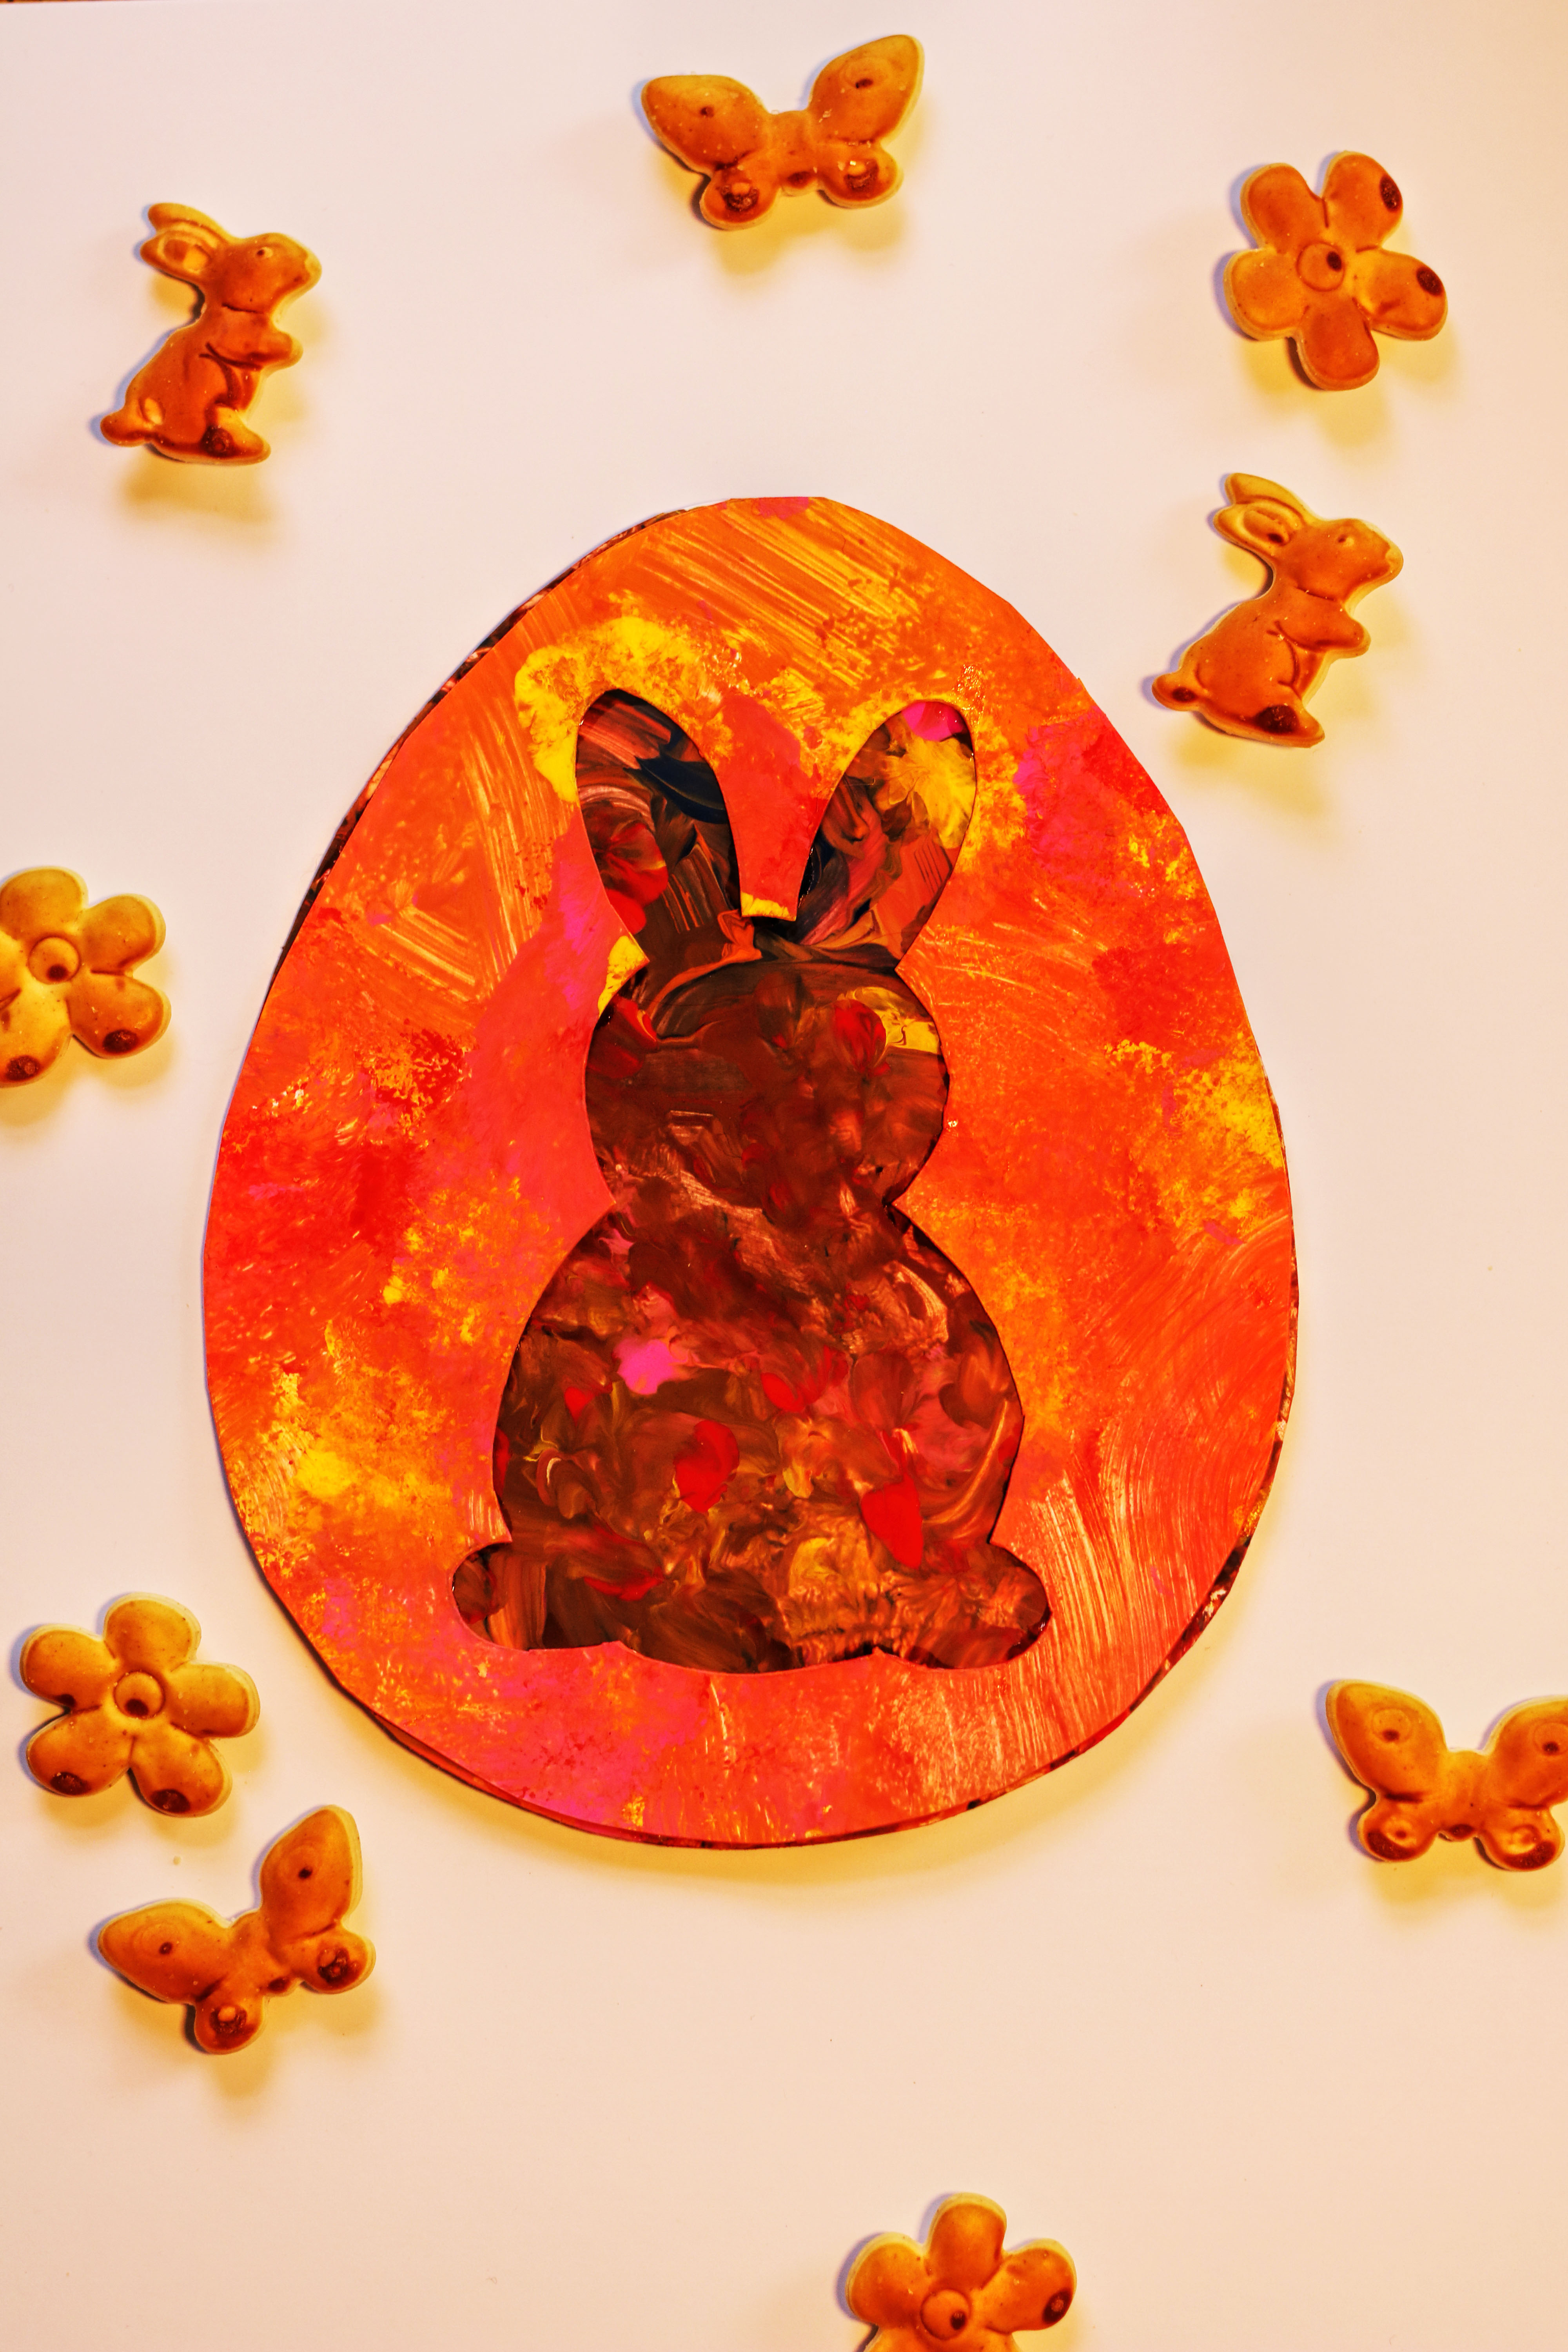
5. Let it dry:
Let the egg dry completely before hanging it up or using it for another project. For a special effect, you can stick a decorated stencil over the painted egg—this creates a colorful, multi-layered work of art.
Perfect as Easter decor or a gift. Have fun crafting and creating!
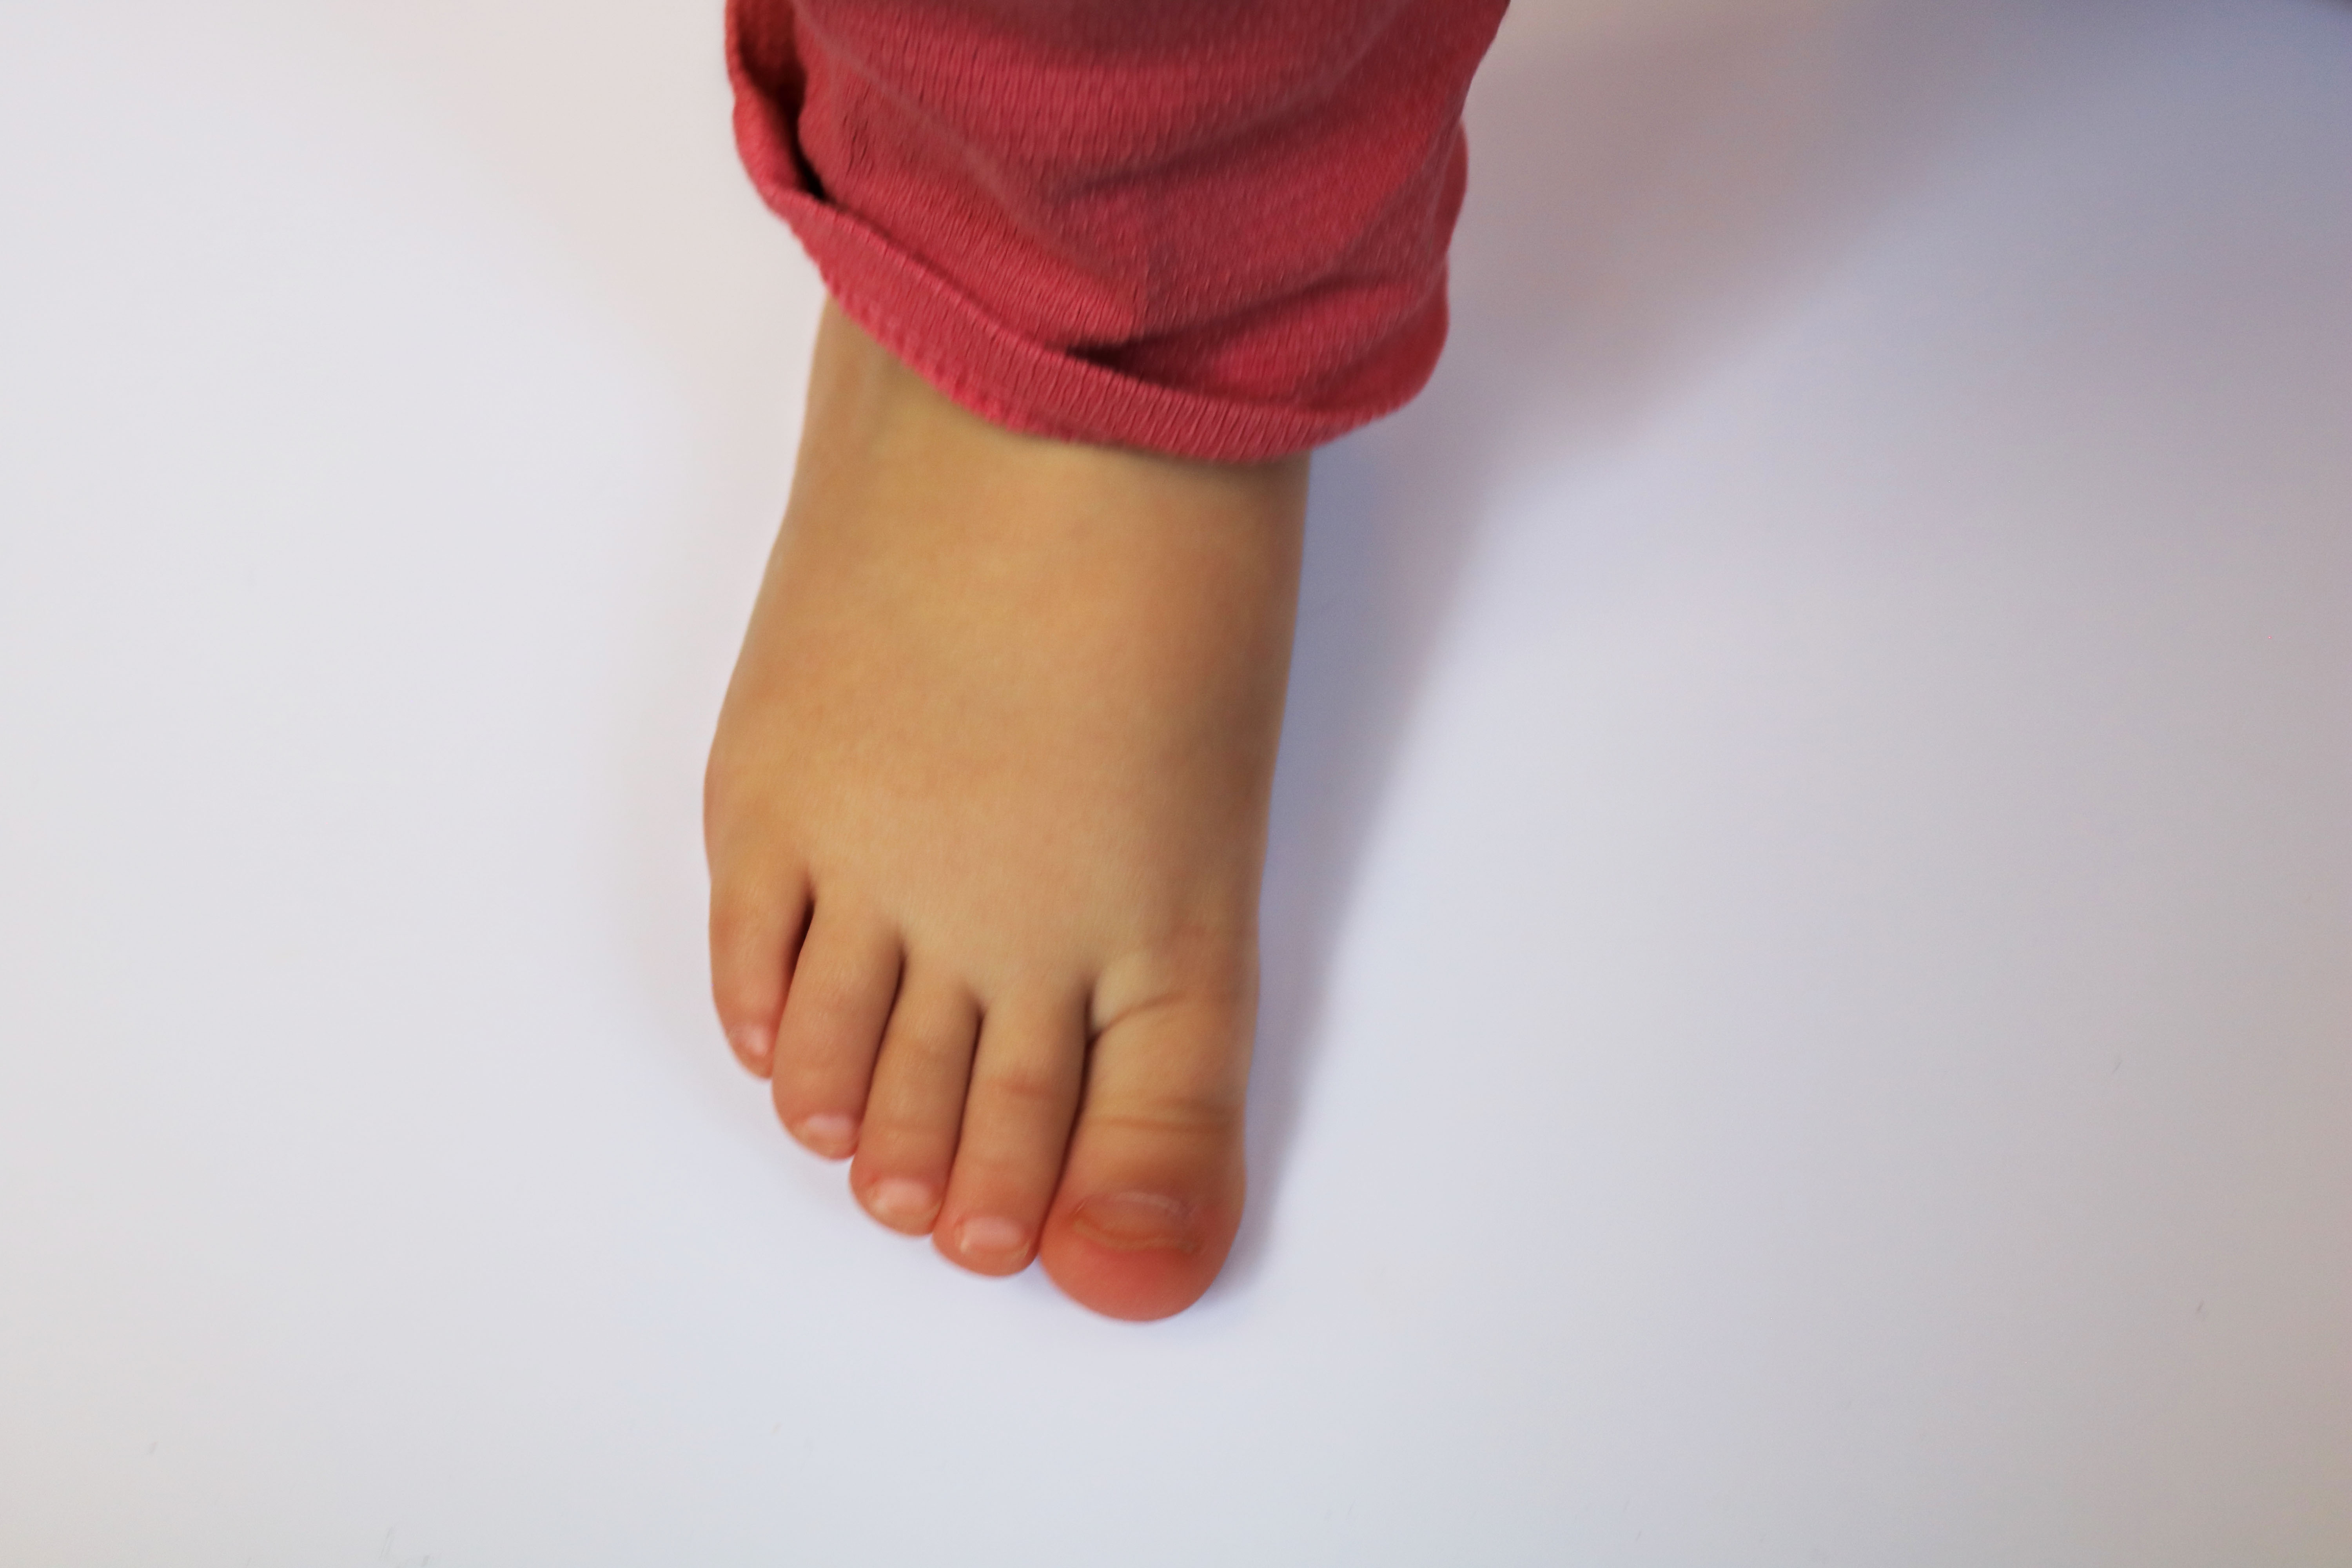
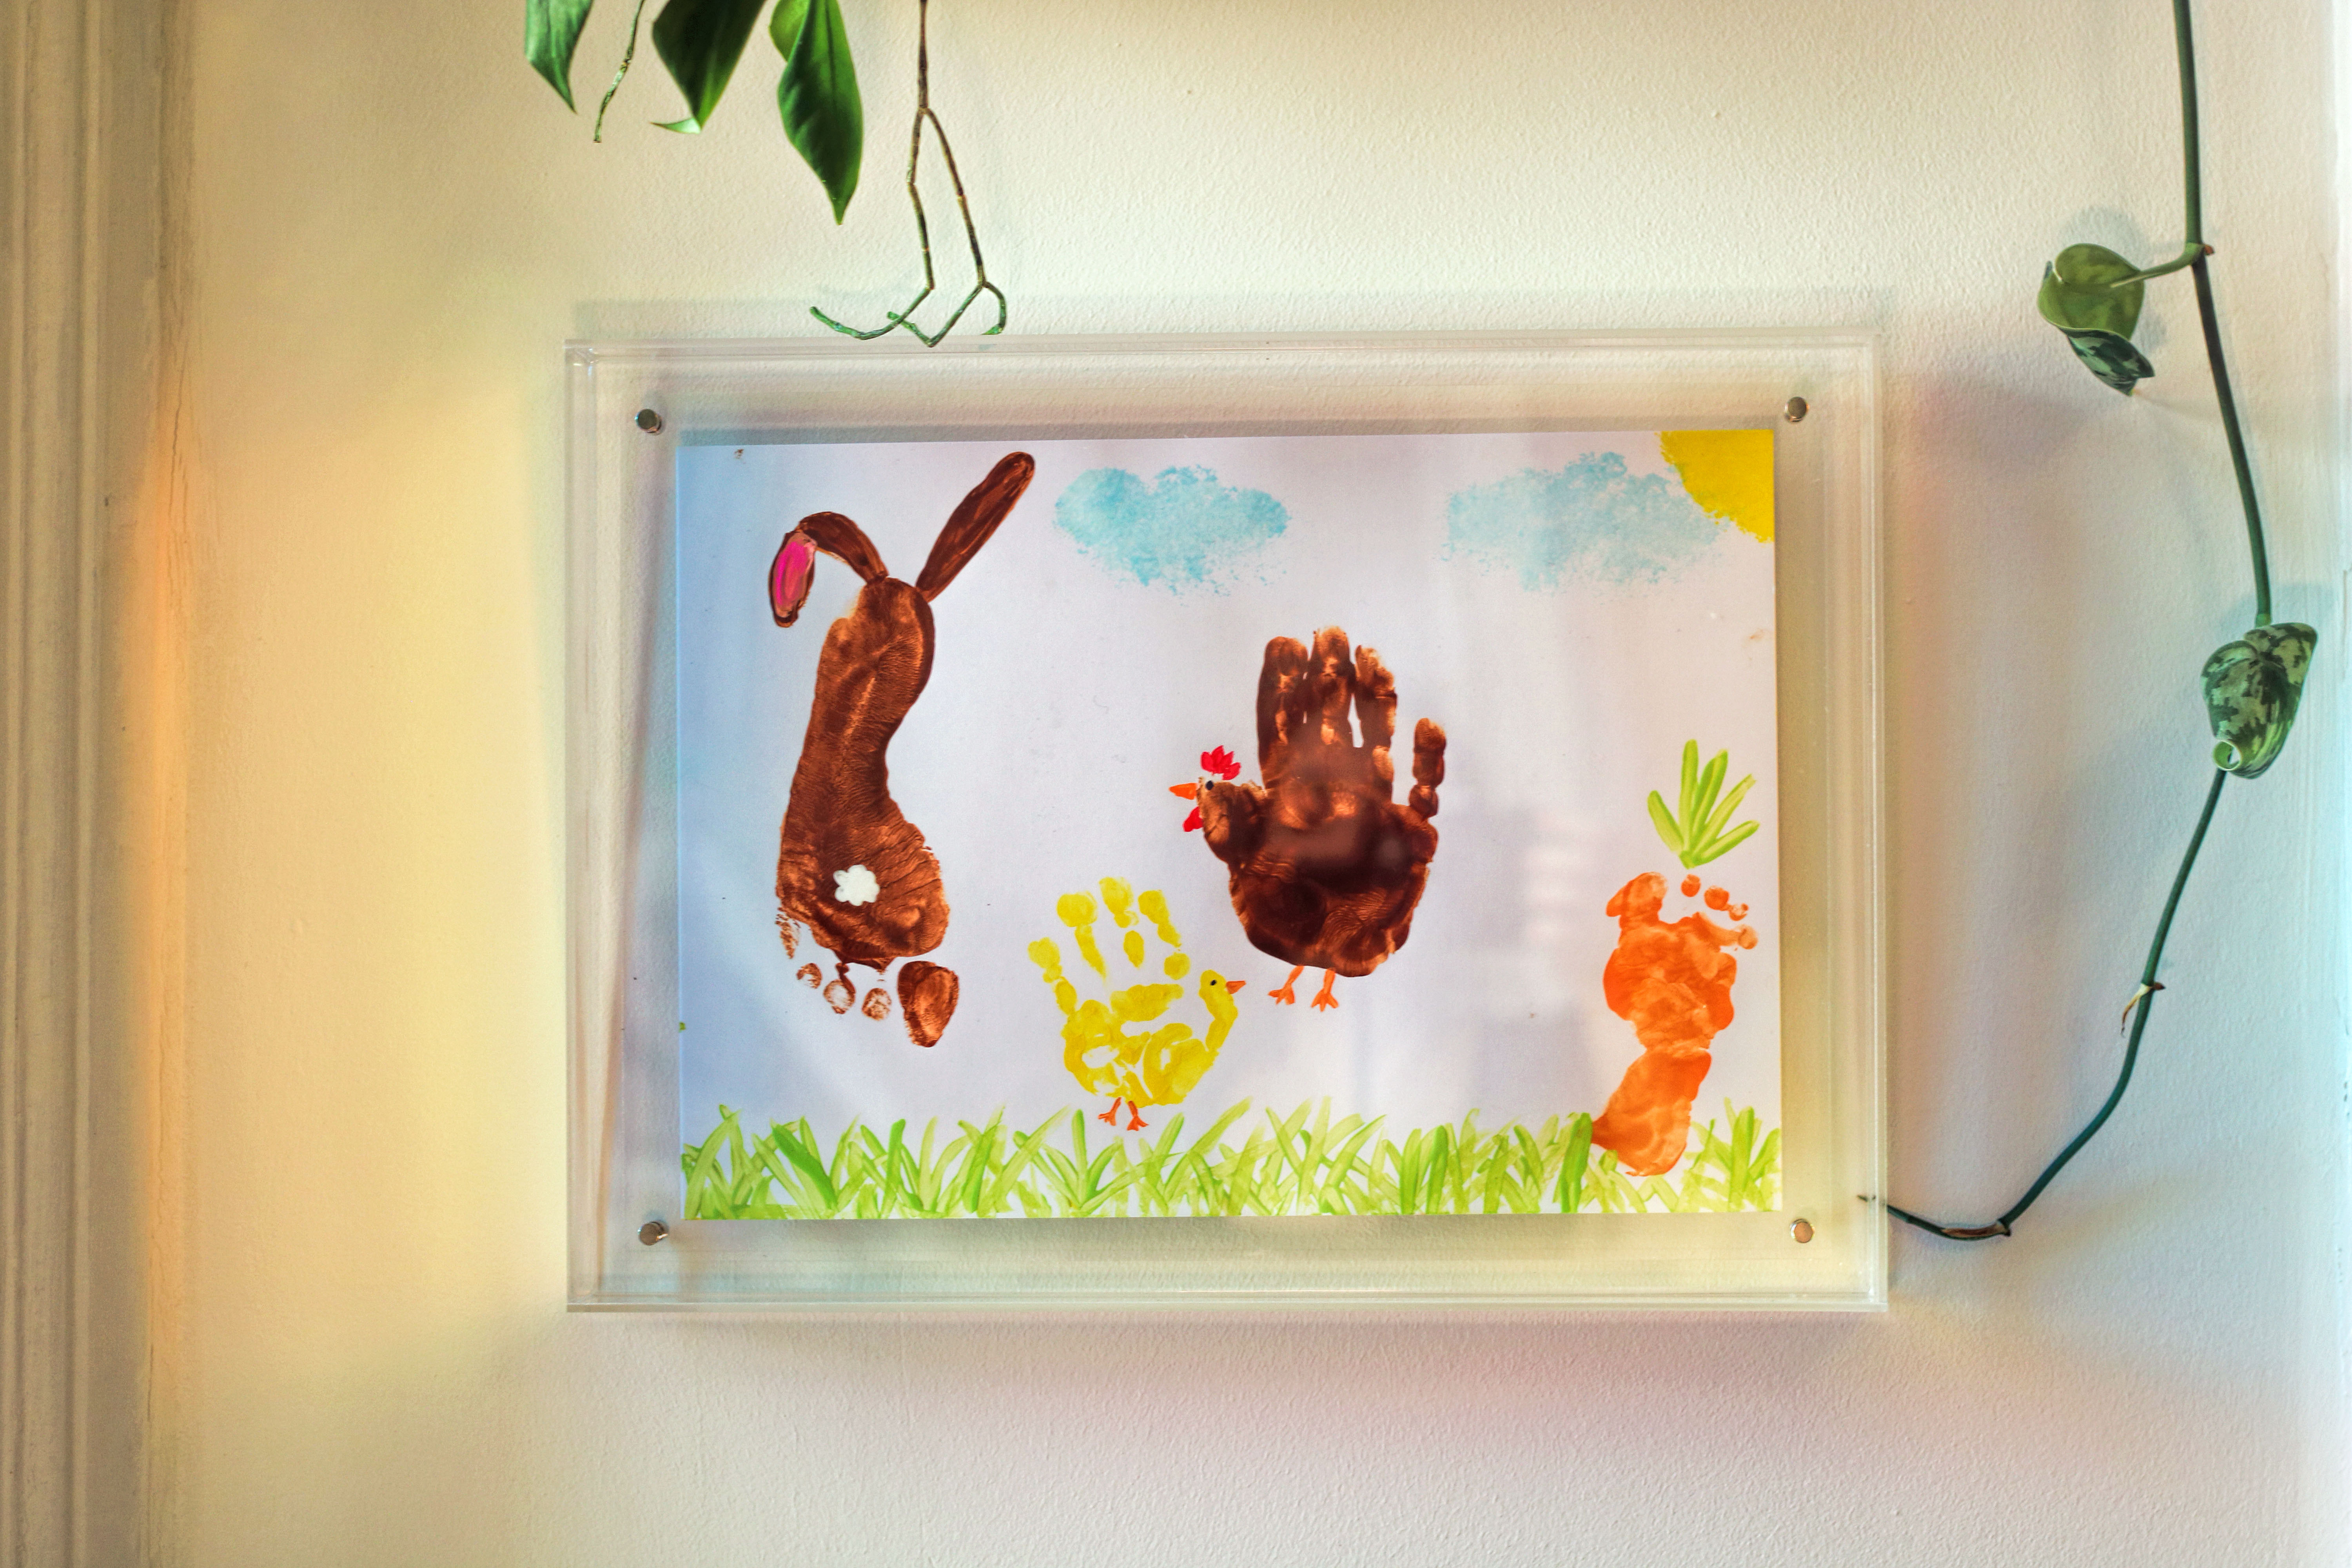
2. Hand and Footprints for Easter

(Bunny, chick, hen, and carrot)
Hand and foot prints are a simple Easter activity for children ages 1–2—and a wonderful keepsake. With just a few details, a print can be turned into a bunny, a chick, or a carrot.
Our children were 2 years and 2 months old when we did this craft.
Here's what you'll need:
- colored cardstock
- Finger paint
- for babies Regular finger paint is not suitable
- from 1 to 2 years
- ages 2 and up most are approved
- We use a food-safe baking mat on the table.
- Protection for your child's clothes Finger paints often don't wash out easily, despite the manufacturer's instructions.
- Wet wipes or water for cleaning
Affiliate links — we may receive a small commission, your price stays the same.

Here's how it works:
1. Prepare the paint:
Put some finger paint on a plate.
2. Paint the hand or foot:
Carefully coat your child’s hand or foot with paint.
3. Make a print:
Press the hand or foot onto the cardstock and slowly lift it back up. Tip: With very young children, this often works especially well during a nap.
4. Add details:
Once dry, you can add details with a pen or brush—for example, ears for the rabbit, a beak for the chick, or green leaves for the carrot. You can dab on clouds and a sun with pom-poms, and other details can be easily created with a brush and finger paint.
Have fun crafting and creating memories!
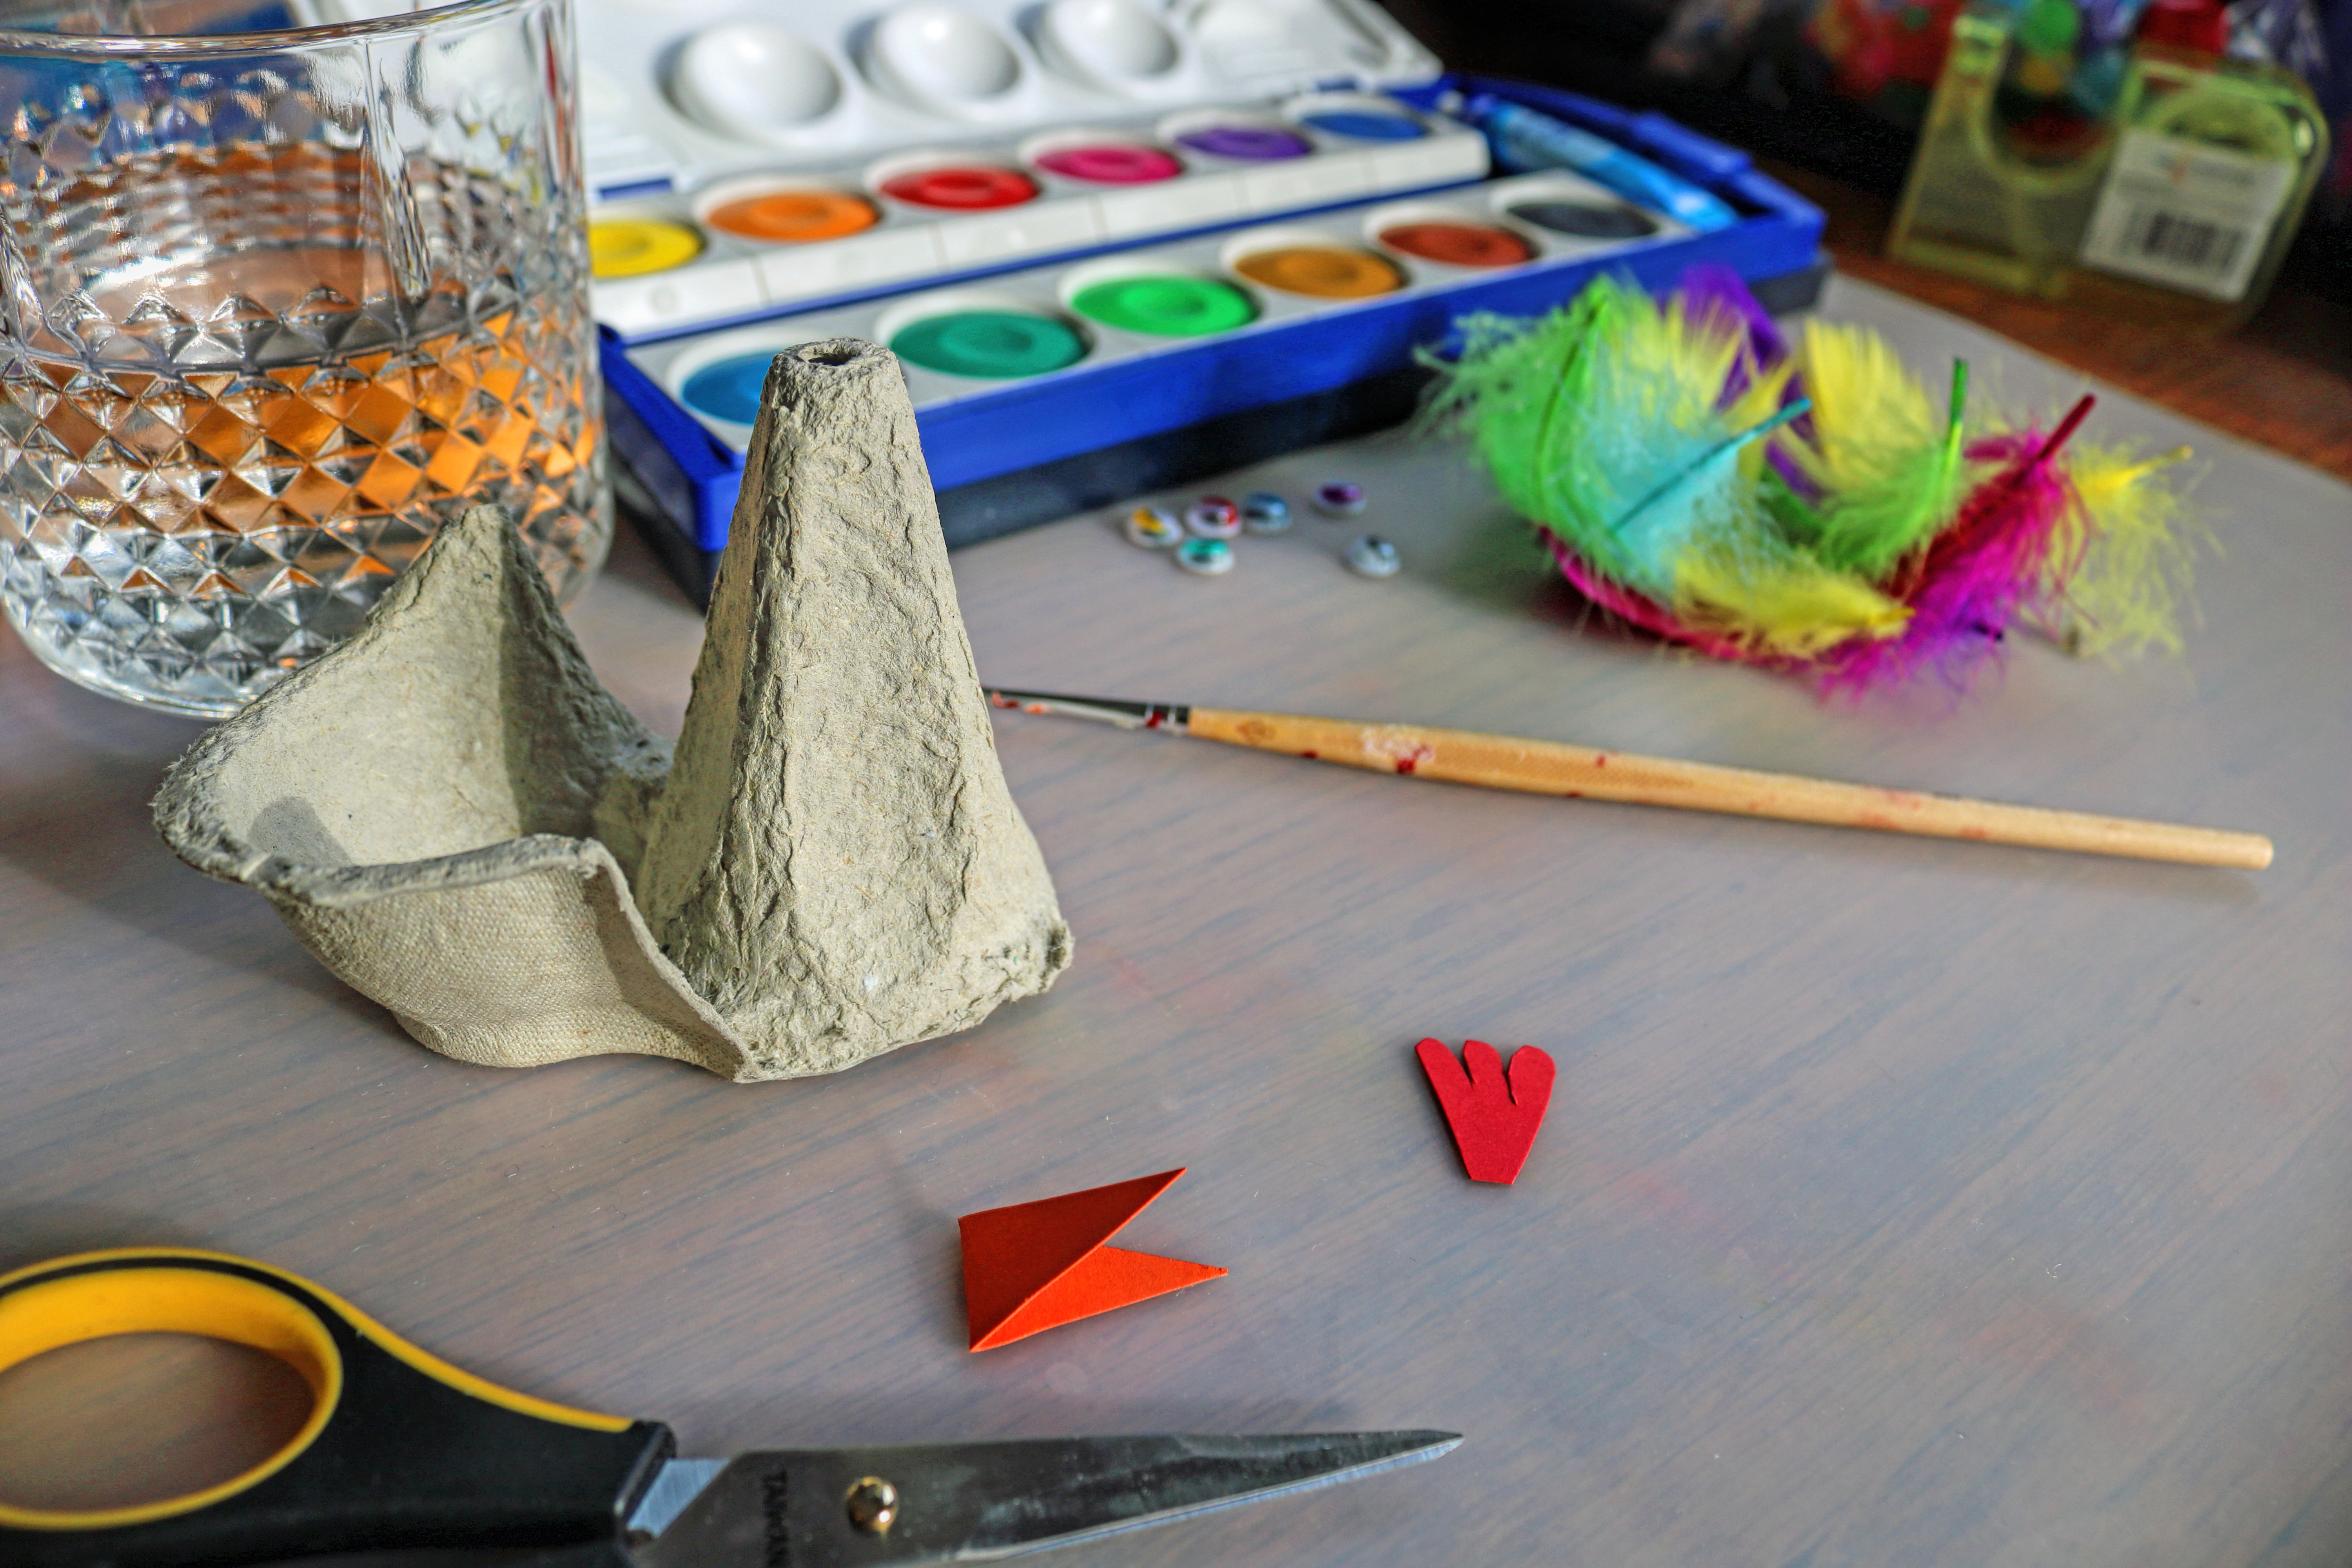
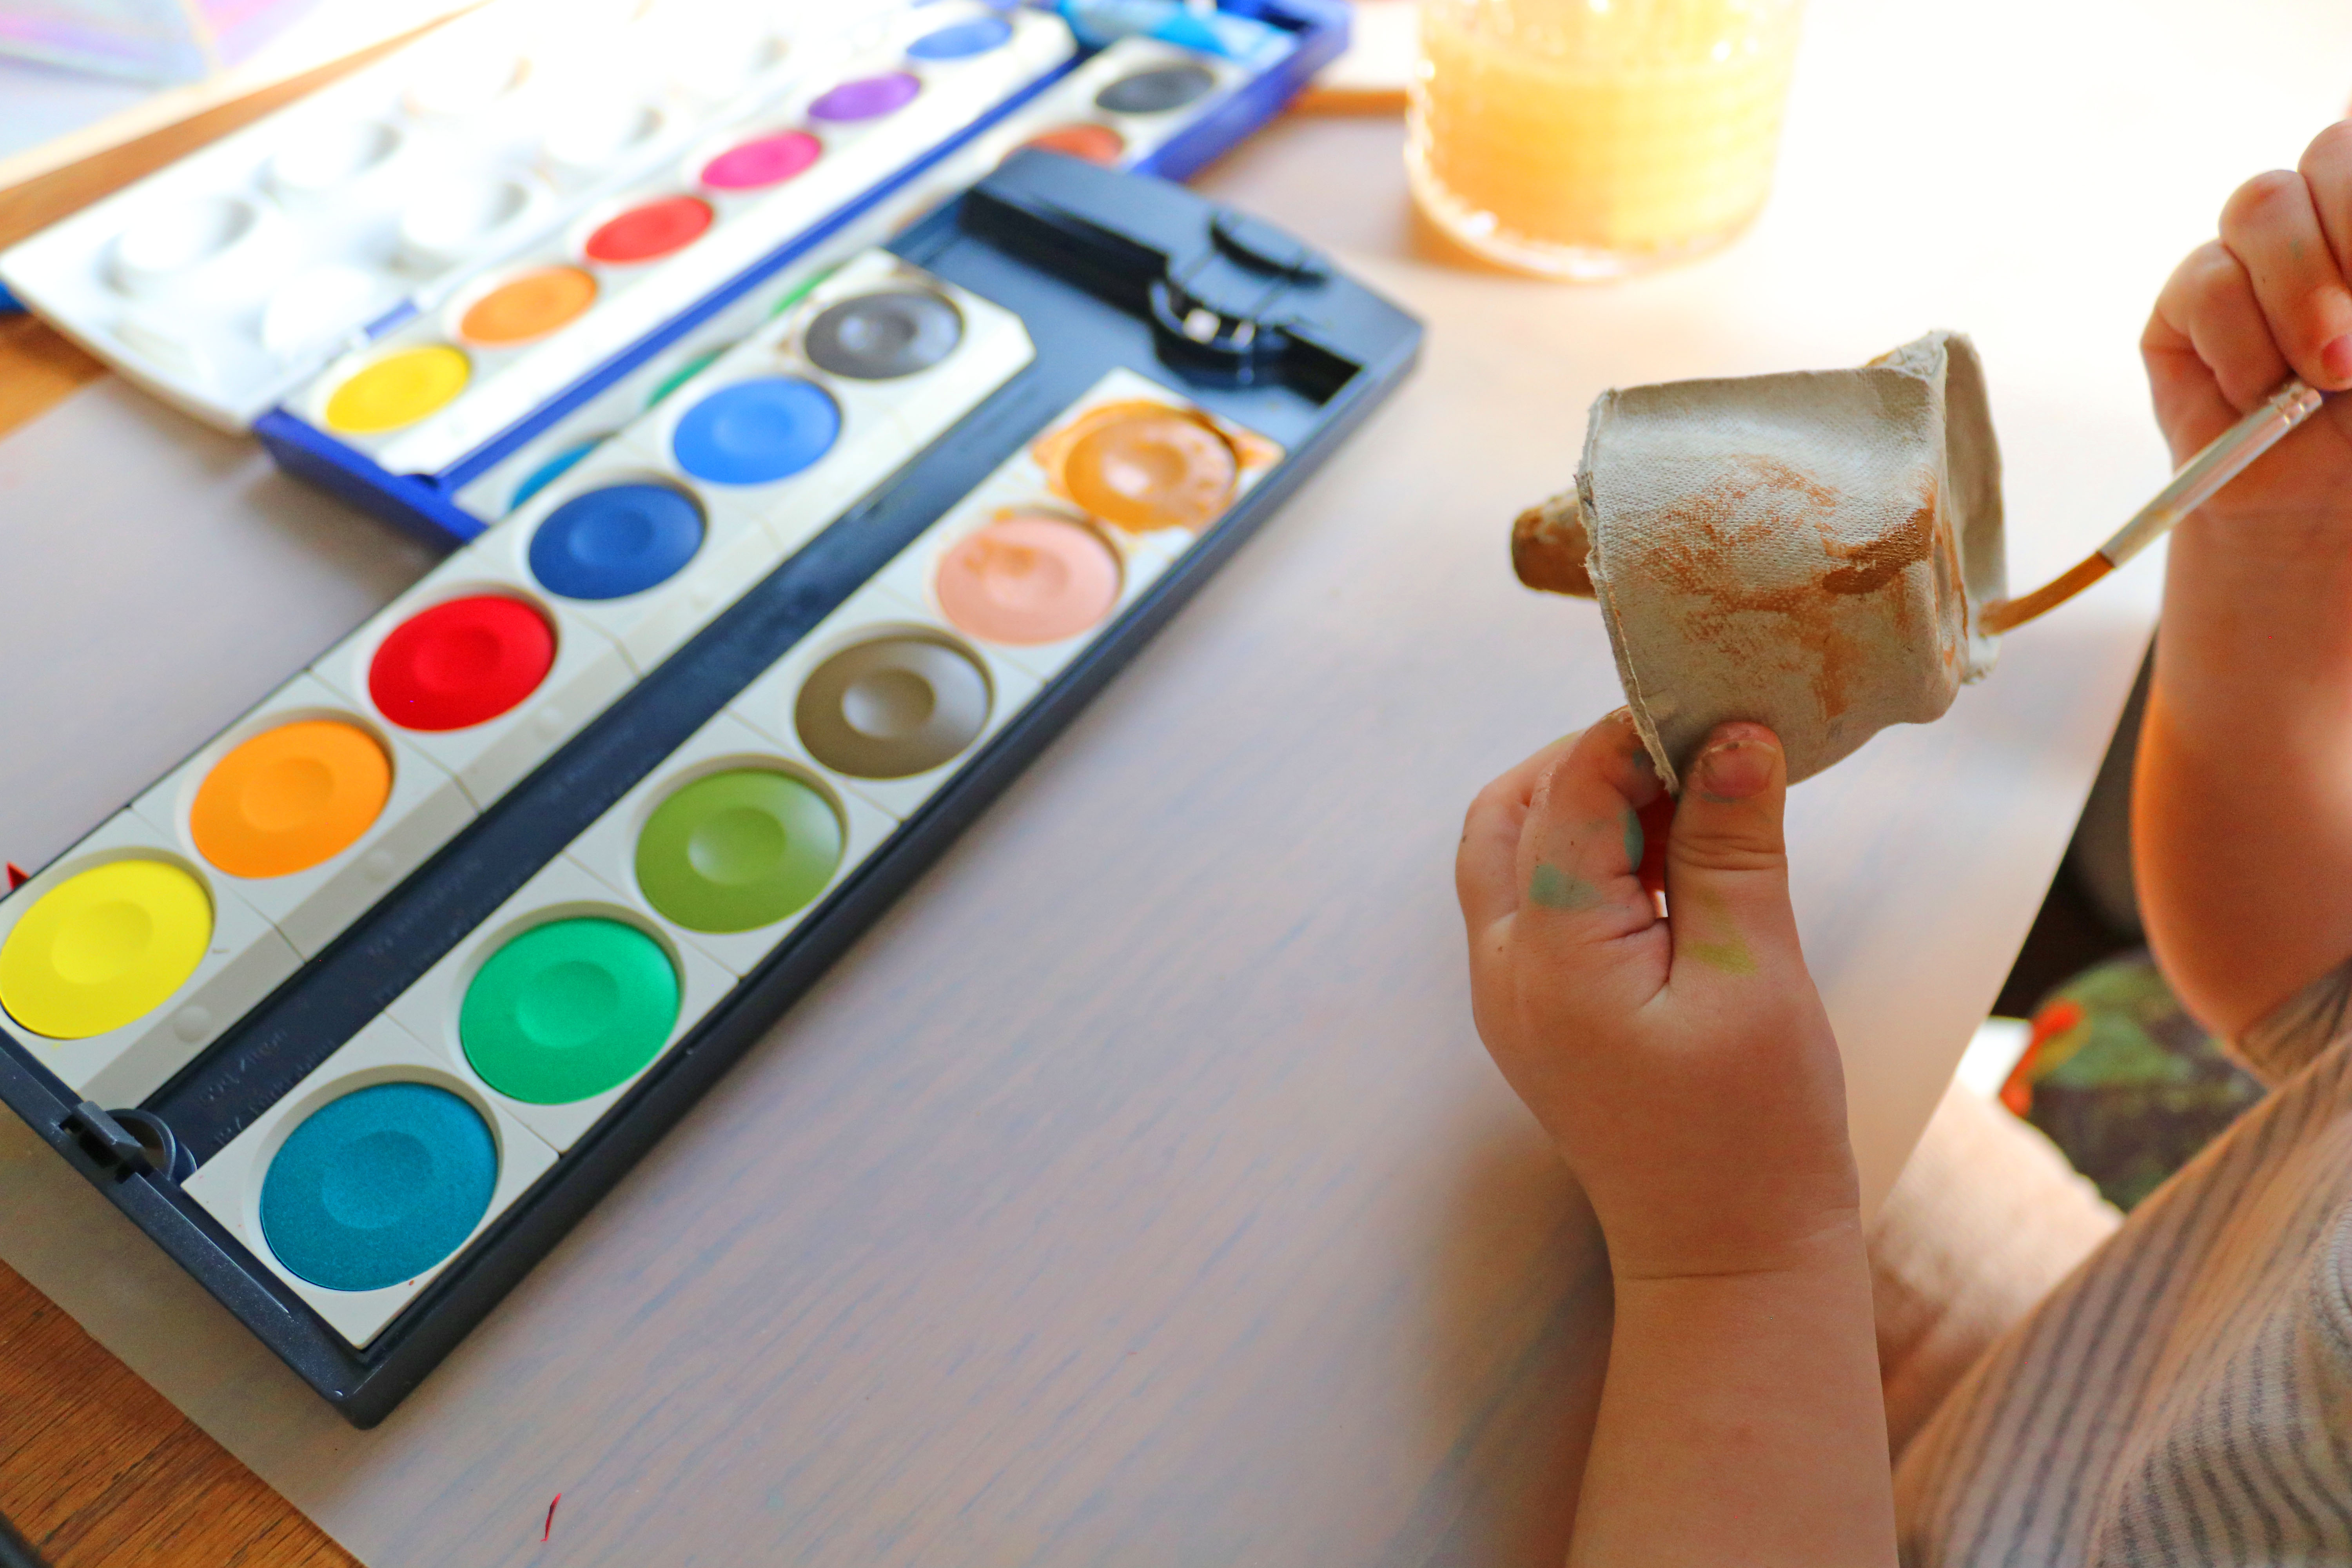
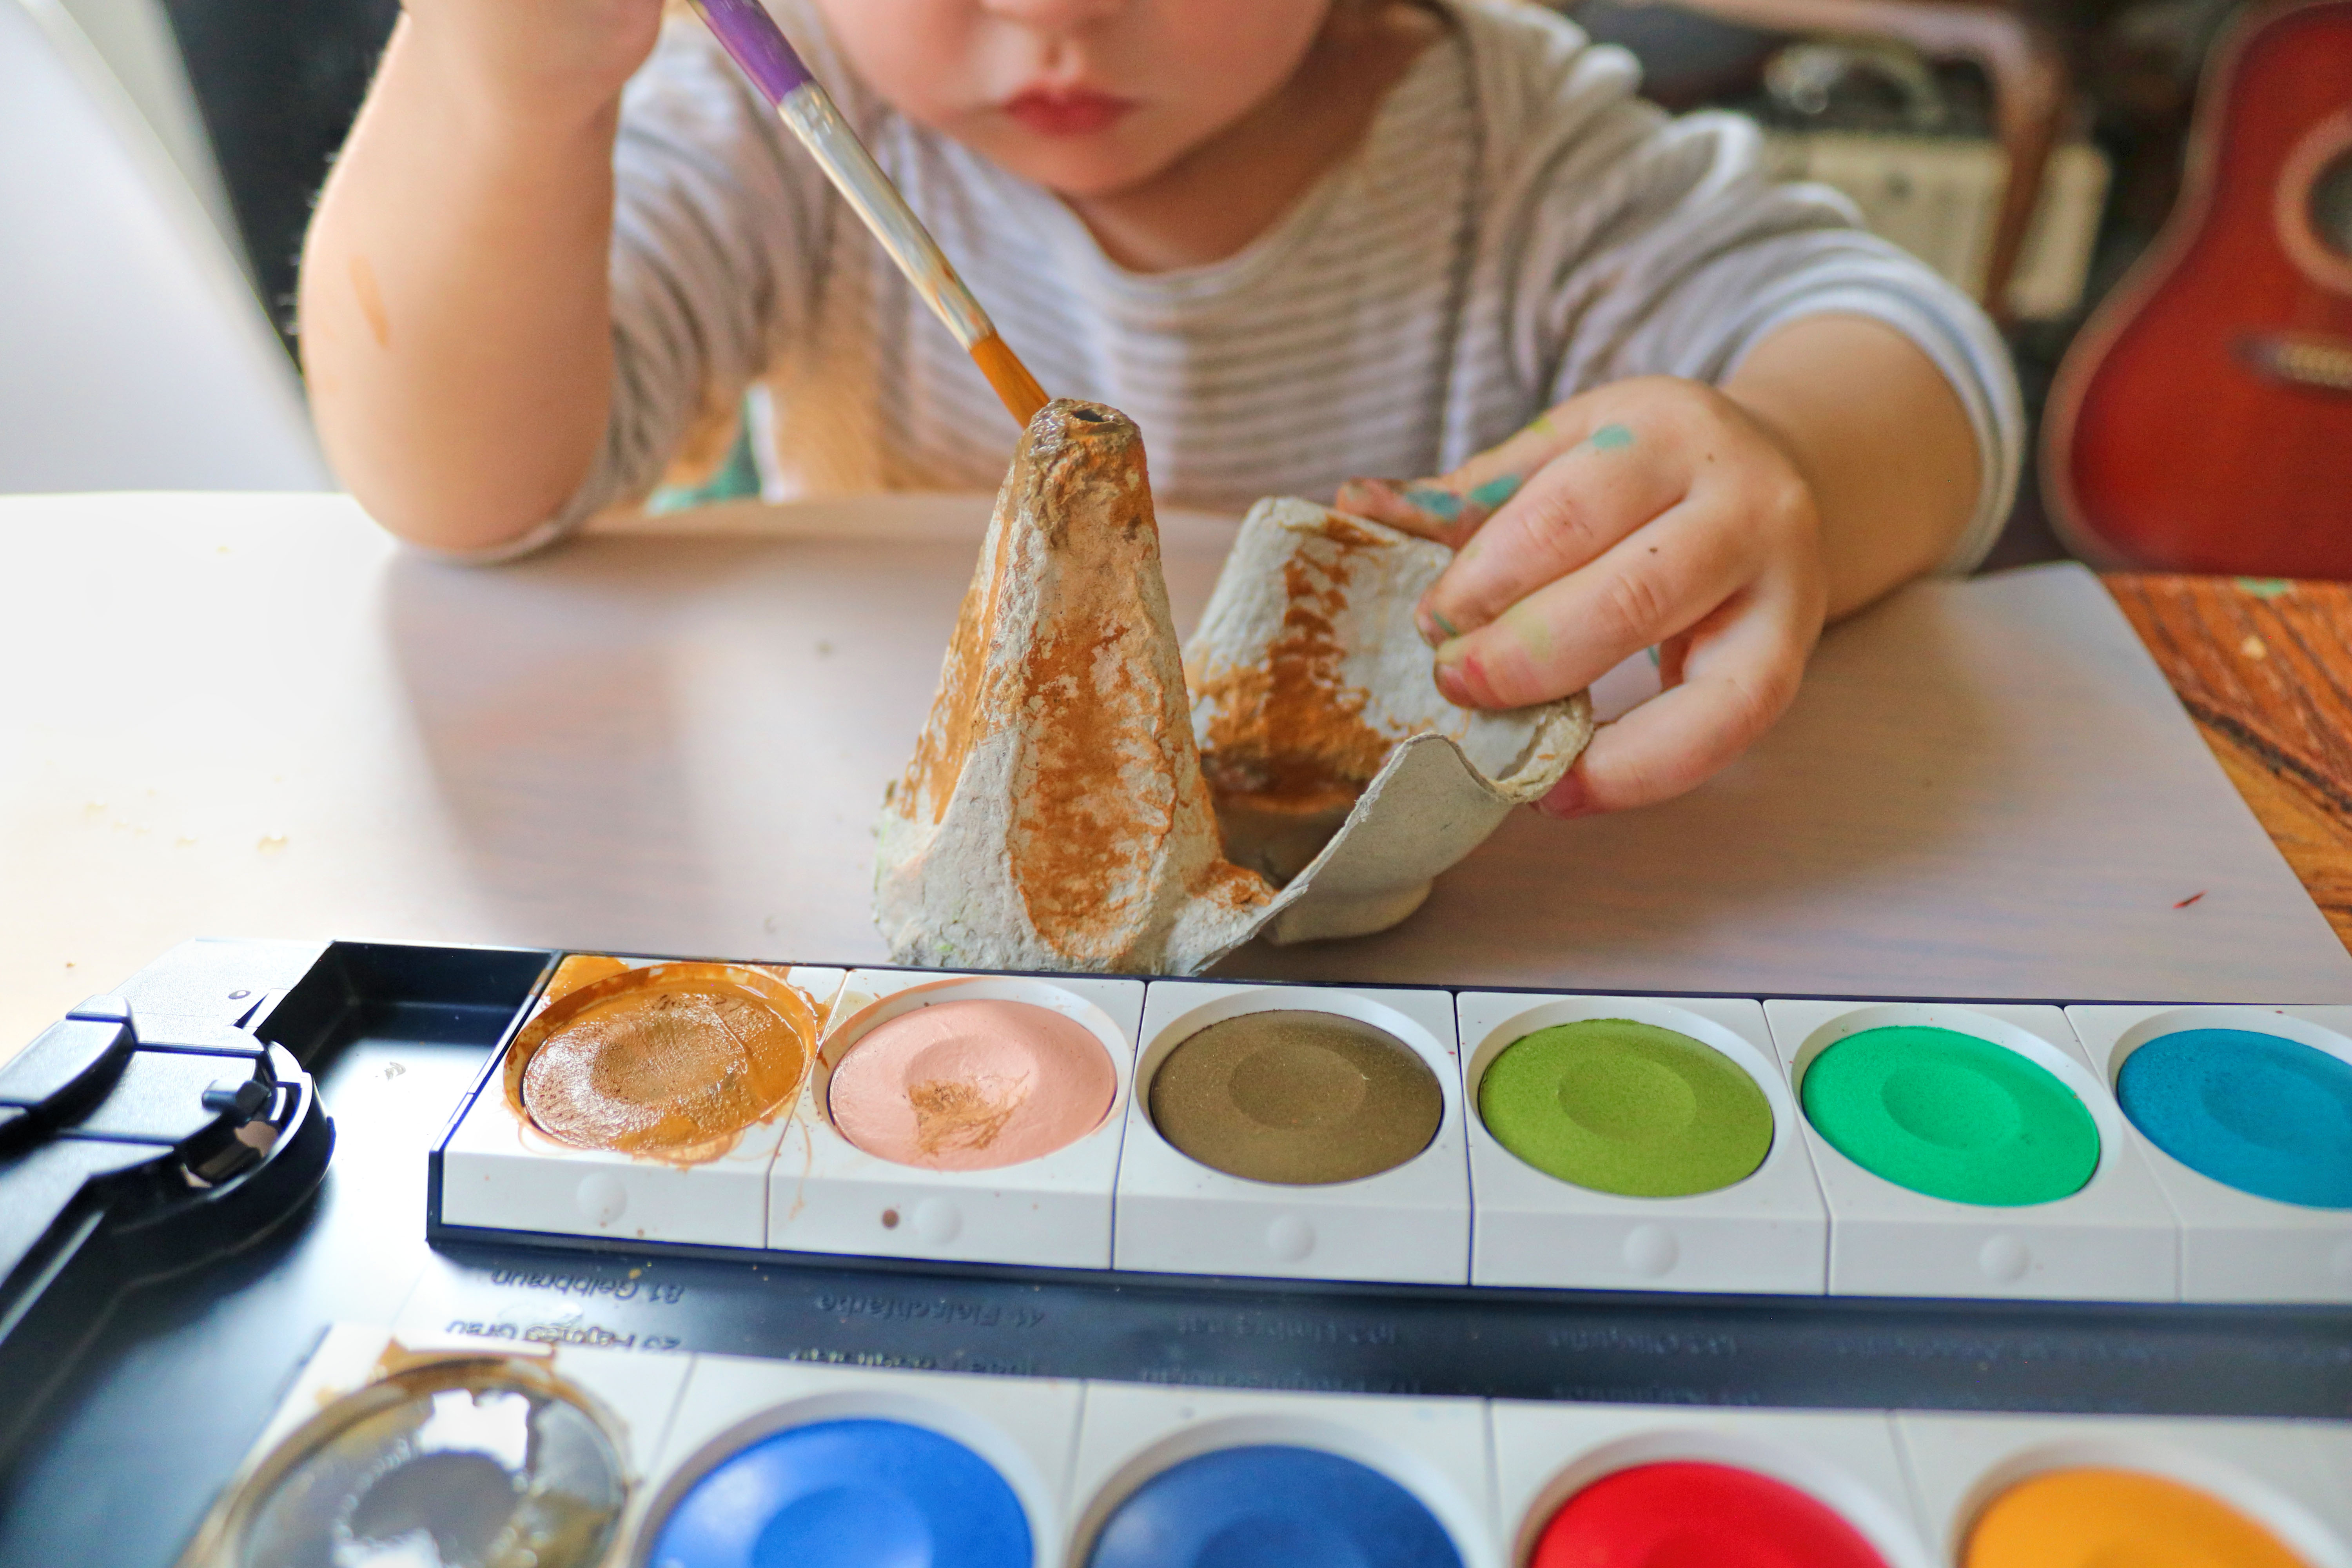
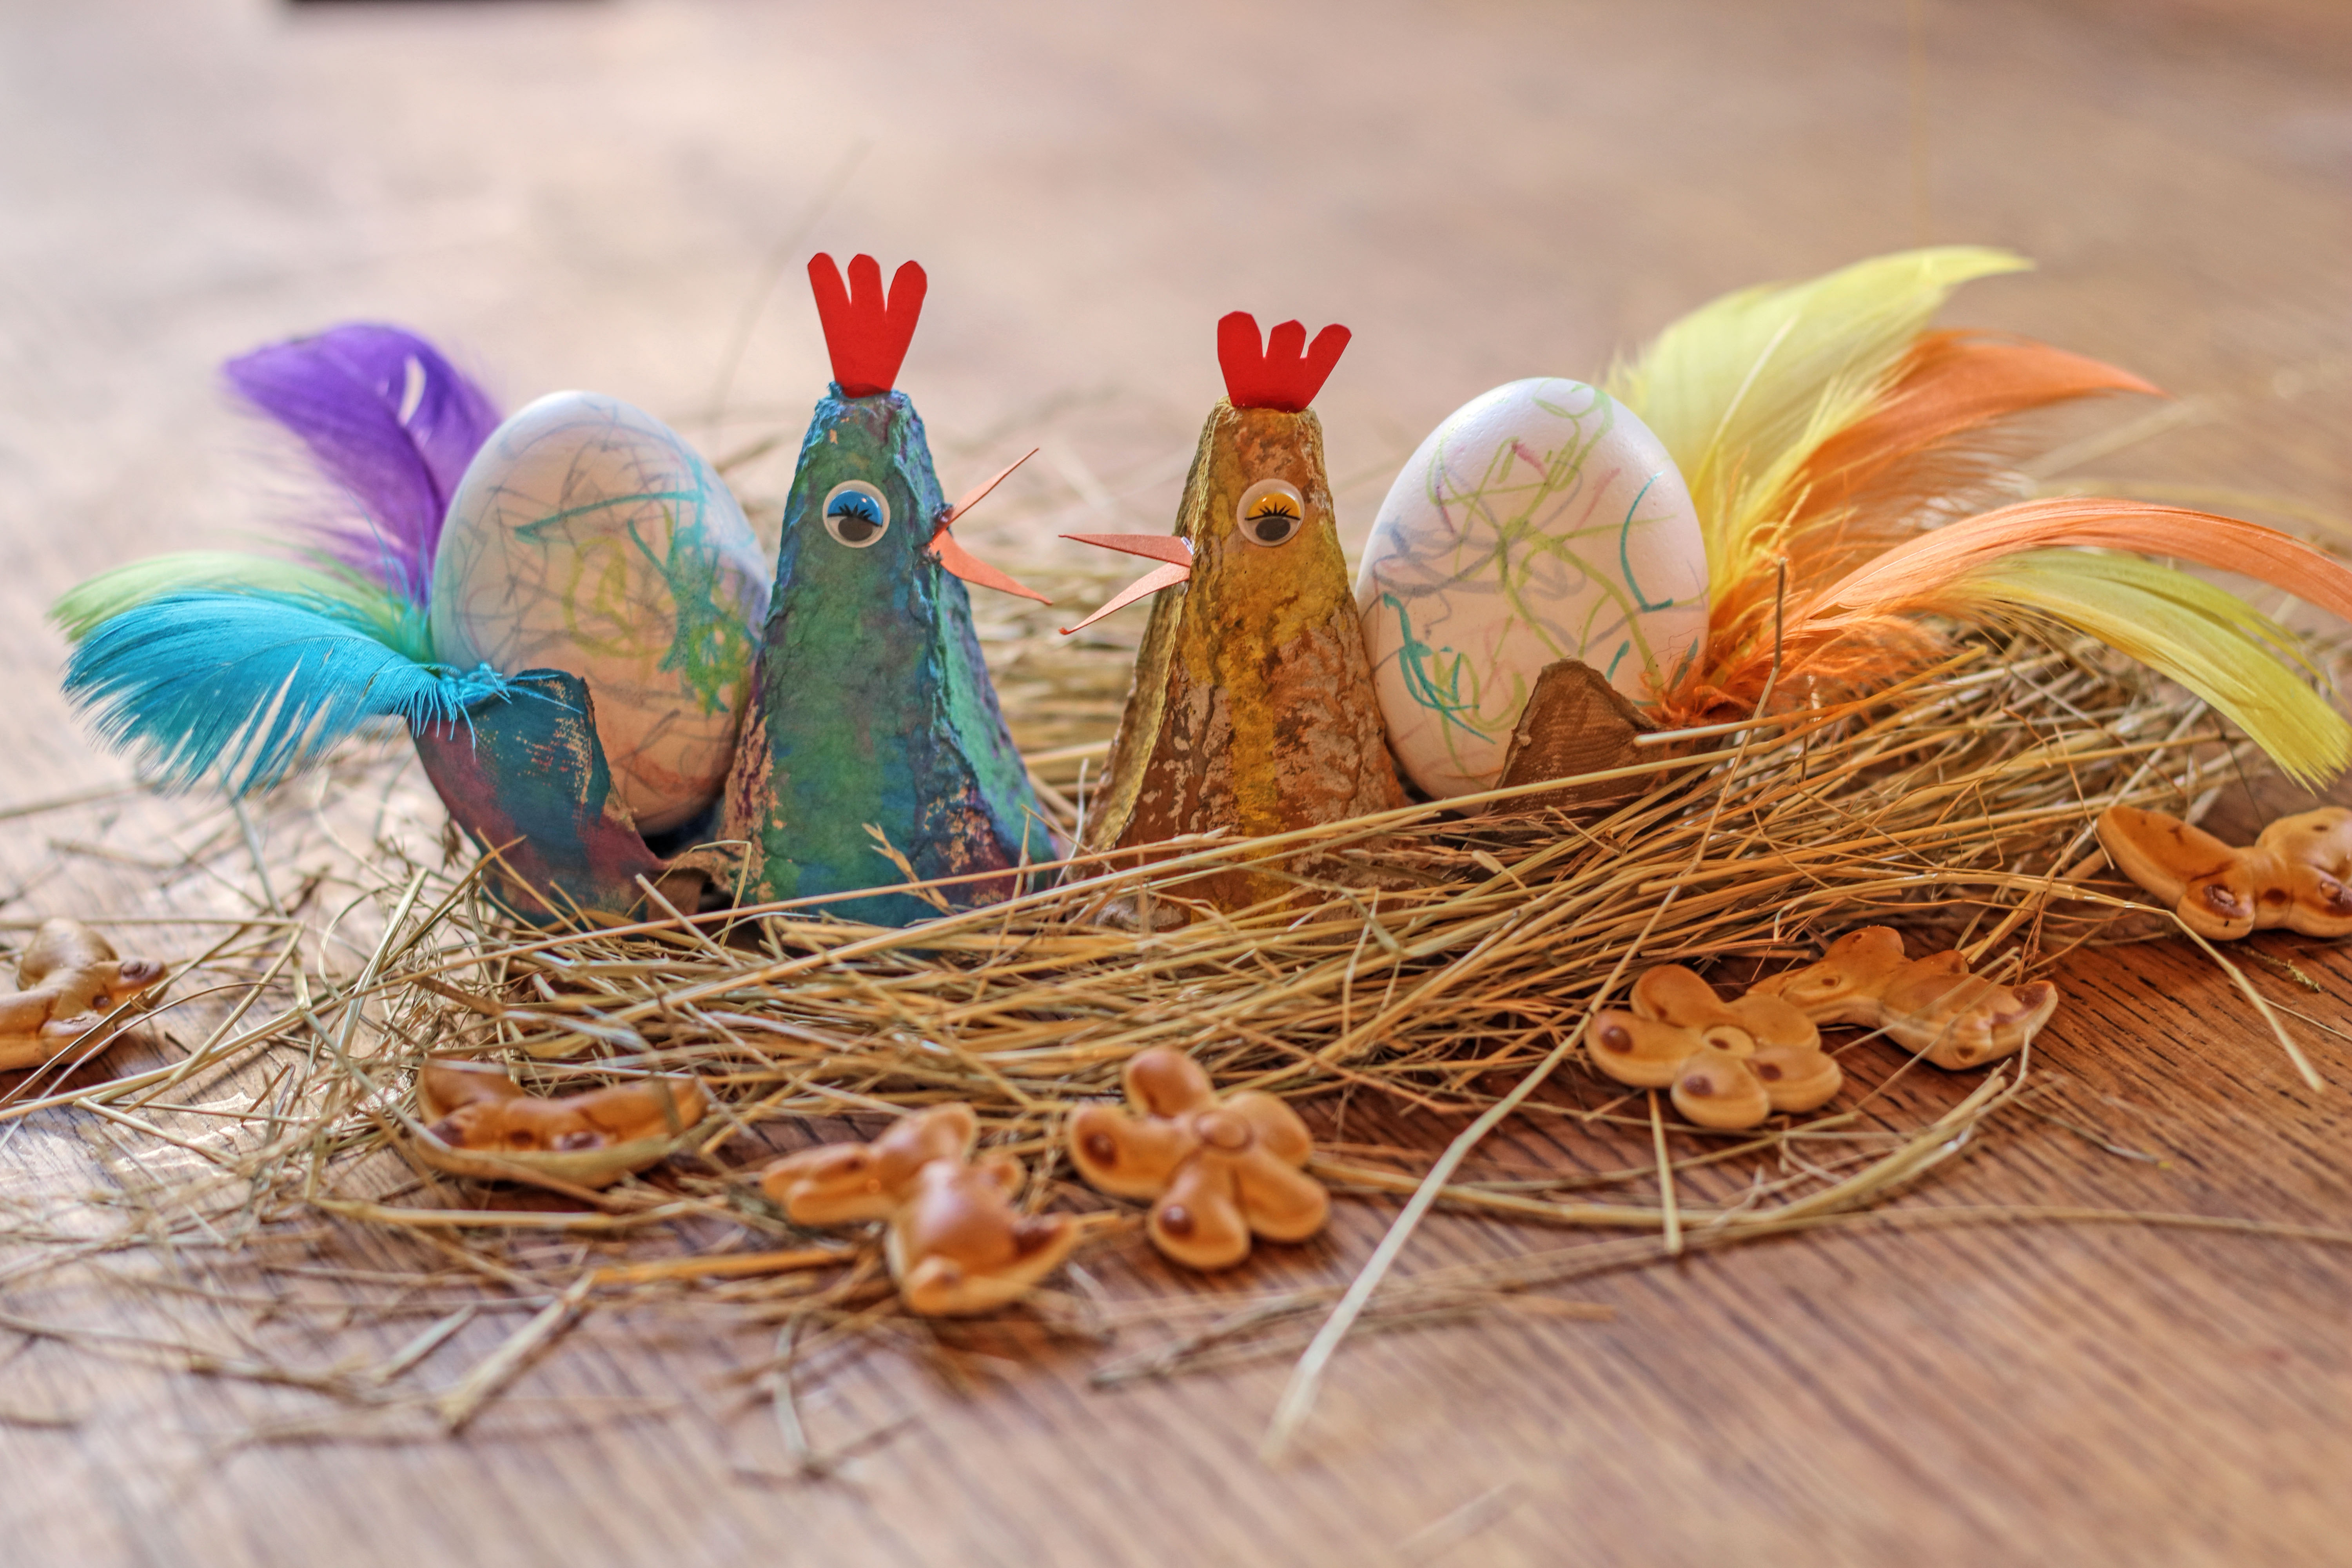
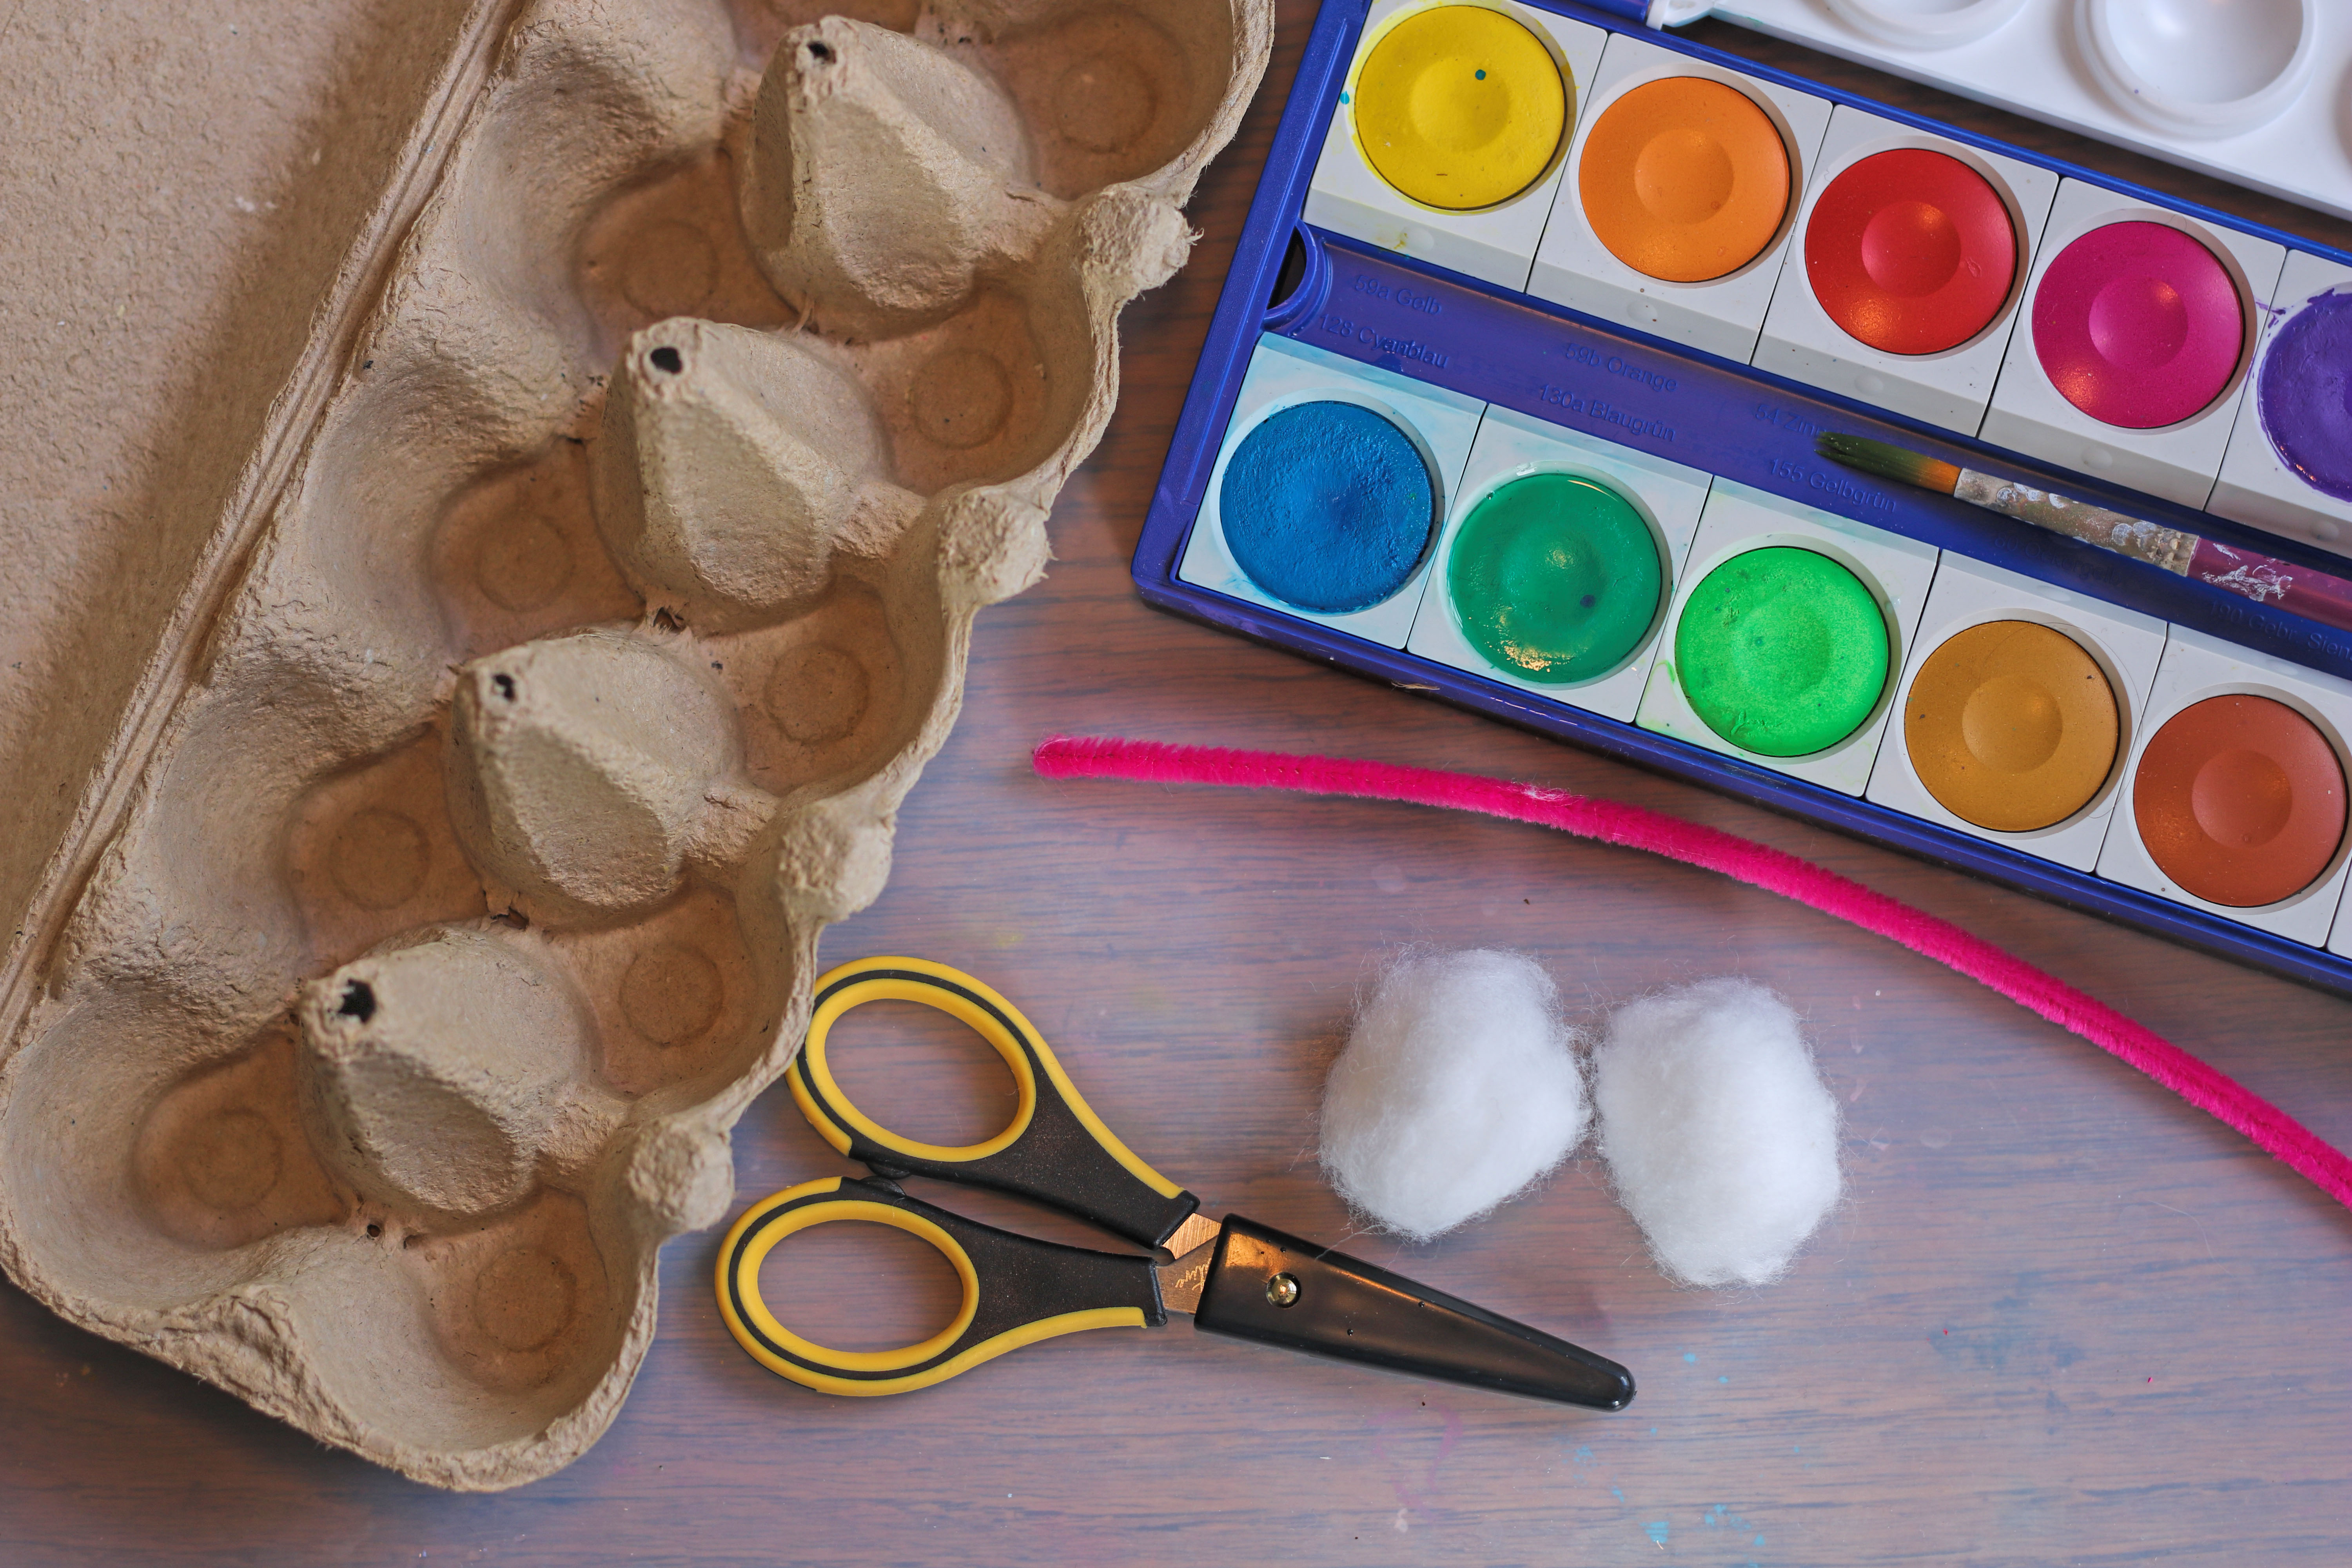
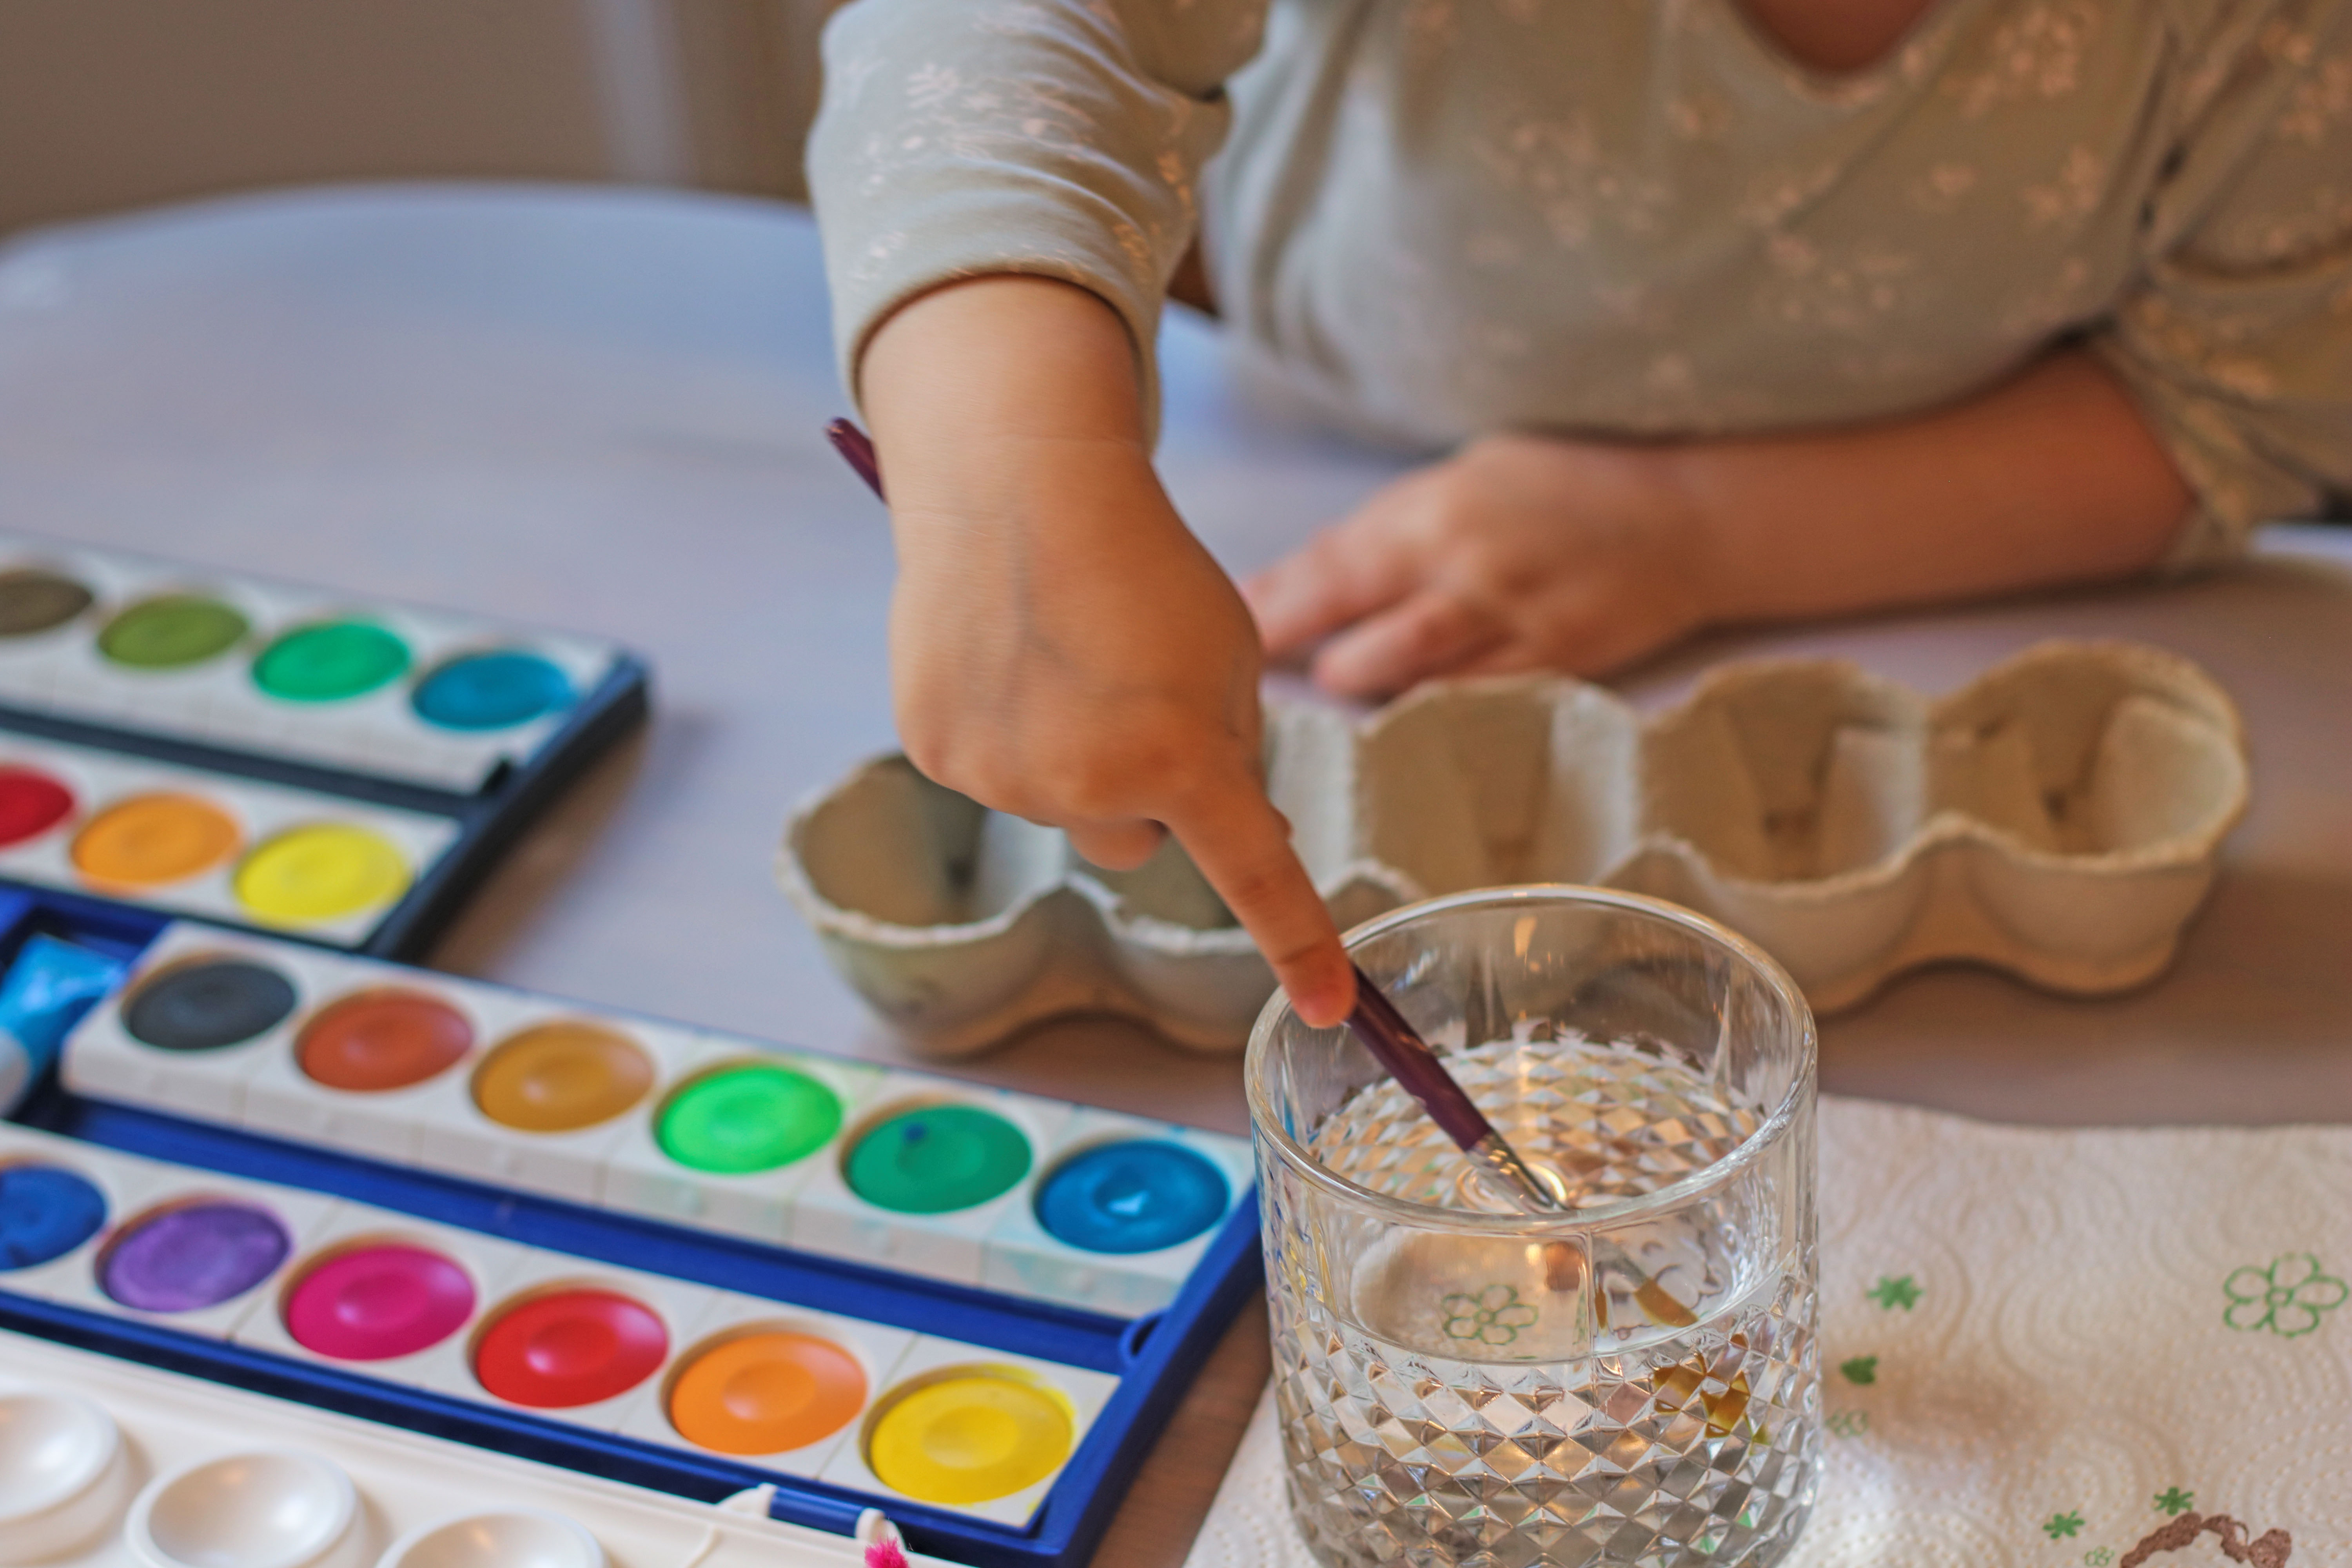
3. Egg Carton Chicken as an Egg Cup
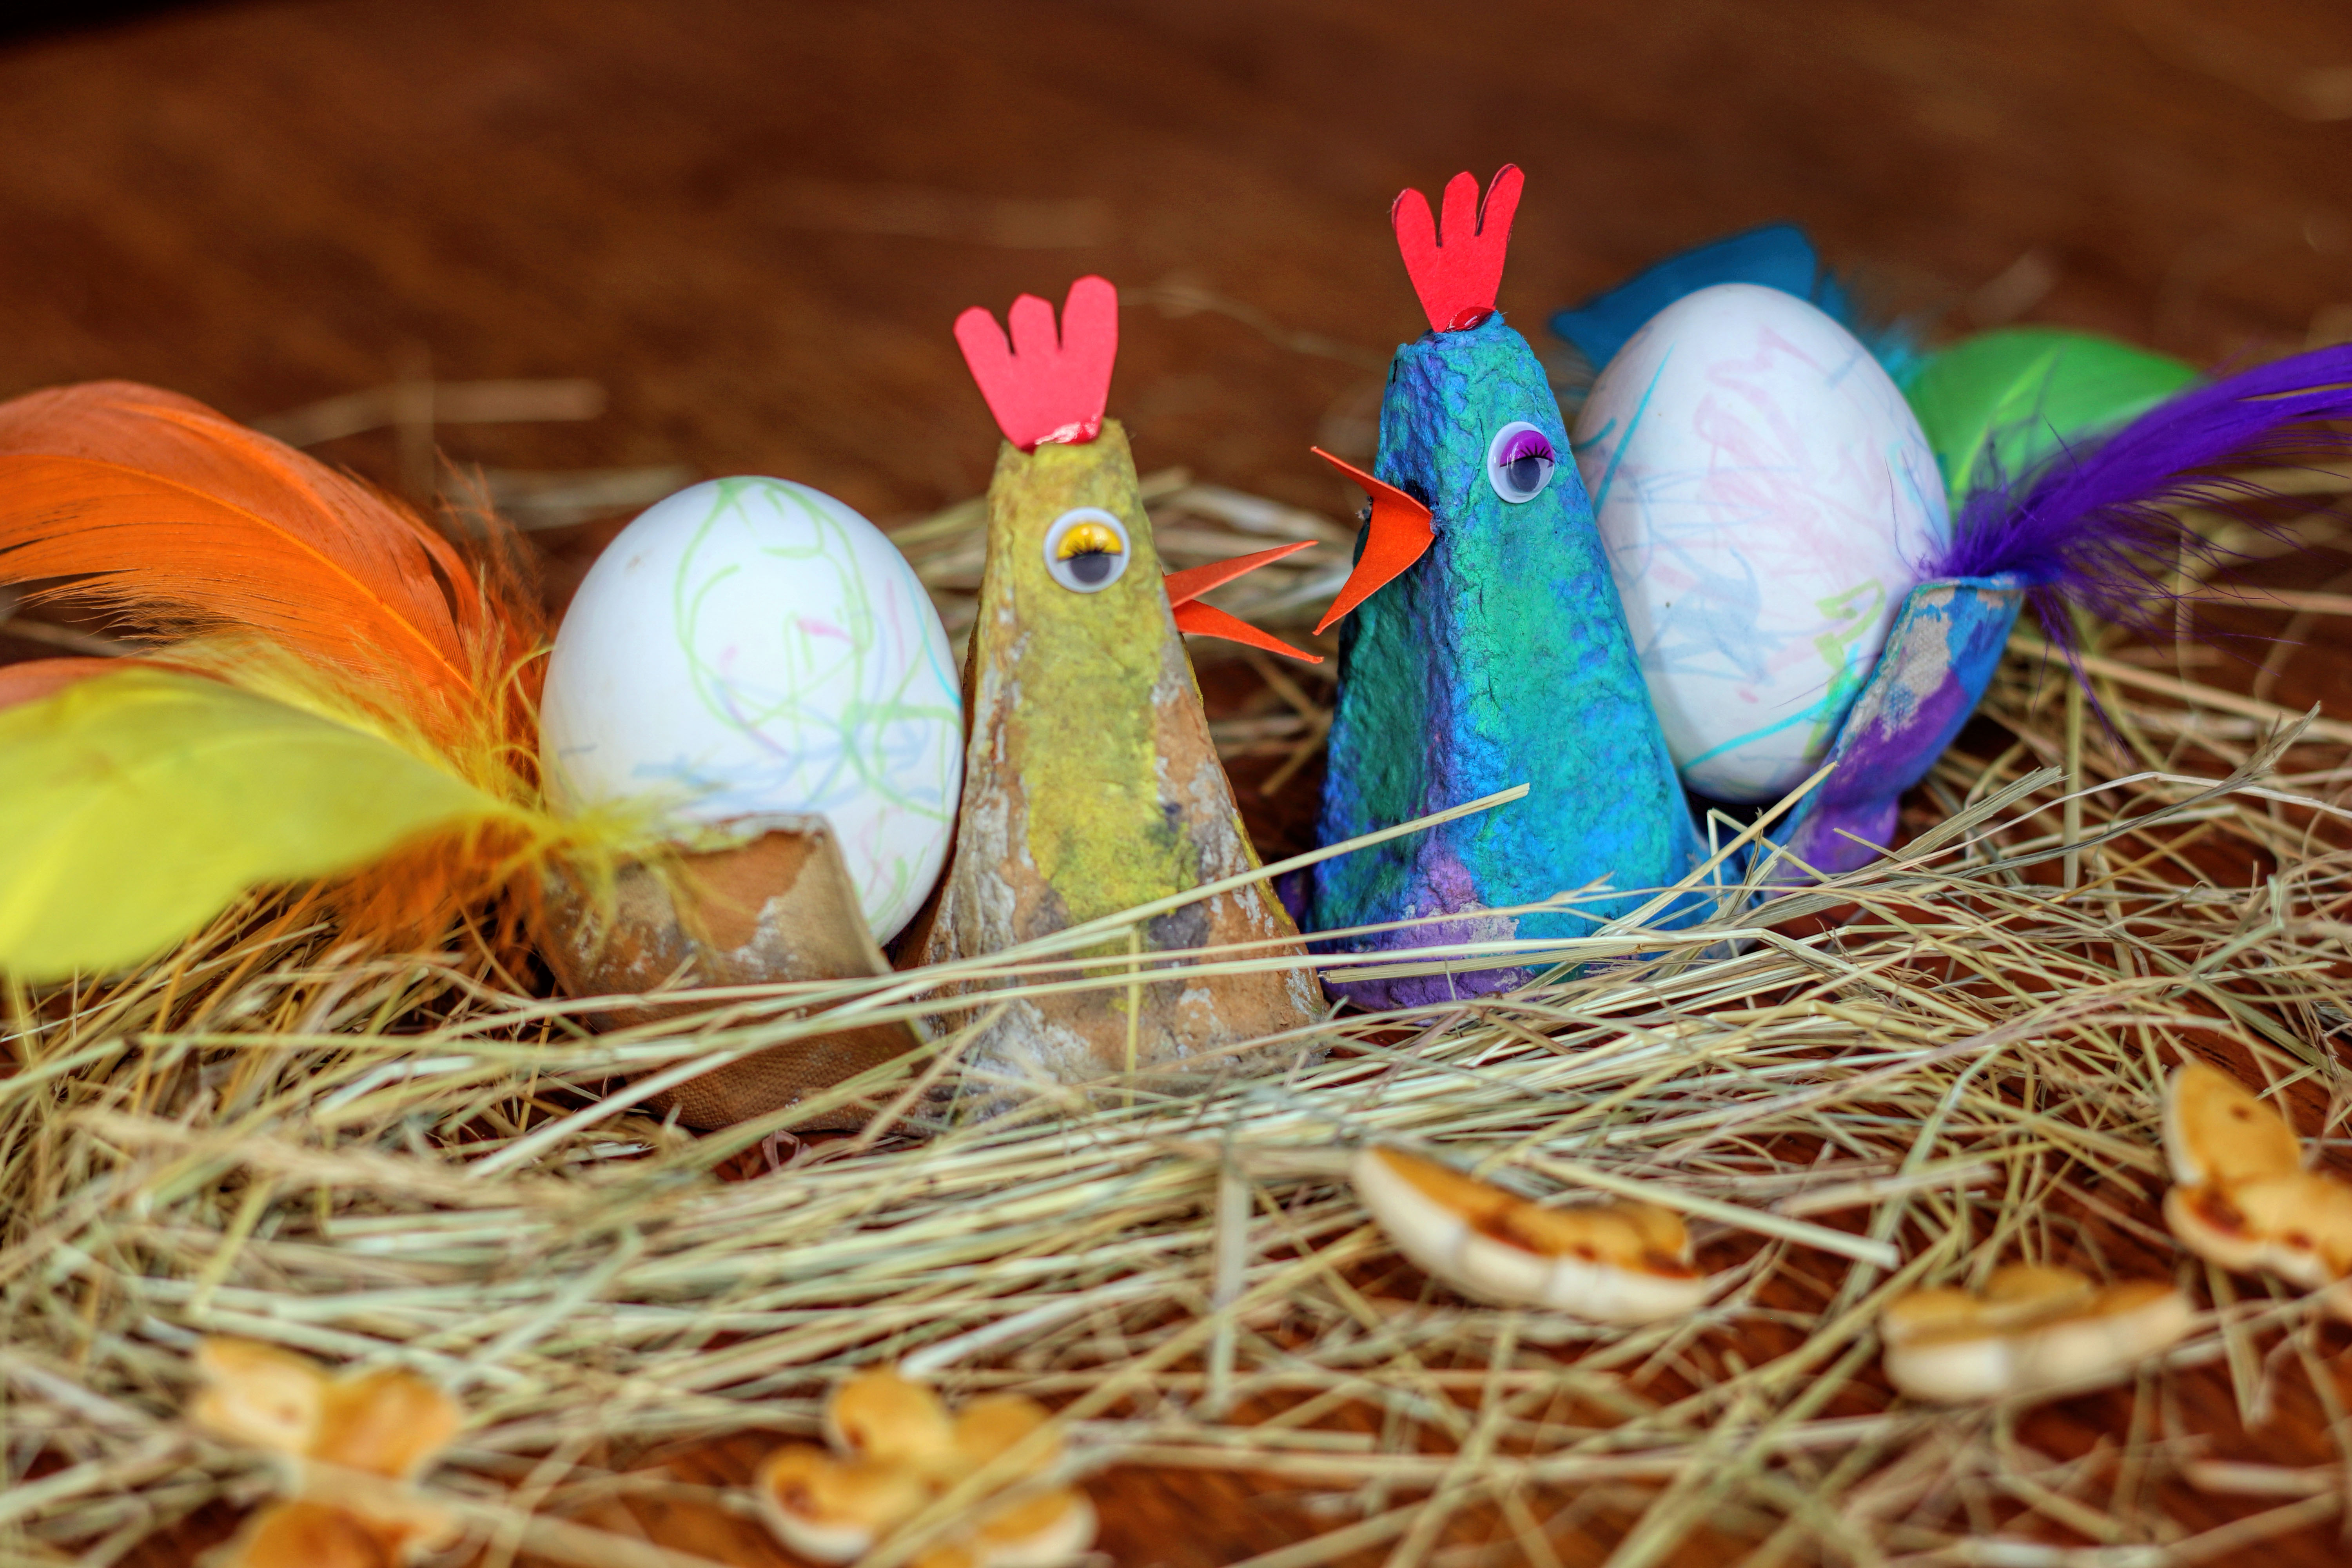
An egg carton can be turned into a little Easter chicken—and at the same time, an egg cup for Easter breakfast. A simple and sustainable craft idea that even small children can easily join in on.
Here's what you'll need:
- Egg carton
- Watercolors or finger paints work well
- Paintbrush
- construction paper for the beak and the comb
- Feathers and googly eyes (optional) in a large set
- Craft scissors for adults
- We use a food-safe baking mat on the table.
- Protection for the child's clothes (e.g., a smock or an old T-shirt)
- Wet wipes or water for cleaning
- special craft glue for children
Affiliate links — we may receive a small commission, your price stays the same.


Here's how it works:
1. Prepare the cardboard:
Cut out a single indentation with the small raised section from the egg carton. The raised section will later form the head, and the indentation will serve as an egg cup
2. Prepare the workspace:
Place a drop cloth on the table and put a smock or an old T-shirt on your child.
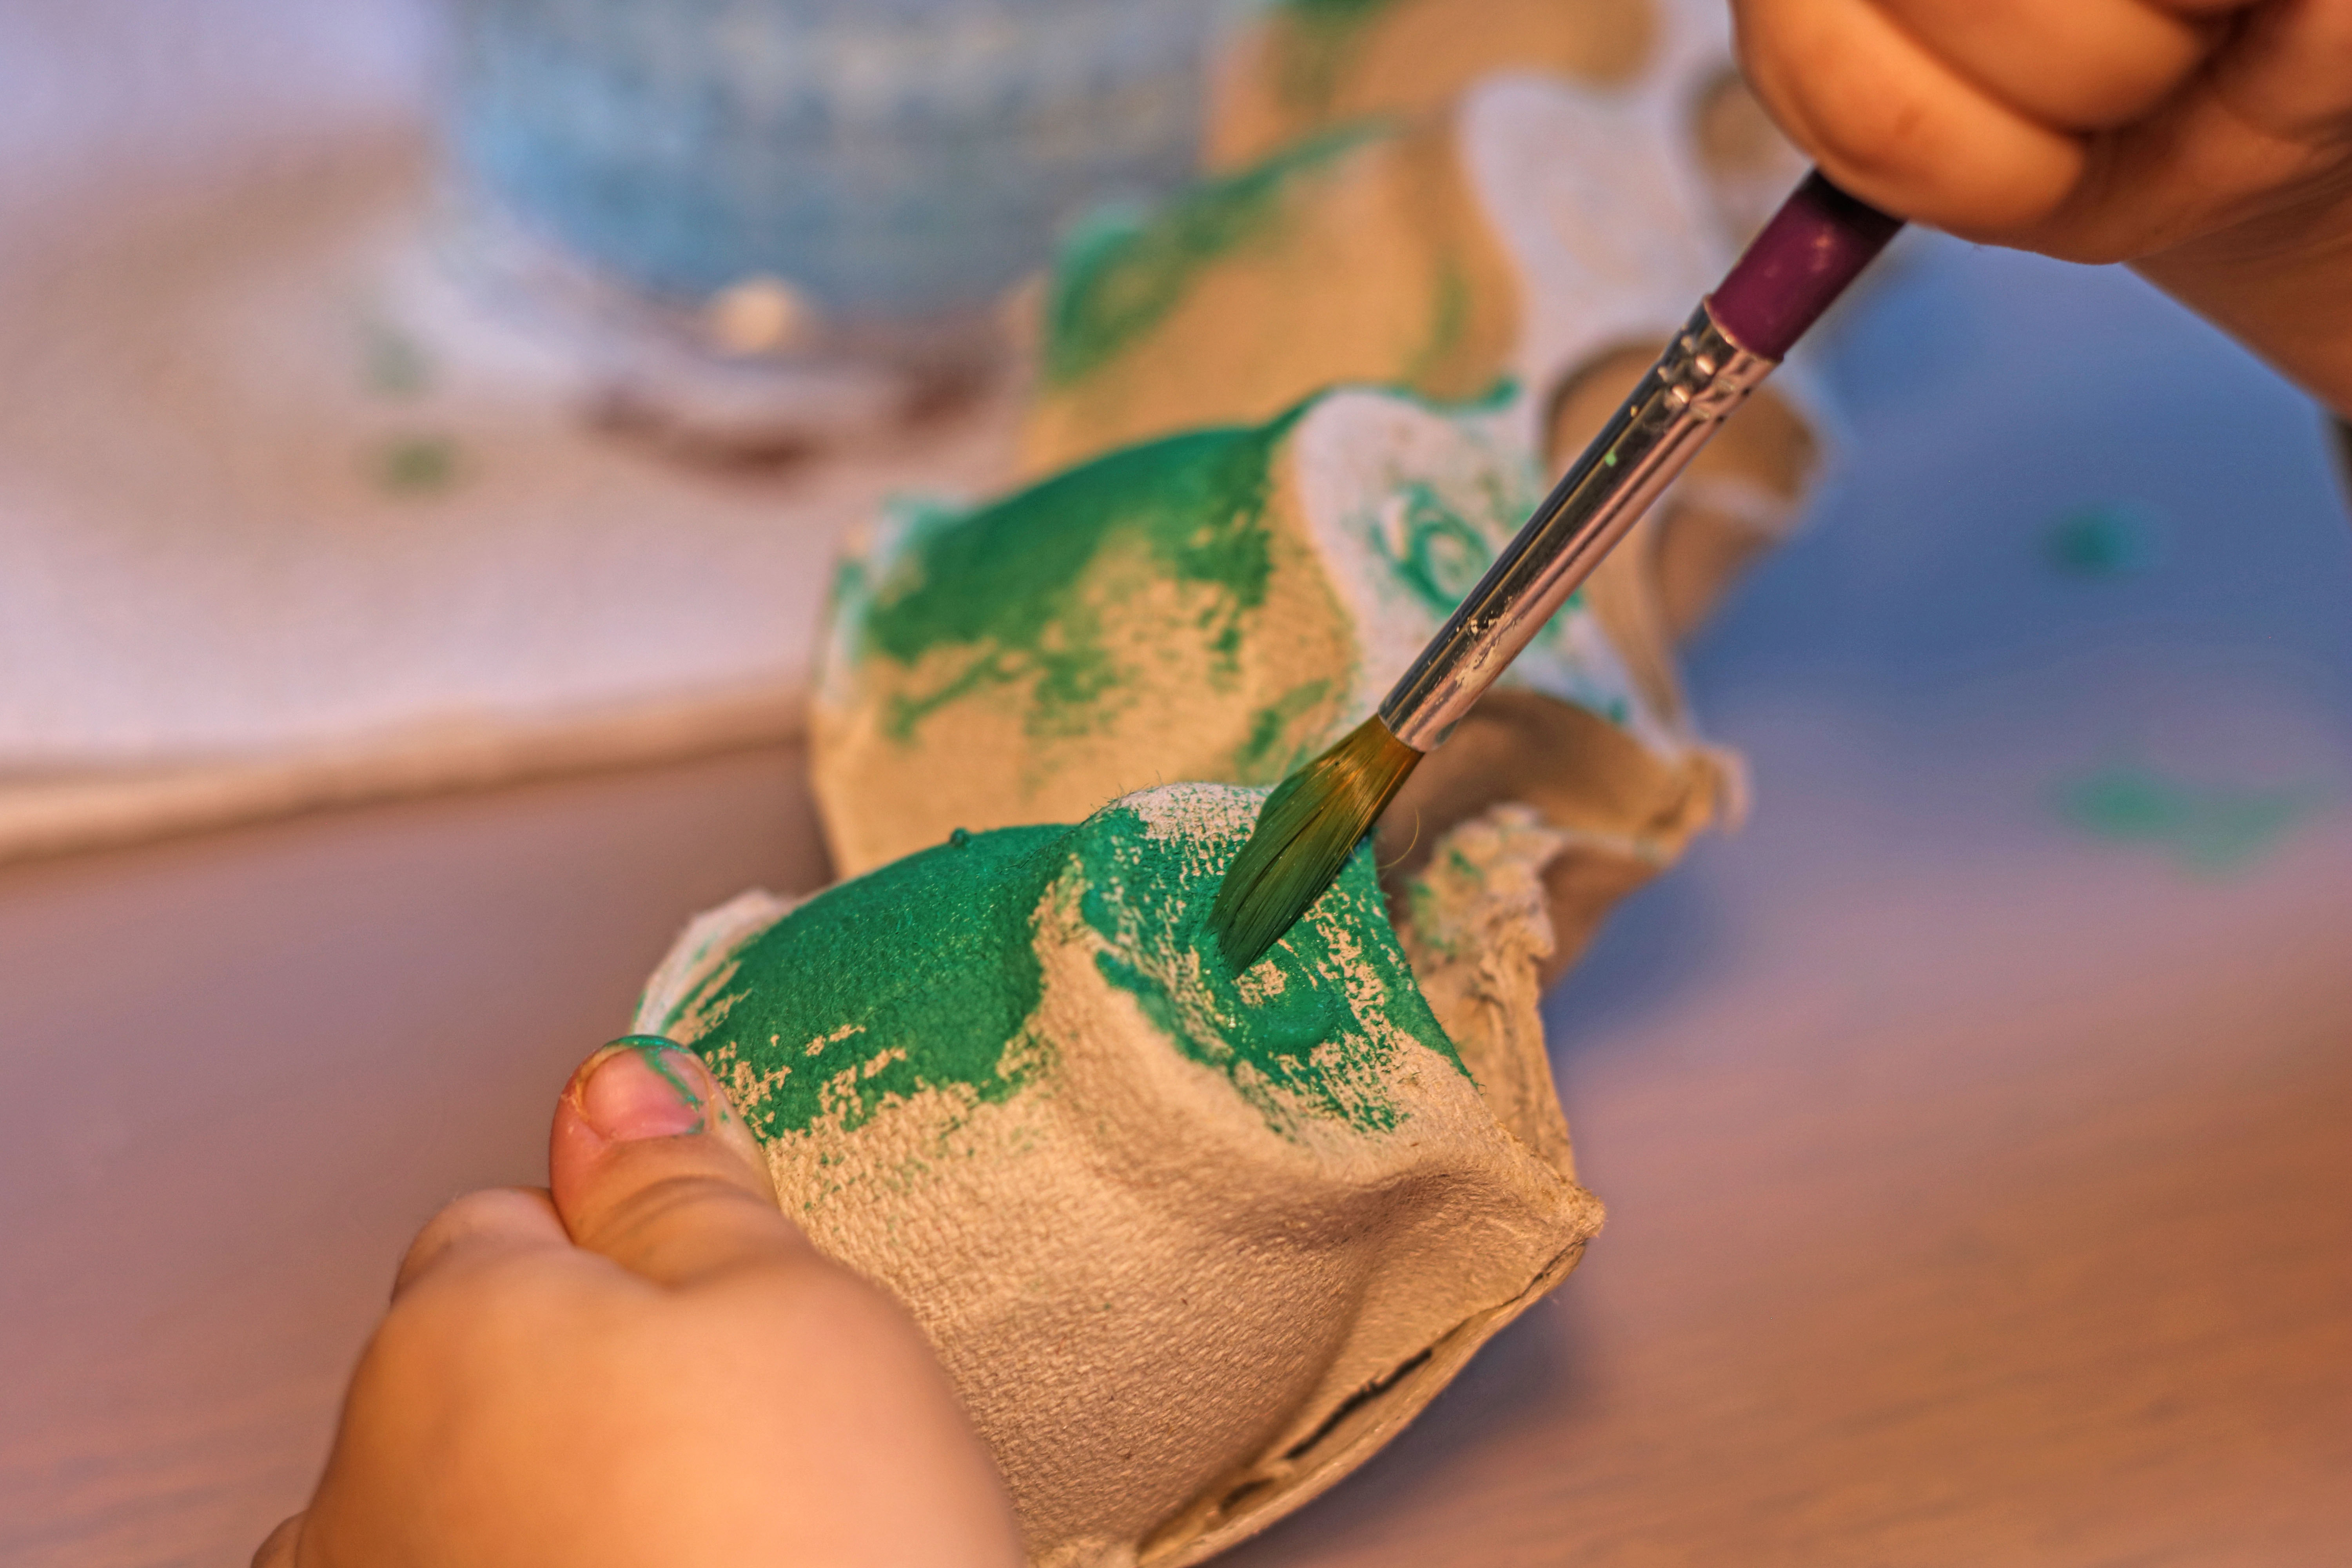
3. Painting:
Now your child can paint the chicken however they like. Let it dry thoroughly afterward.
4. Attach the beak:
Cut a small slit in the raised area and insert a paper beak cut out from paper.
5. Add the comb:
The existing hole in the cardboard can be used for the comb—simply insert a small paper comb into it.
6. Decorate:
Optionally, glue on googly eyes or draw eyes.
7. Insert the egg:
Once dry, the hard-boiled egg can be placed in the hollow.
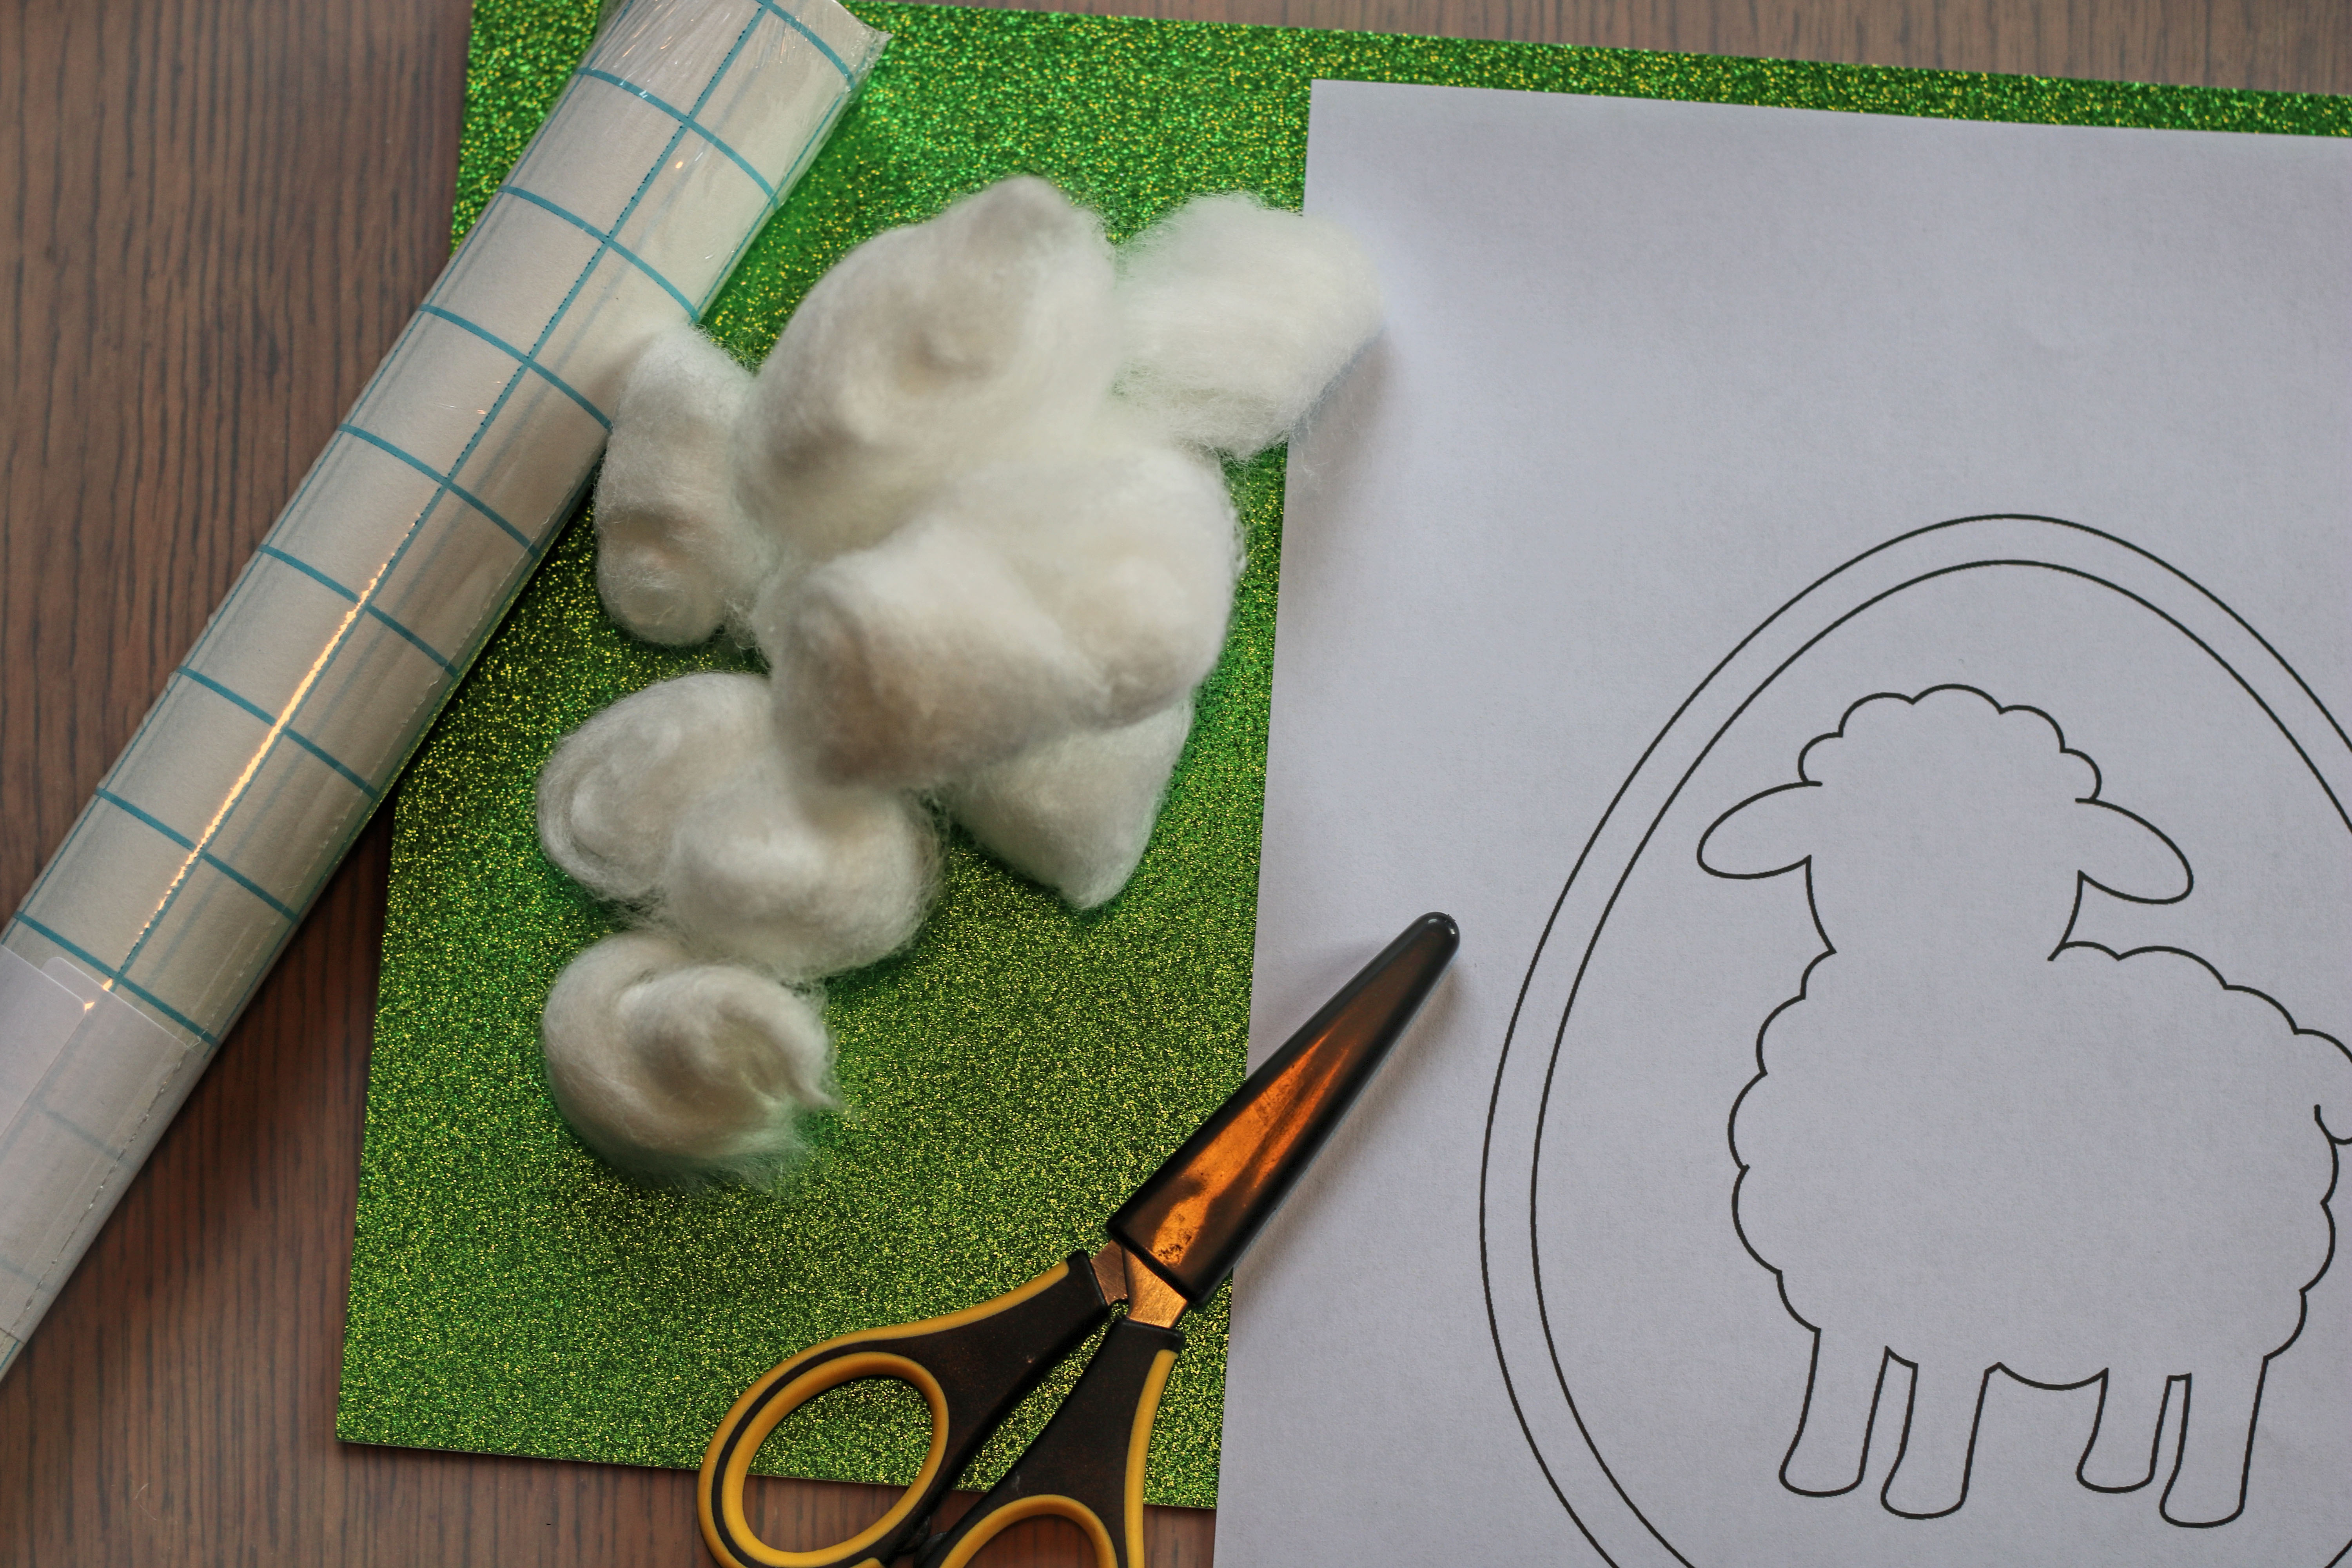
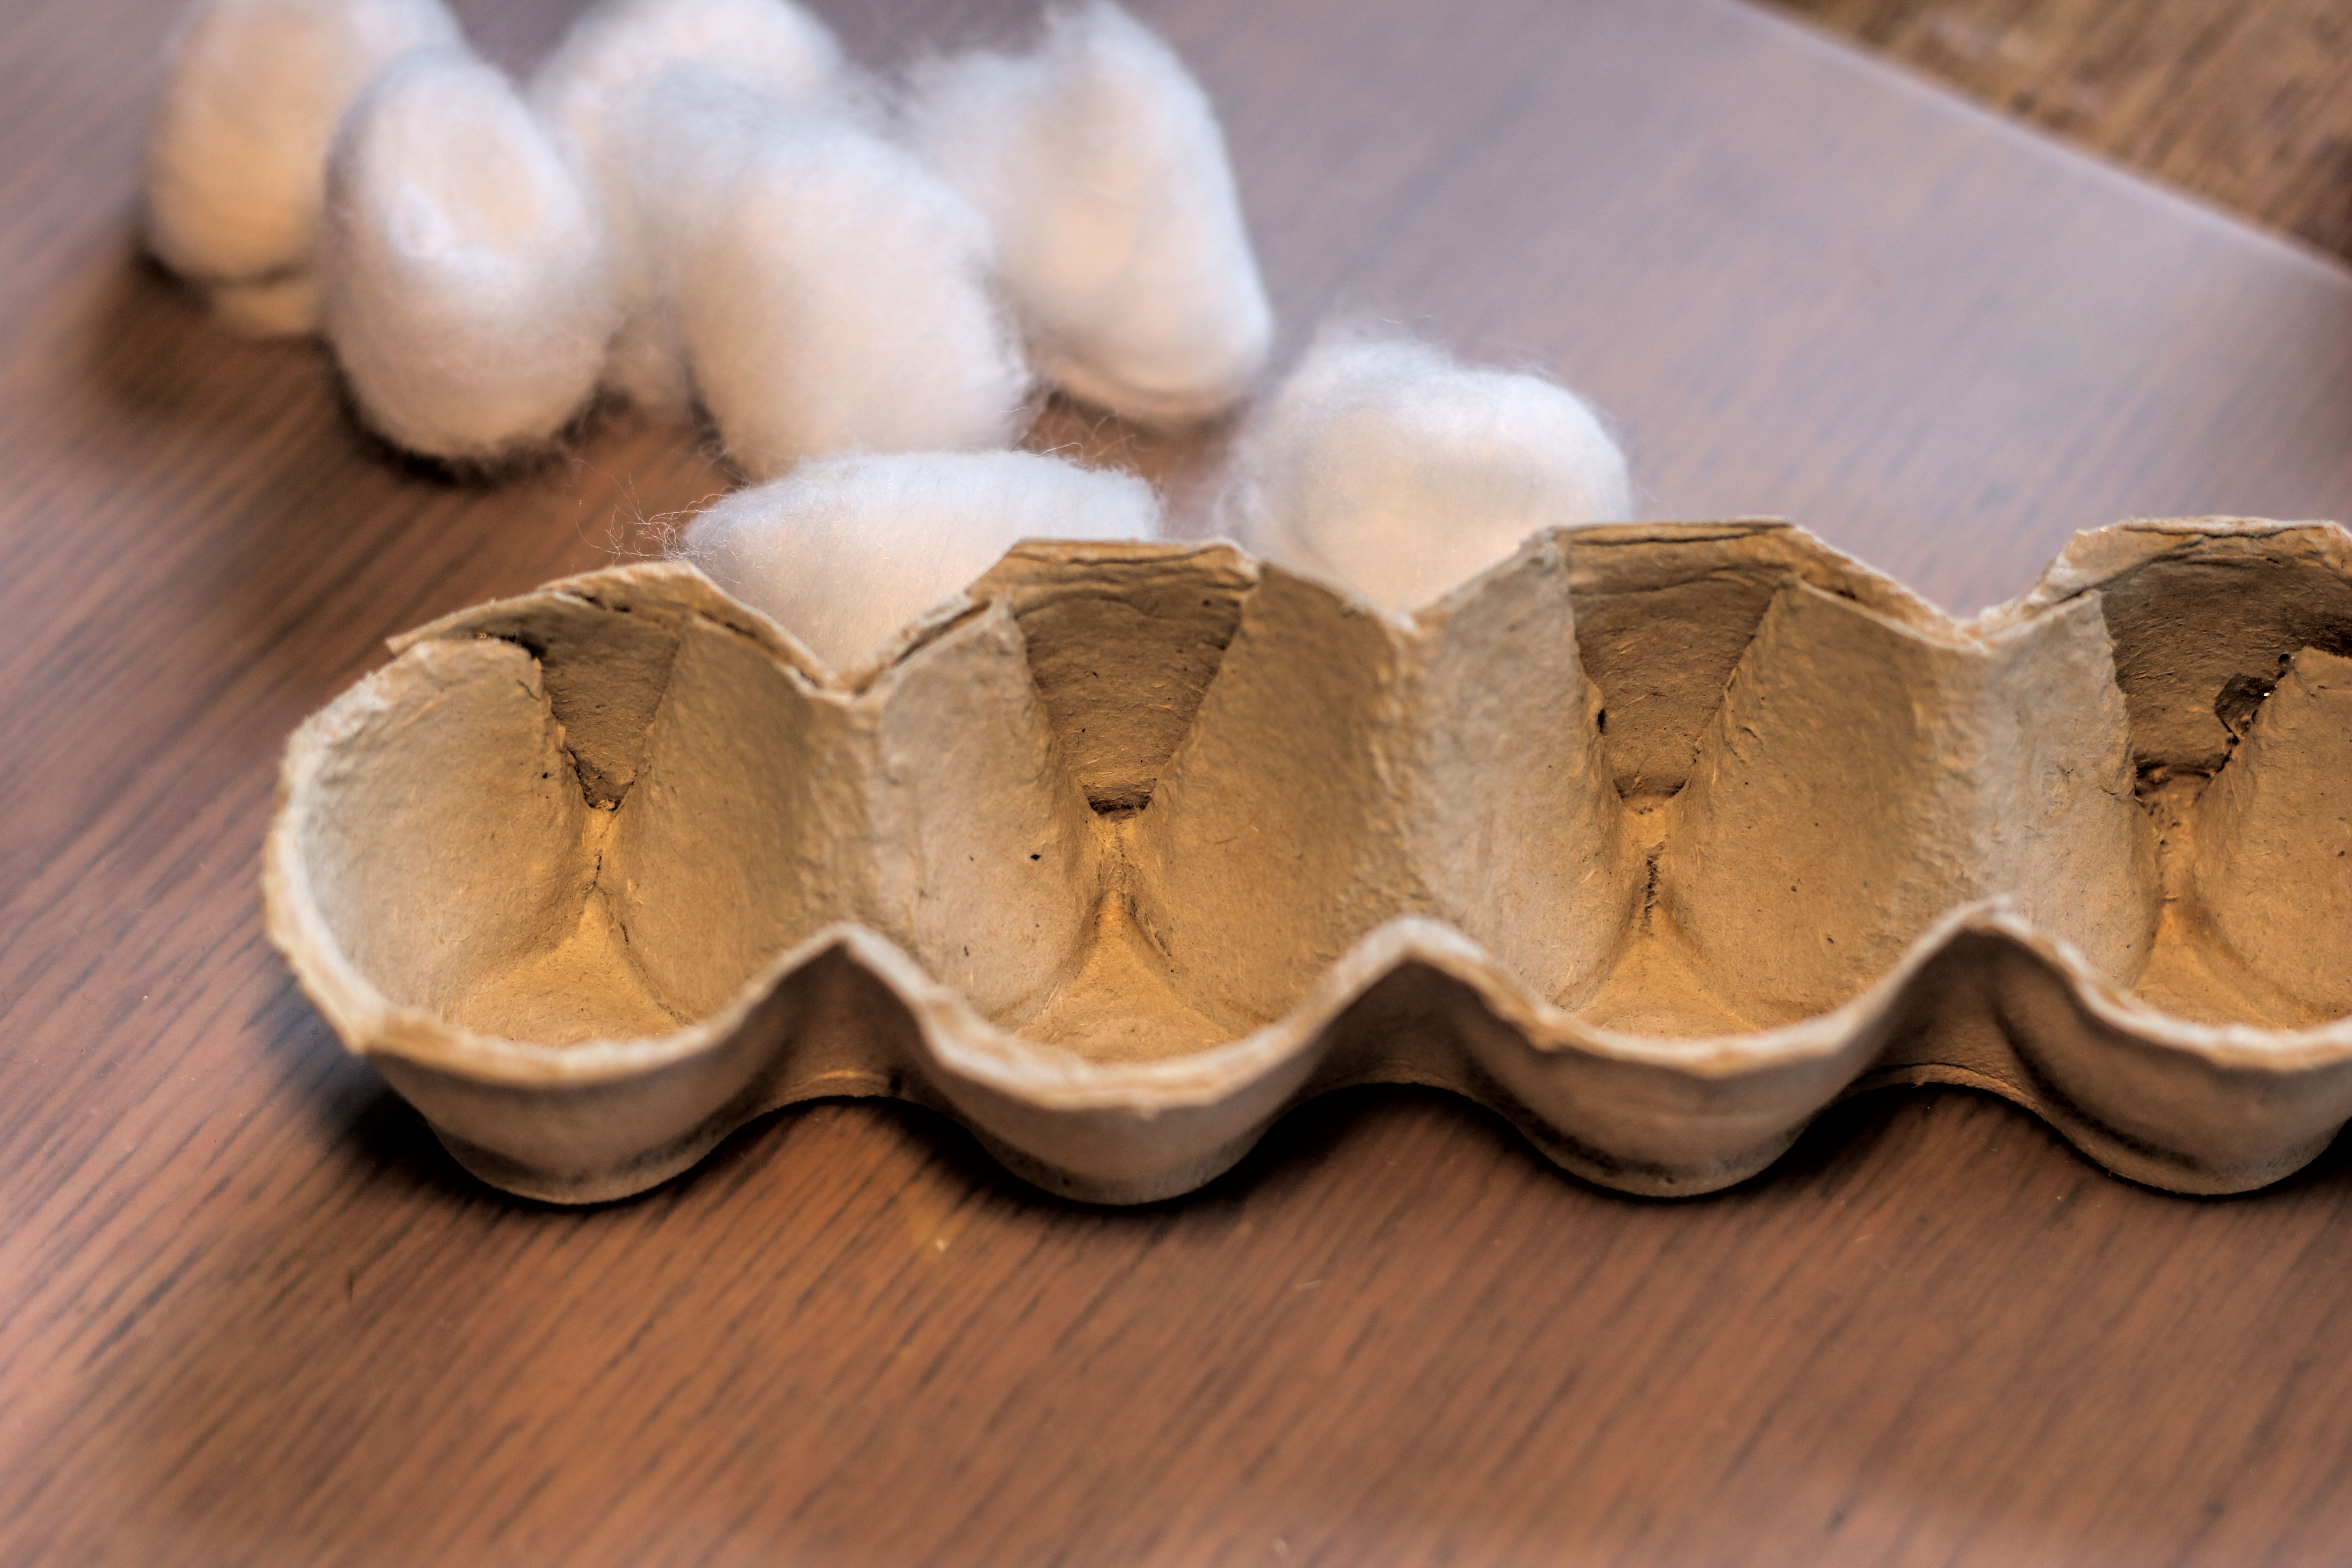
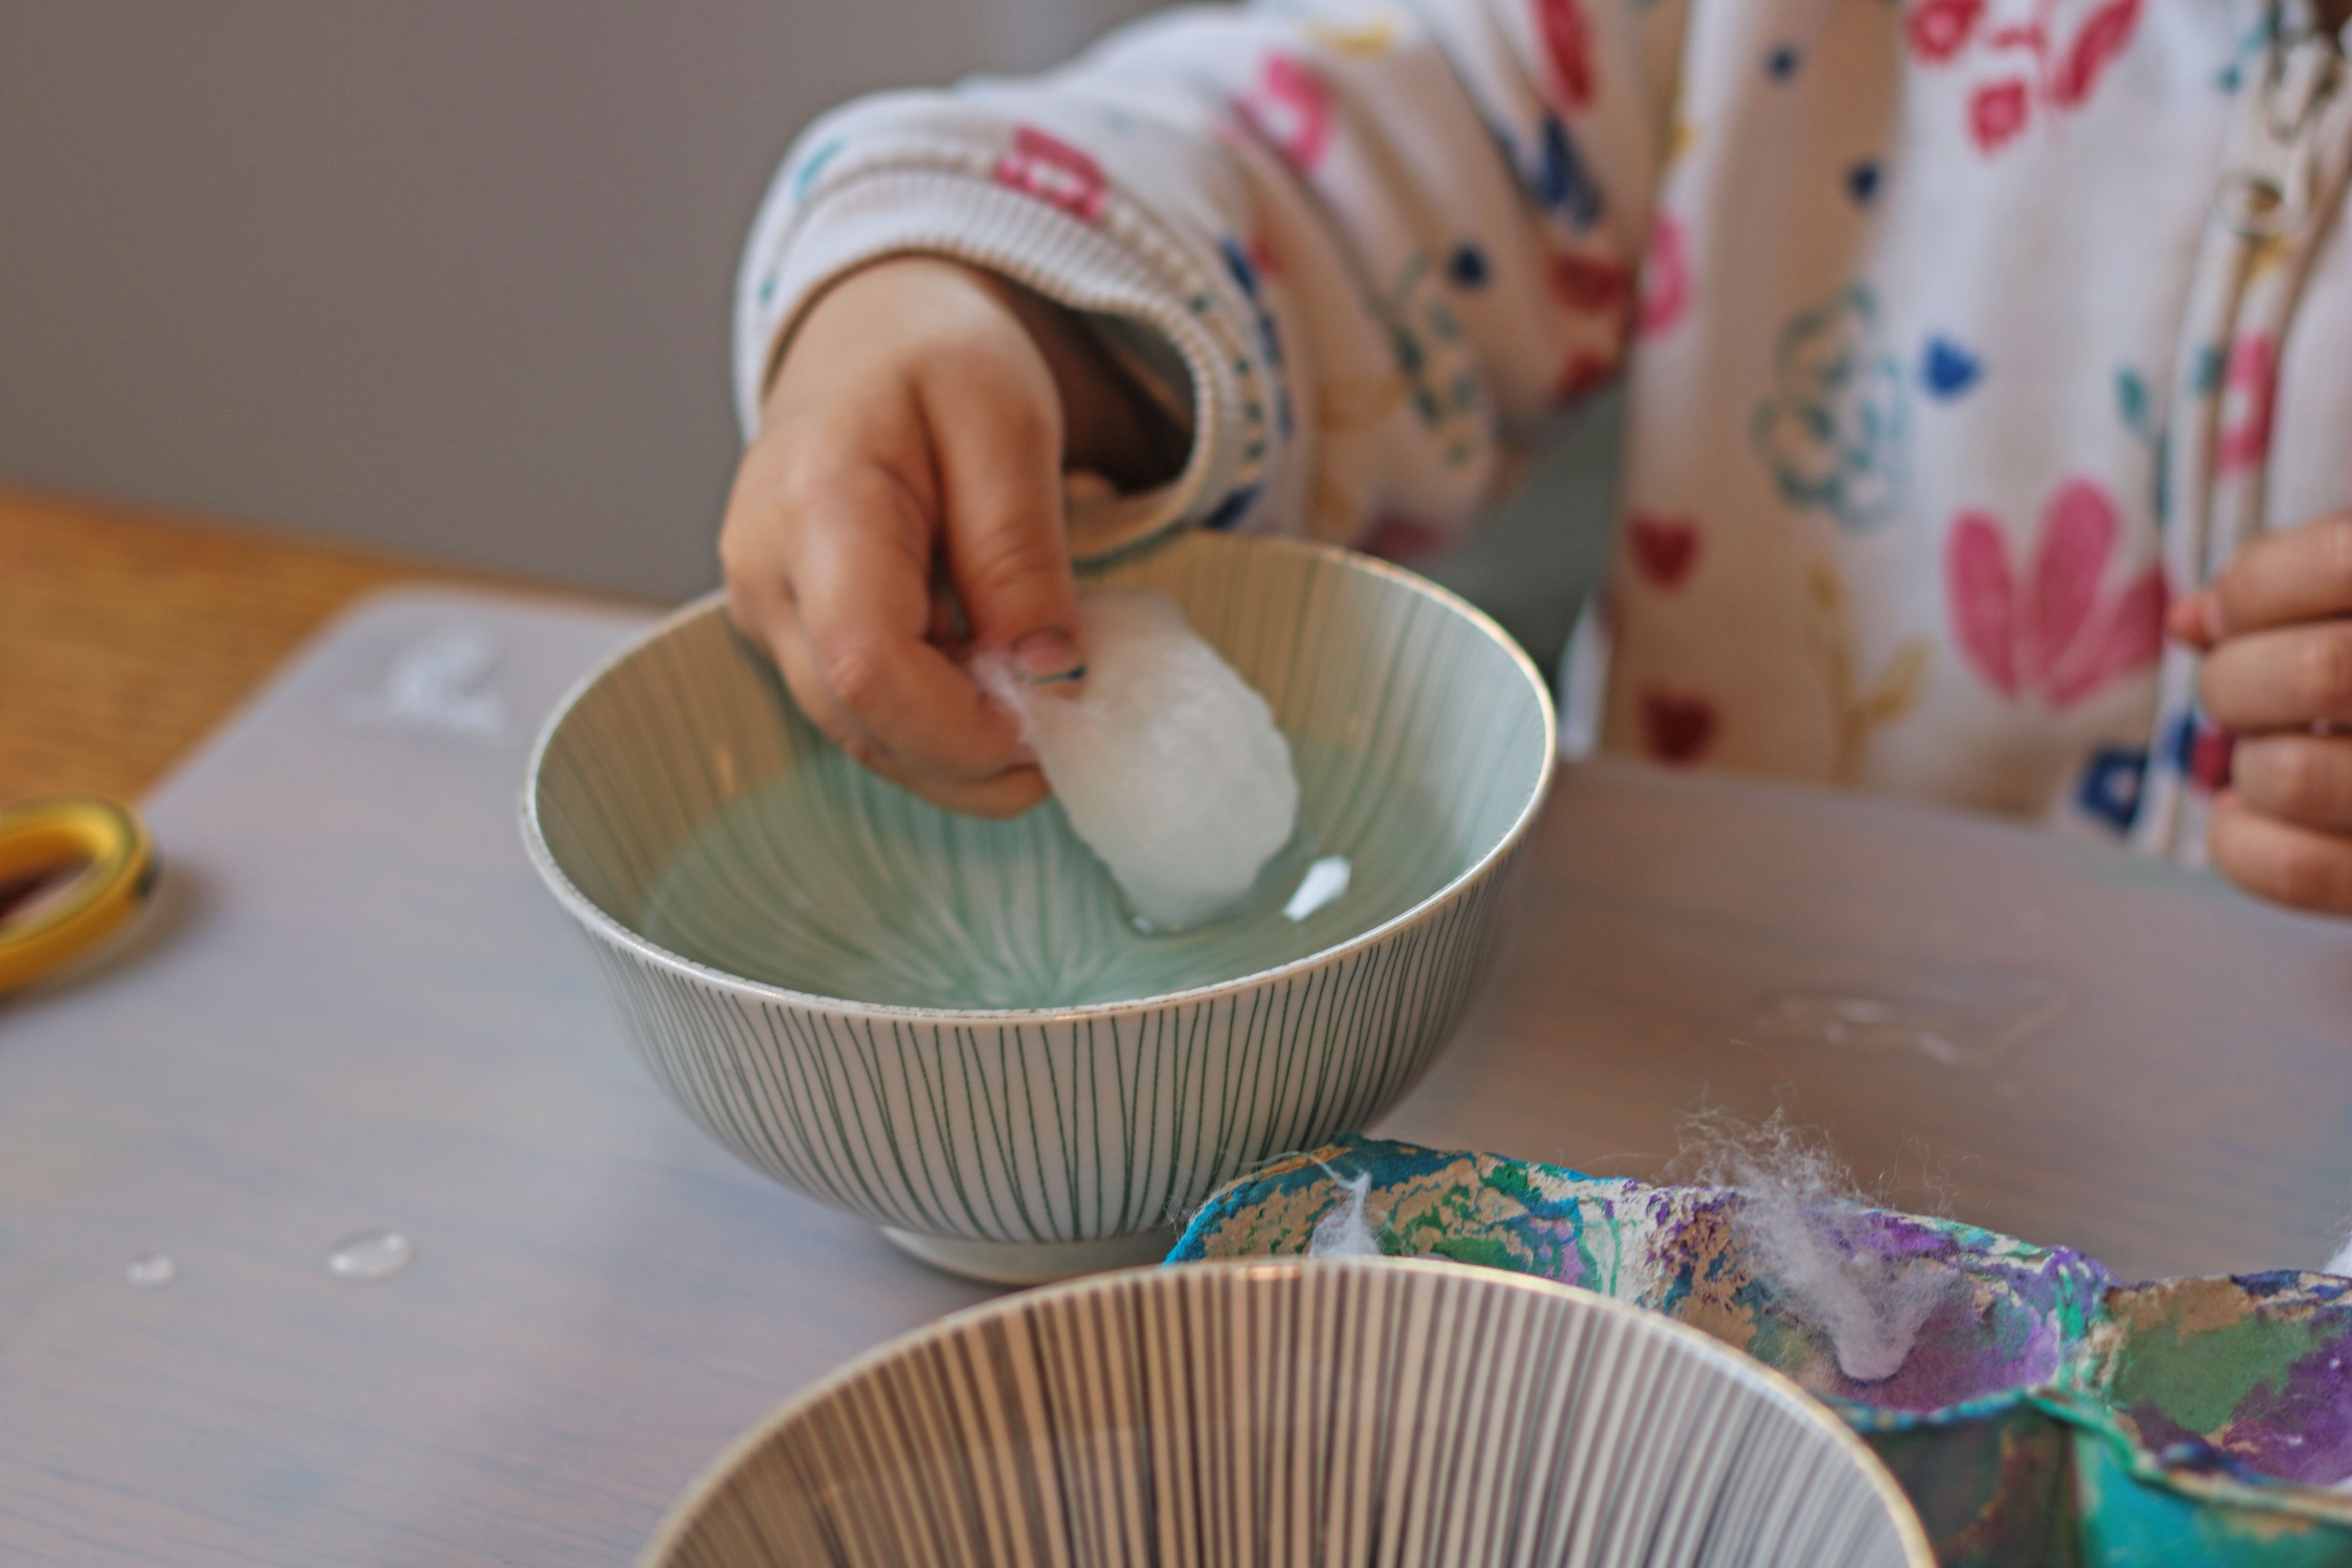
4. Cotton Ball Sheep
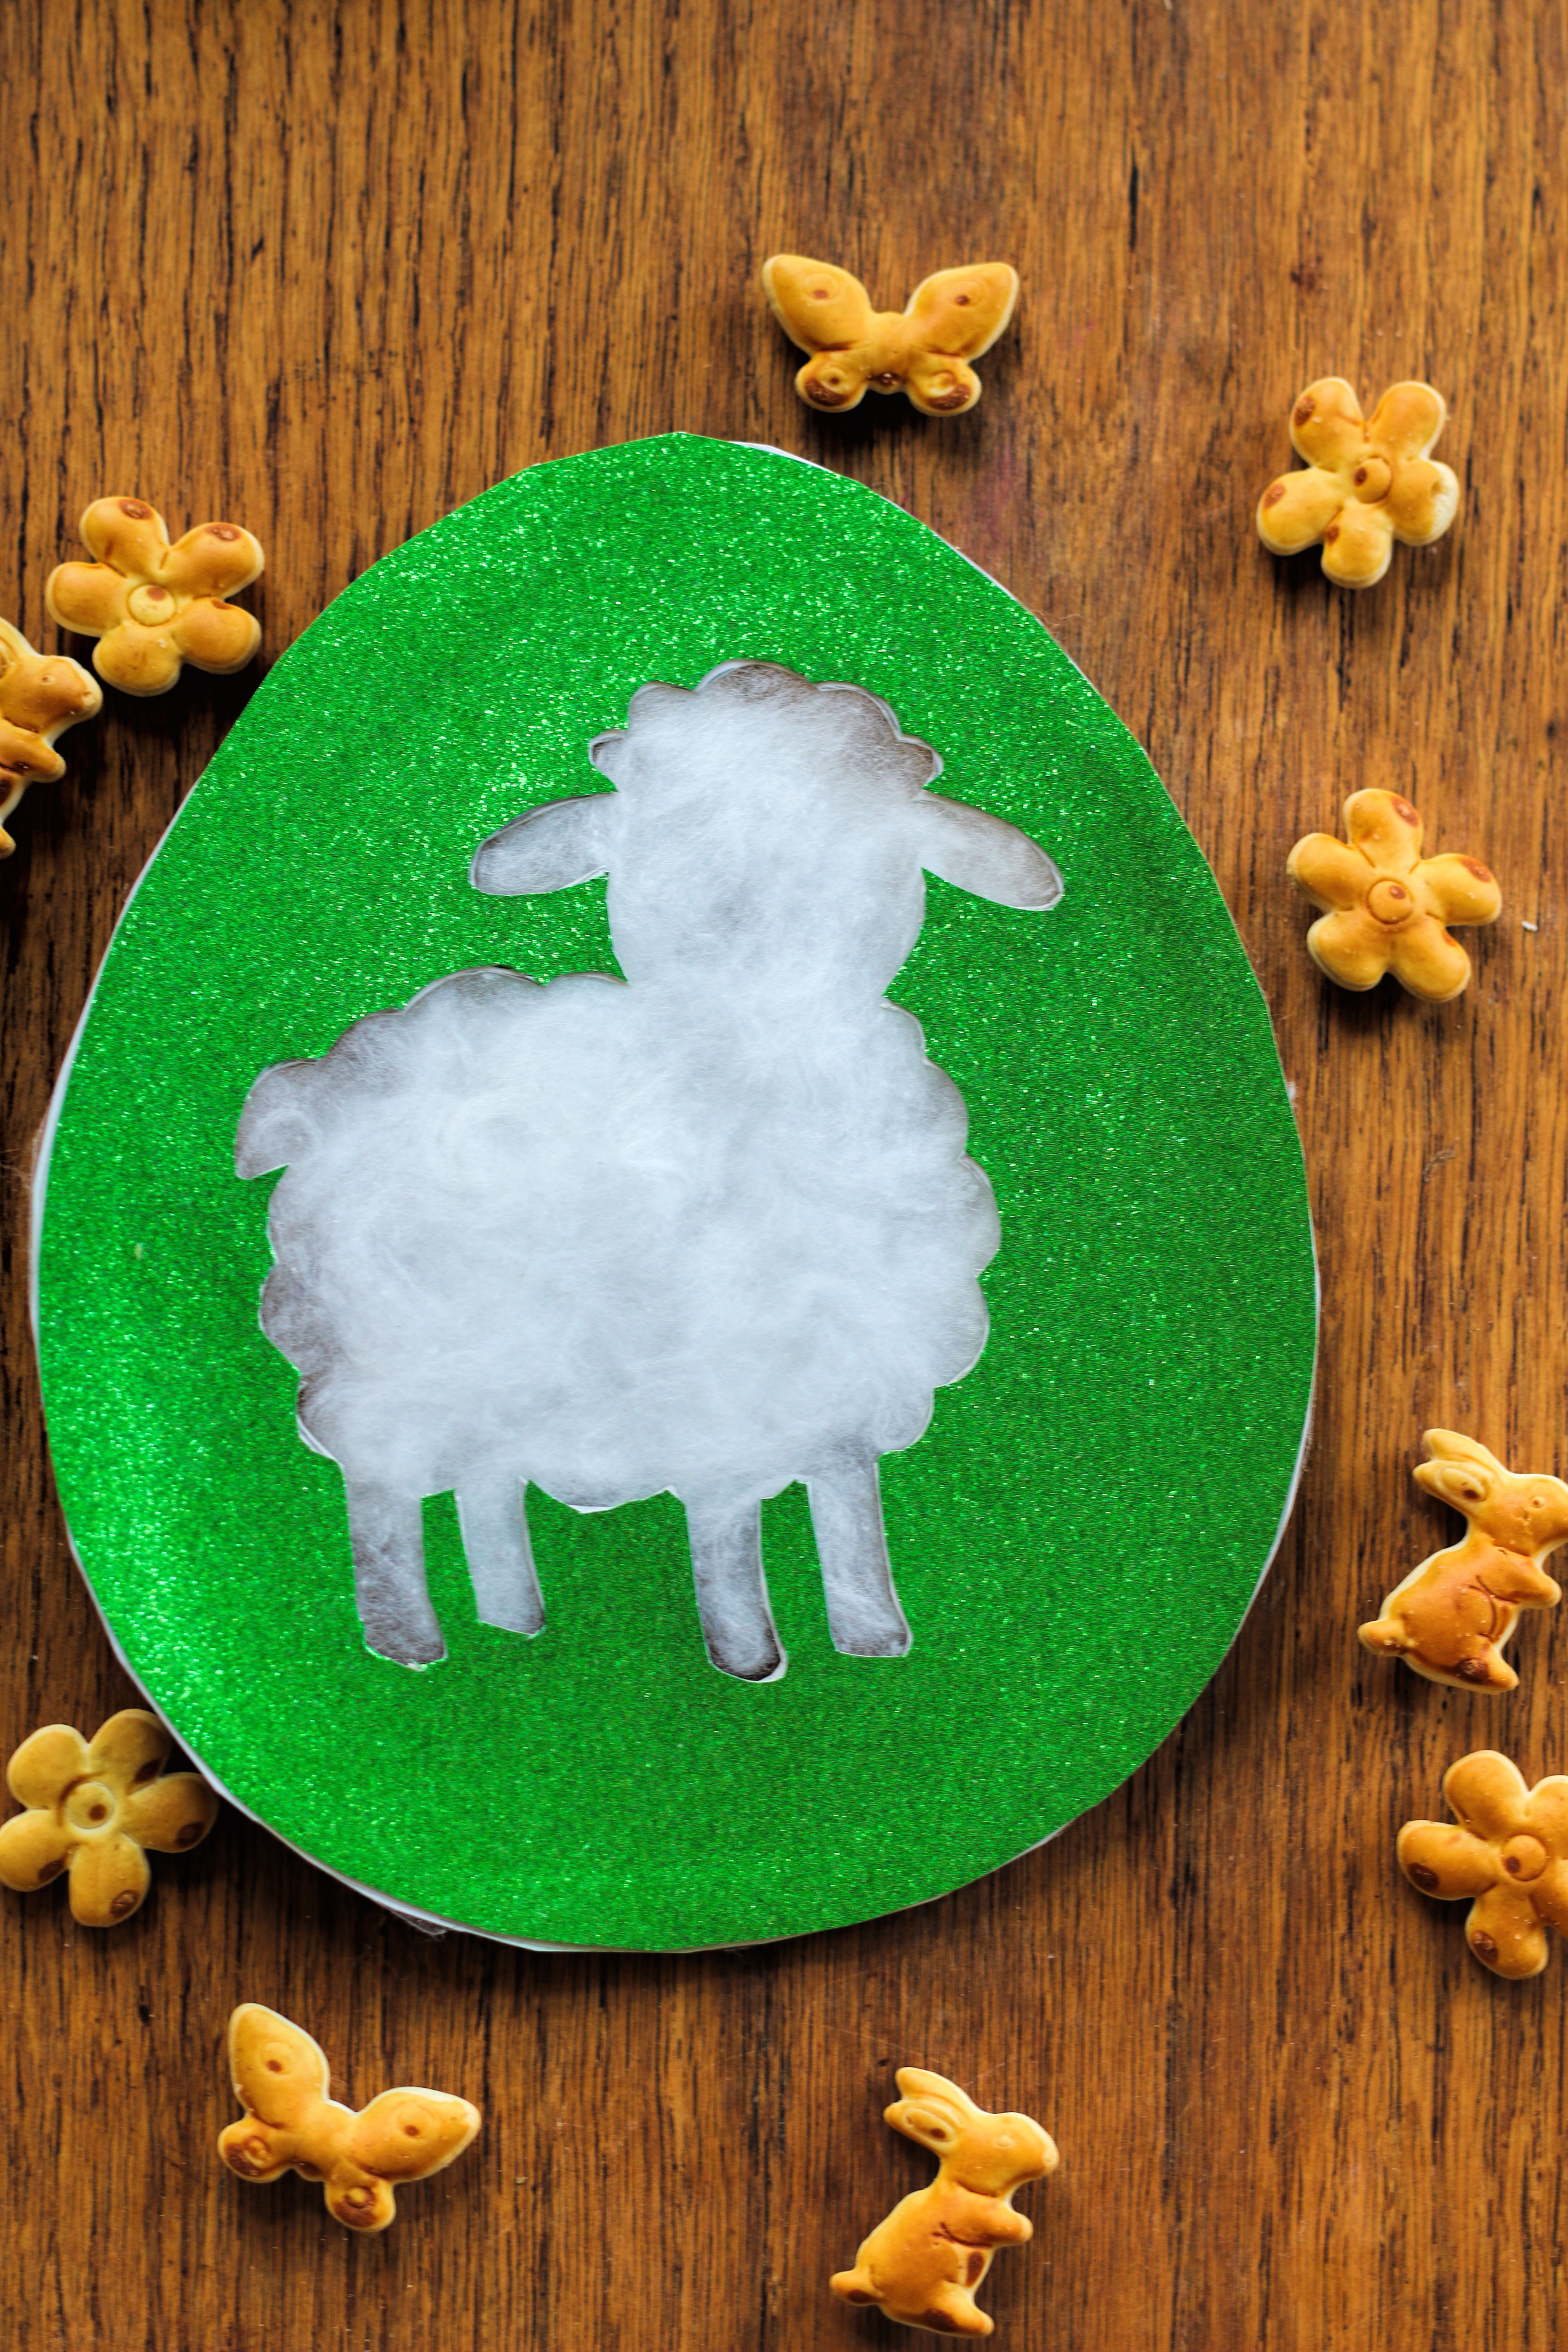
This fluffy sheep in an egg carton is a simple Easter craft that’s perfect for even young children. As they pull apart and stick on the cotton, kids have a wonderful sensory experienceA sensory experience happens when children intentionally feel, notice, and explore different materials. In crafts, this can happen with cotton wool, tracing paperTracing paper is thin and translucent (approx. 40–60 gsm), ideal for lantern crafts or window pictures.Zum Glossar, finger paint, sand, or natural materials.Zum Glossar. The book adhesive film creates a smooth, beautiful surface on the back. The texture of the cotton really stands out, especially when displayed in a window.
Here's what you'll need:
- From our craft templates: Sheep in an Egg
- Glitter paper we used for this craft project
- Bookbinding film
- Cotton wool
- Craft scissors for adults
- craft glue
Affiliate links — we may receive a small commission, your price stays the same.

Here's how it works:
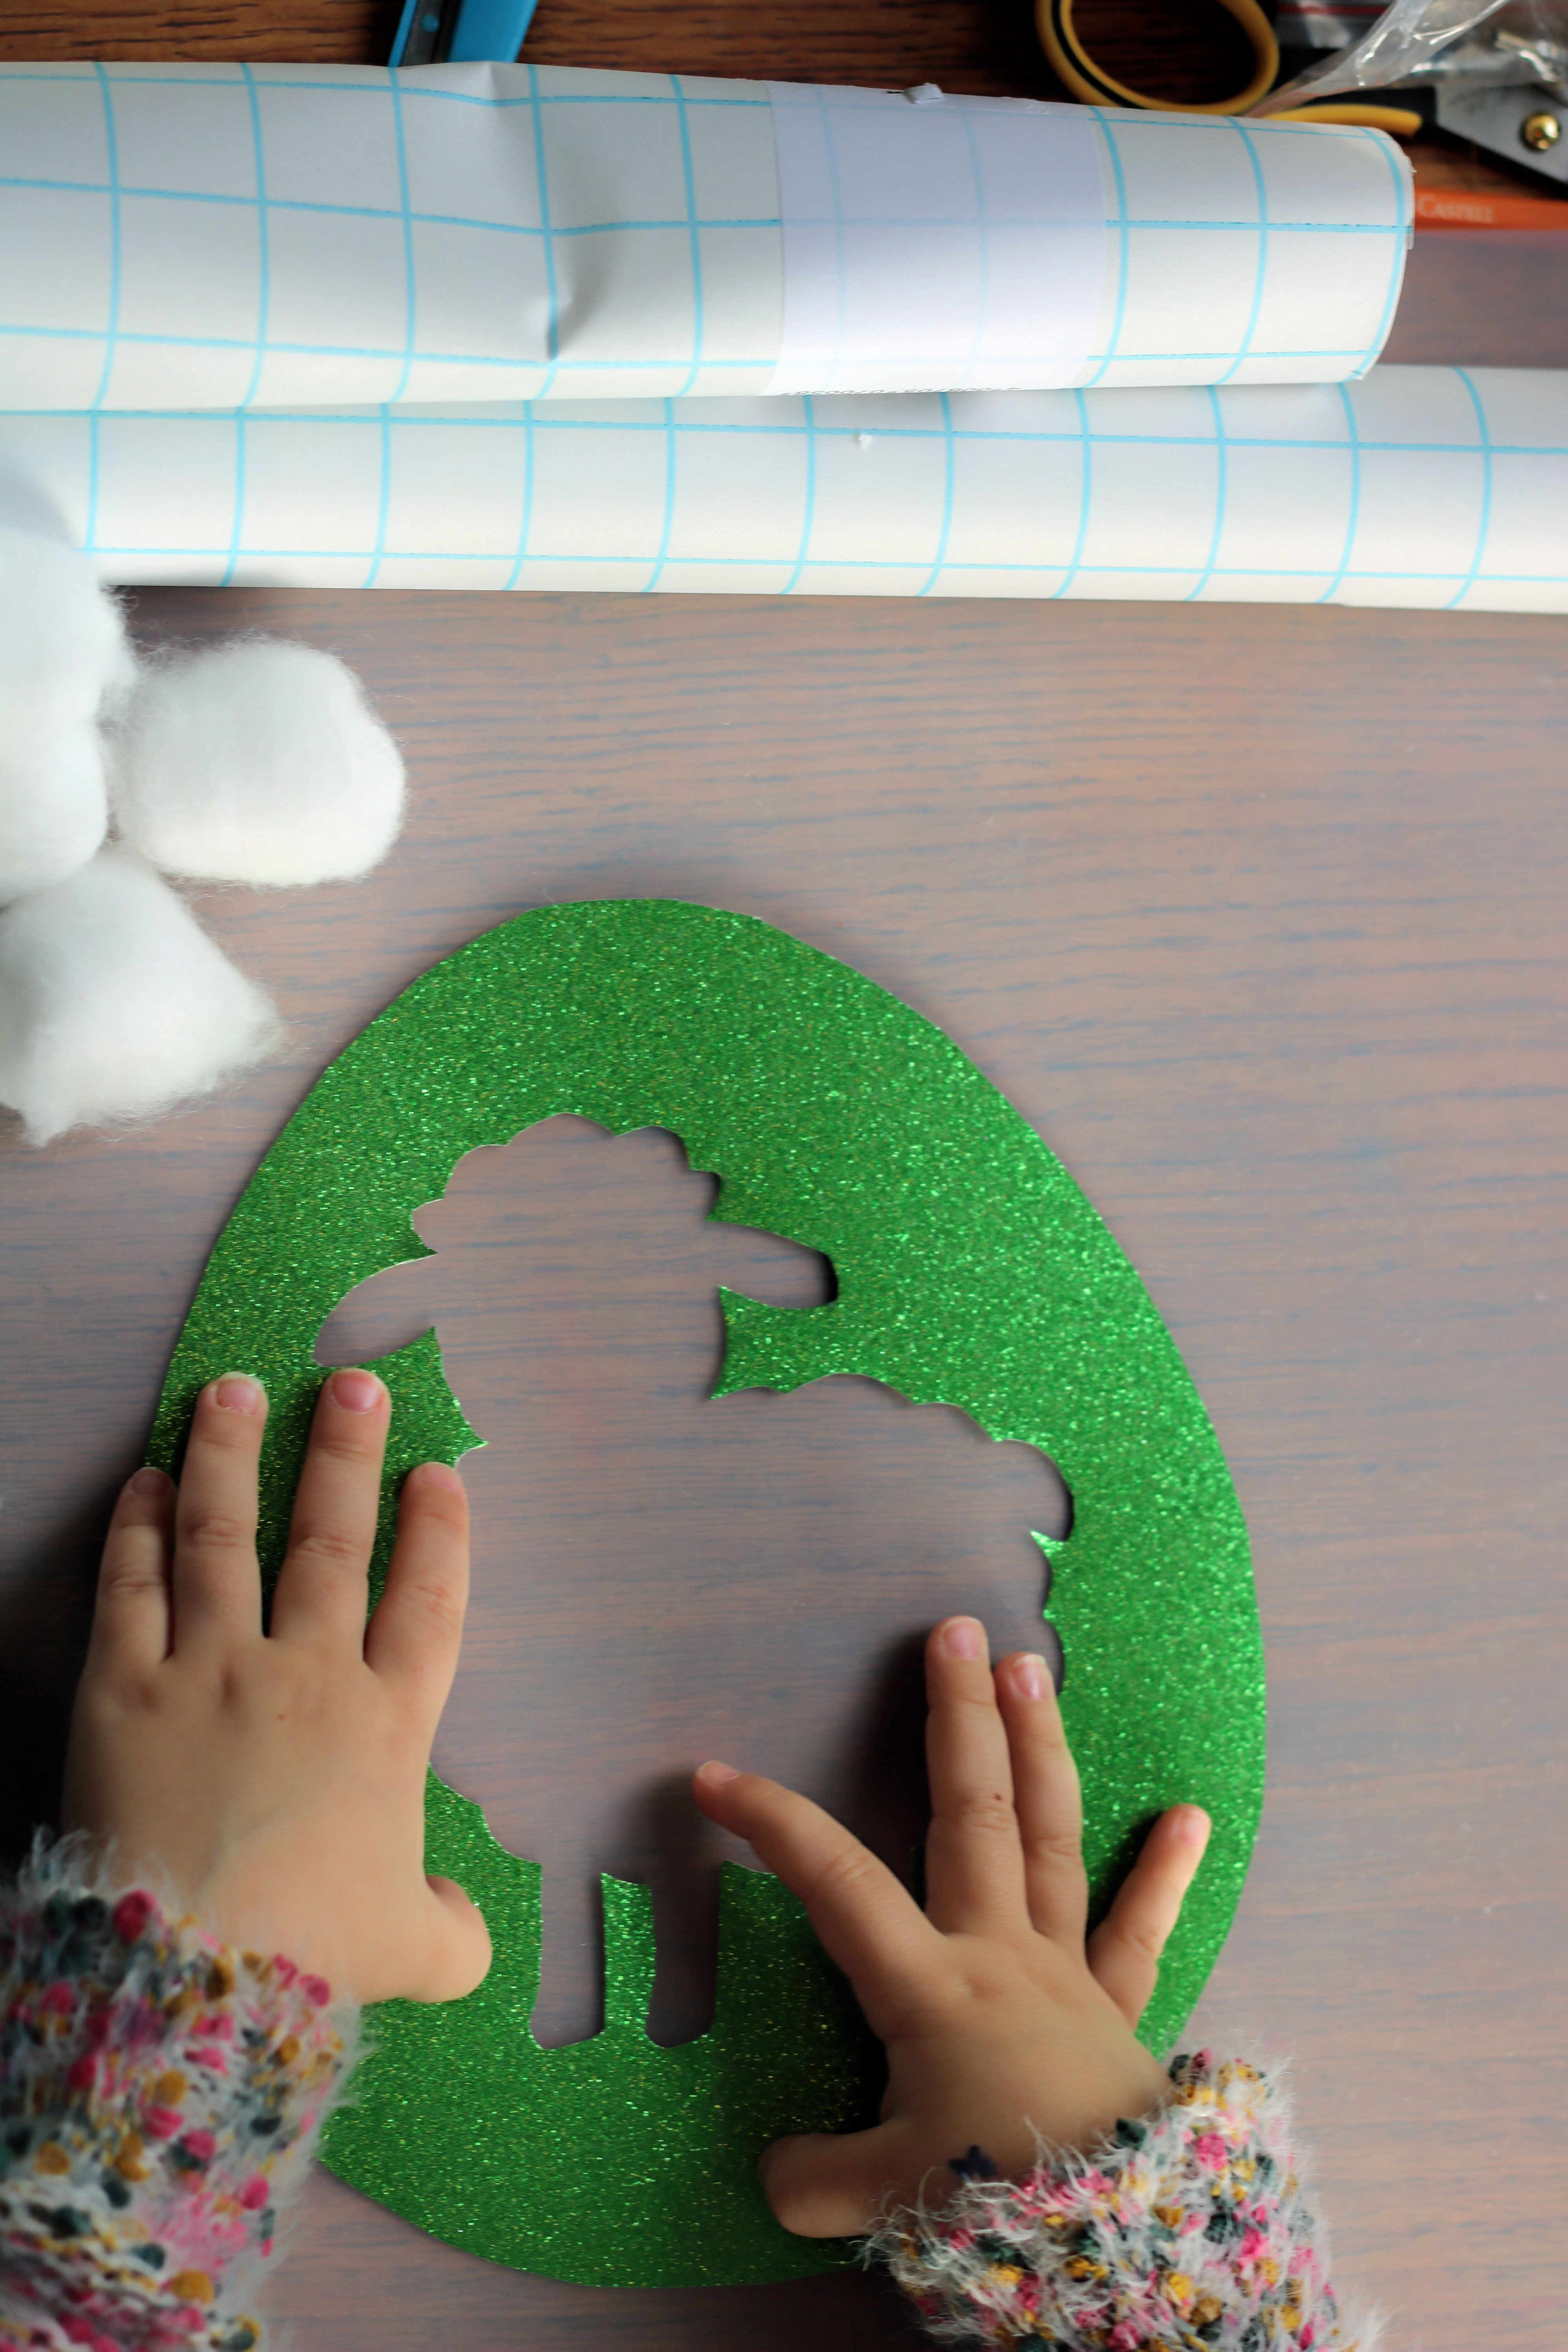
1. Prepare the templates:
Print out the “Egg with Sheep” template twice, with one copy mirrored, and cut out both pieces.
2. Apply book adhesive film:
Apply bookbinding adhesive to the back of one of the two cut-out templates so that the cotton wool can be attached to it later.
3. Prepare your workspace:
Place a mat on the table to keep everything clean while crafting.
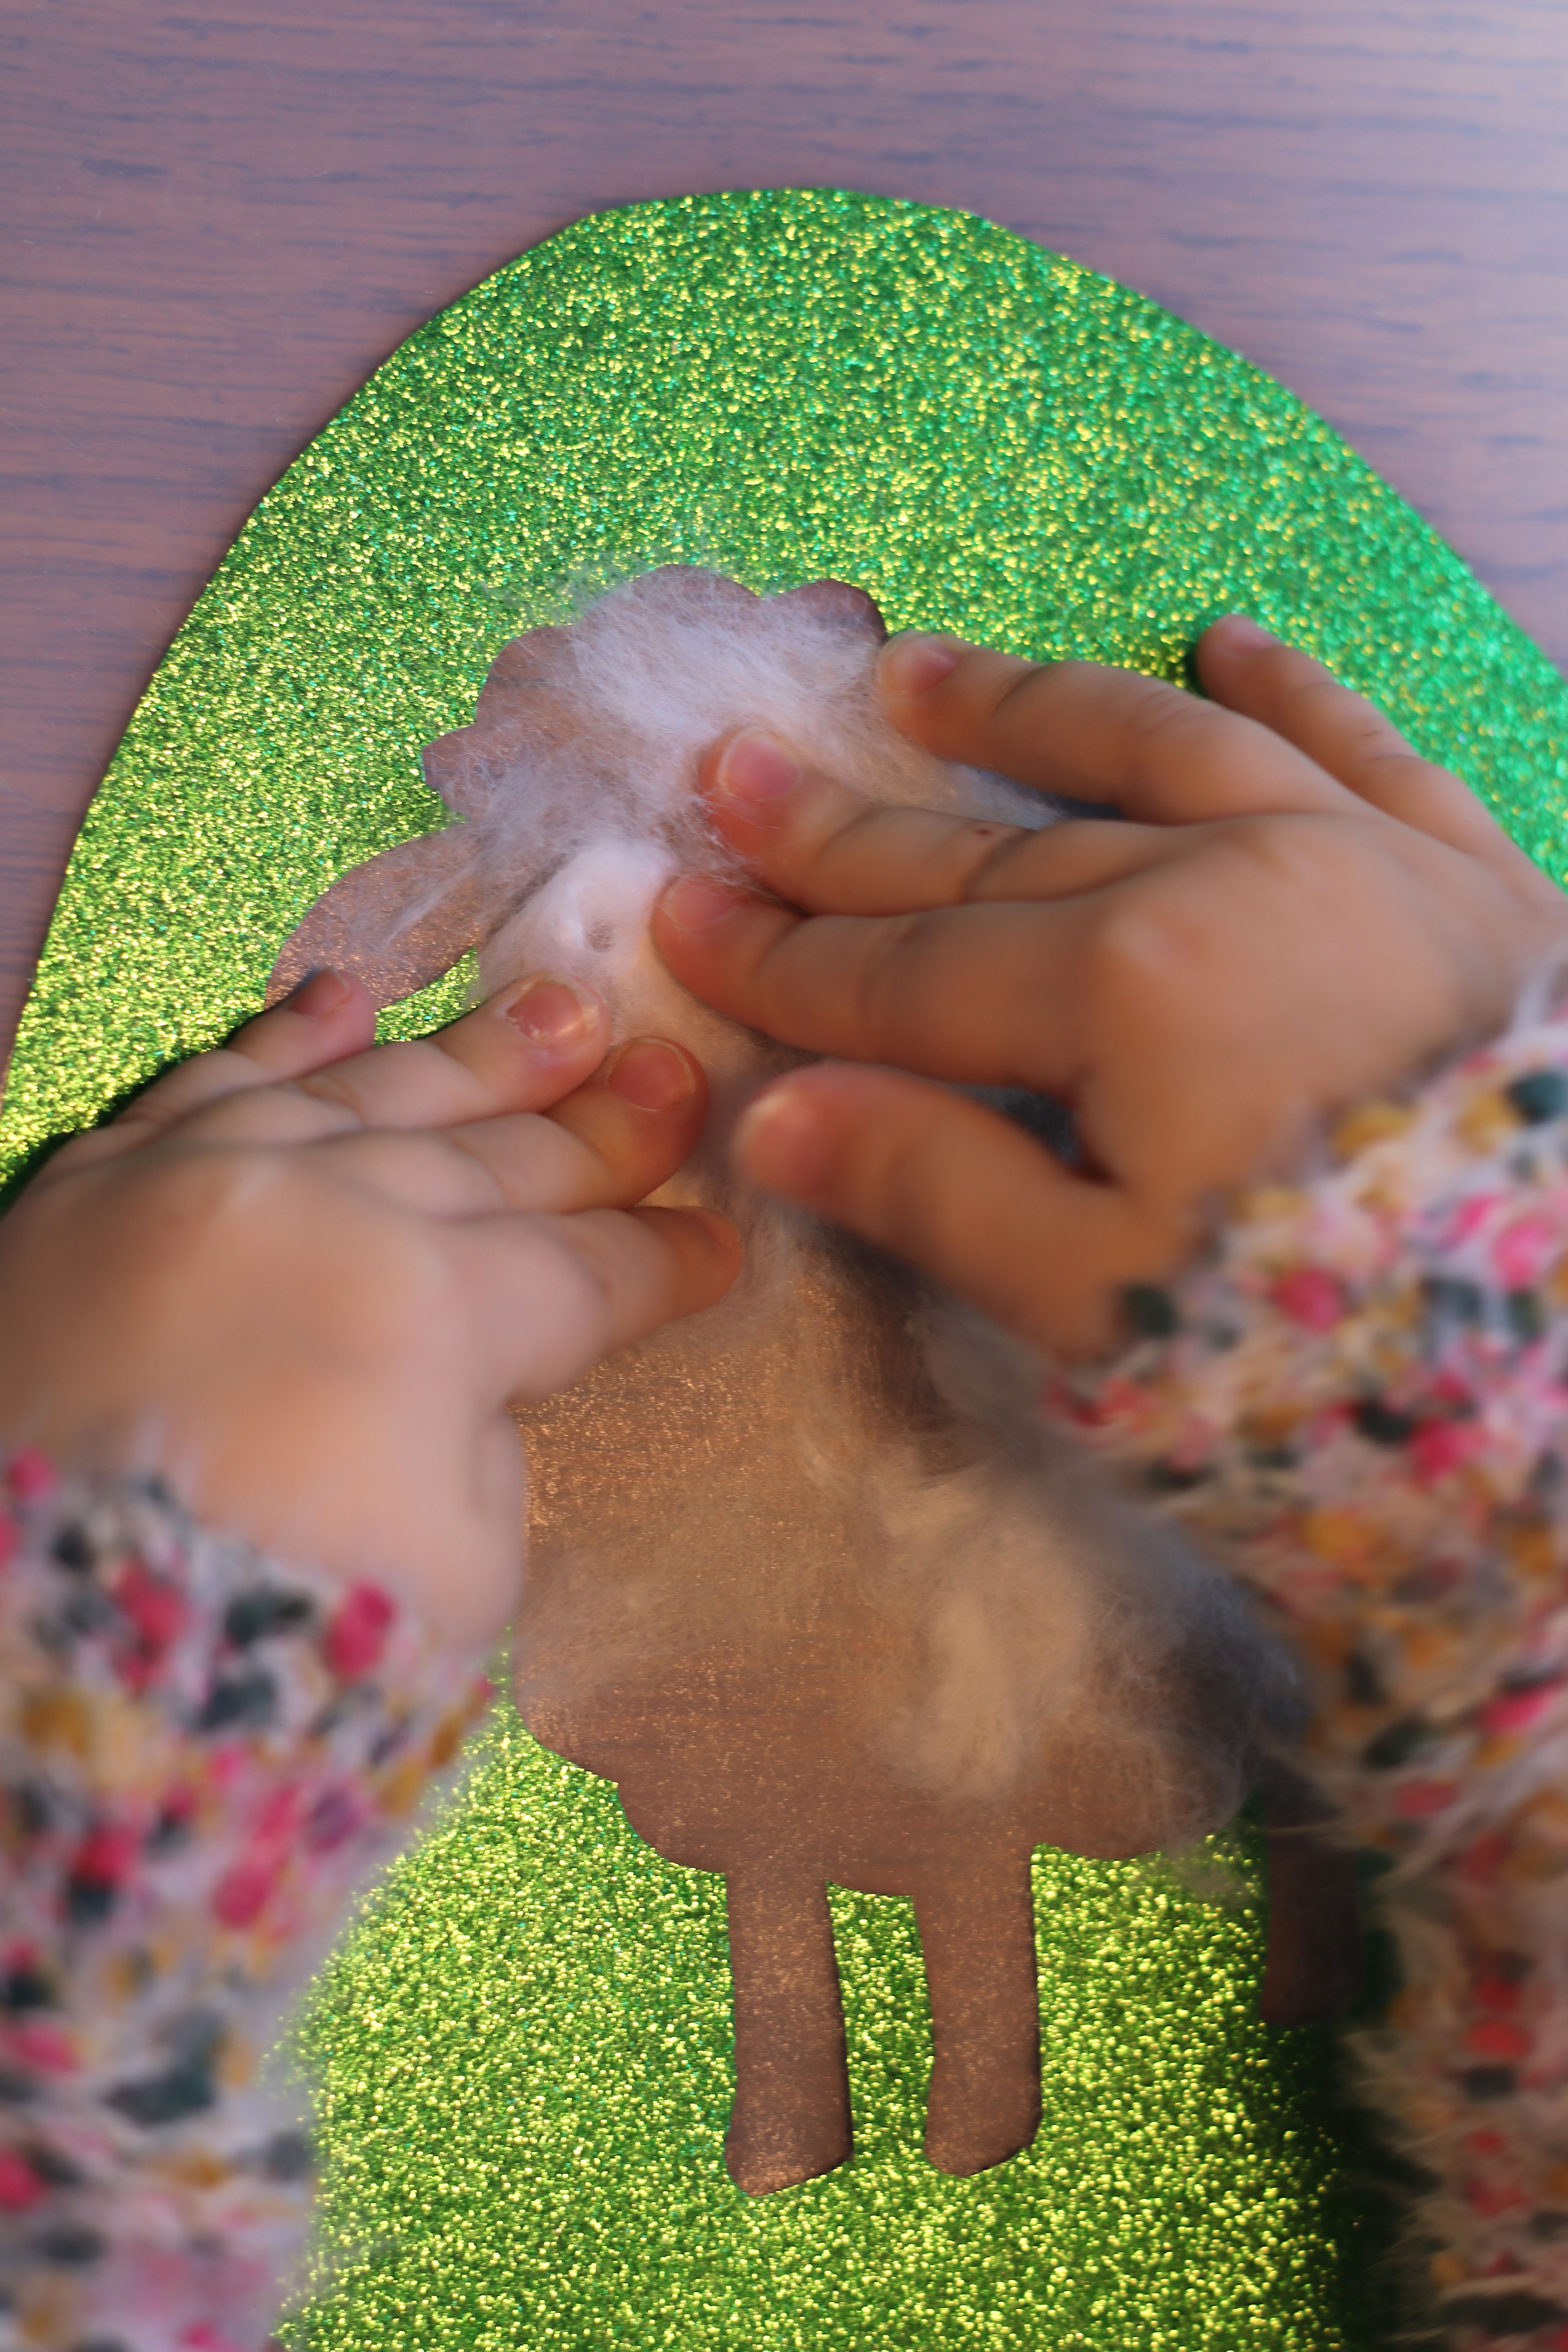
4. Pull apart the cotton:
Now your child can pull the cotton into small pieces. This feels exciting and is a great sensory experience for young children.
5. Glue on the cotton:
The small pieces of cotton are now glued onto the sheep. Especially with young children, it’s okay if a larger cotton ball forms.
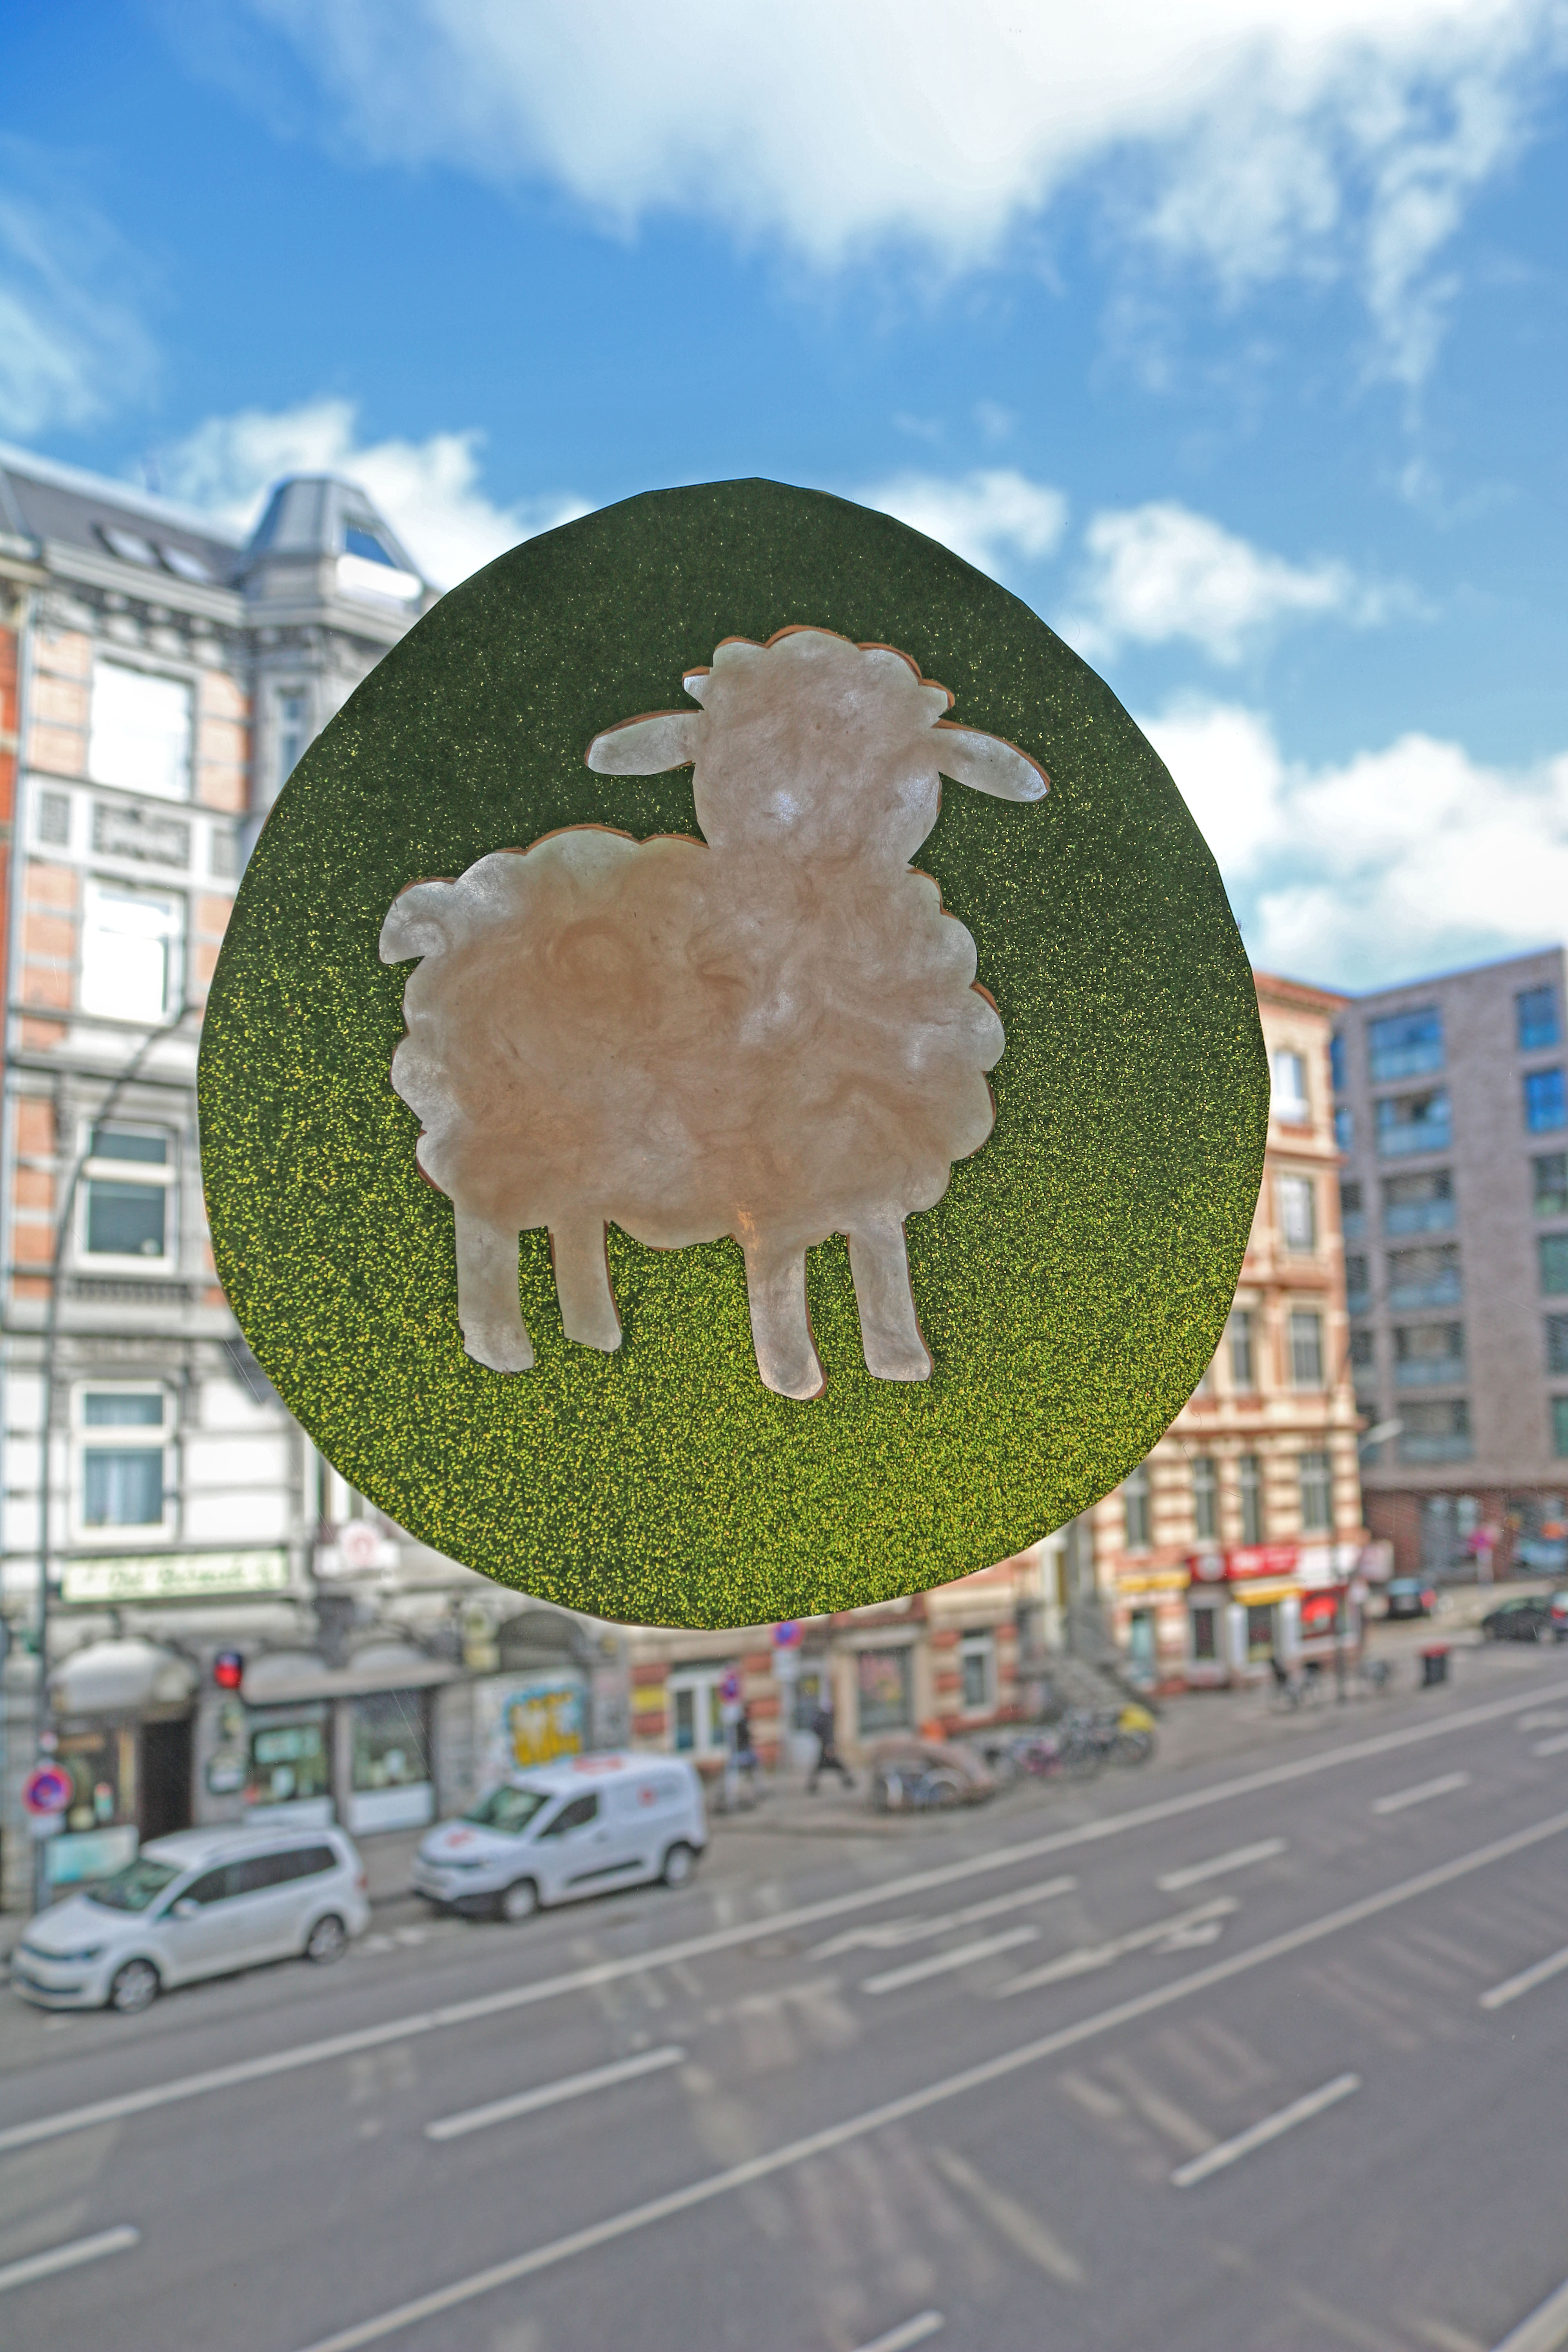
6. Glue on the second template:
Finally, glue the second, mirrored template onto the back. This creates a beautiful surface on the back through the foil, while the cotton wool shines through.
7. Hang it on the window:
The cotton wool sheep looks especially beautiful on the window because the light makes the texture of the cotton wool particularly visible there.
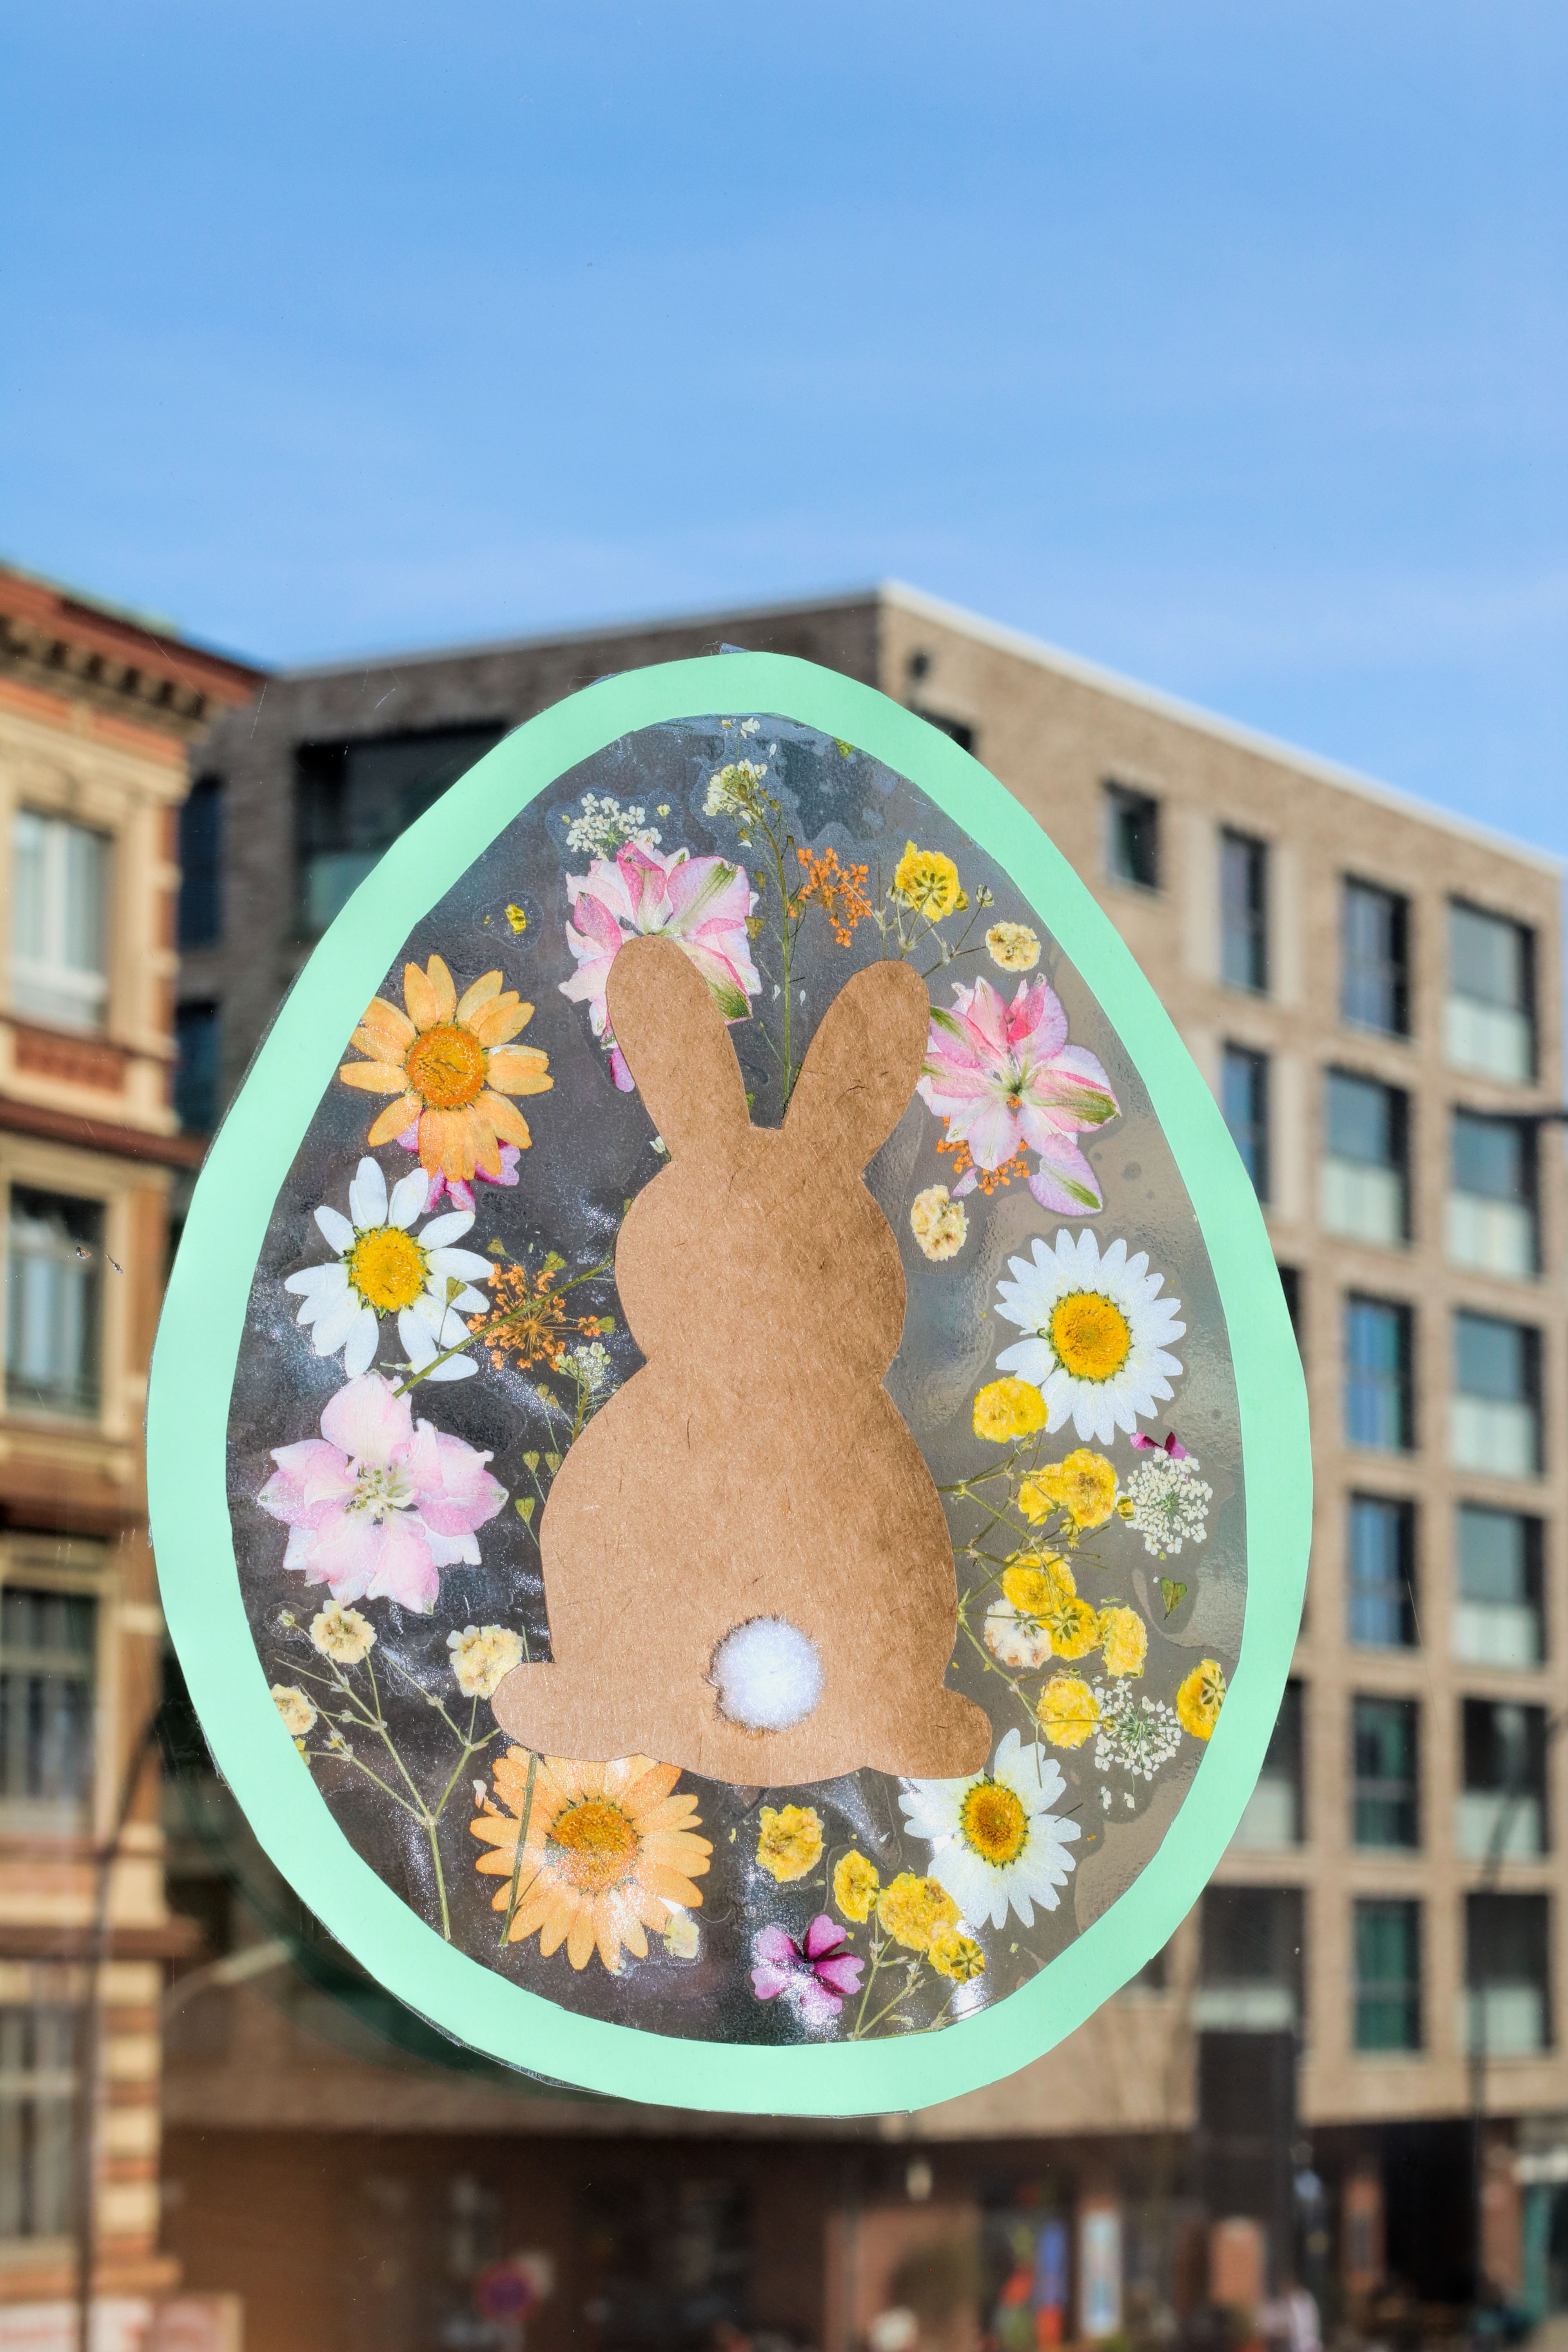
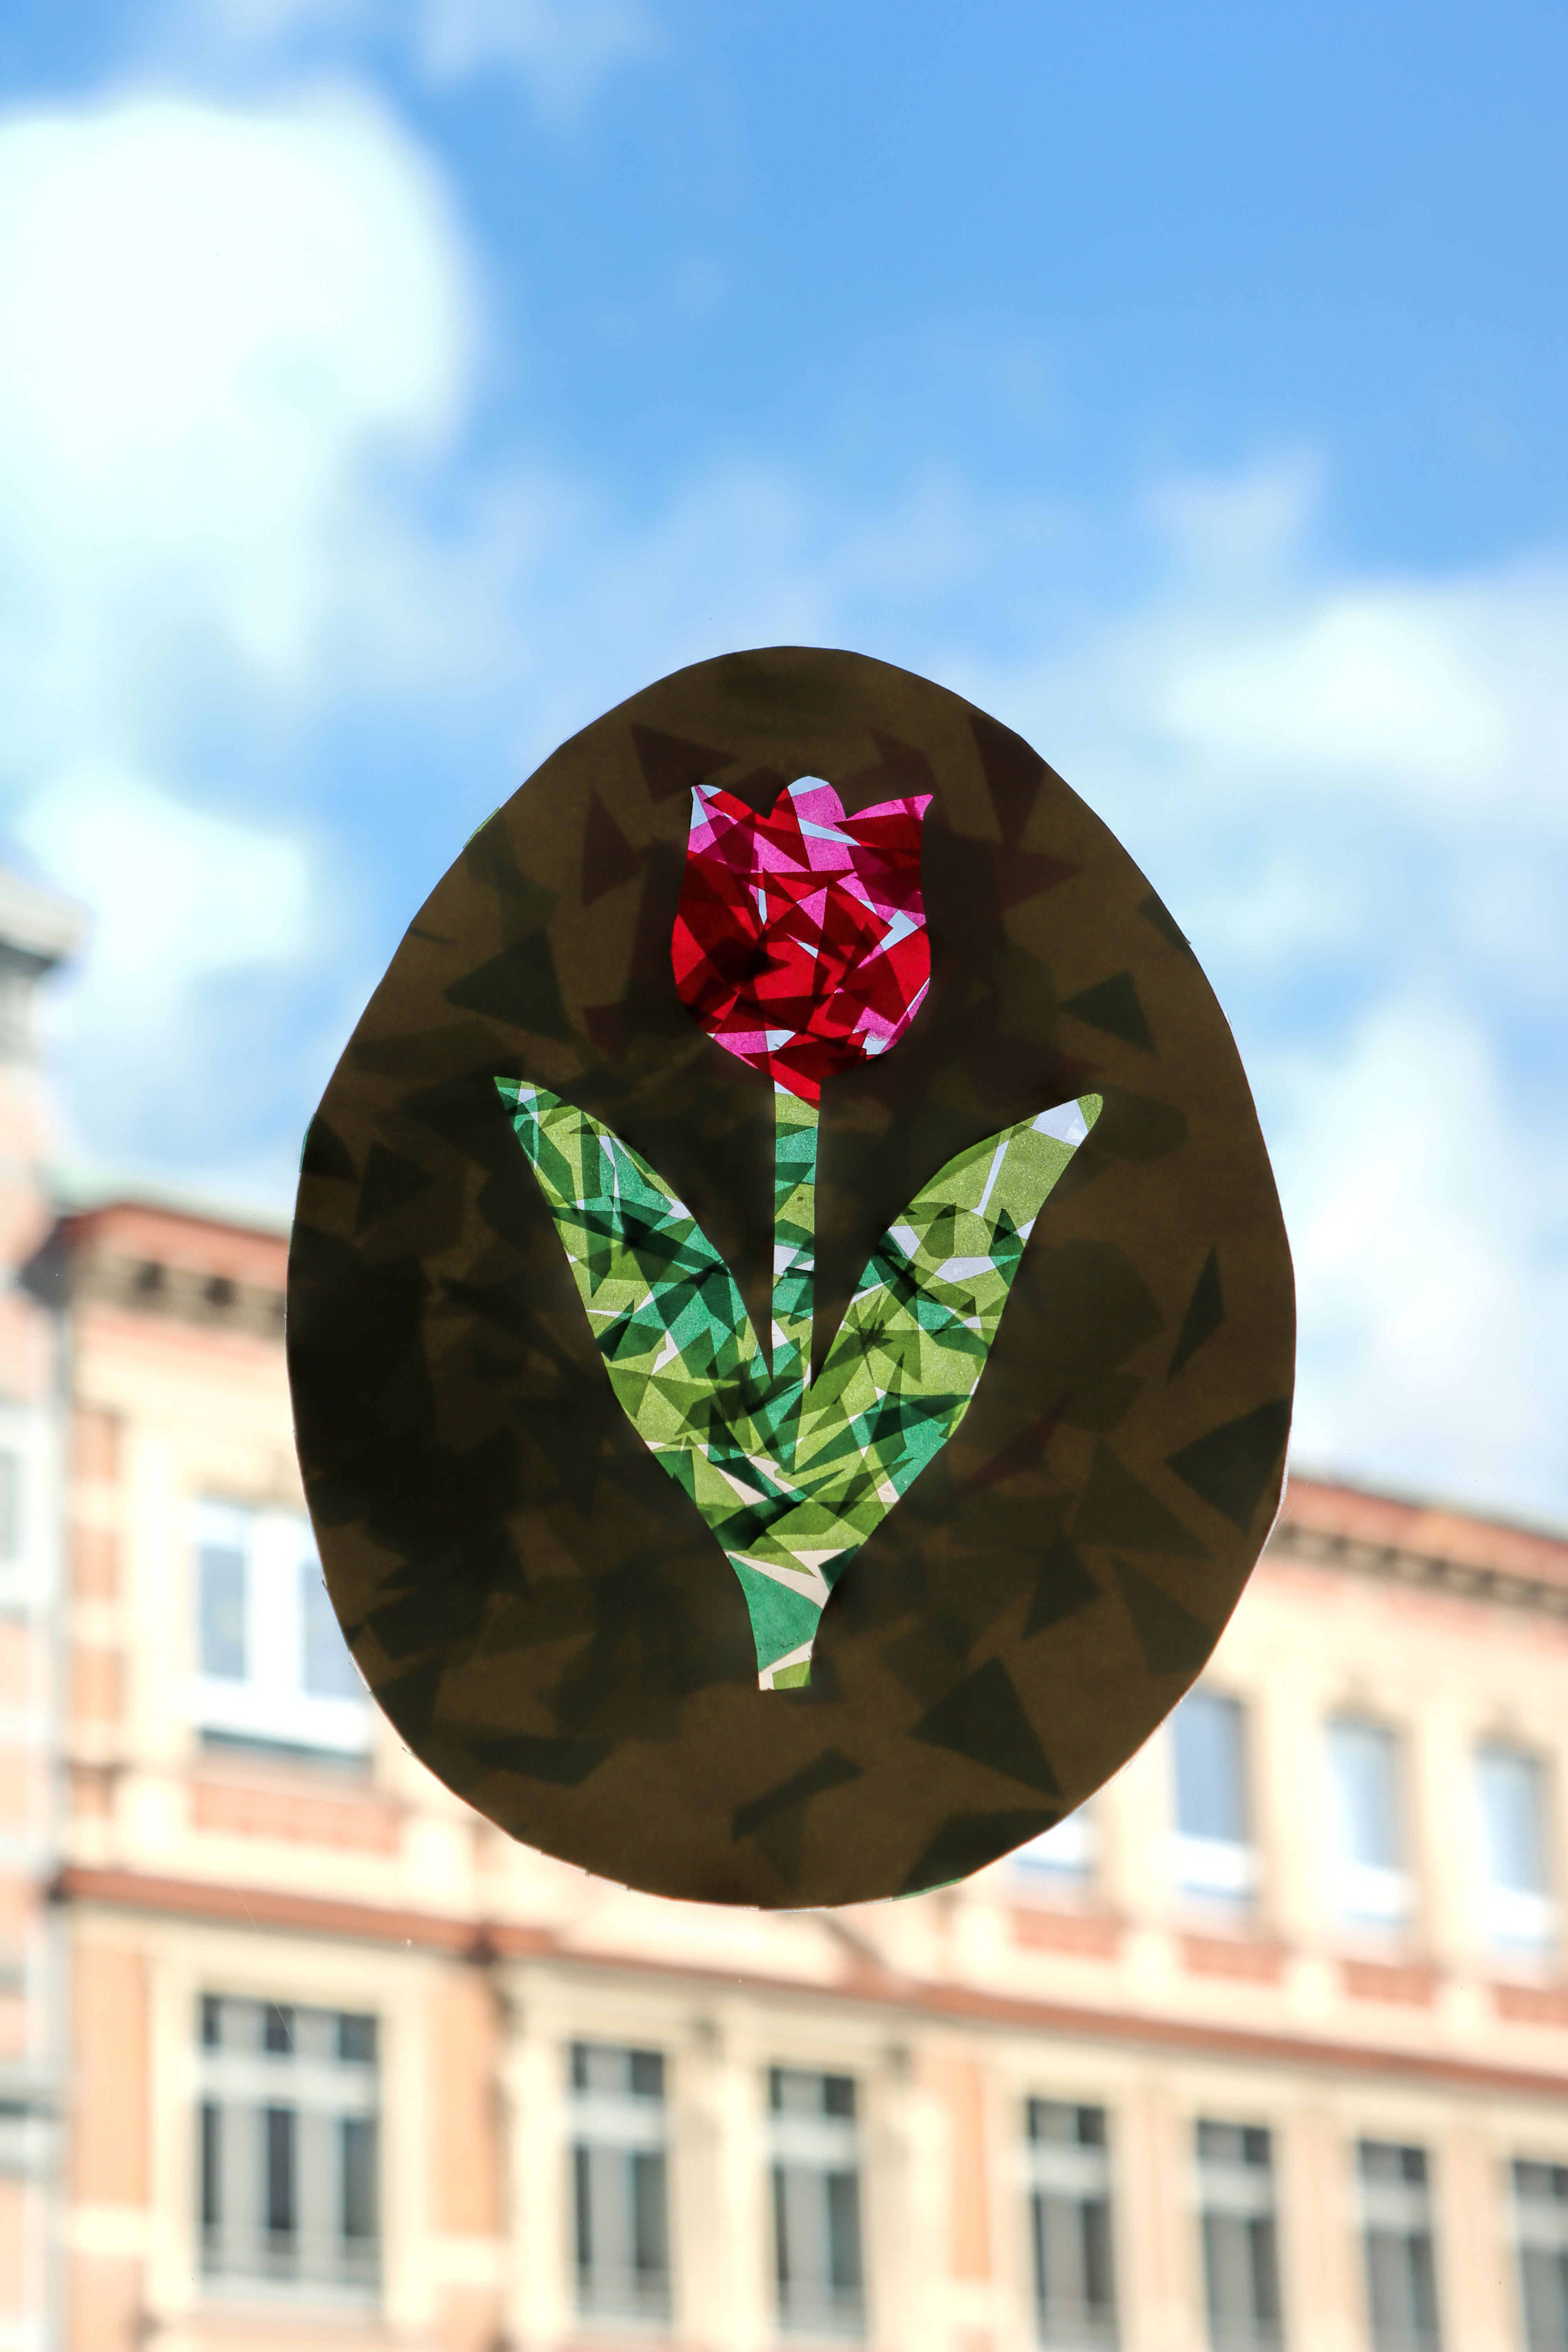
5. Easter Window Decorations – Glowing Designs for the Window
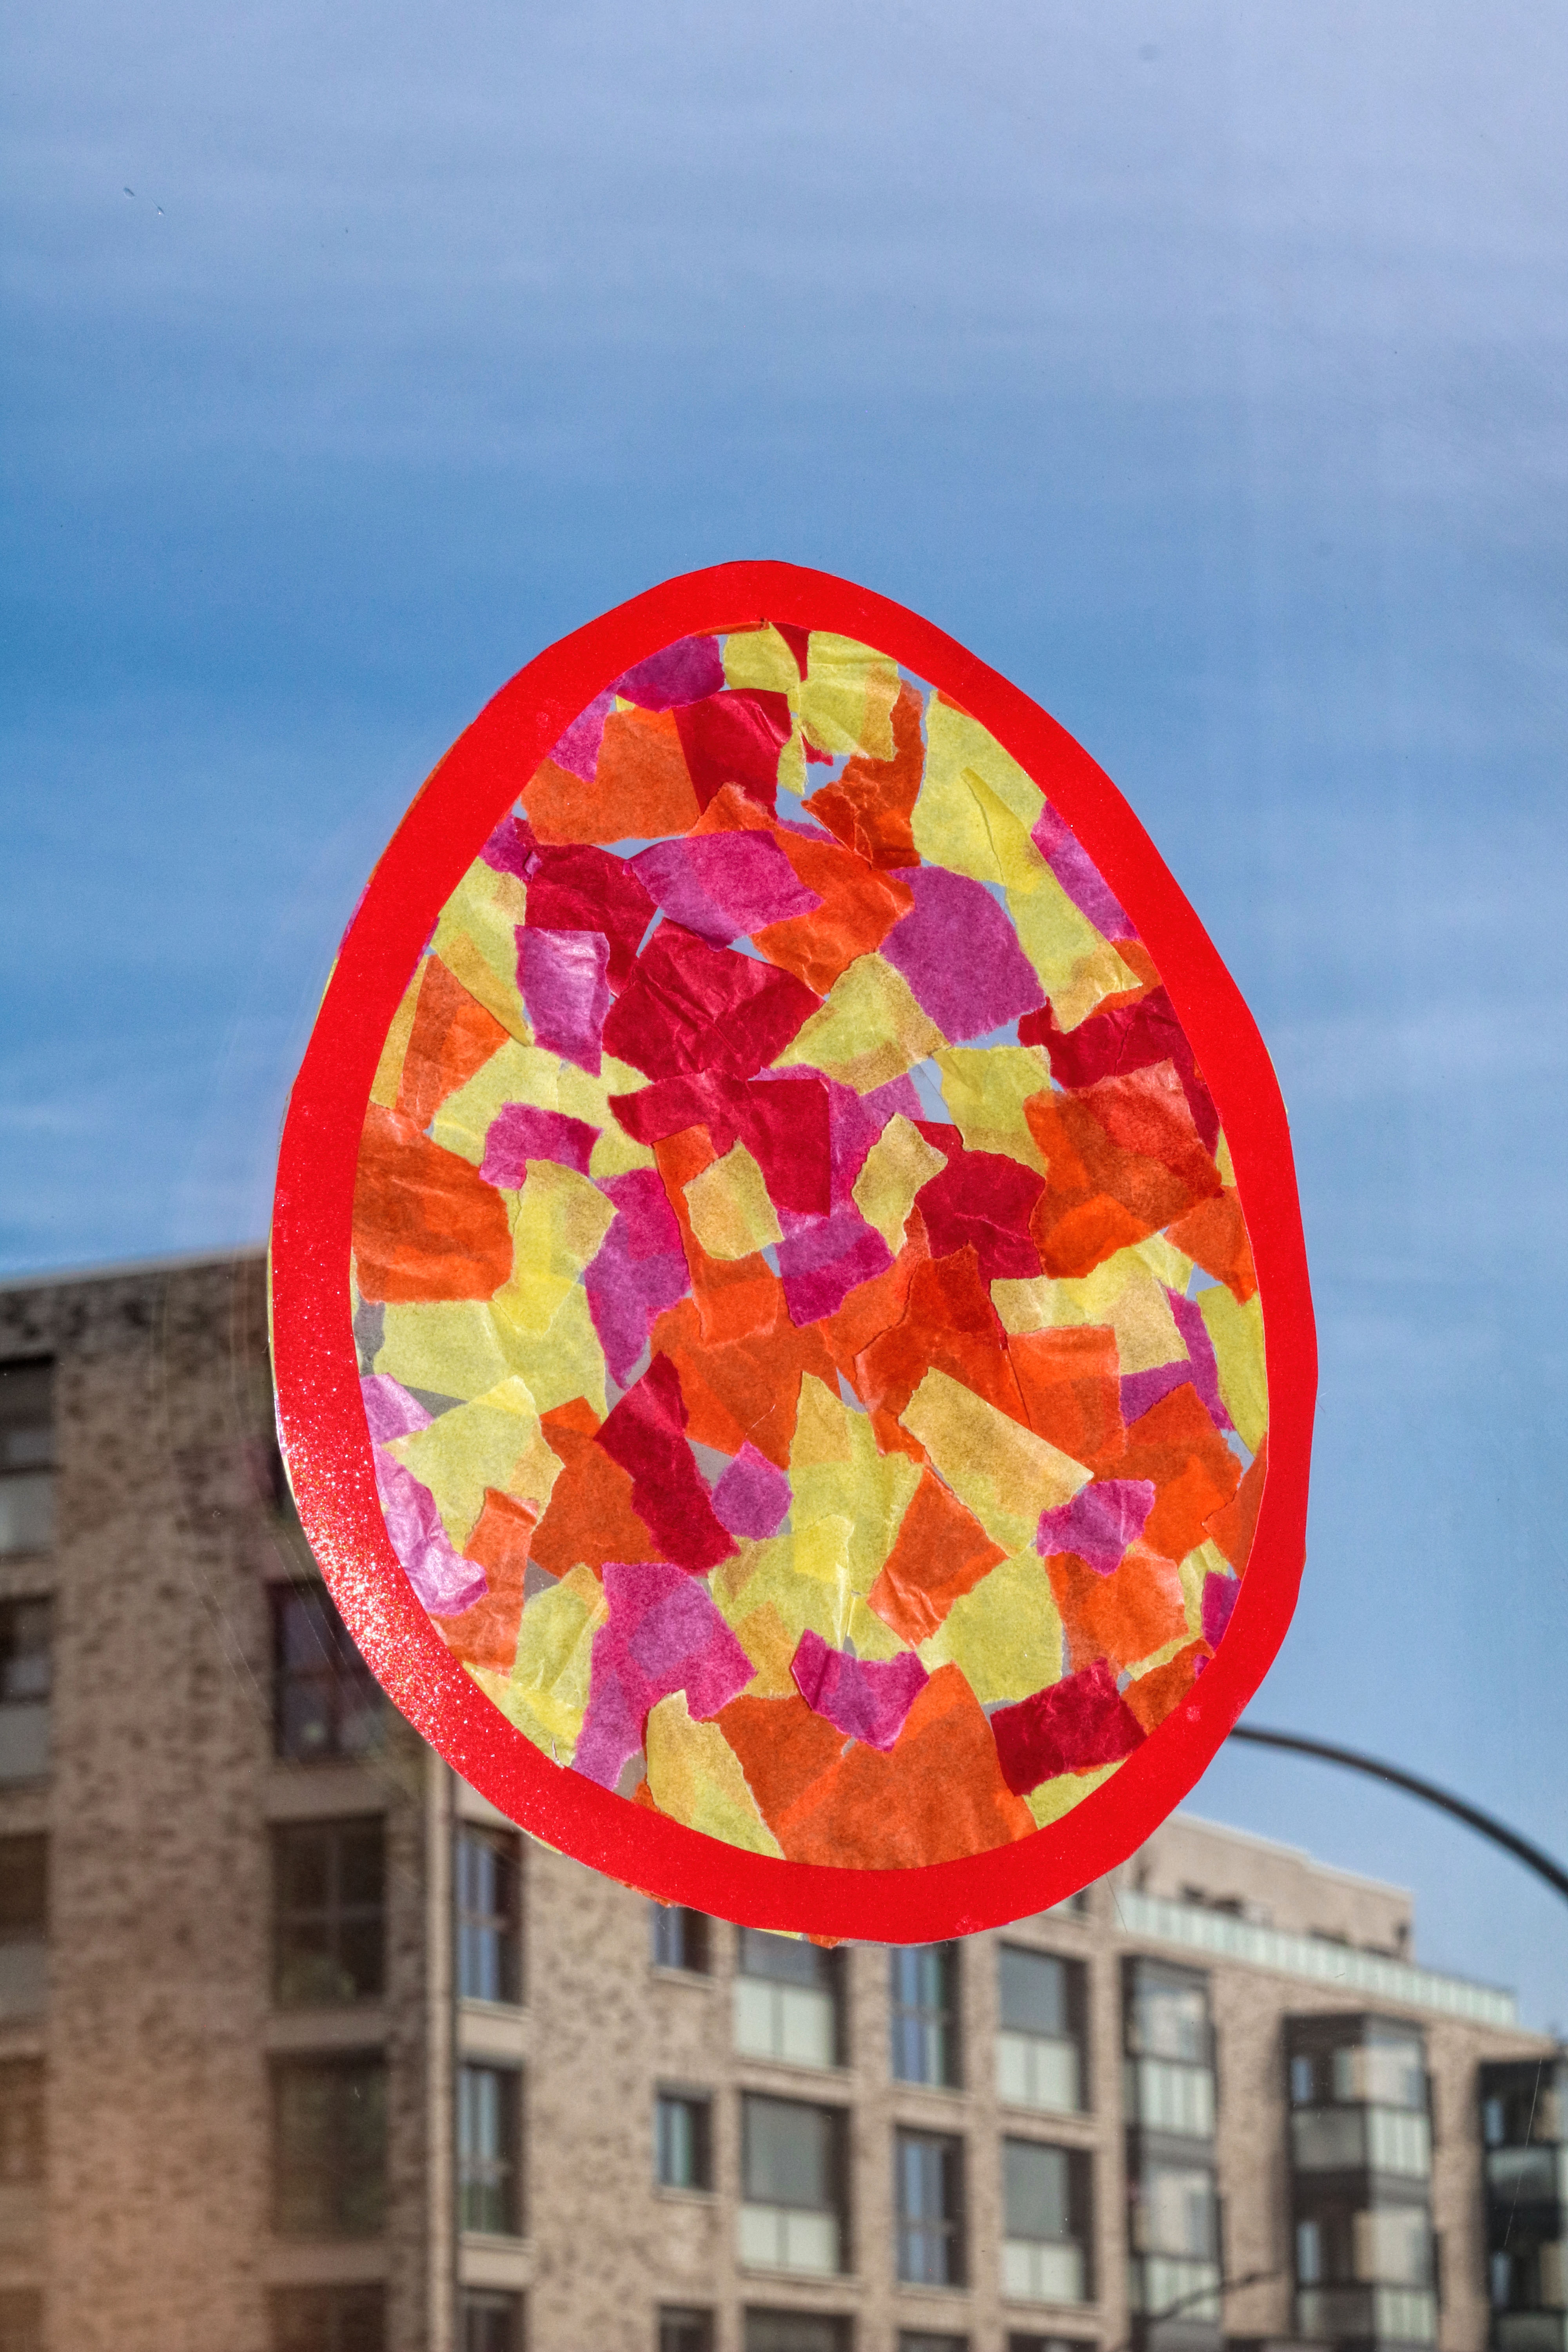

Window decals are a lovely craft idea for Easter—especially with toddlers. When light shines through the colorful designs, vibrant colors appear in the window.
Among our templates, you’ll find various Easter motifs that you can print out and use right away—for example, an Easter egg with bunnies, chicks, a carrot, and many other spring motifs.
Perfect for a creative craft afternoon and cheerful Easter decorations.
Here's what you'll need:
- construction paper
- Craft scissors for adults
- safety scissors for toddlers if necessary, for the tracing paper
- Easter stencil of your choice created using our craft templates or our generator
- Tracing paper - optional: dried flowers
- tracing paper
- Pressed flowers
- Double-sided tape – depending on your craft project
- Bookbinding film
Affiliate links — we may receive a small commission, your price stays the same.


Here's how it works:
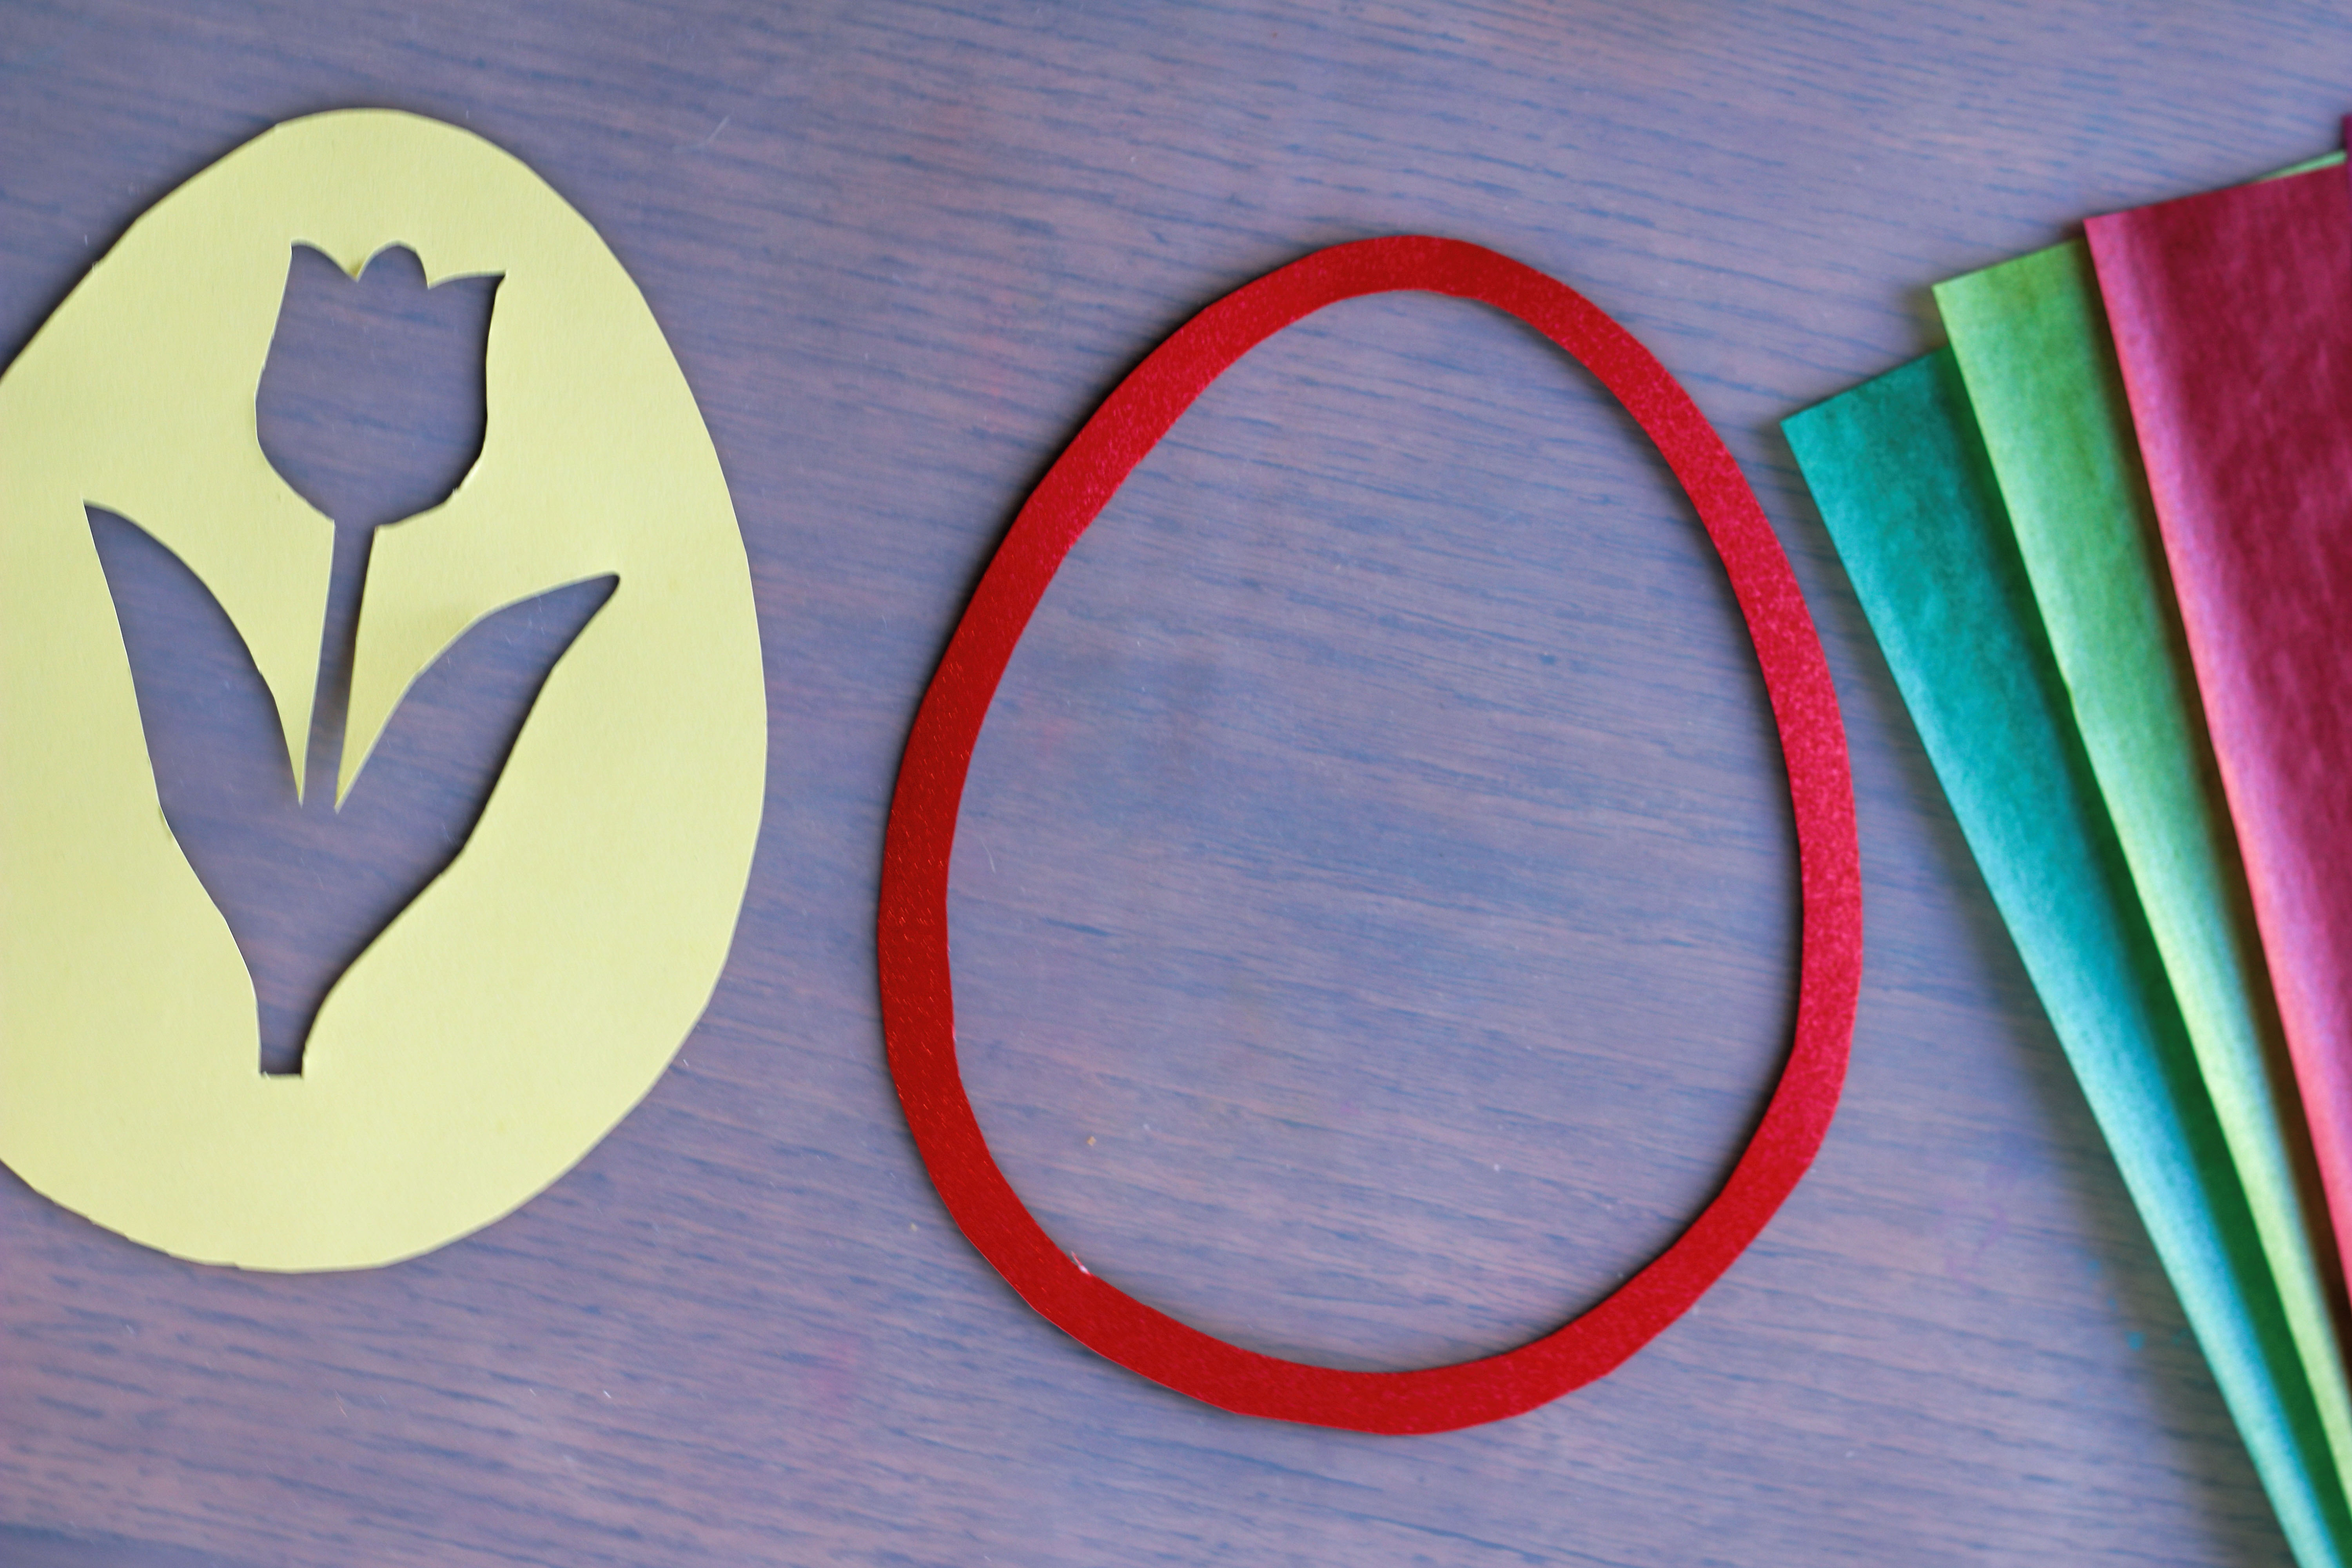
1. Prepare the designs:
Print out the desired template and cut it out. Depending on the window design, you may need to proceed slightly differently.
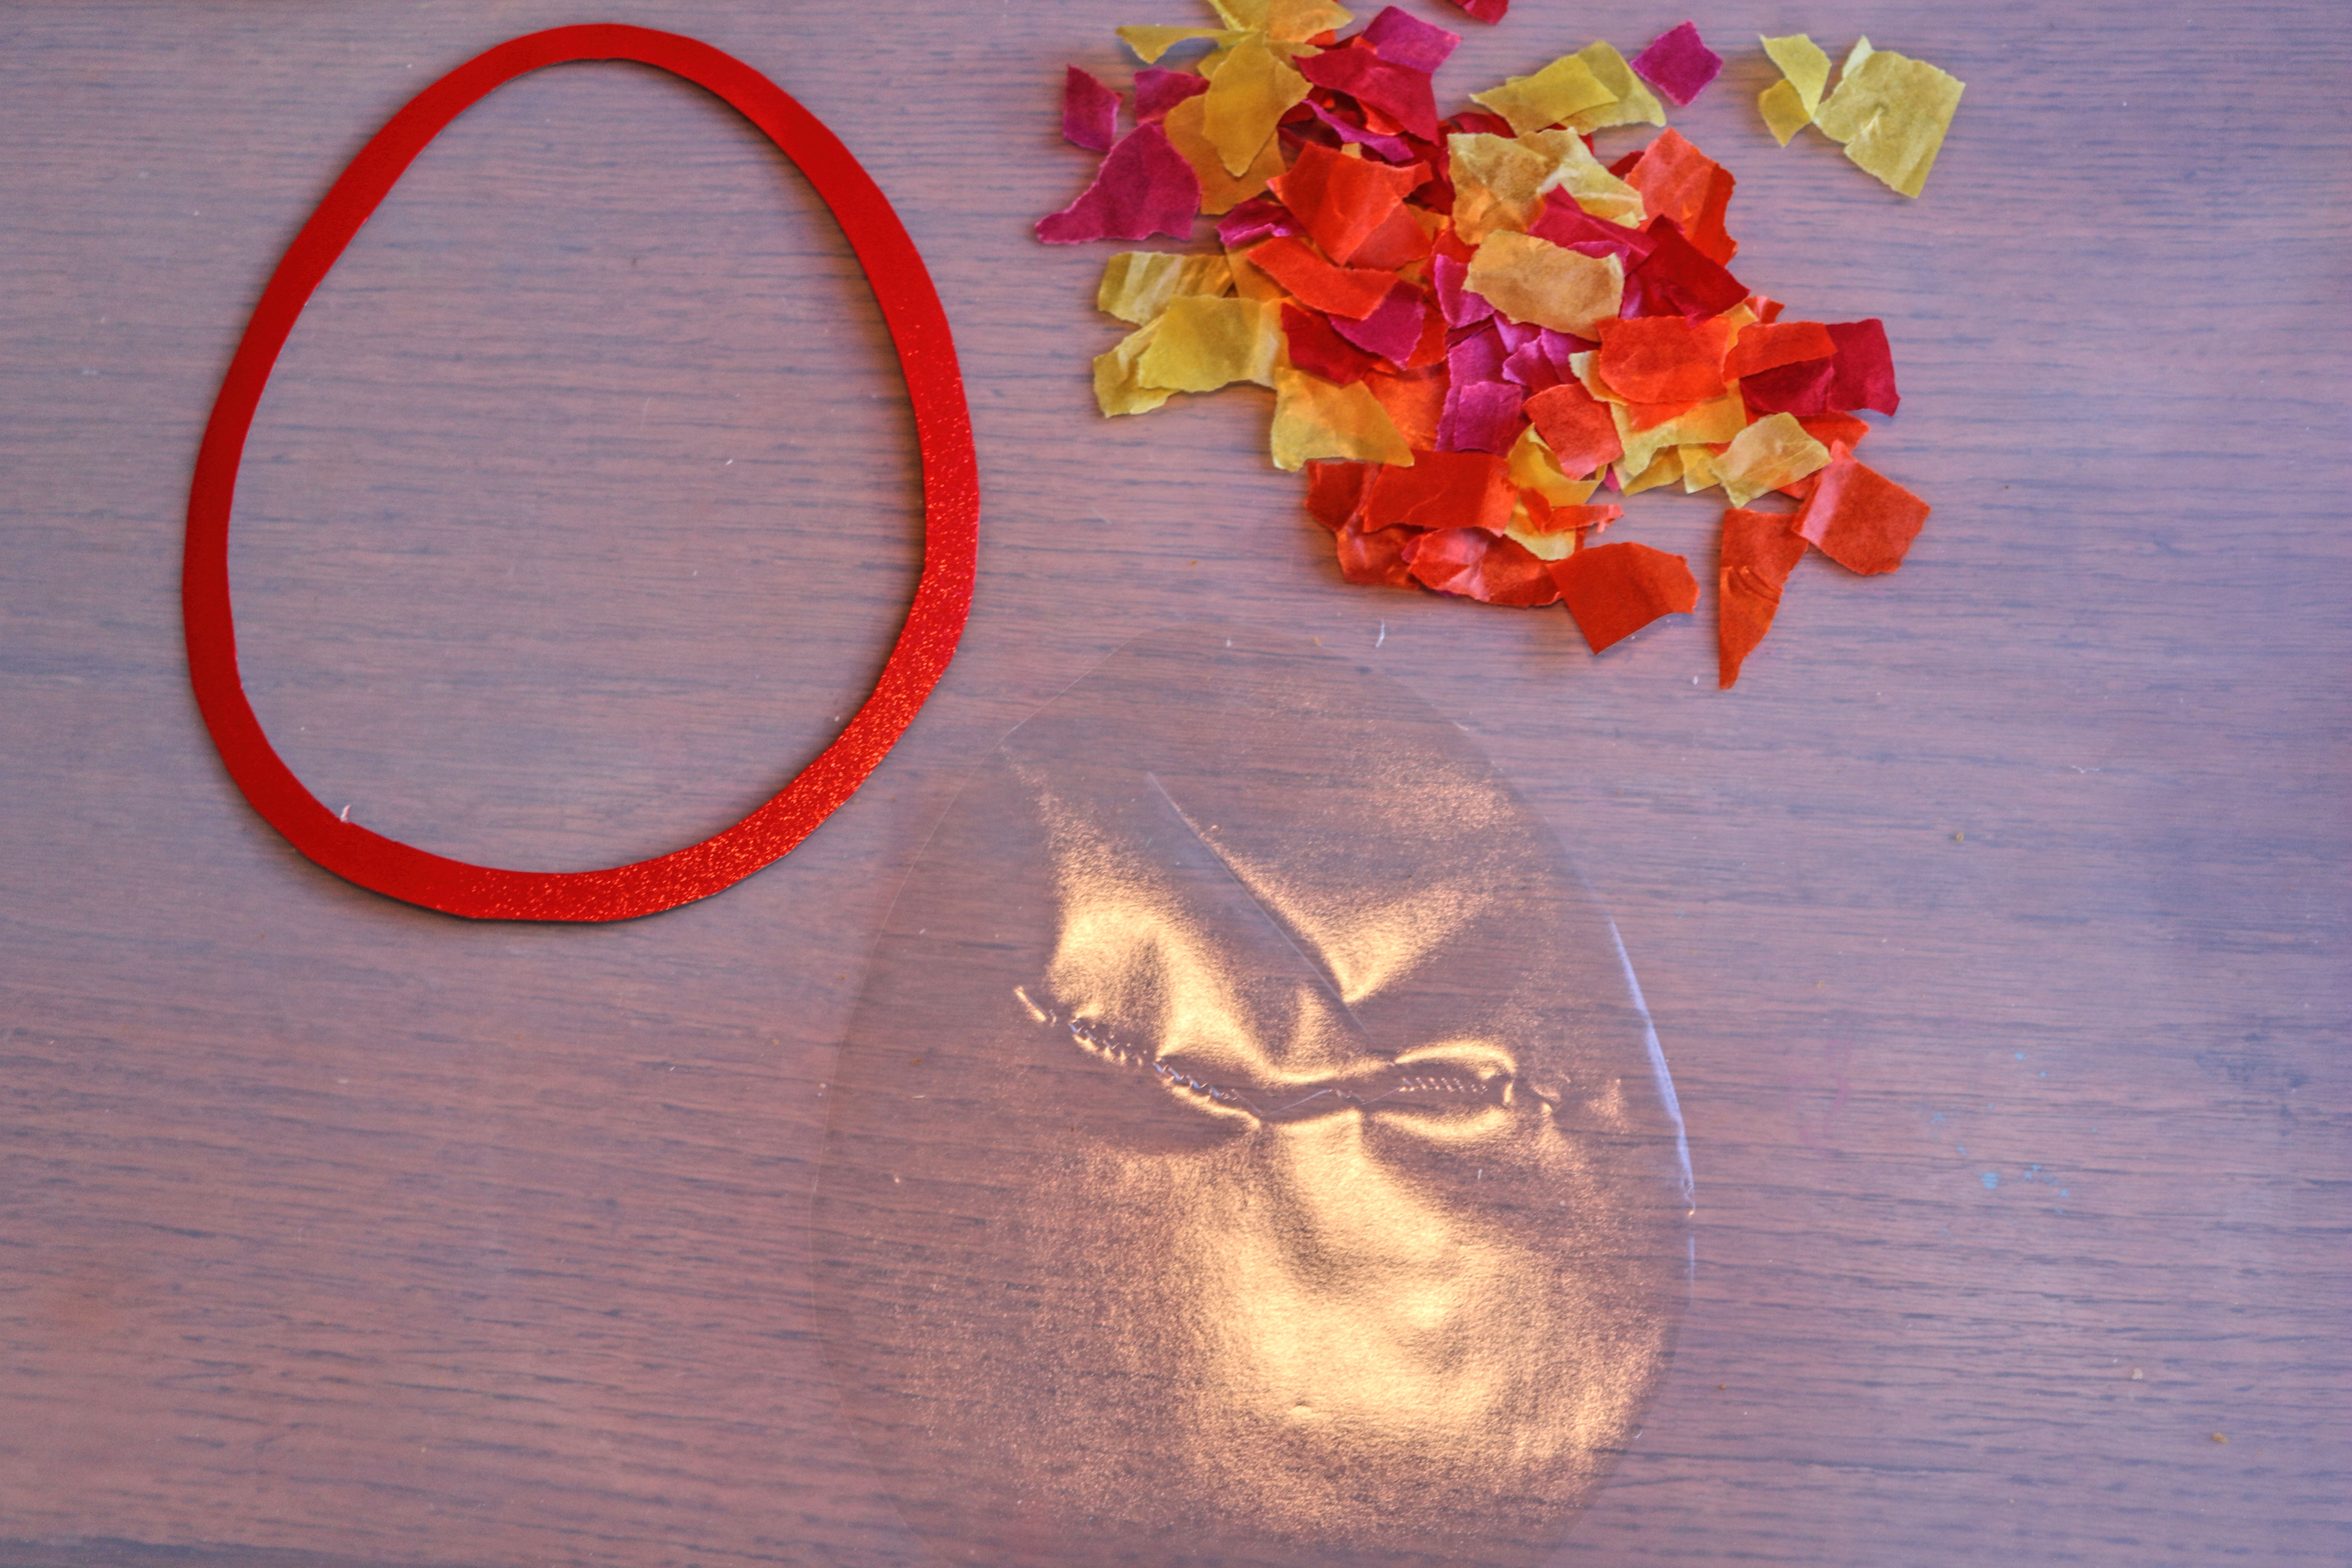
2. Apply the book foil:
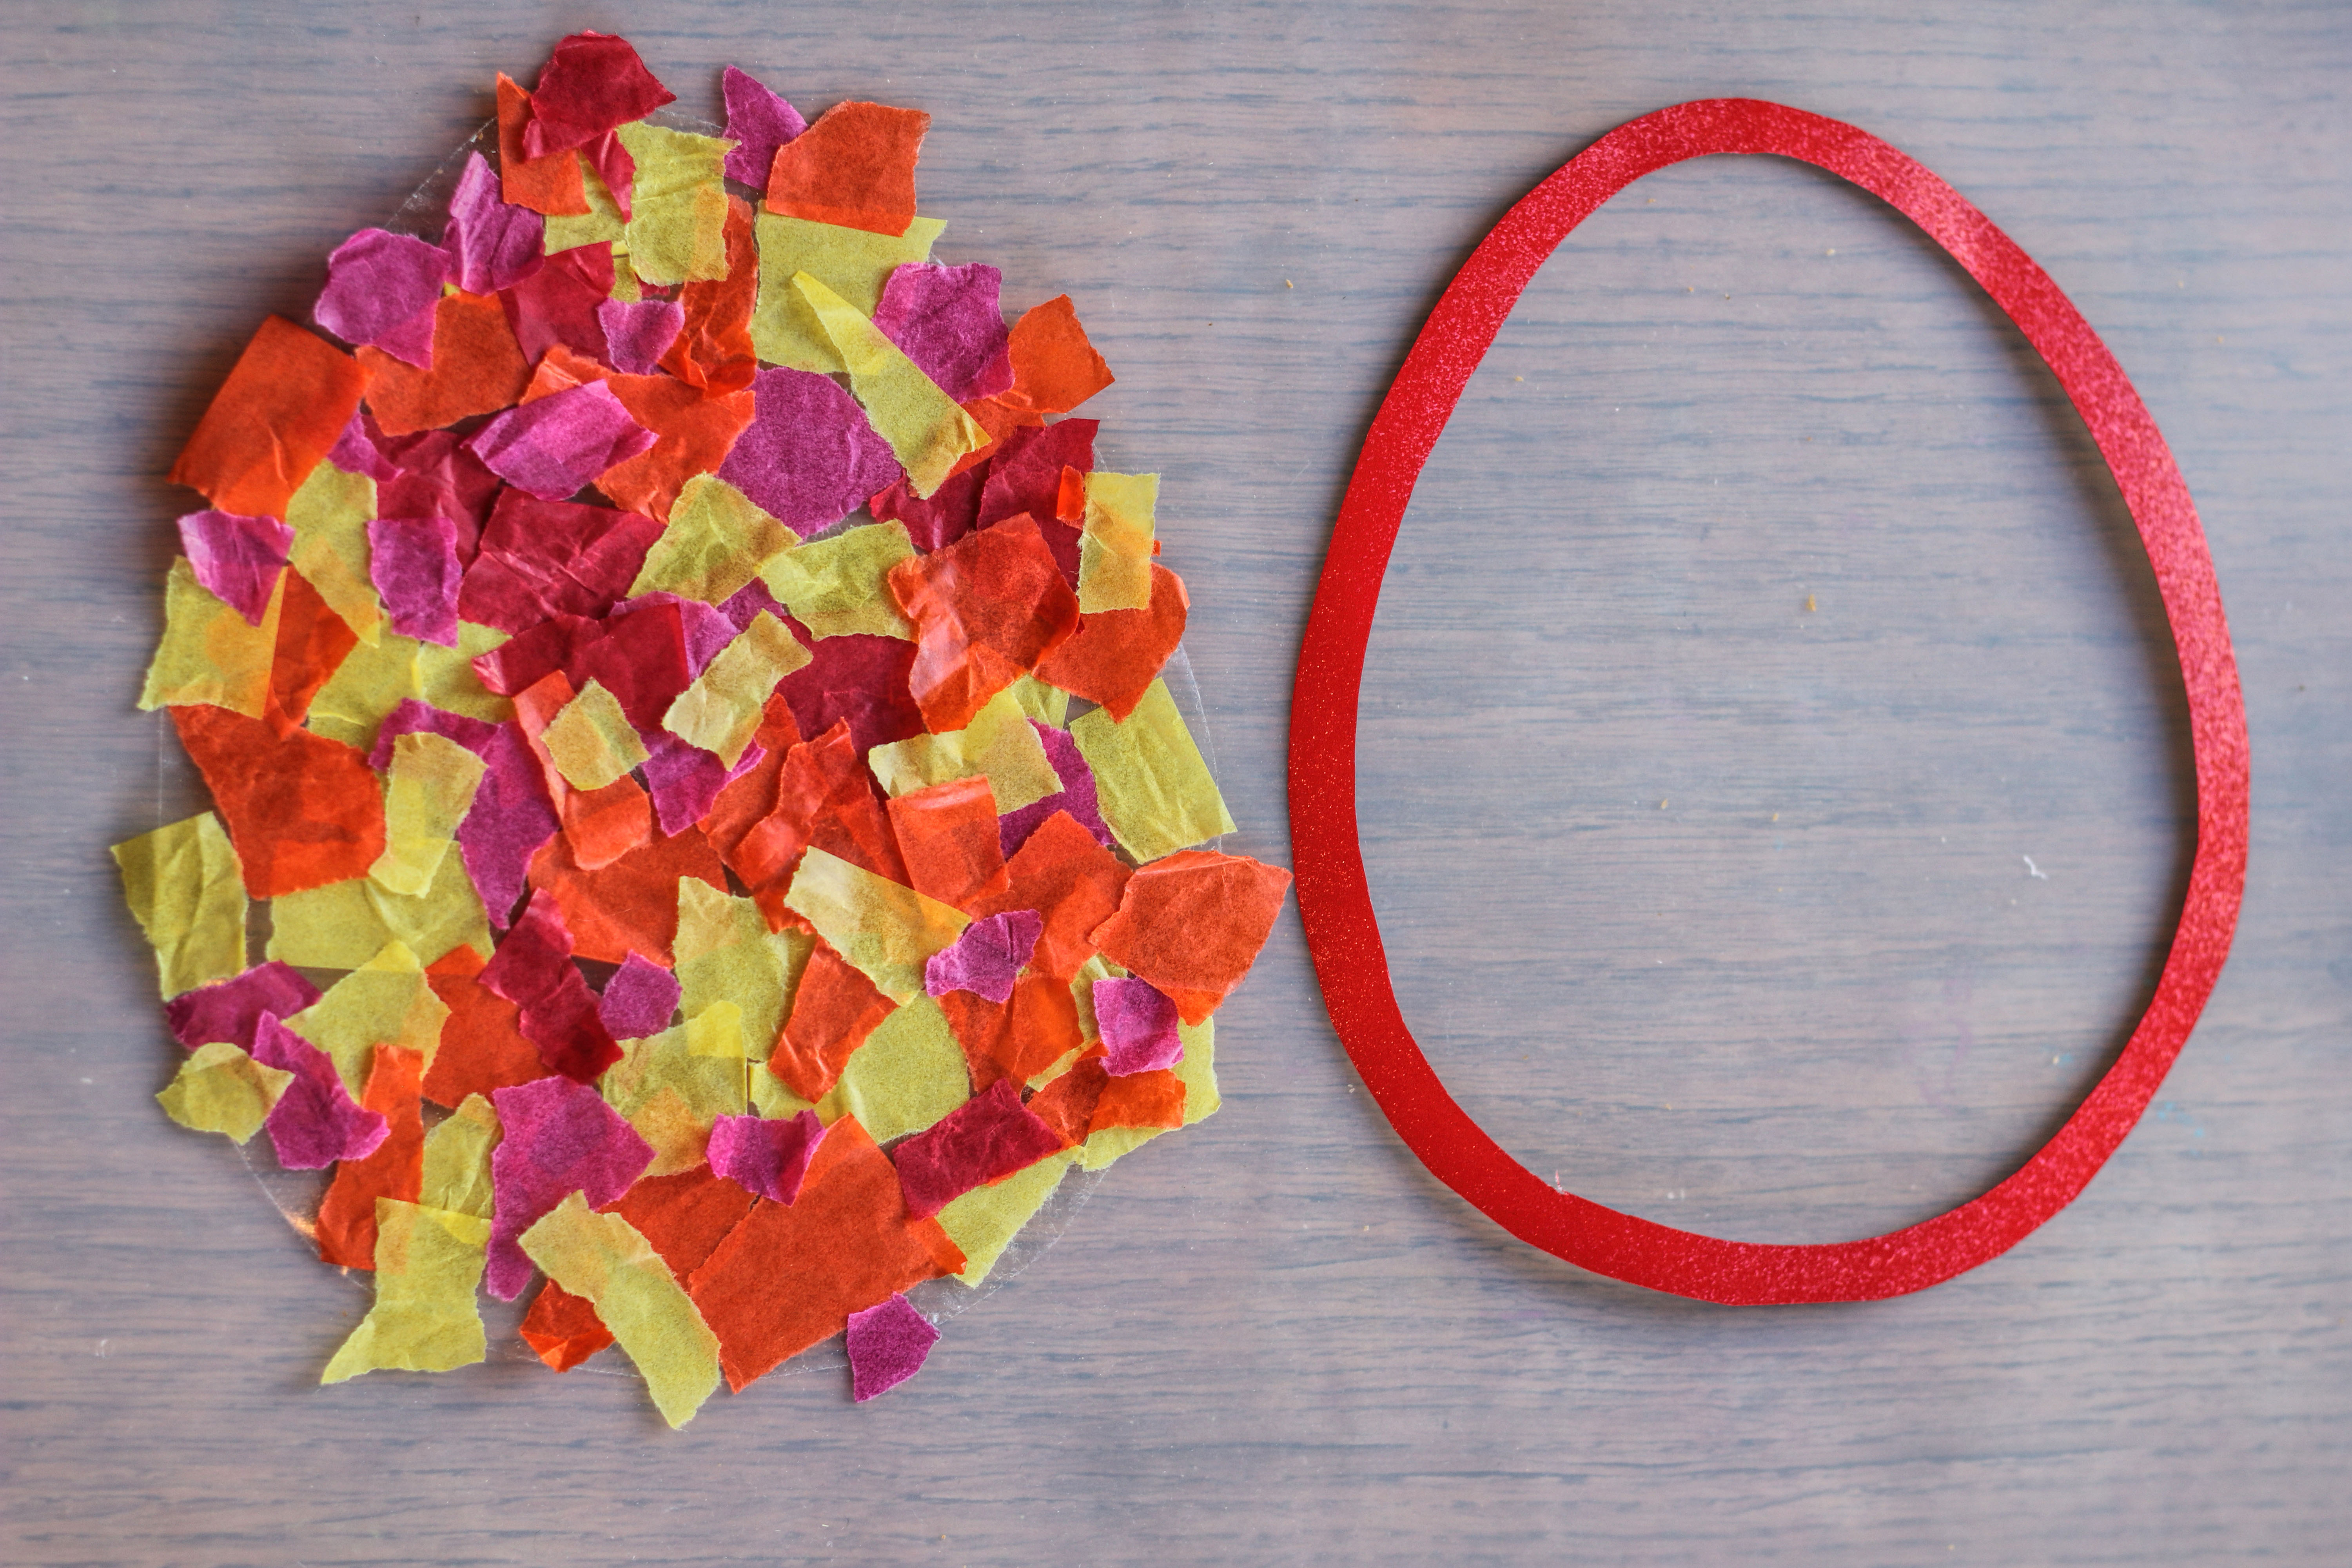
For the simple Easter egg, you can cut an egg directly out of the book adhesive foil and give it to your child to decorate. In this case, the frame is attached later.
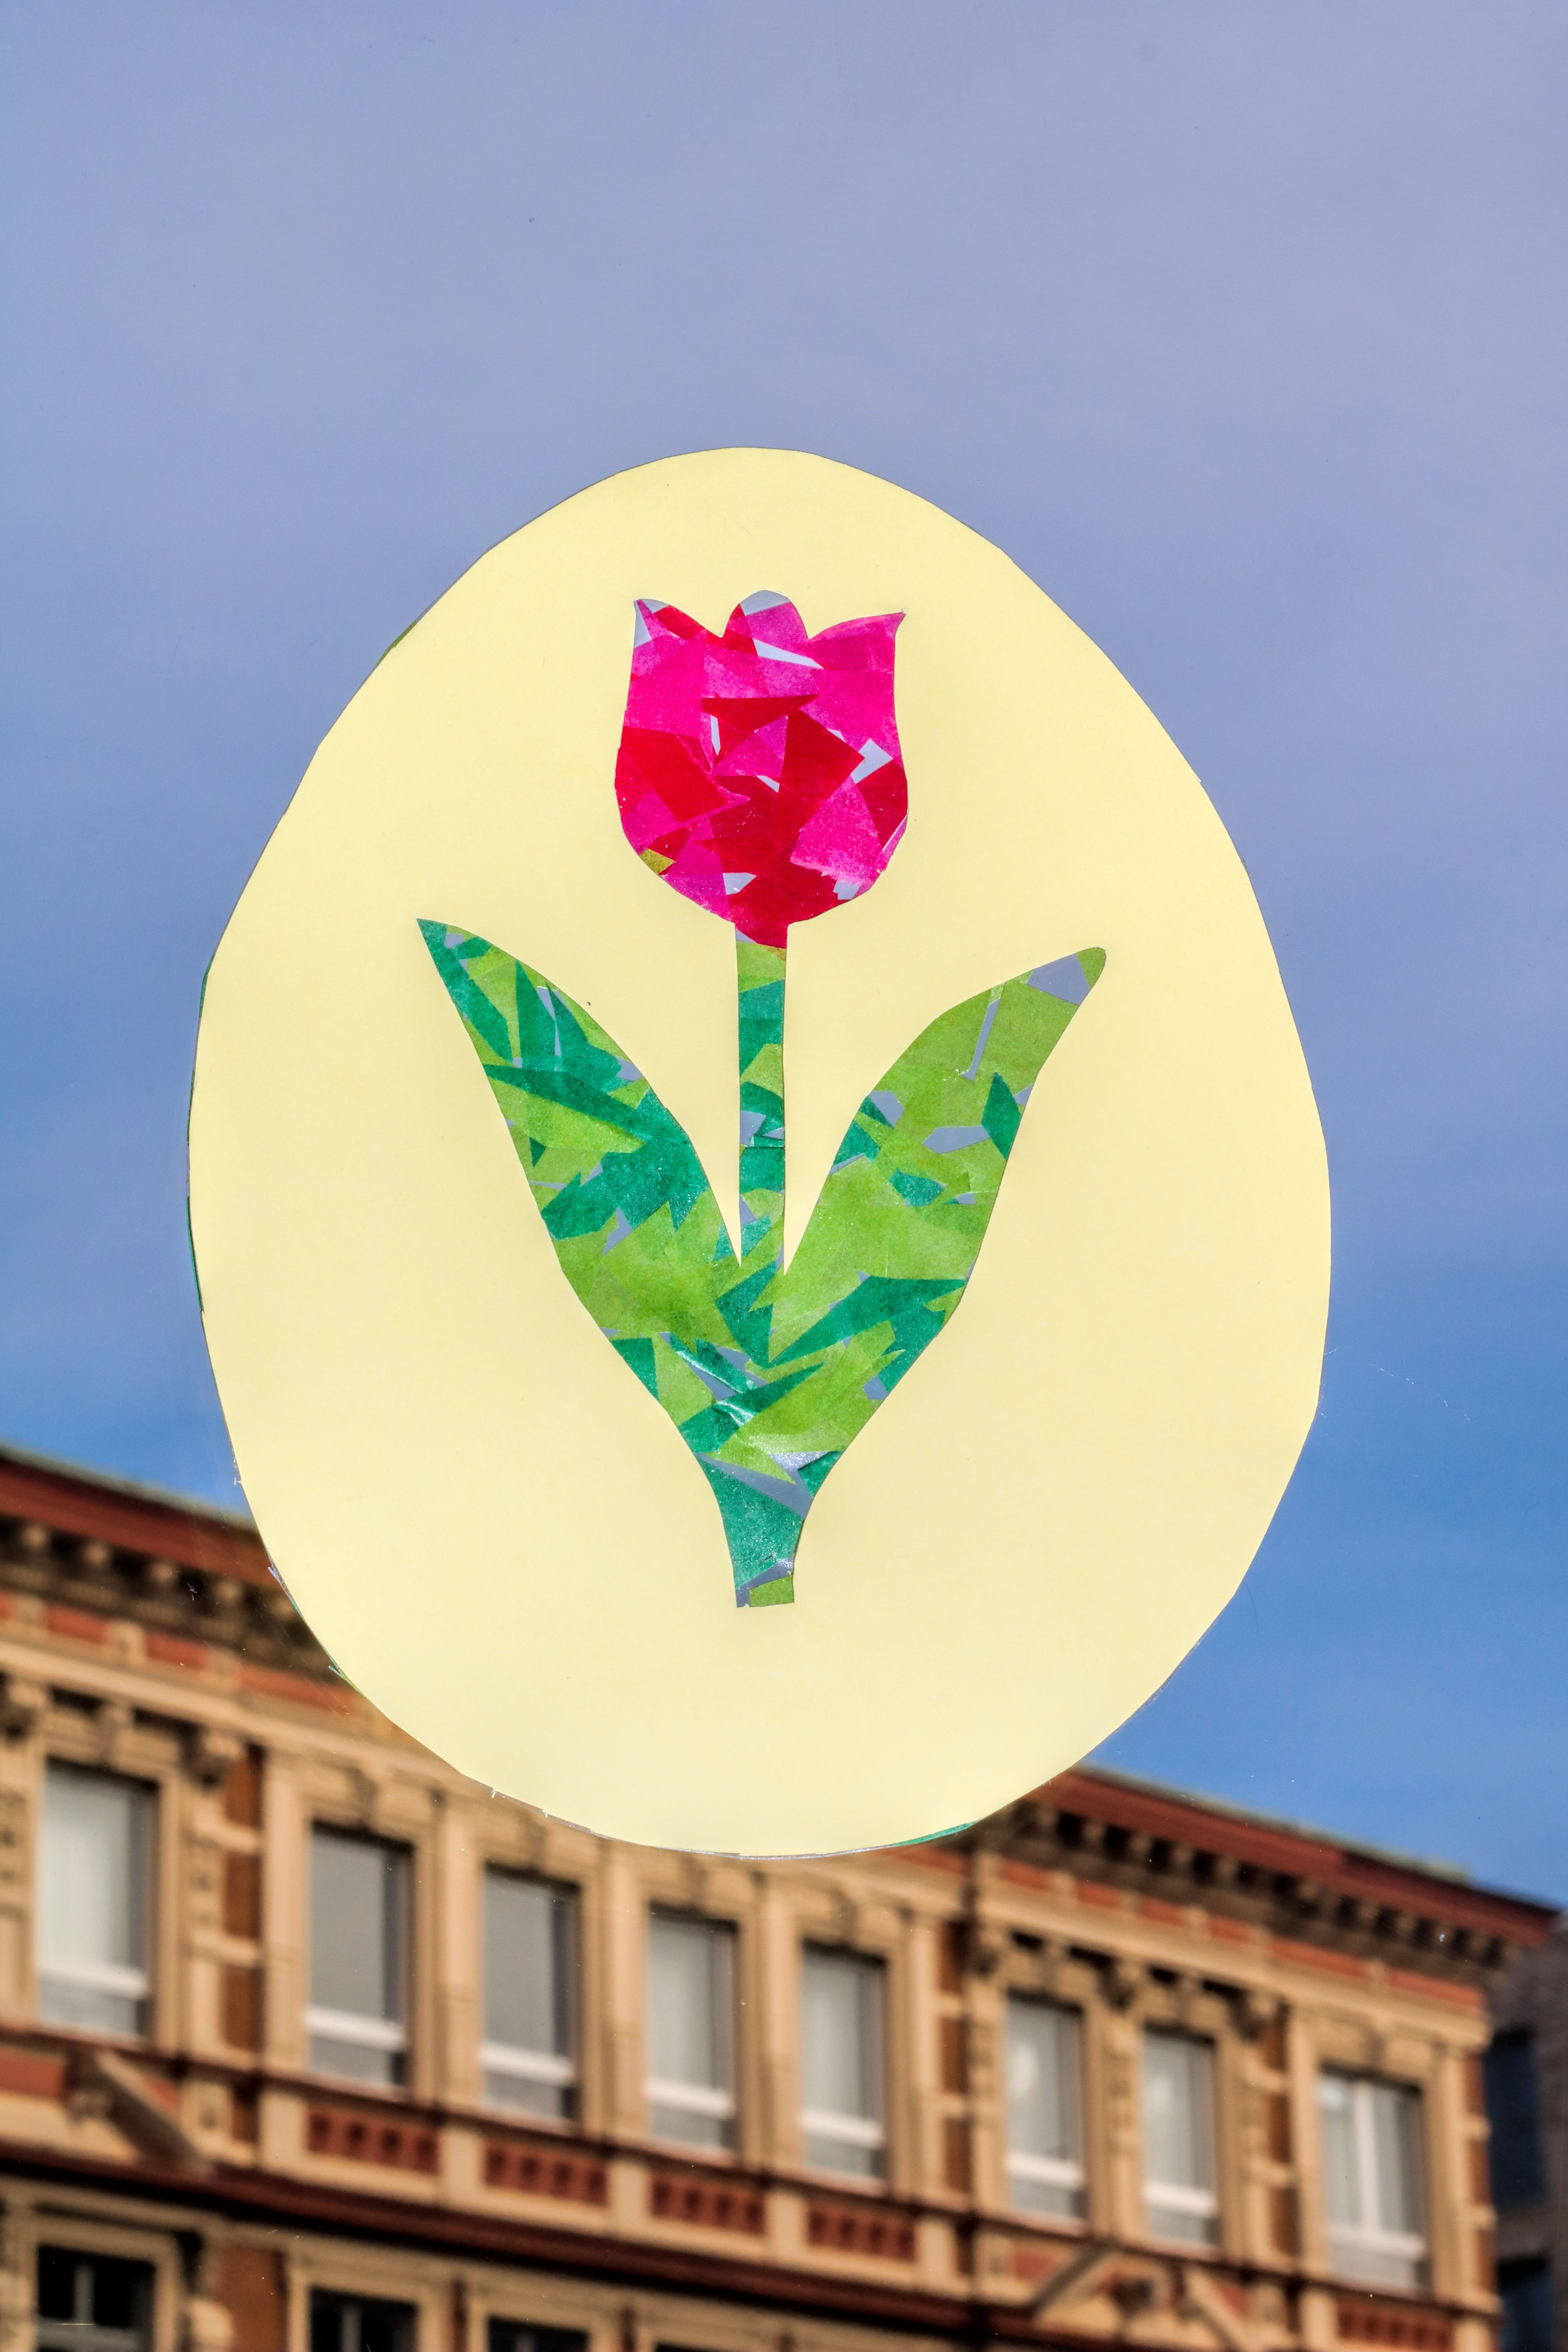
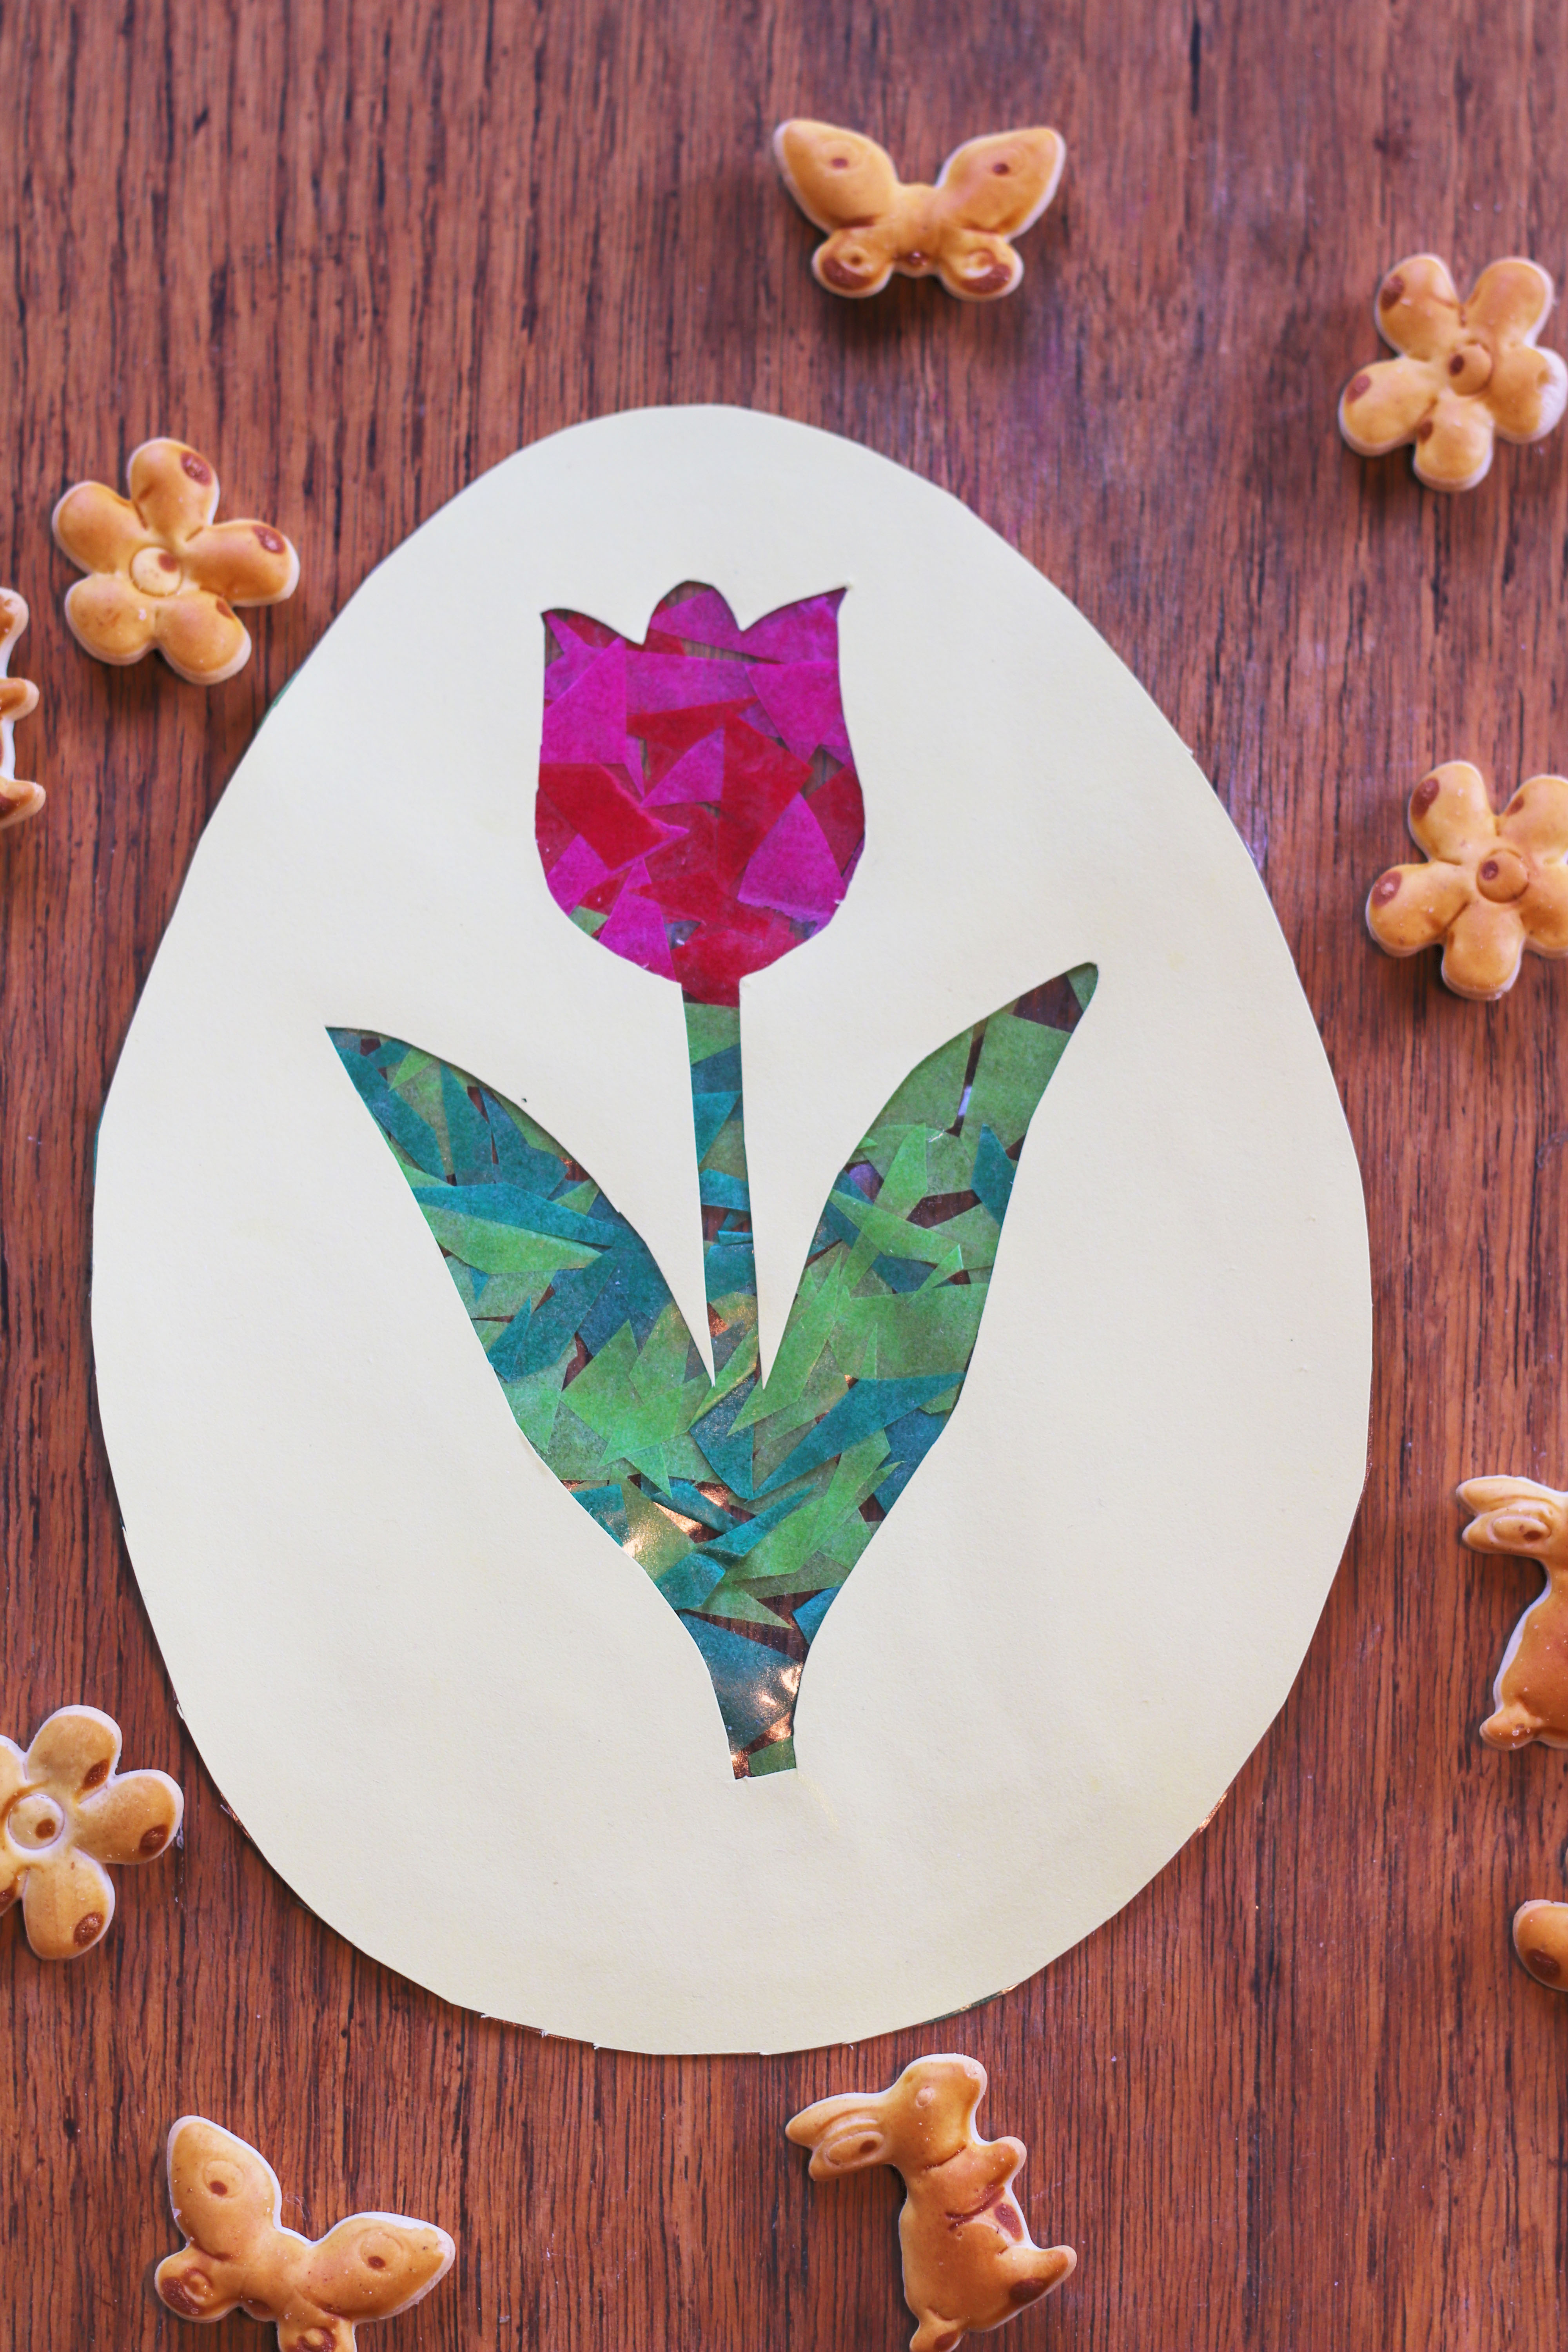
For the egg with a tulip, we did the same thing and additionally secured the foil egg with small strips of tape.
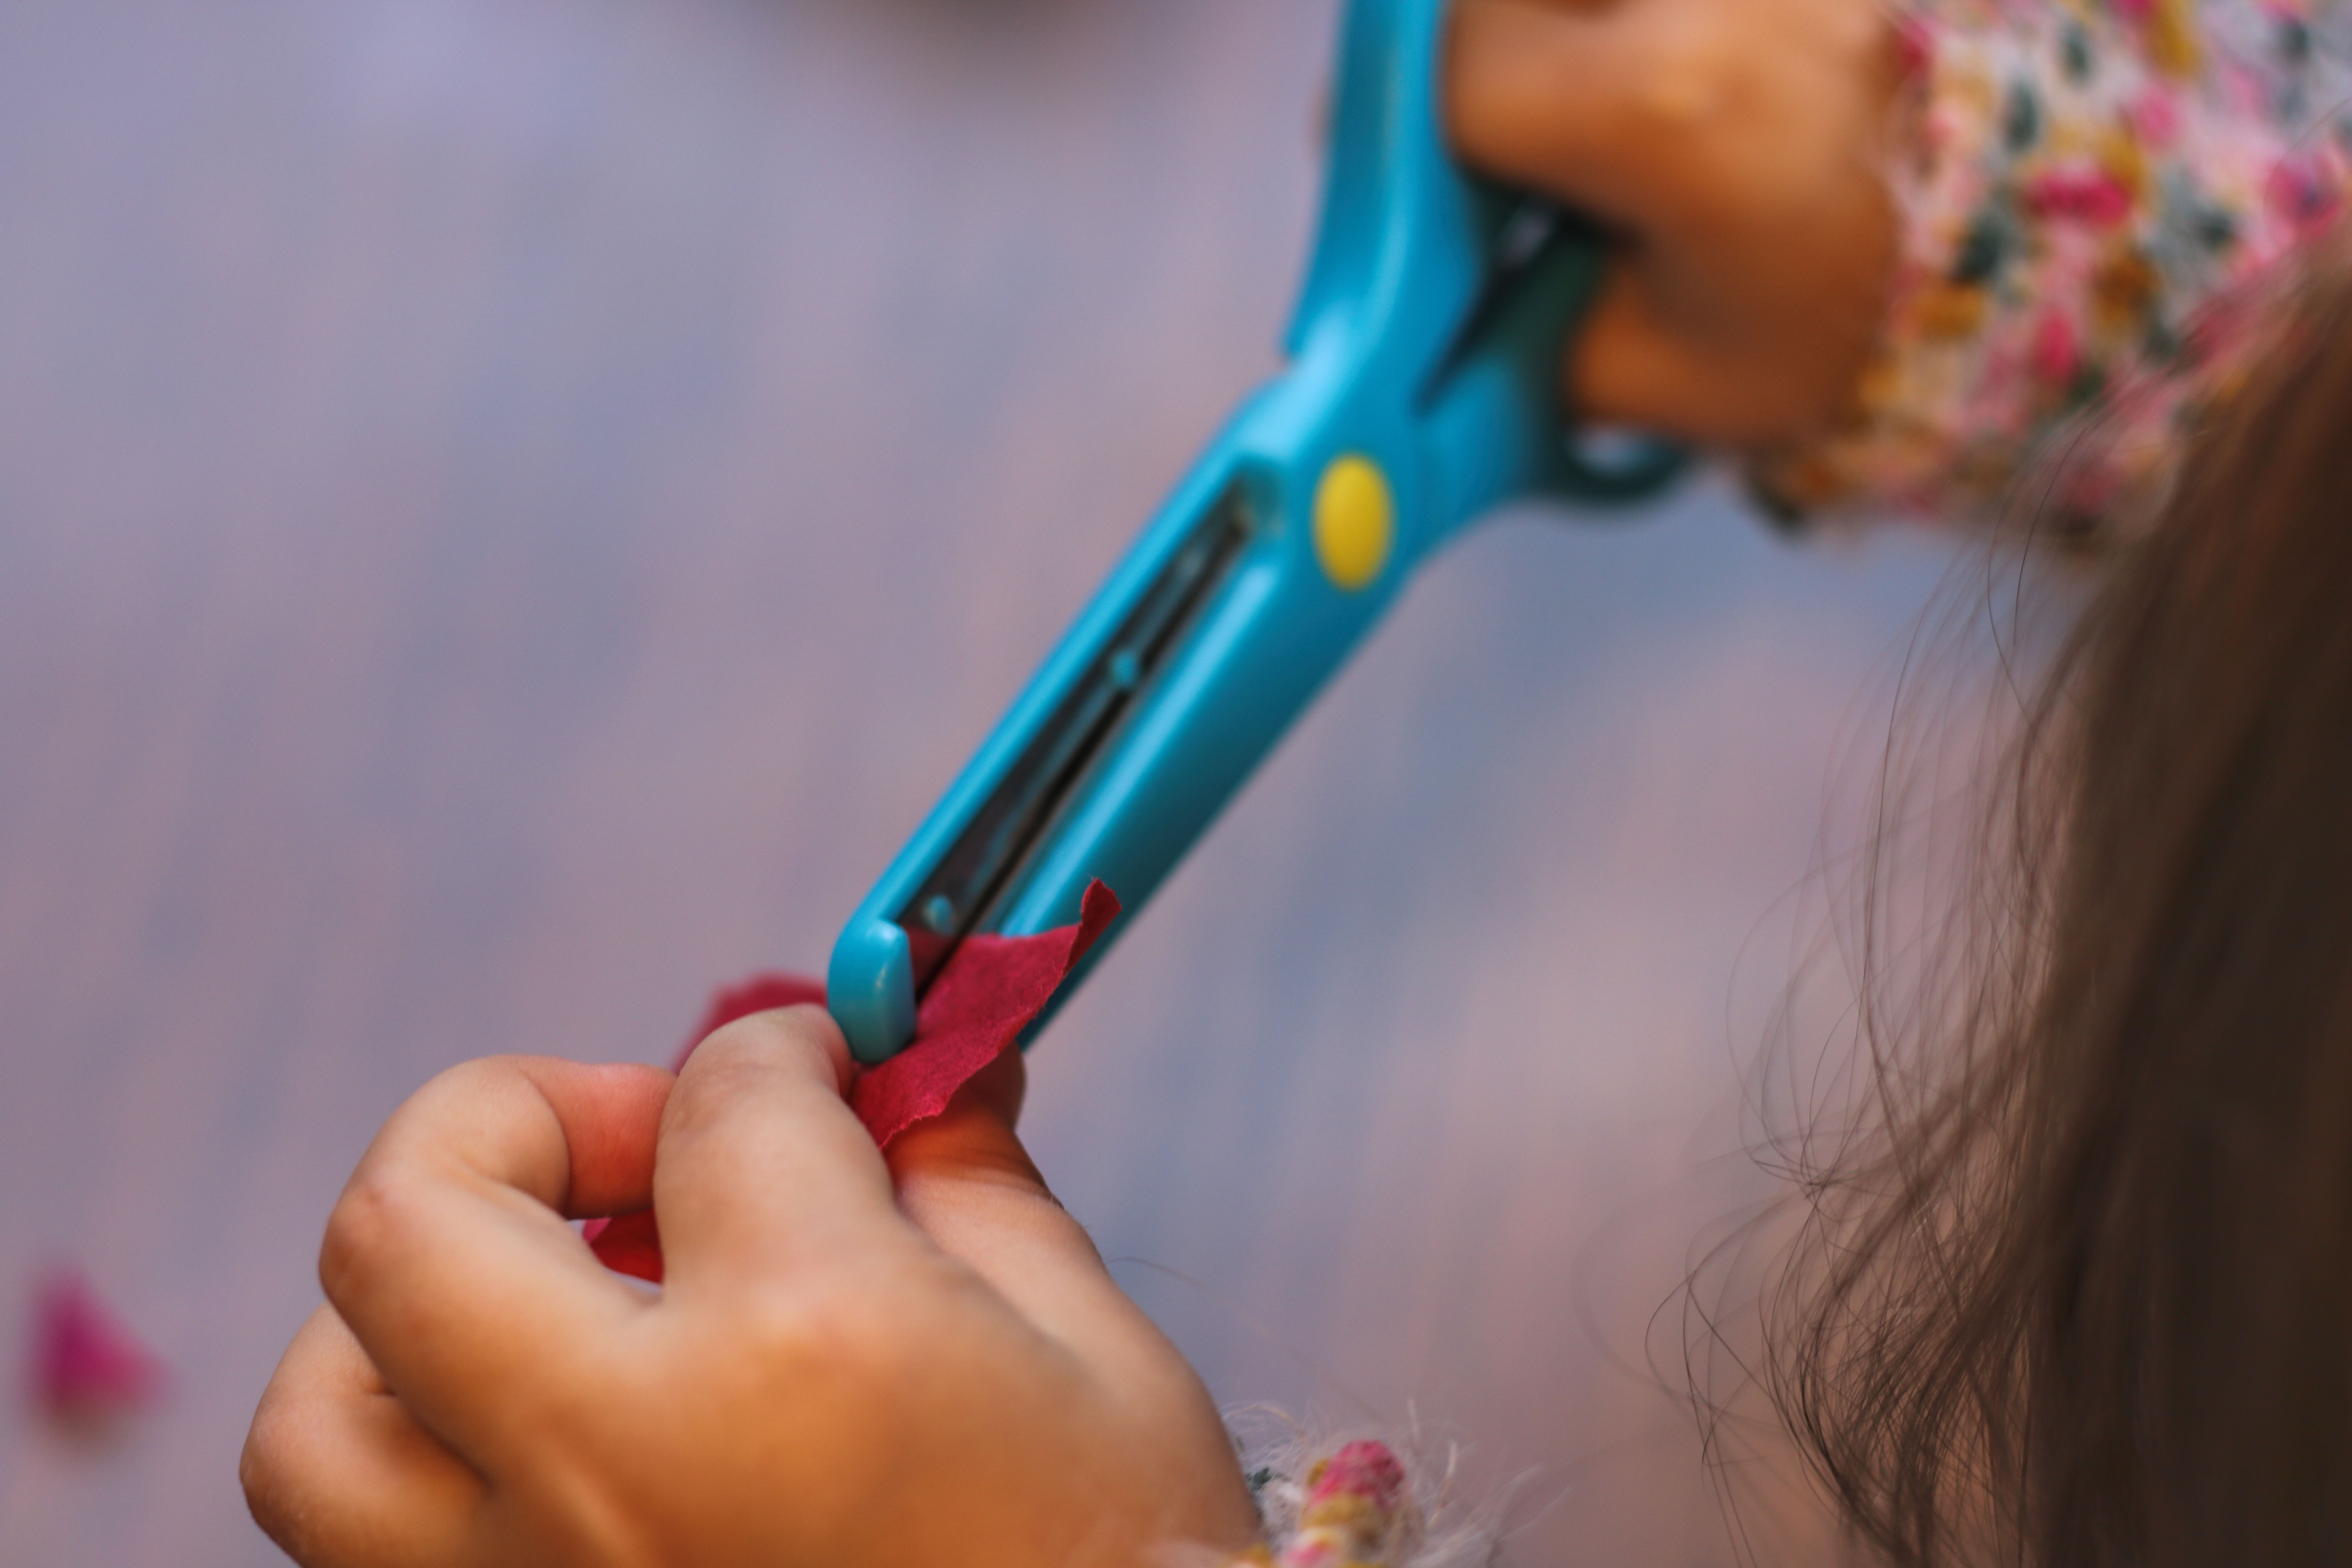
3. Prepare the tracing paper:
Now your child can tear the tracing paper into small pieces or cut them with children’s scissors. Just see what your child prefers—some children really enjoy cutting, while others prefer to tear the pieces by hand.
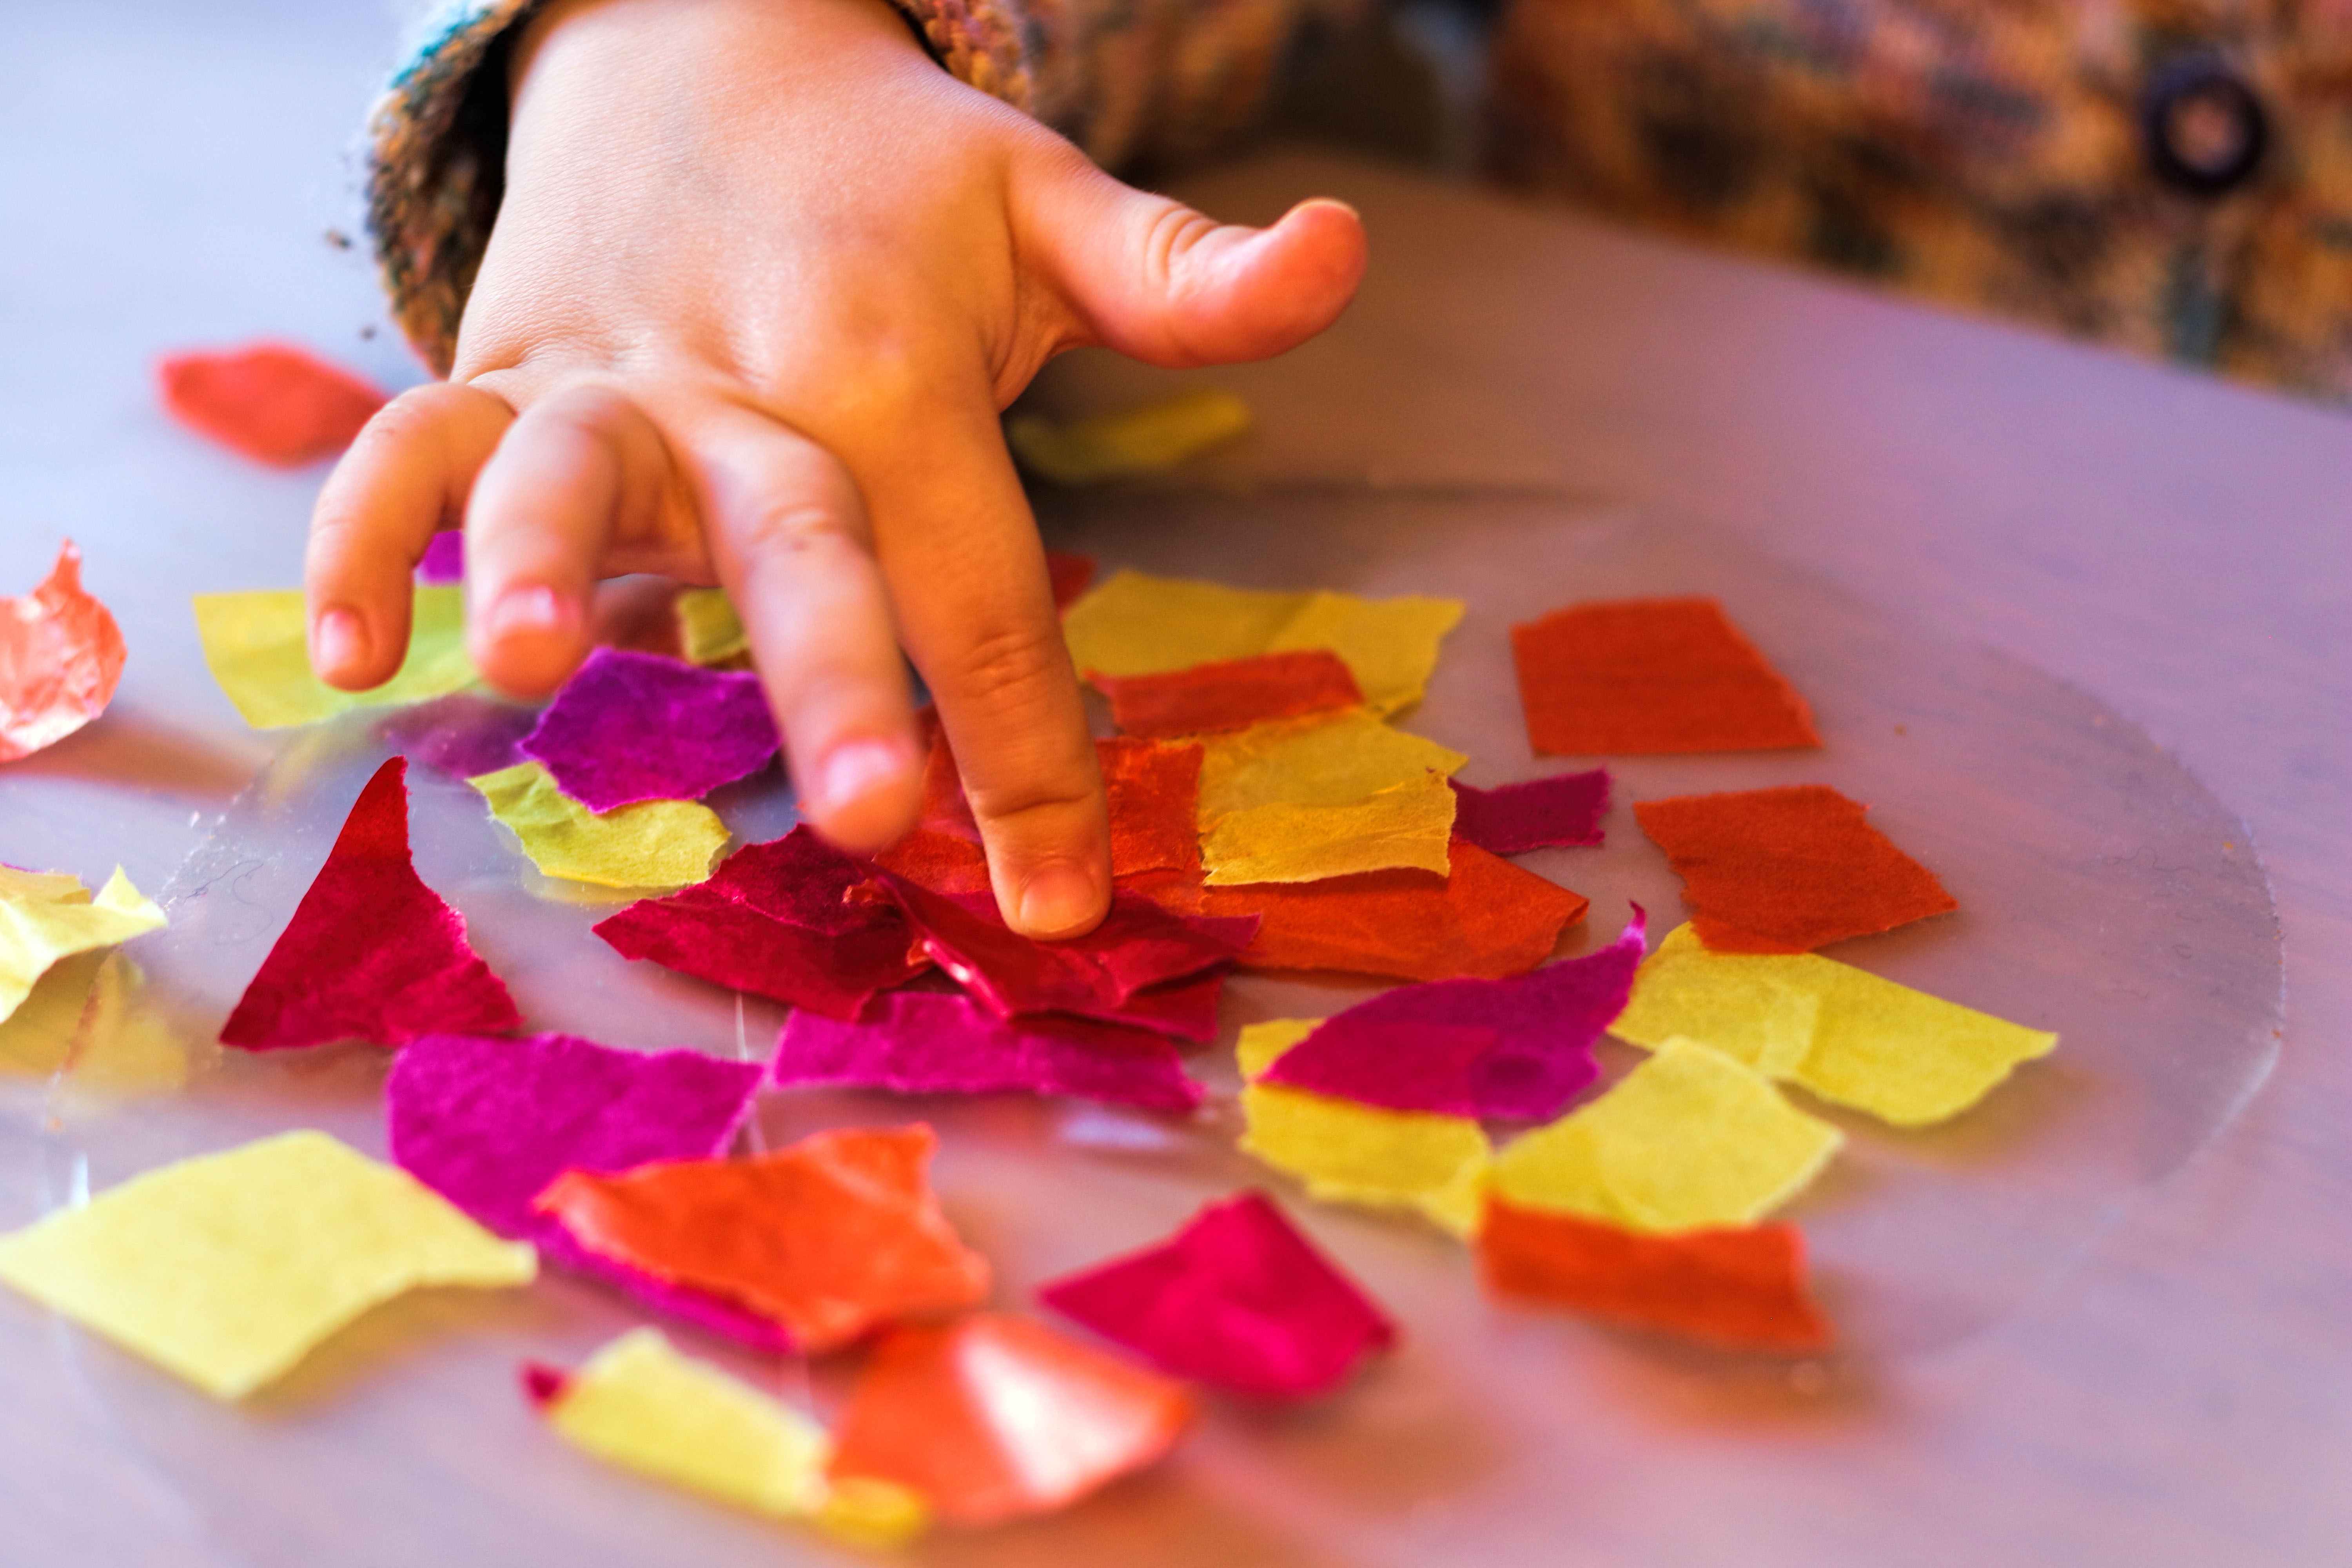
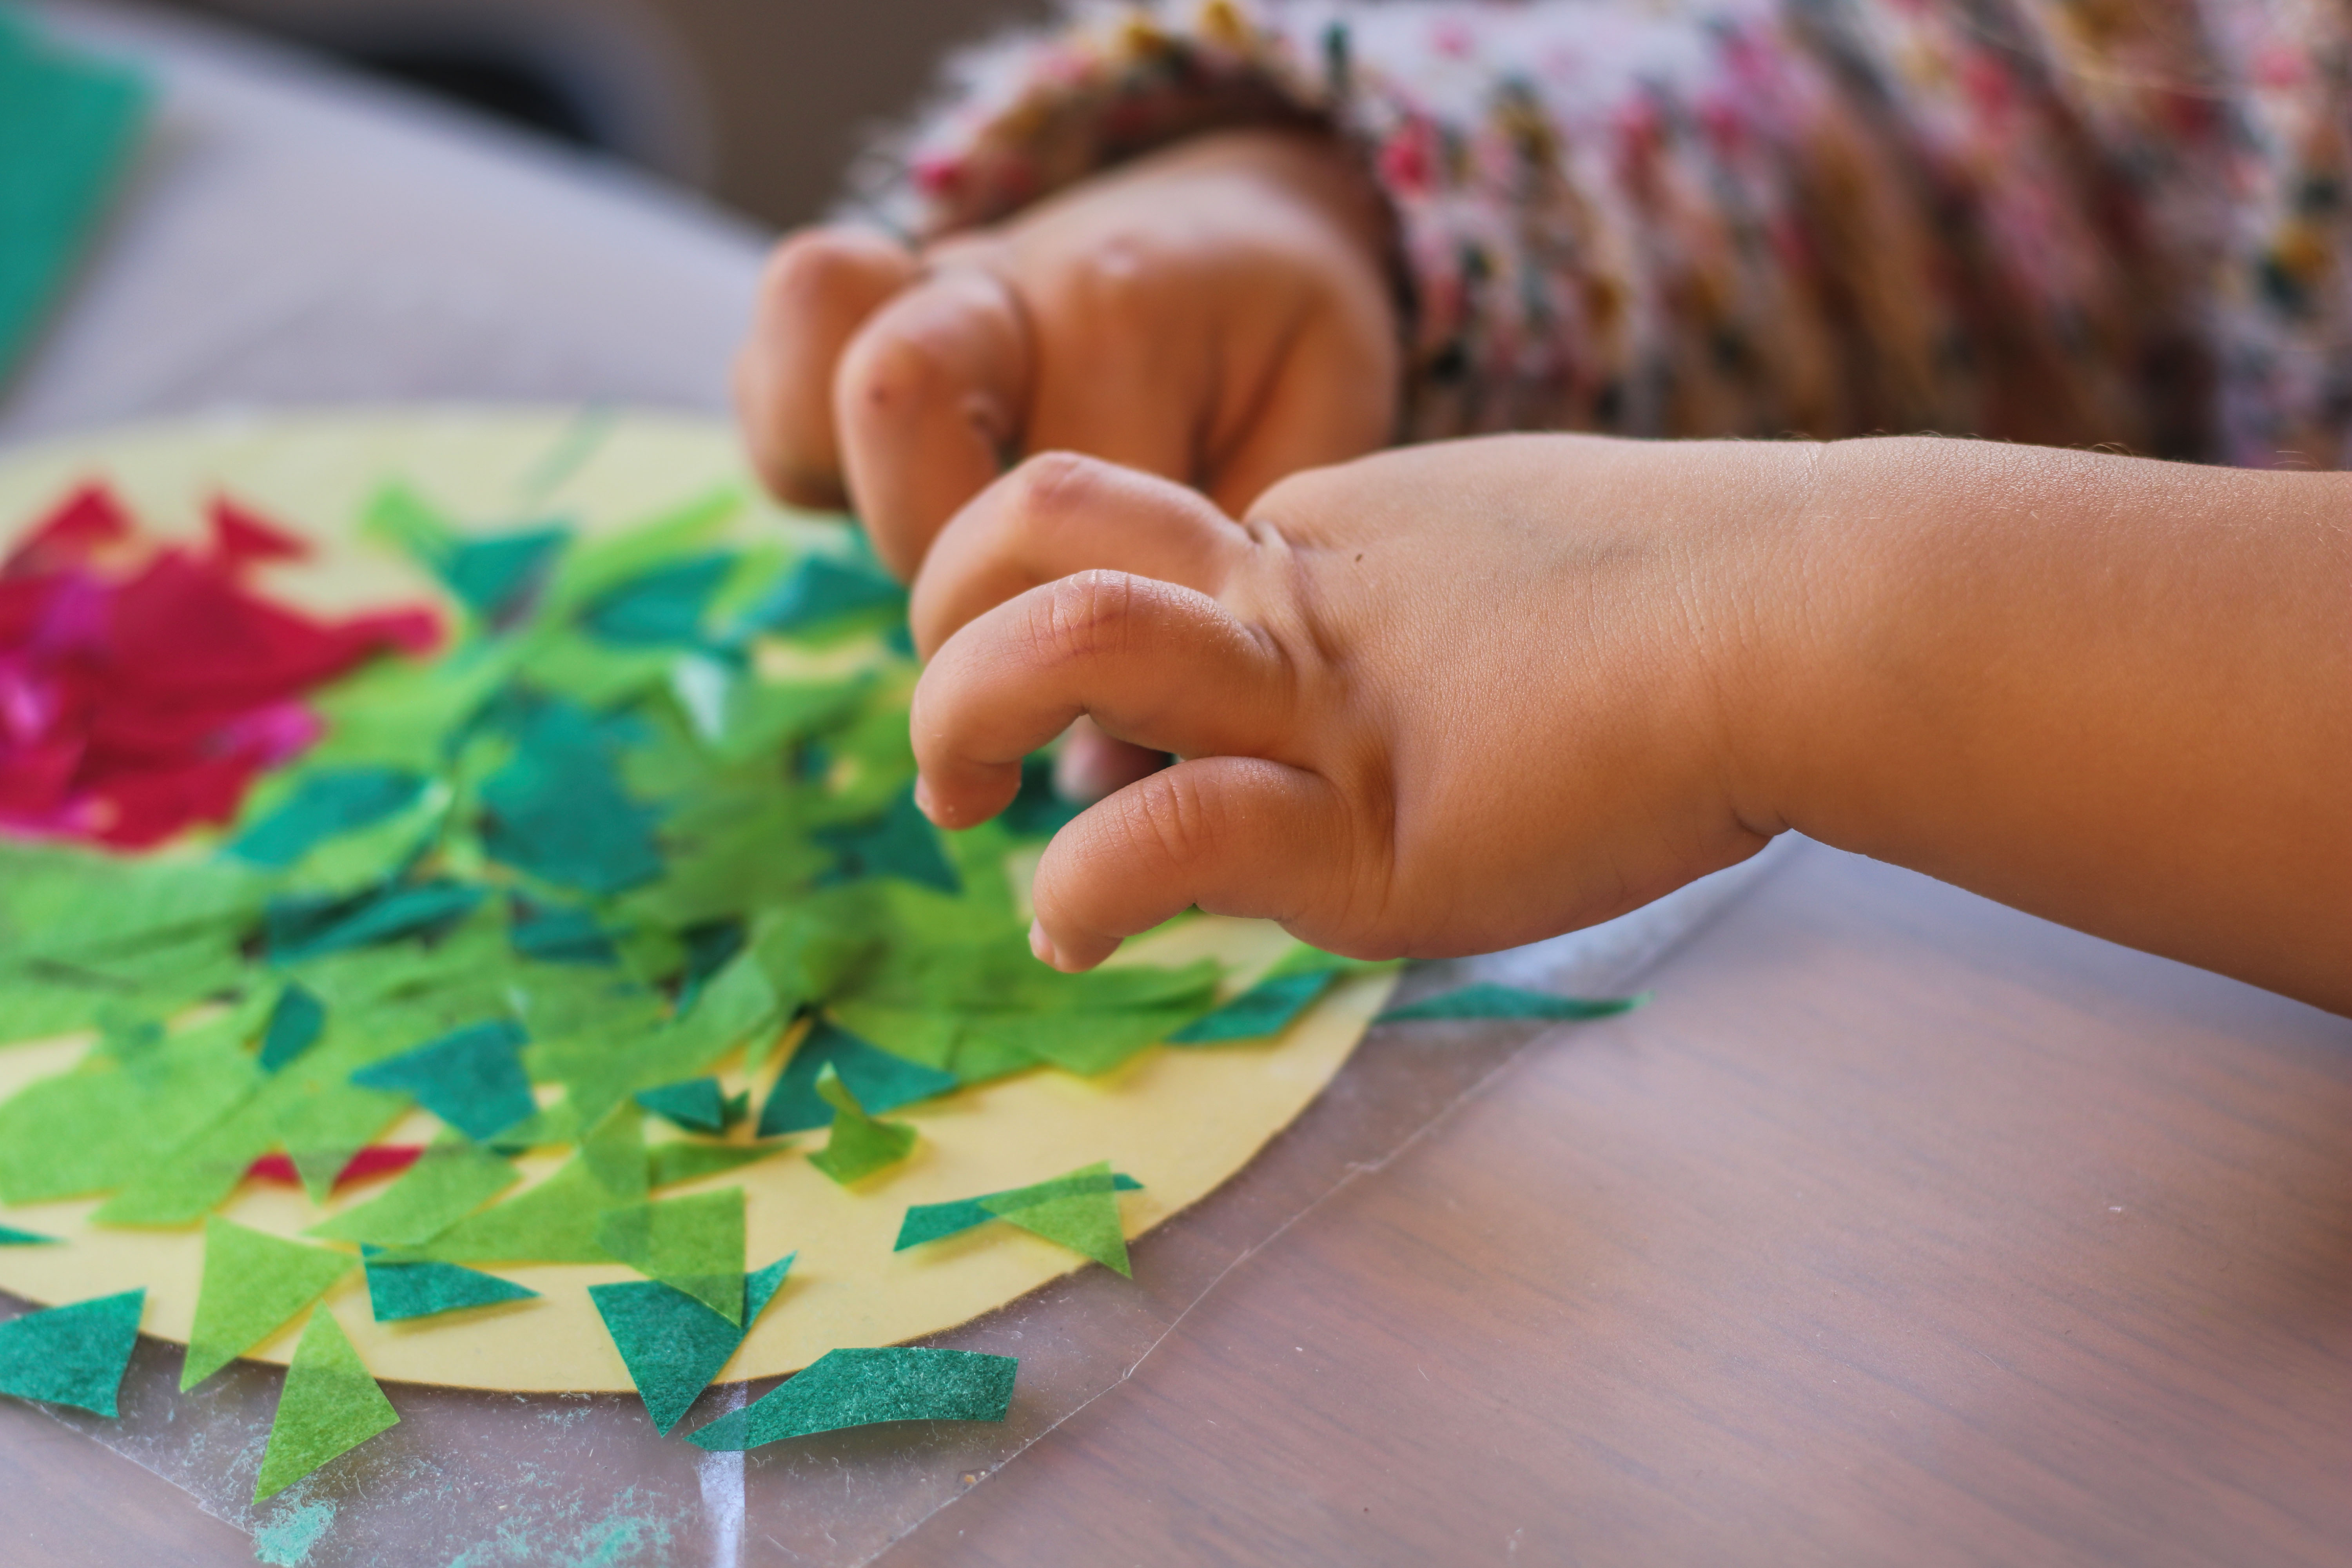
4. Cover the surface:
The colorful pieces of tracing paper are now pressed onto the adhesive surface until the design is nicely filled in.
If the design—like our tulip—has multiple colors, it can help to start by placing a few pieces at the transitions. For us, for example, these were green and red.
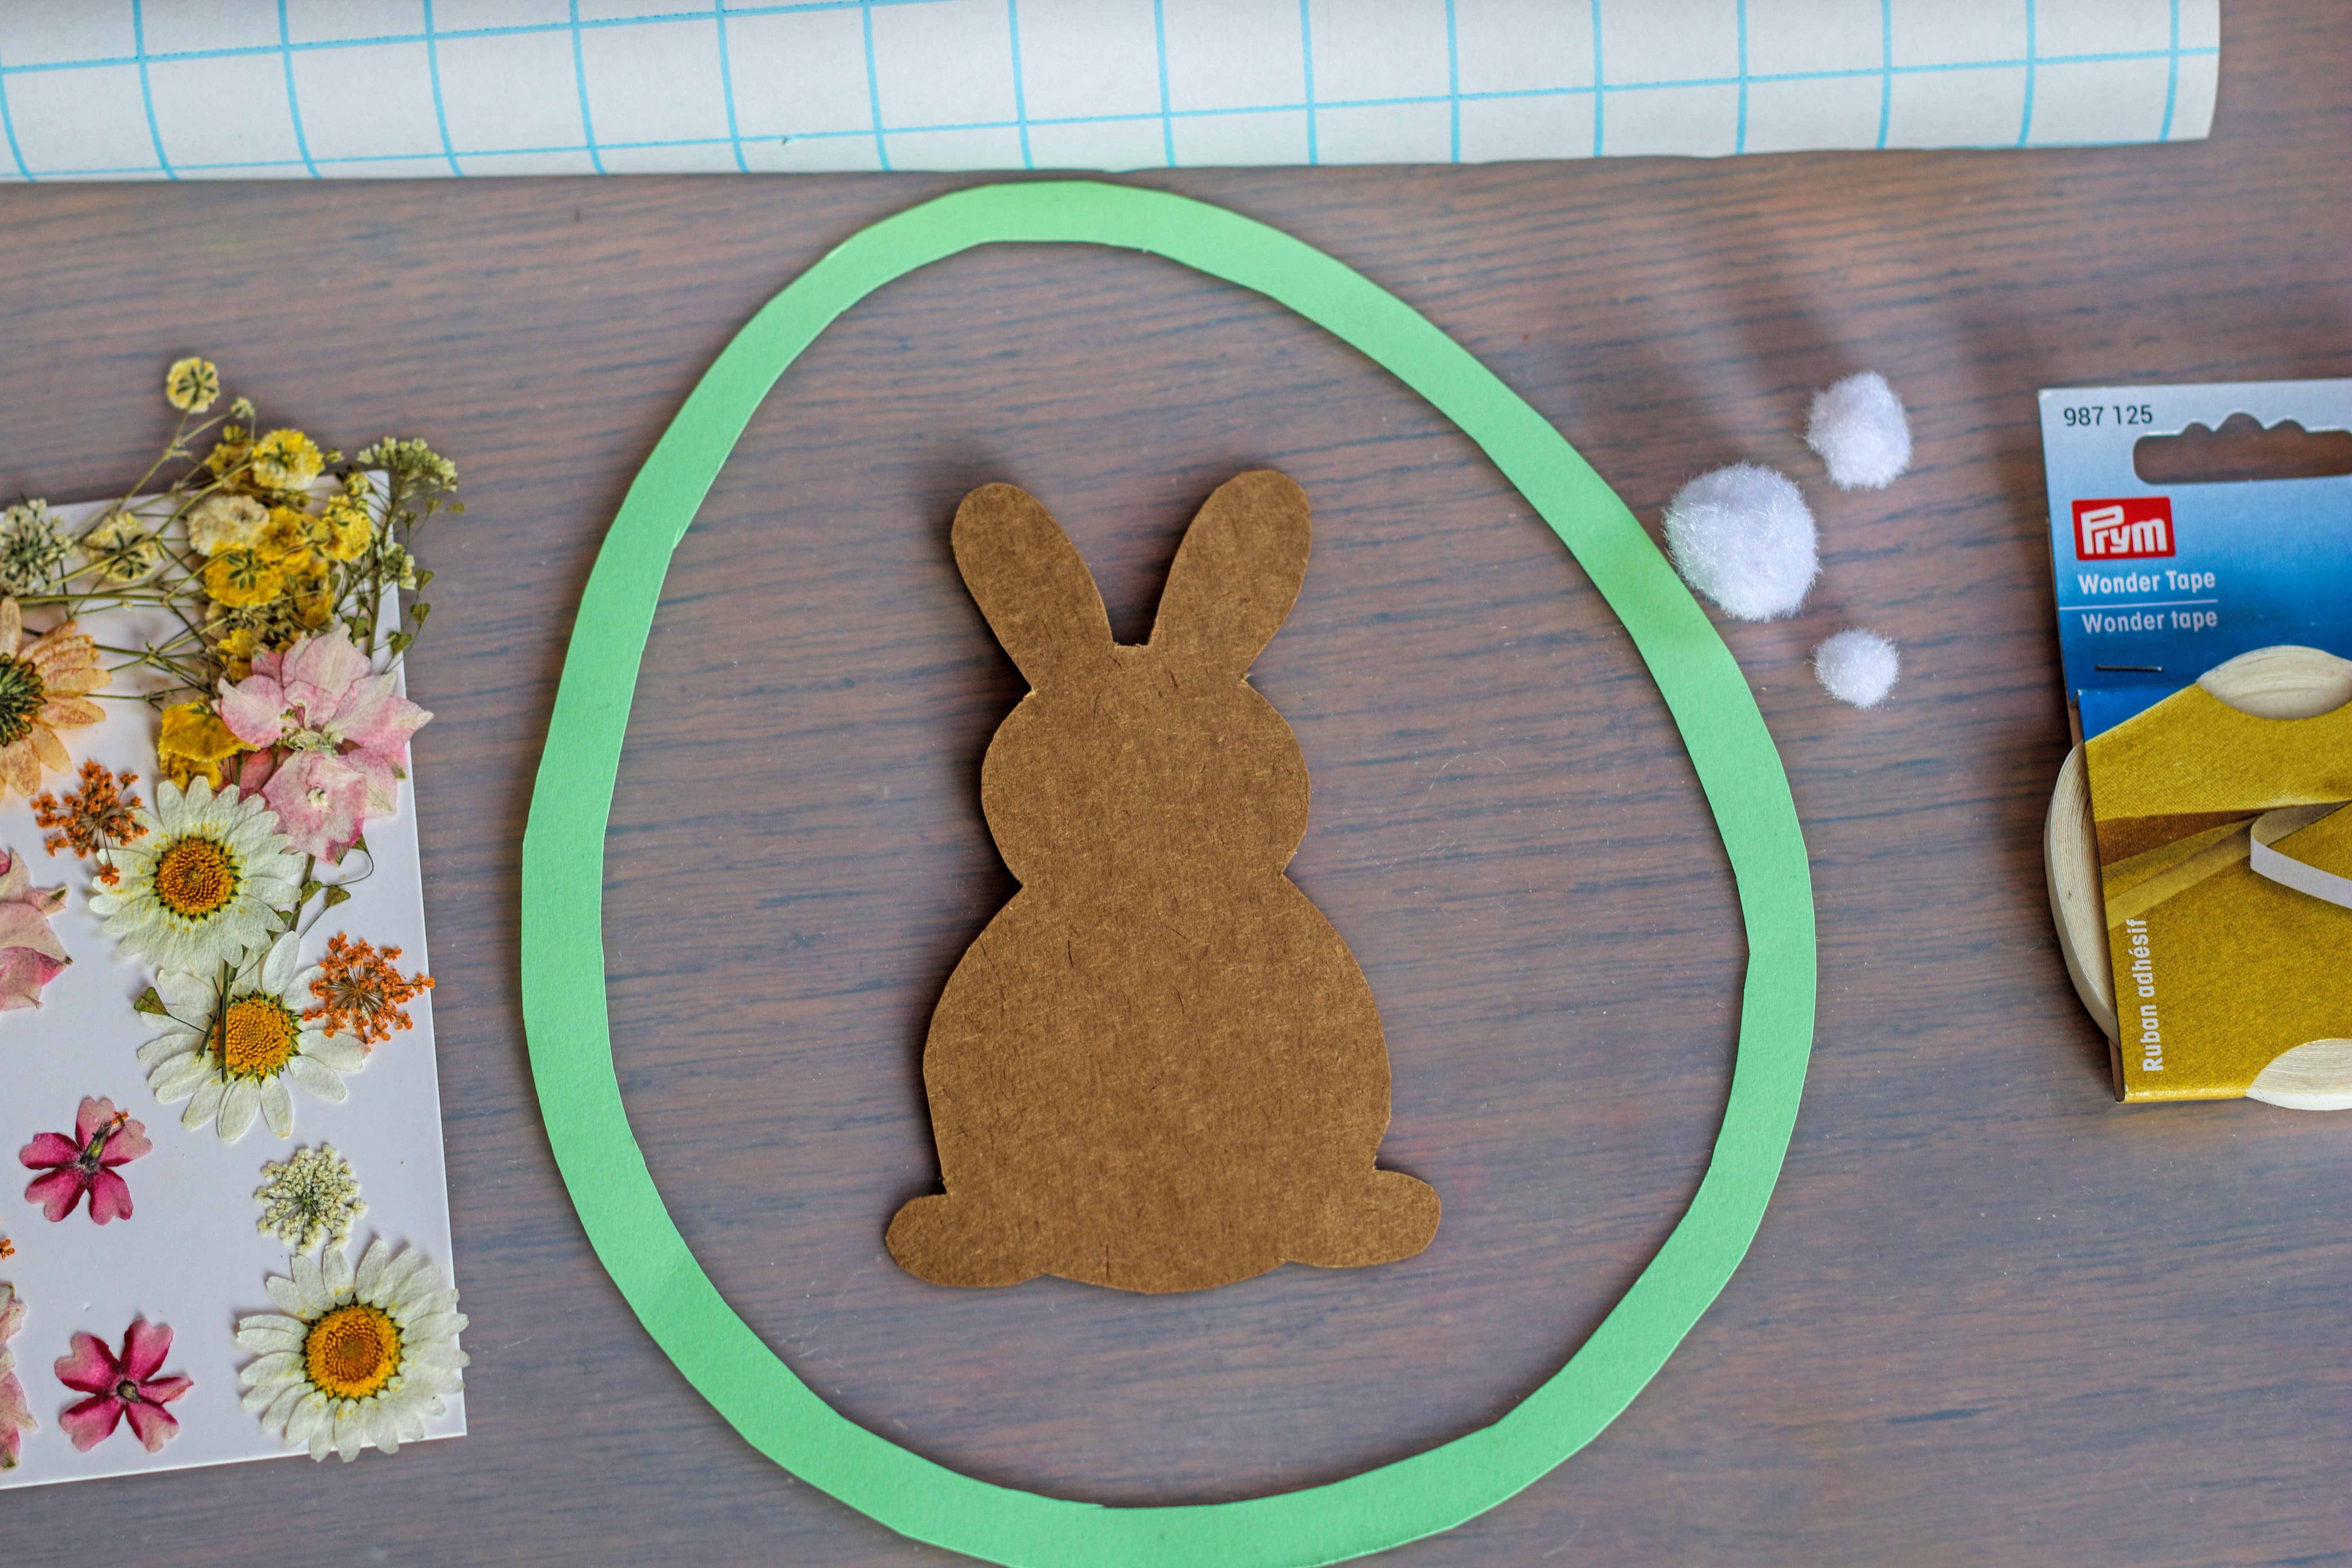
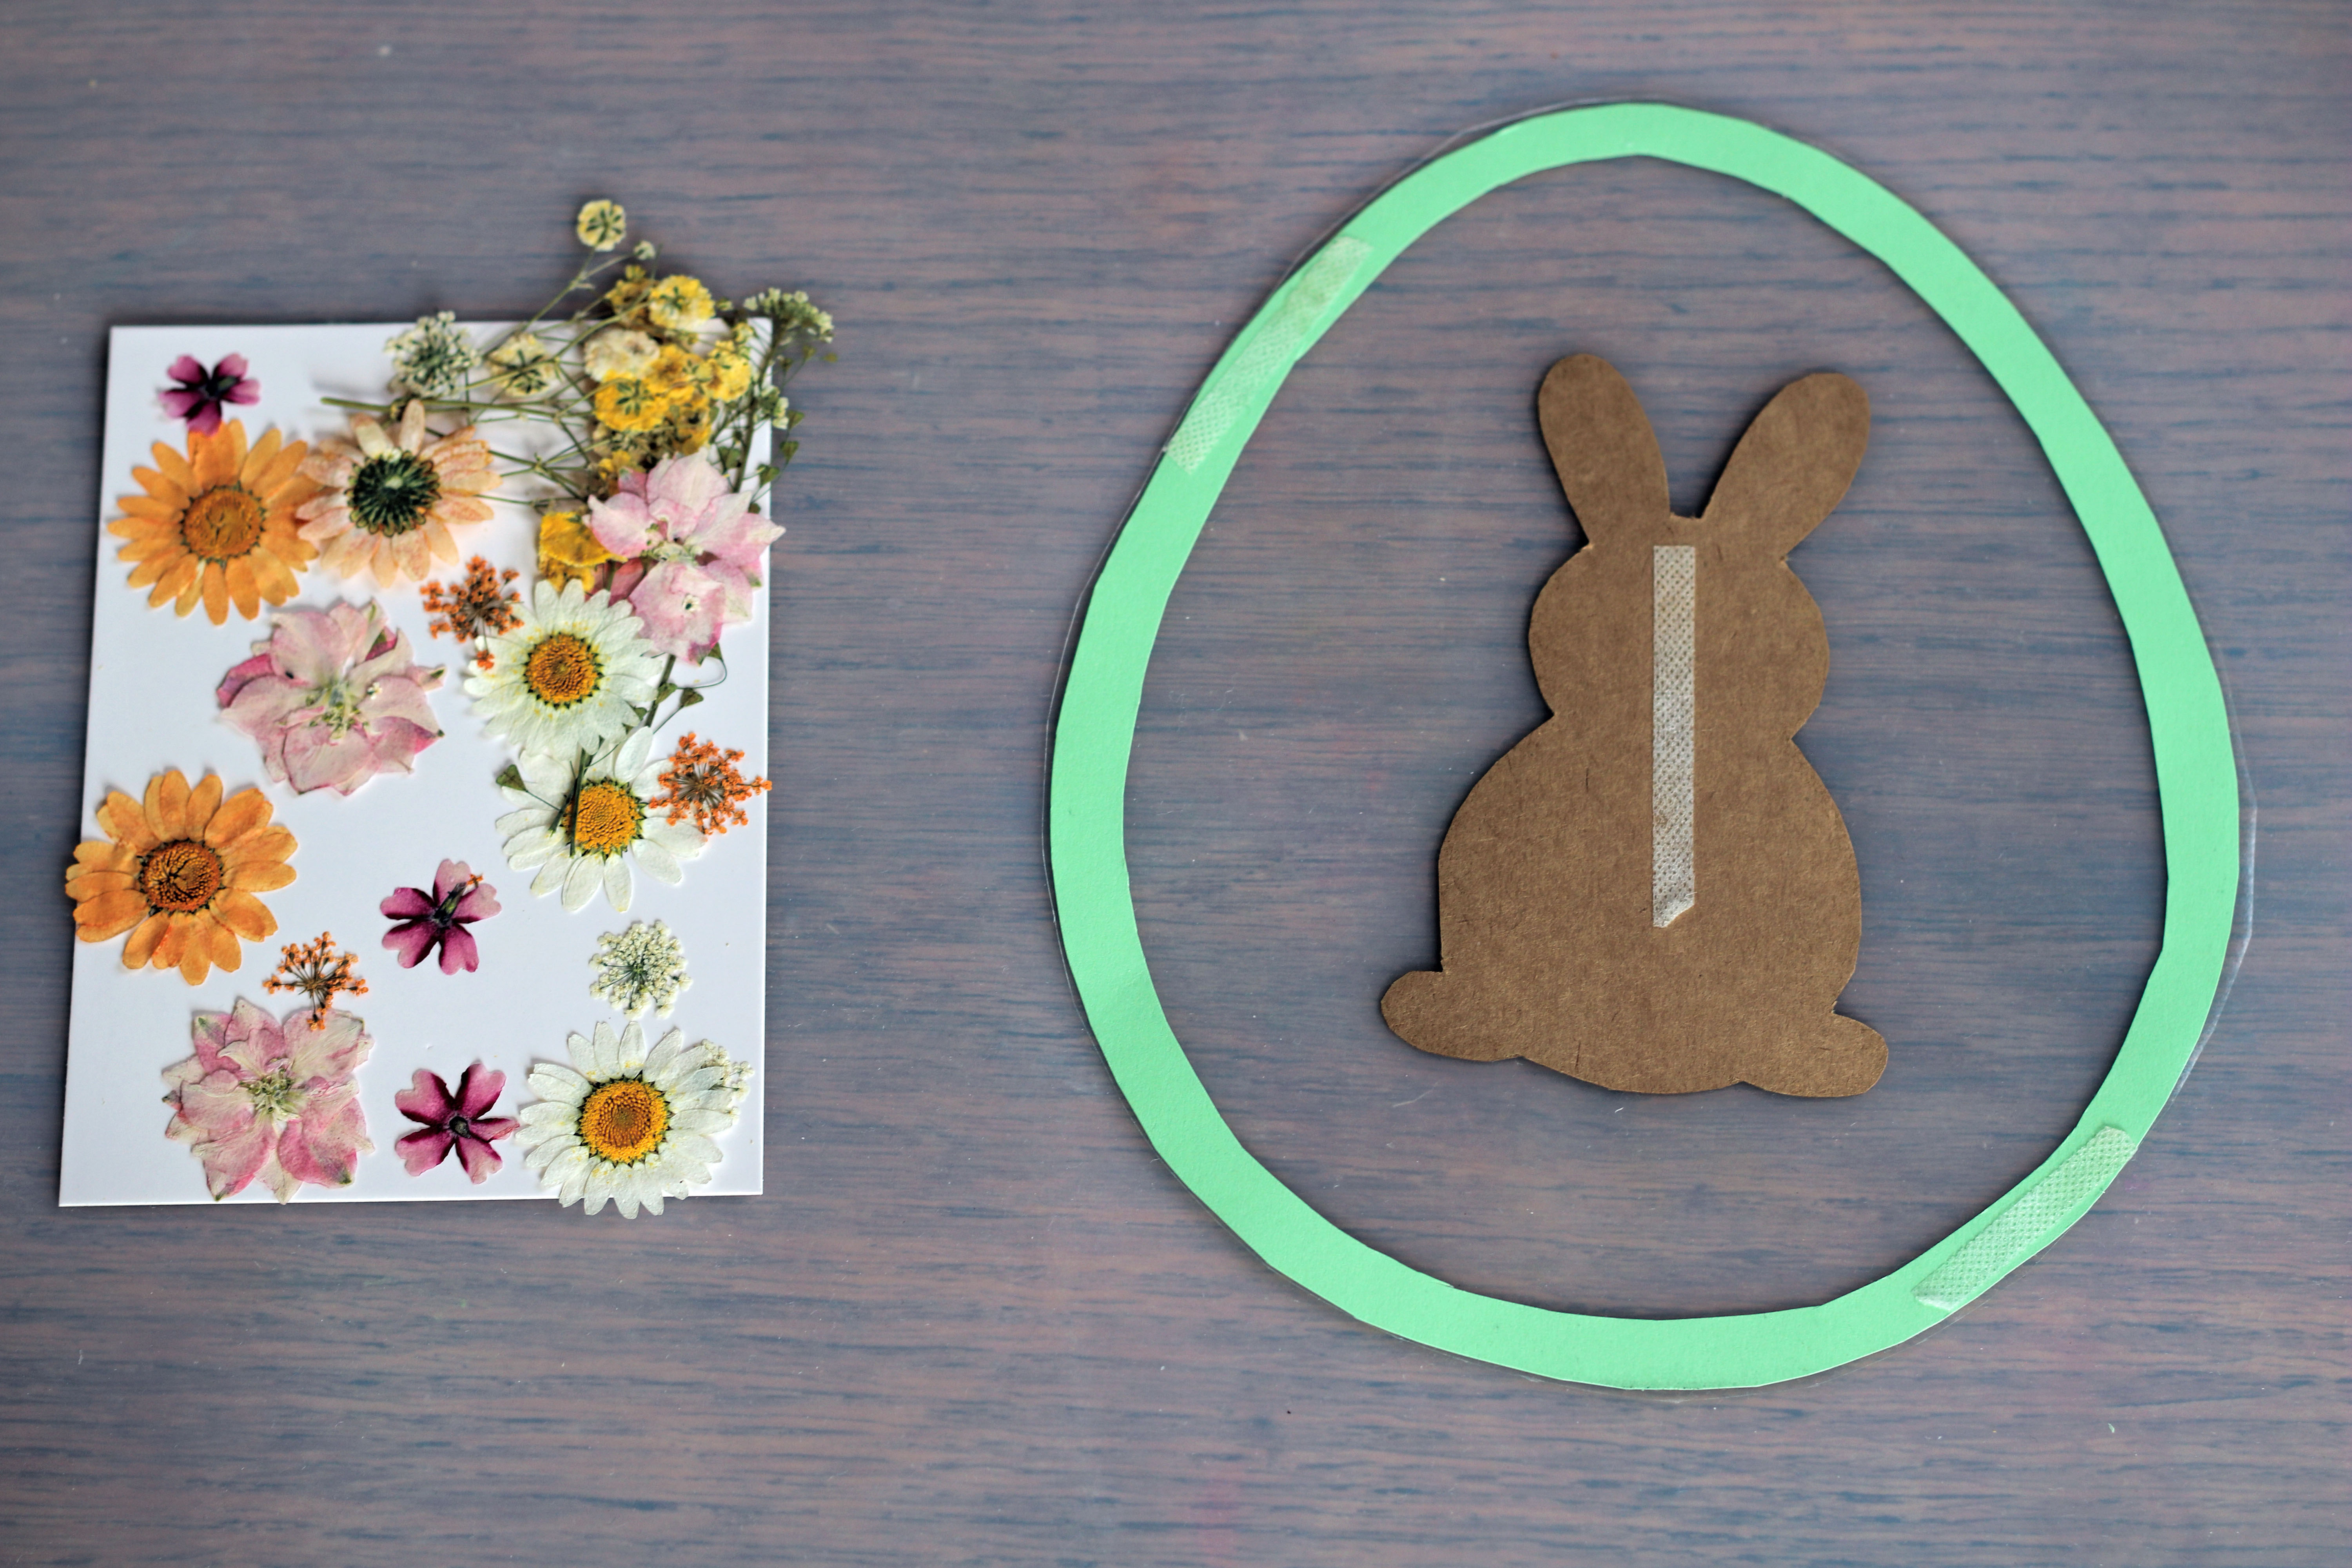
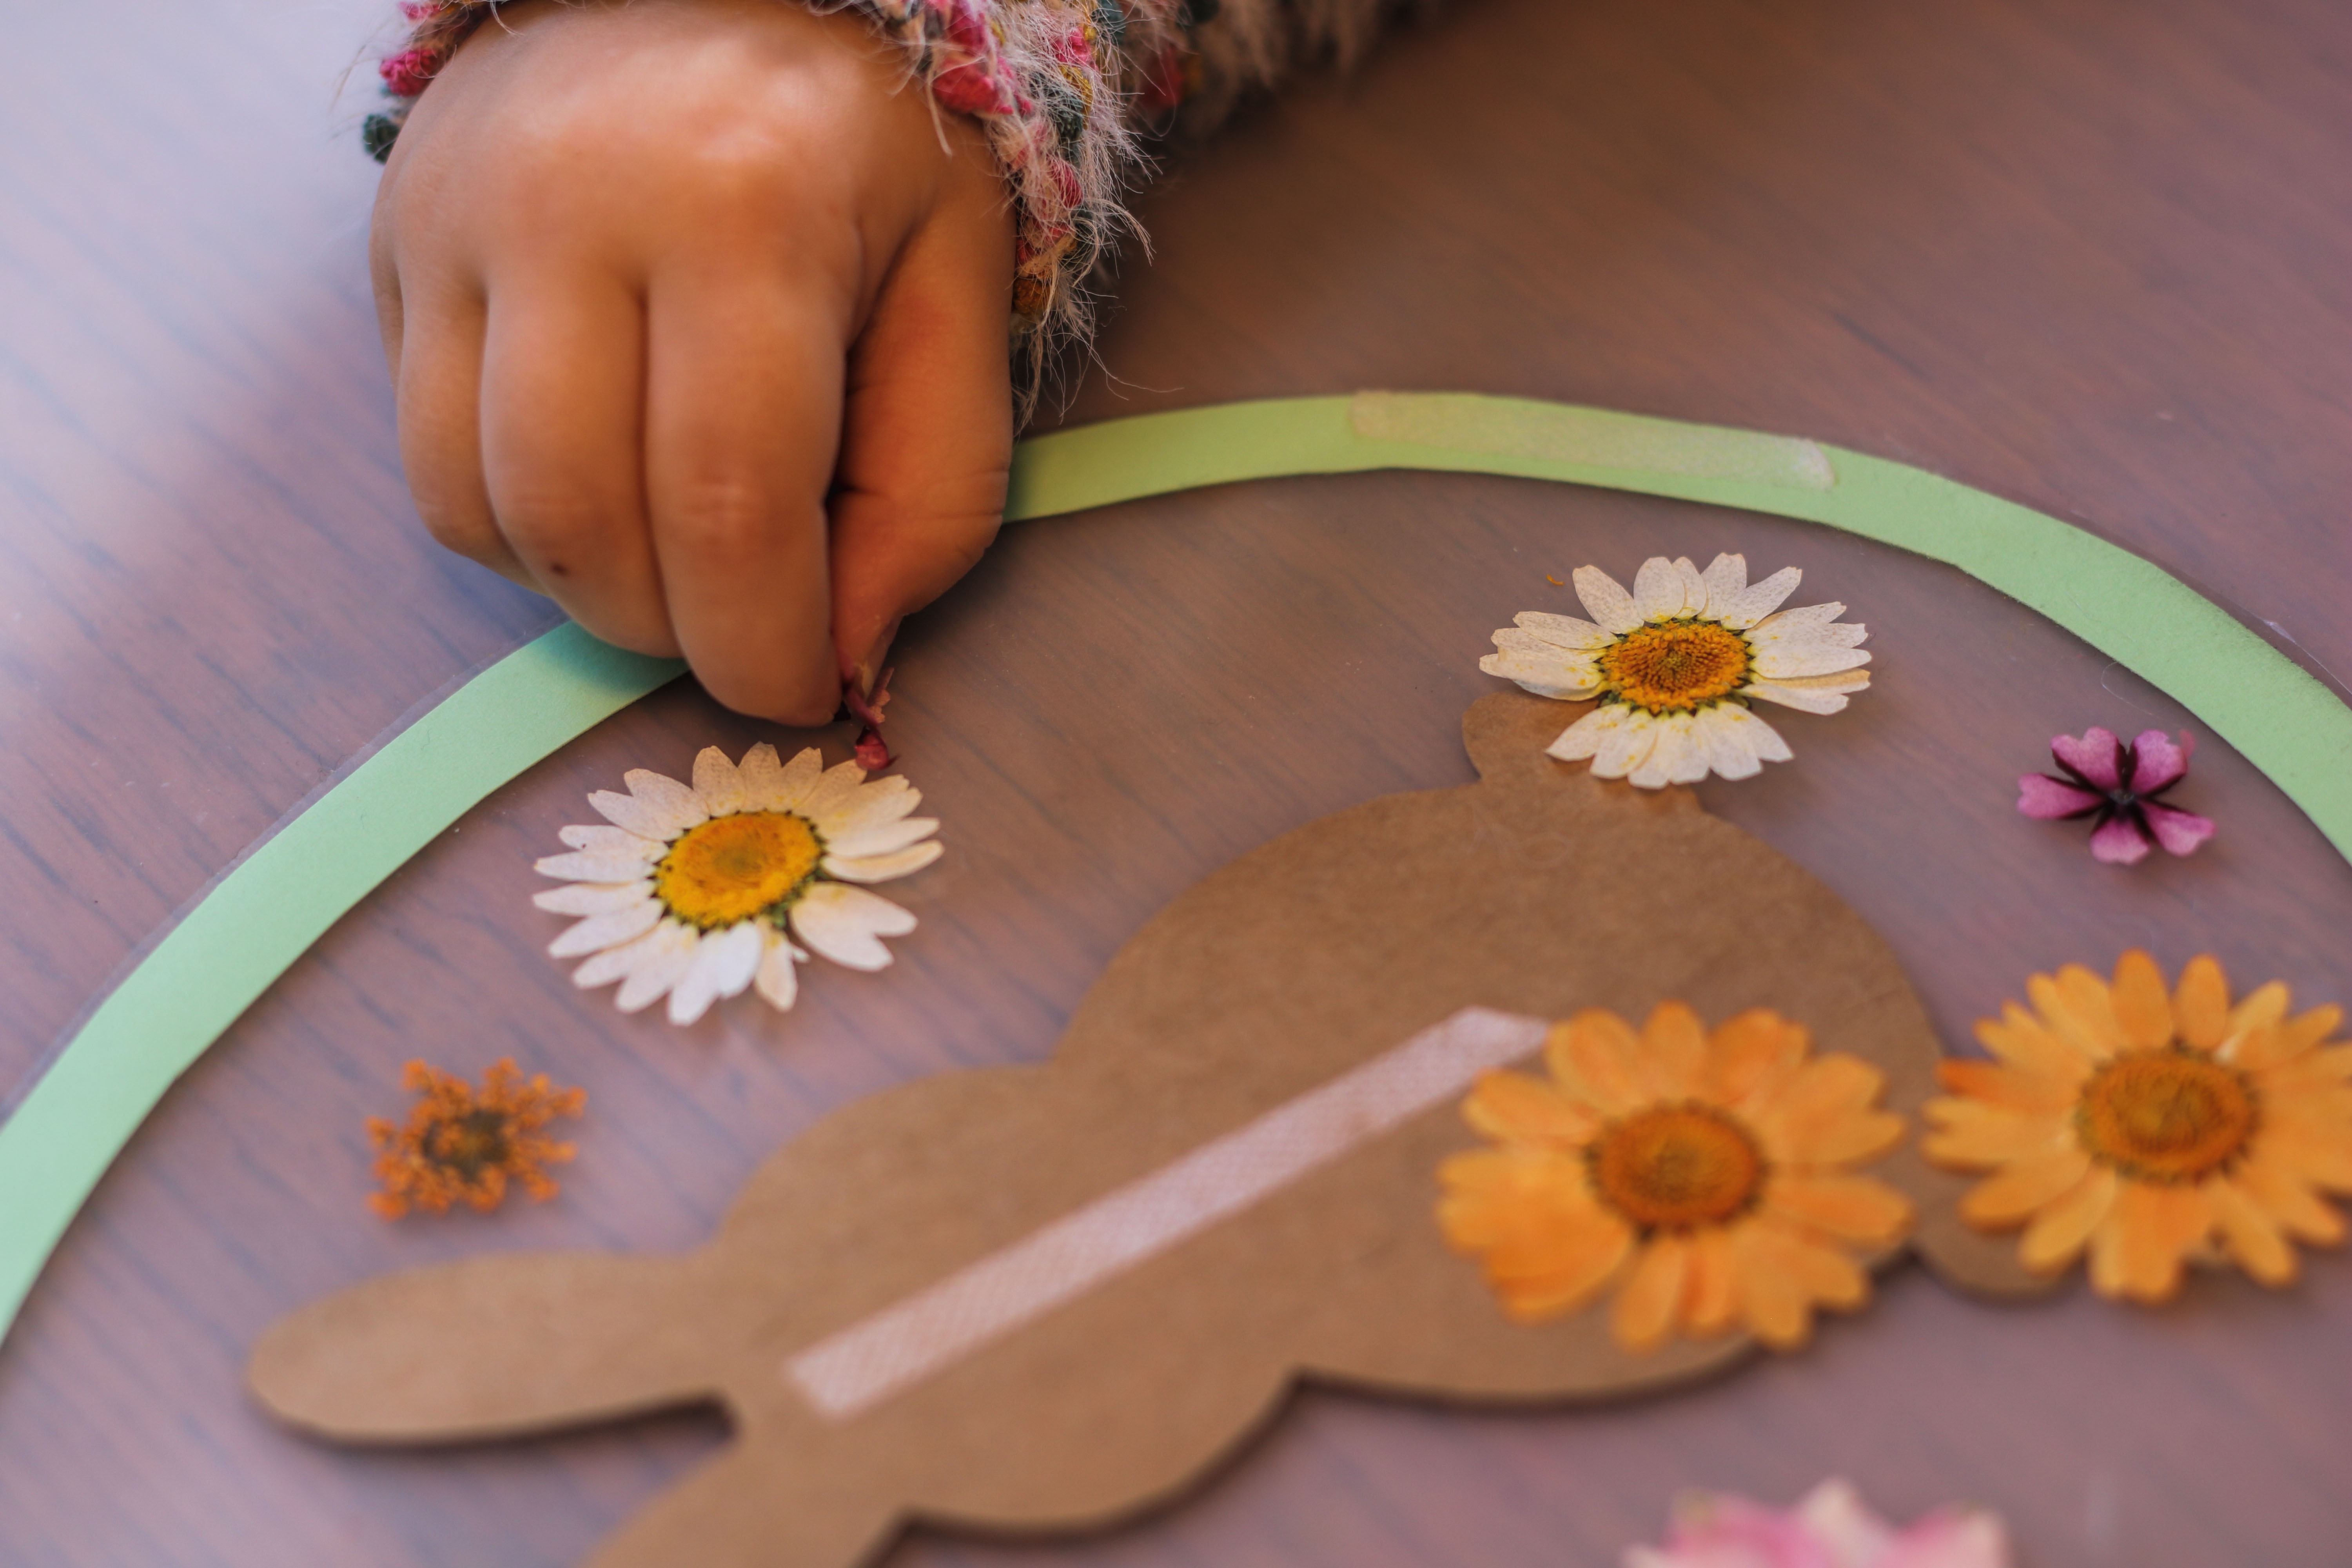
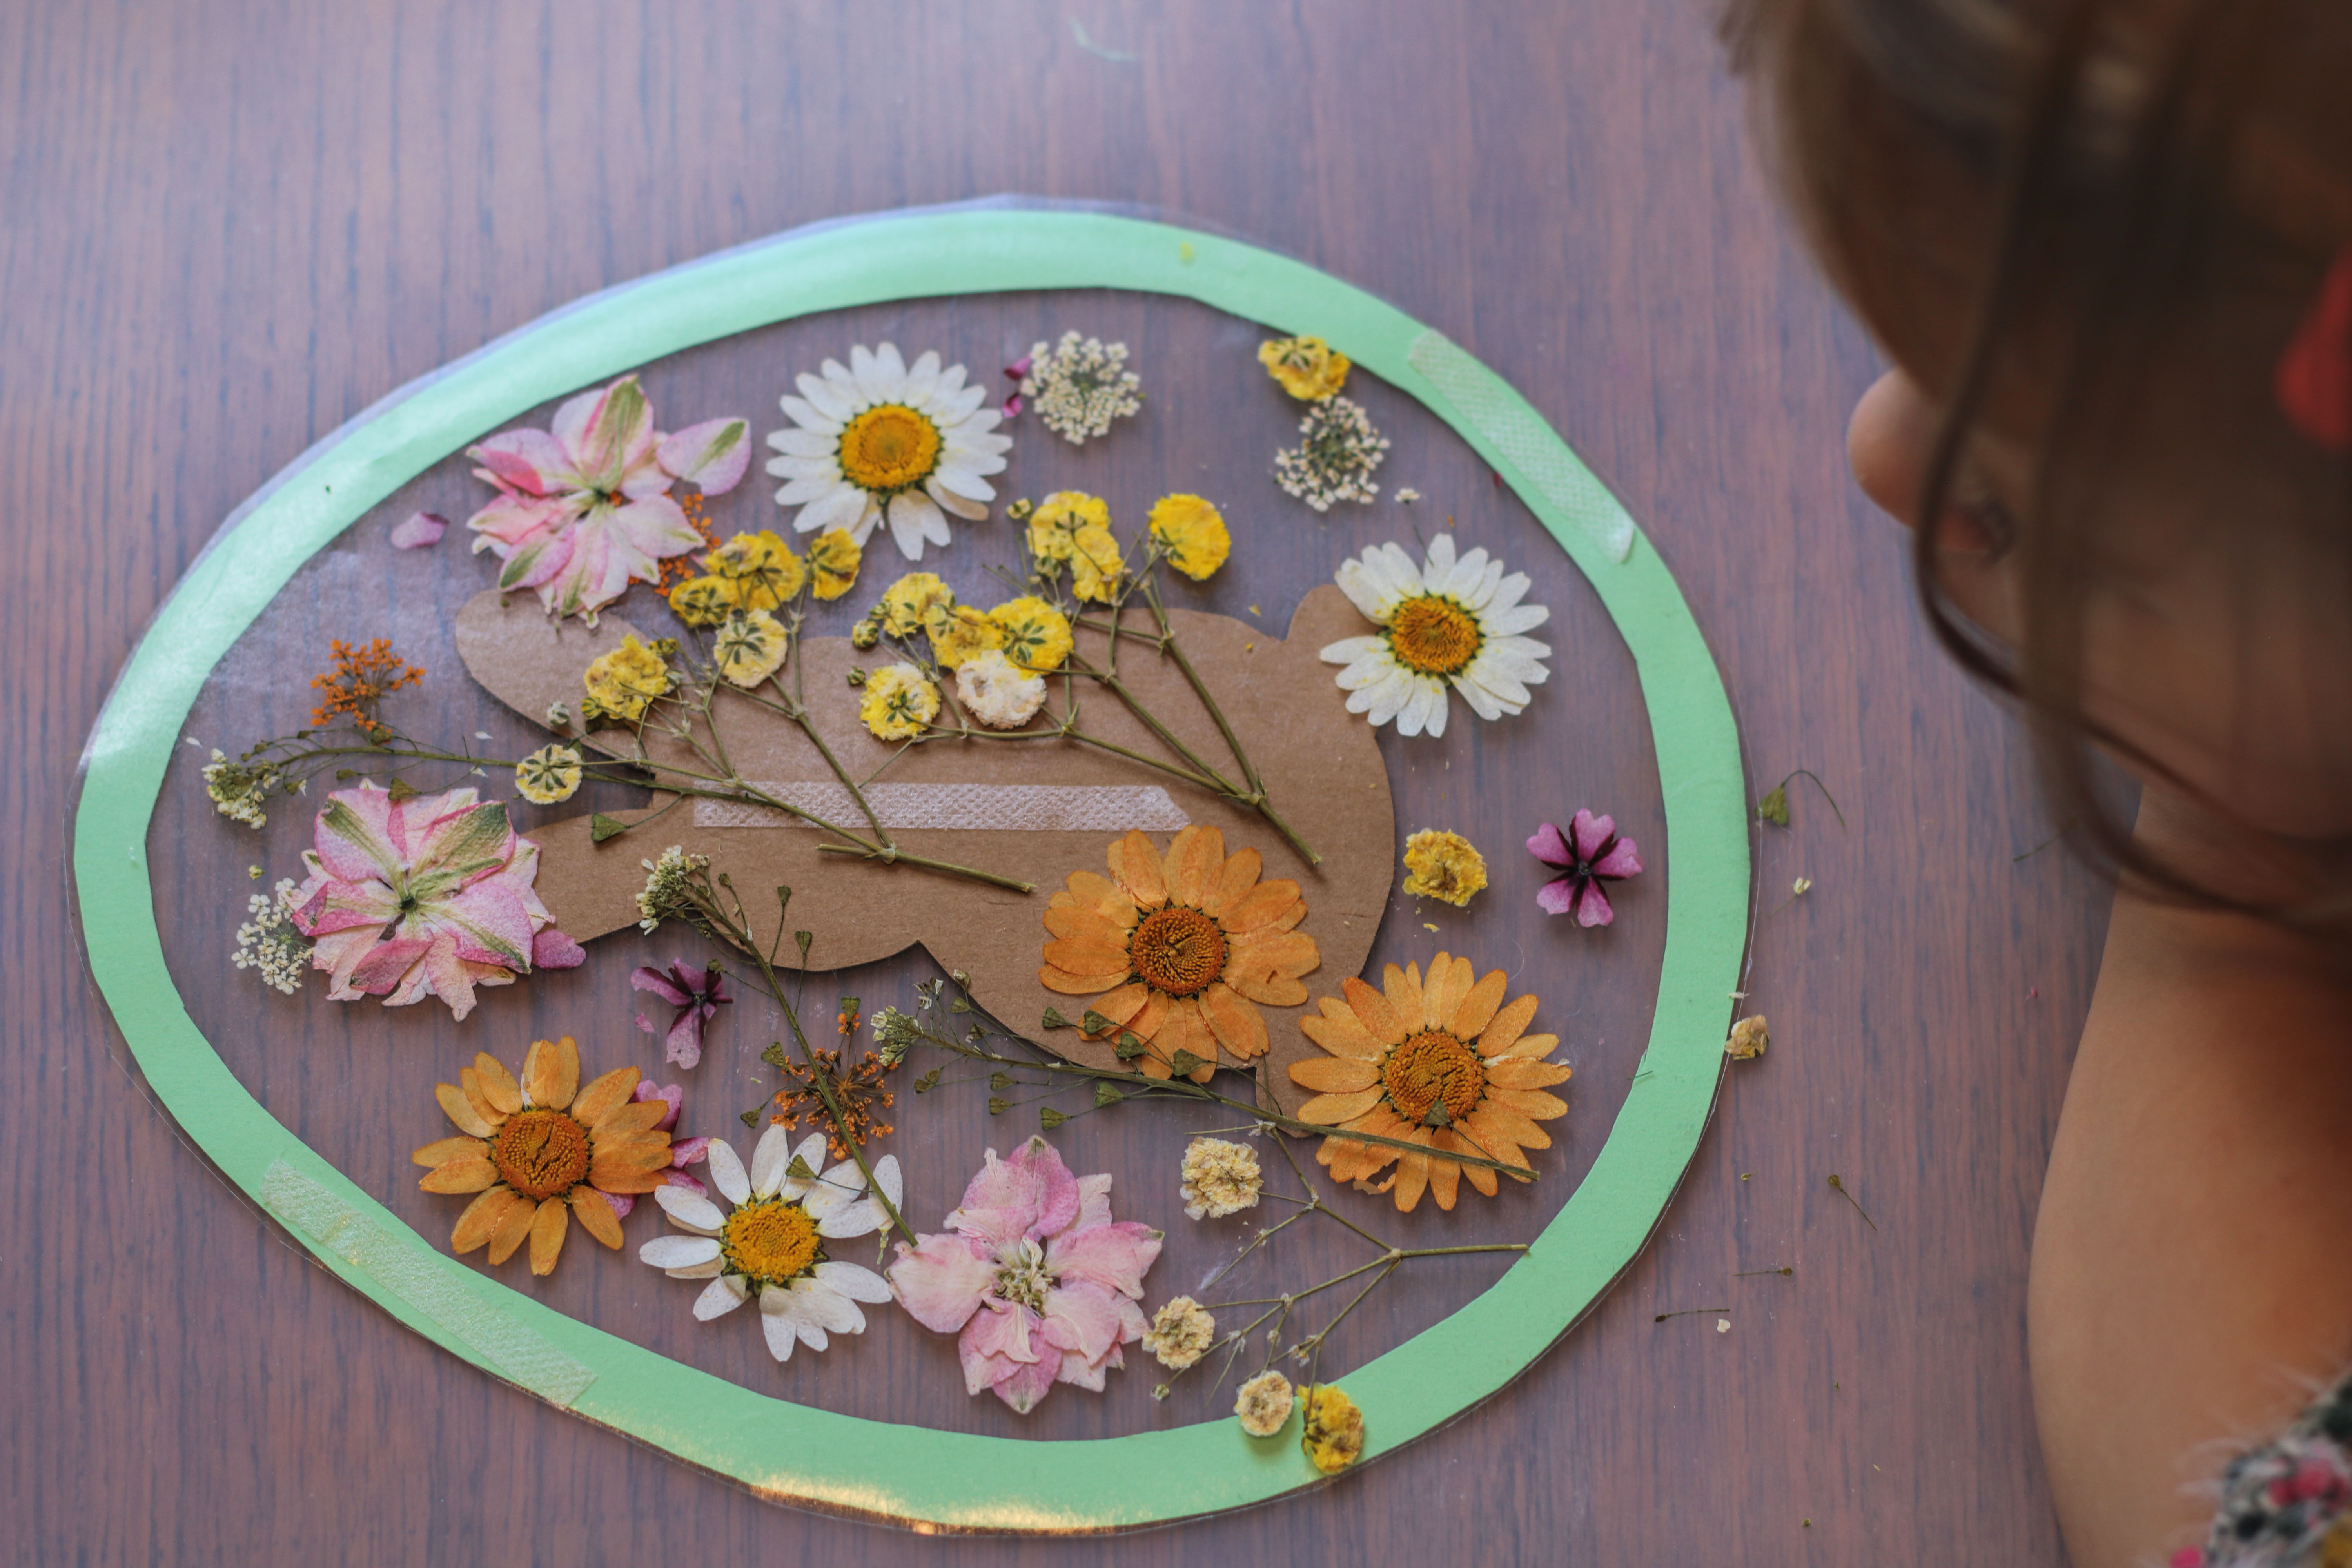
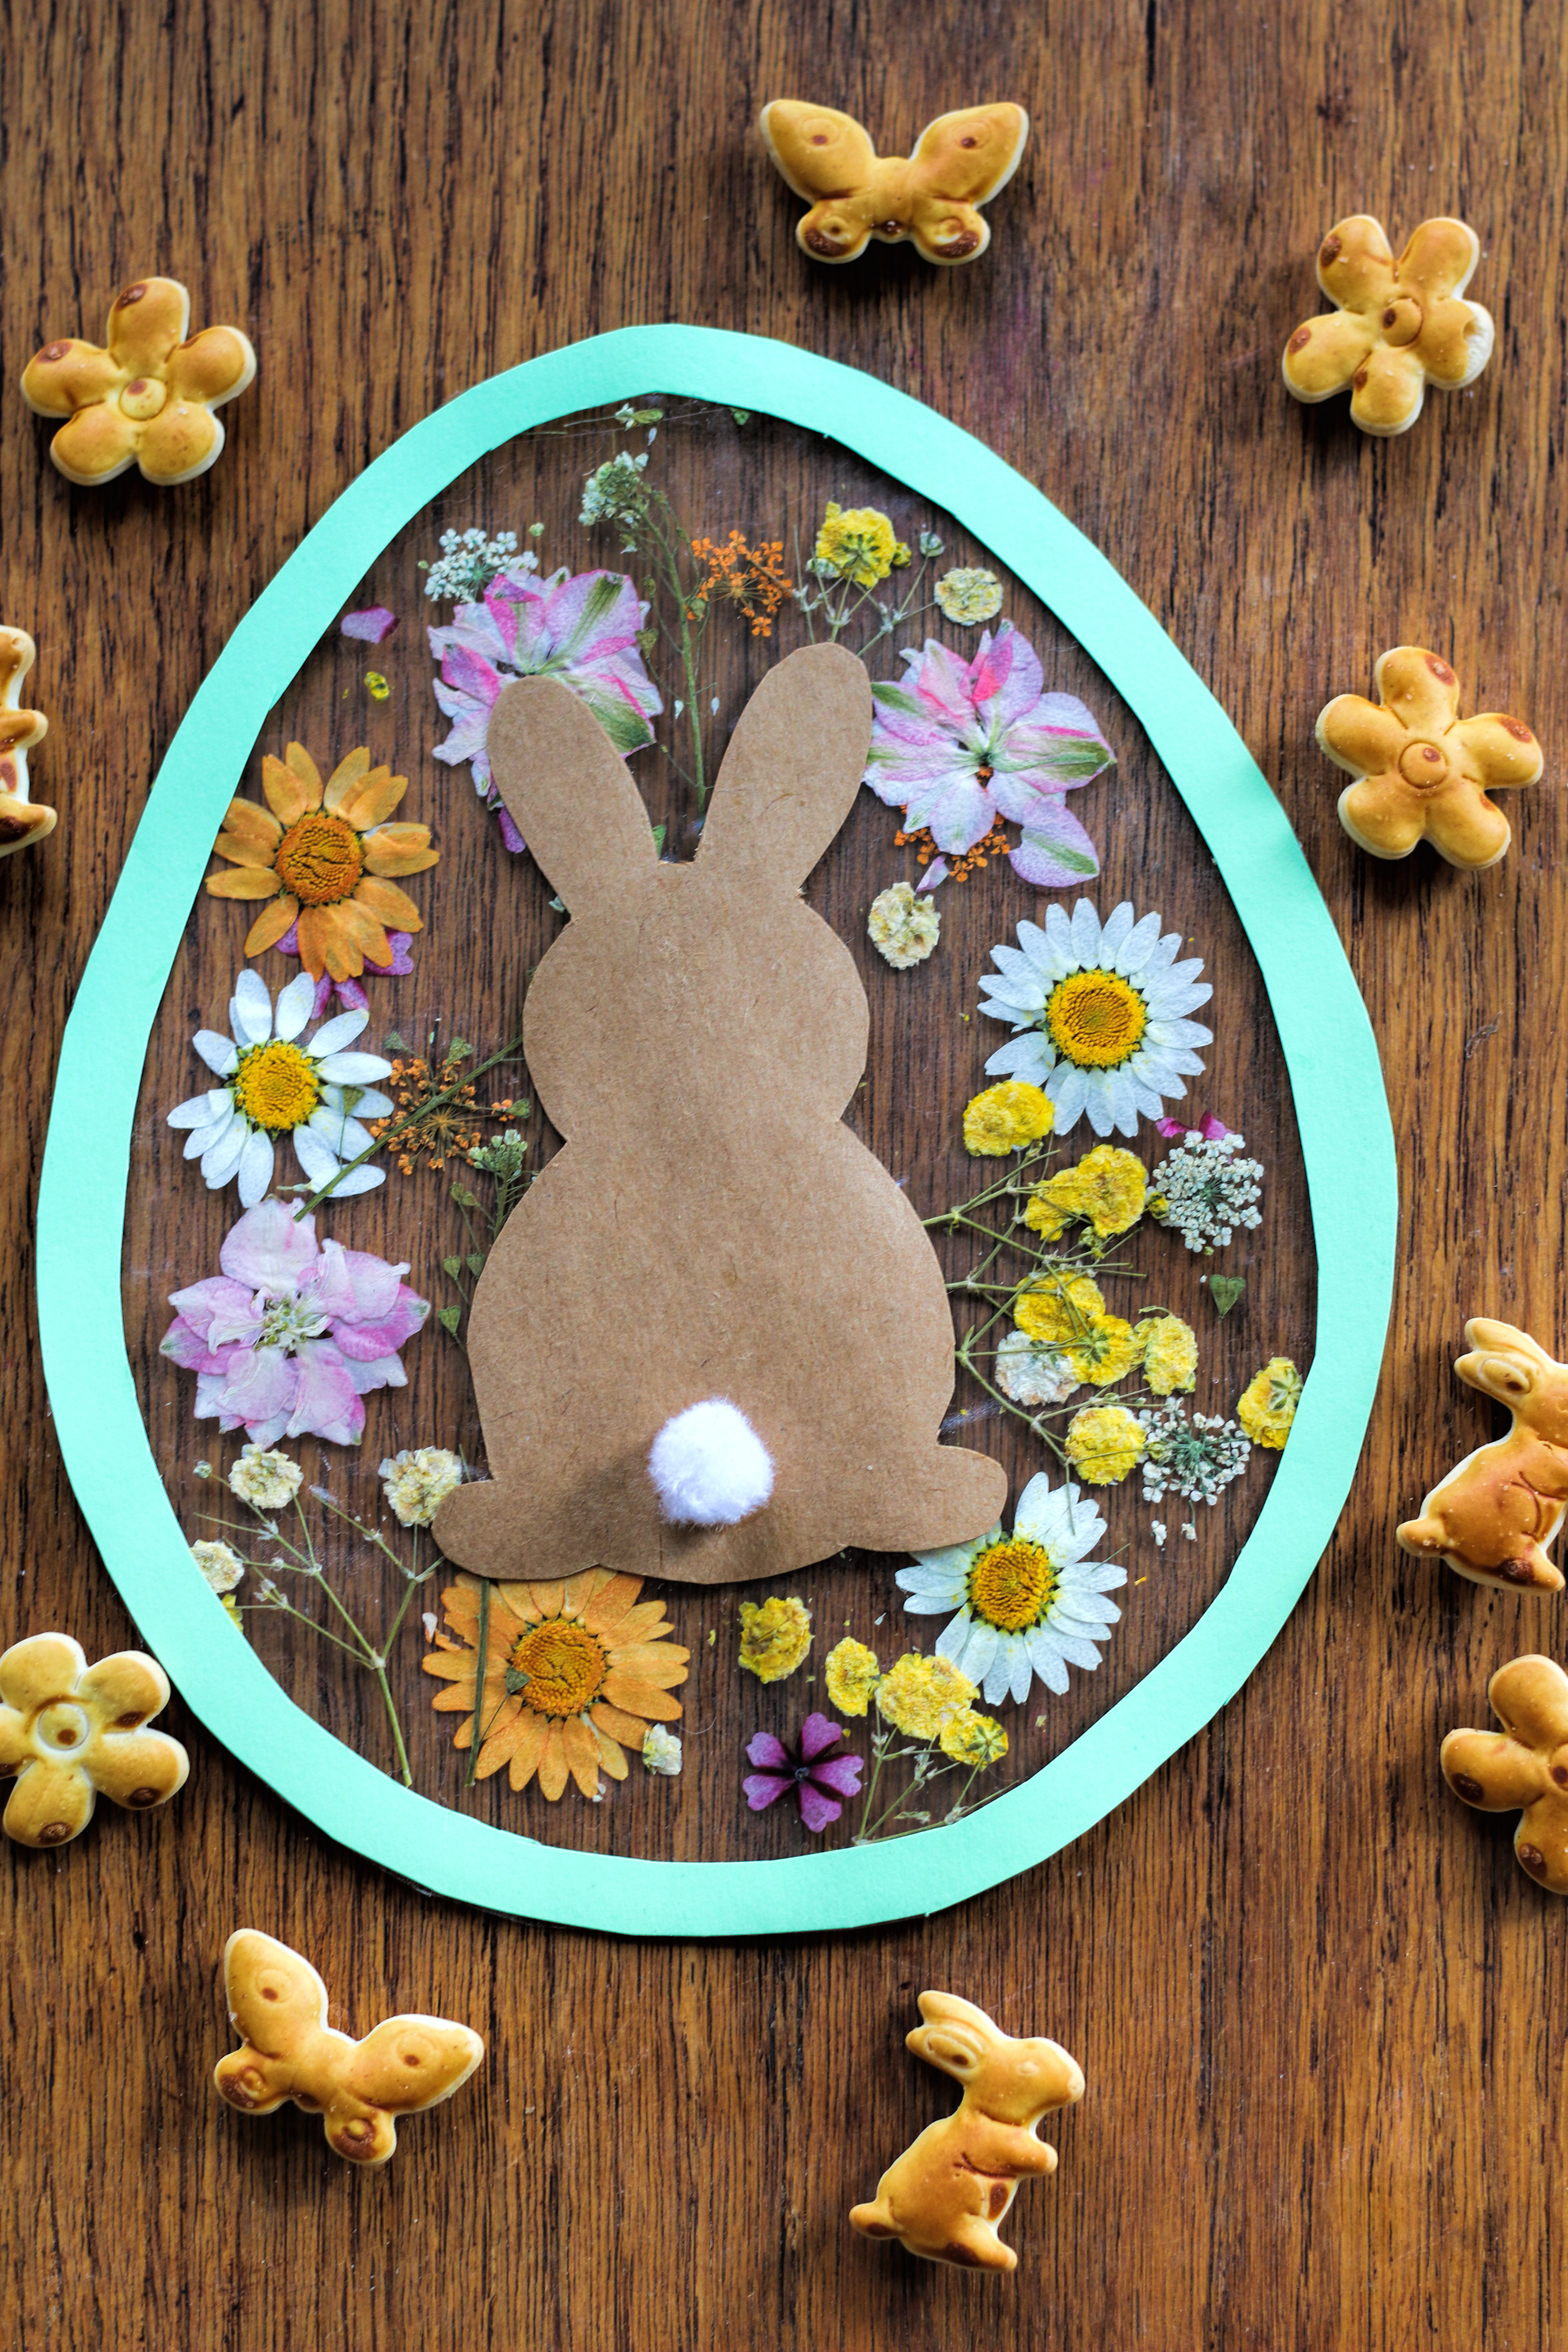
5. Alternative with dried flowers:
For the Easter bunny egg, we used dried flowers instead of transparent paper. To do this, the cut-out shapes were attached from the back with double-sided tape, which can be easily removed. The flowers could then be placed on the adhesive surface.
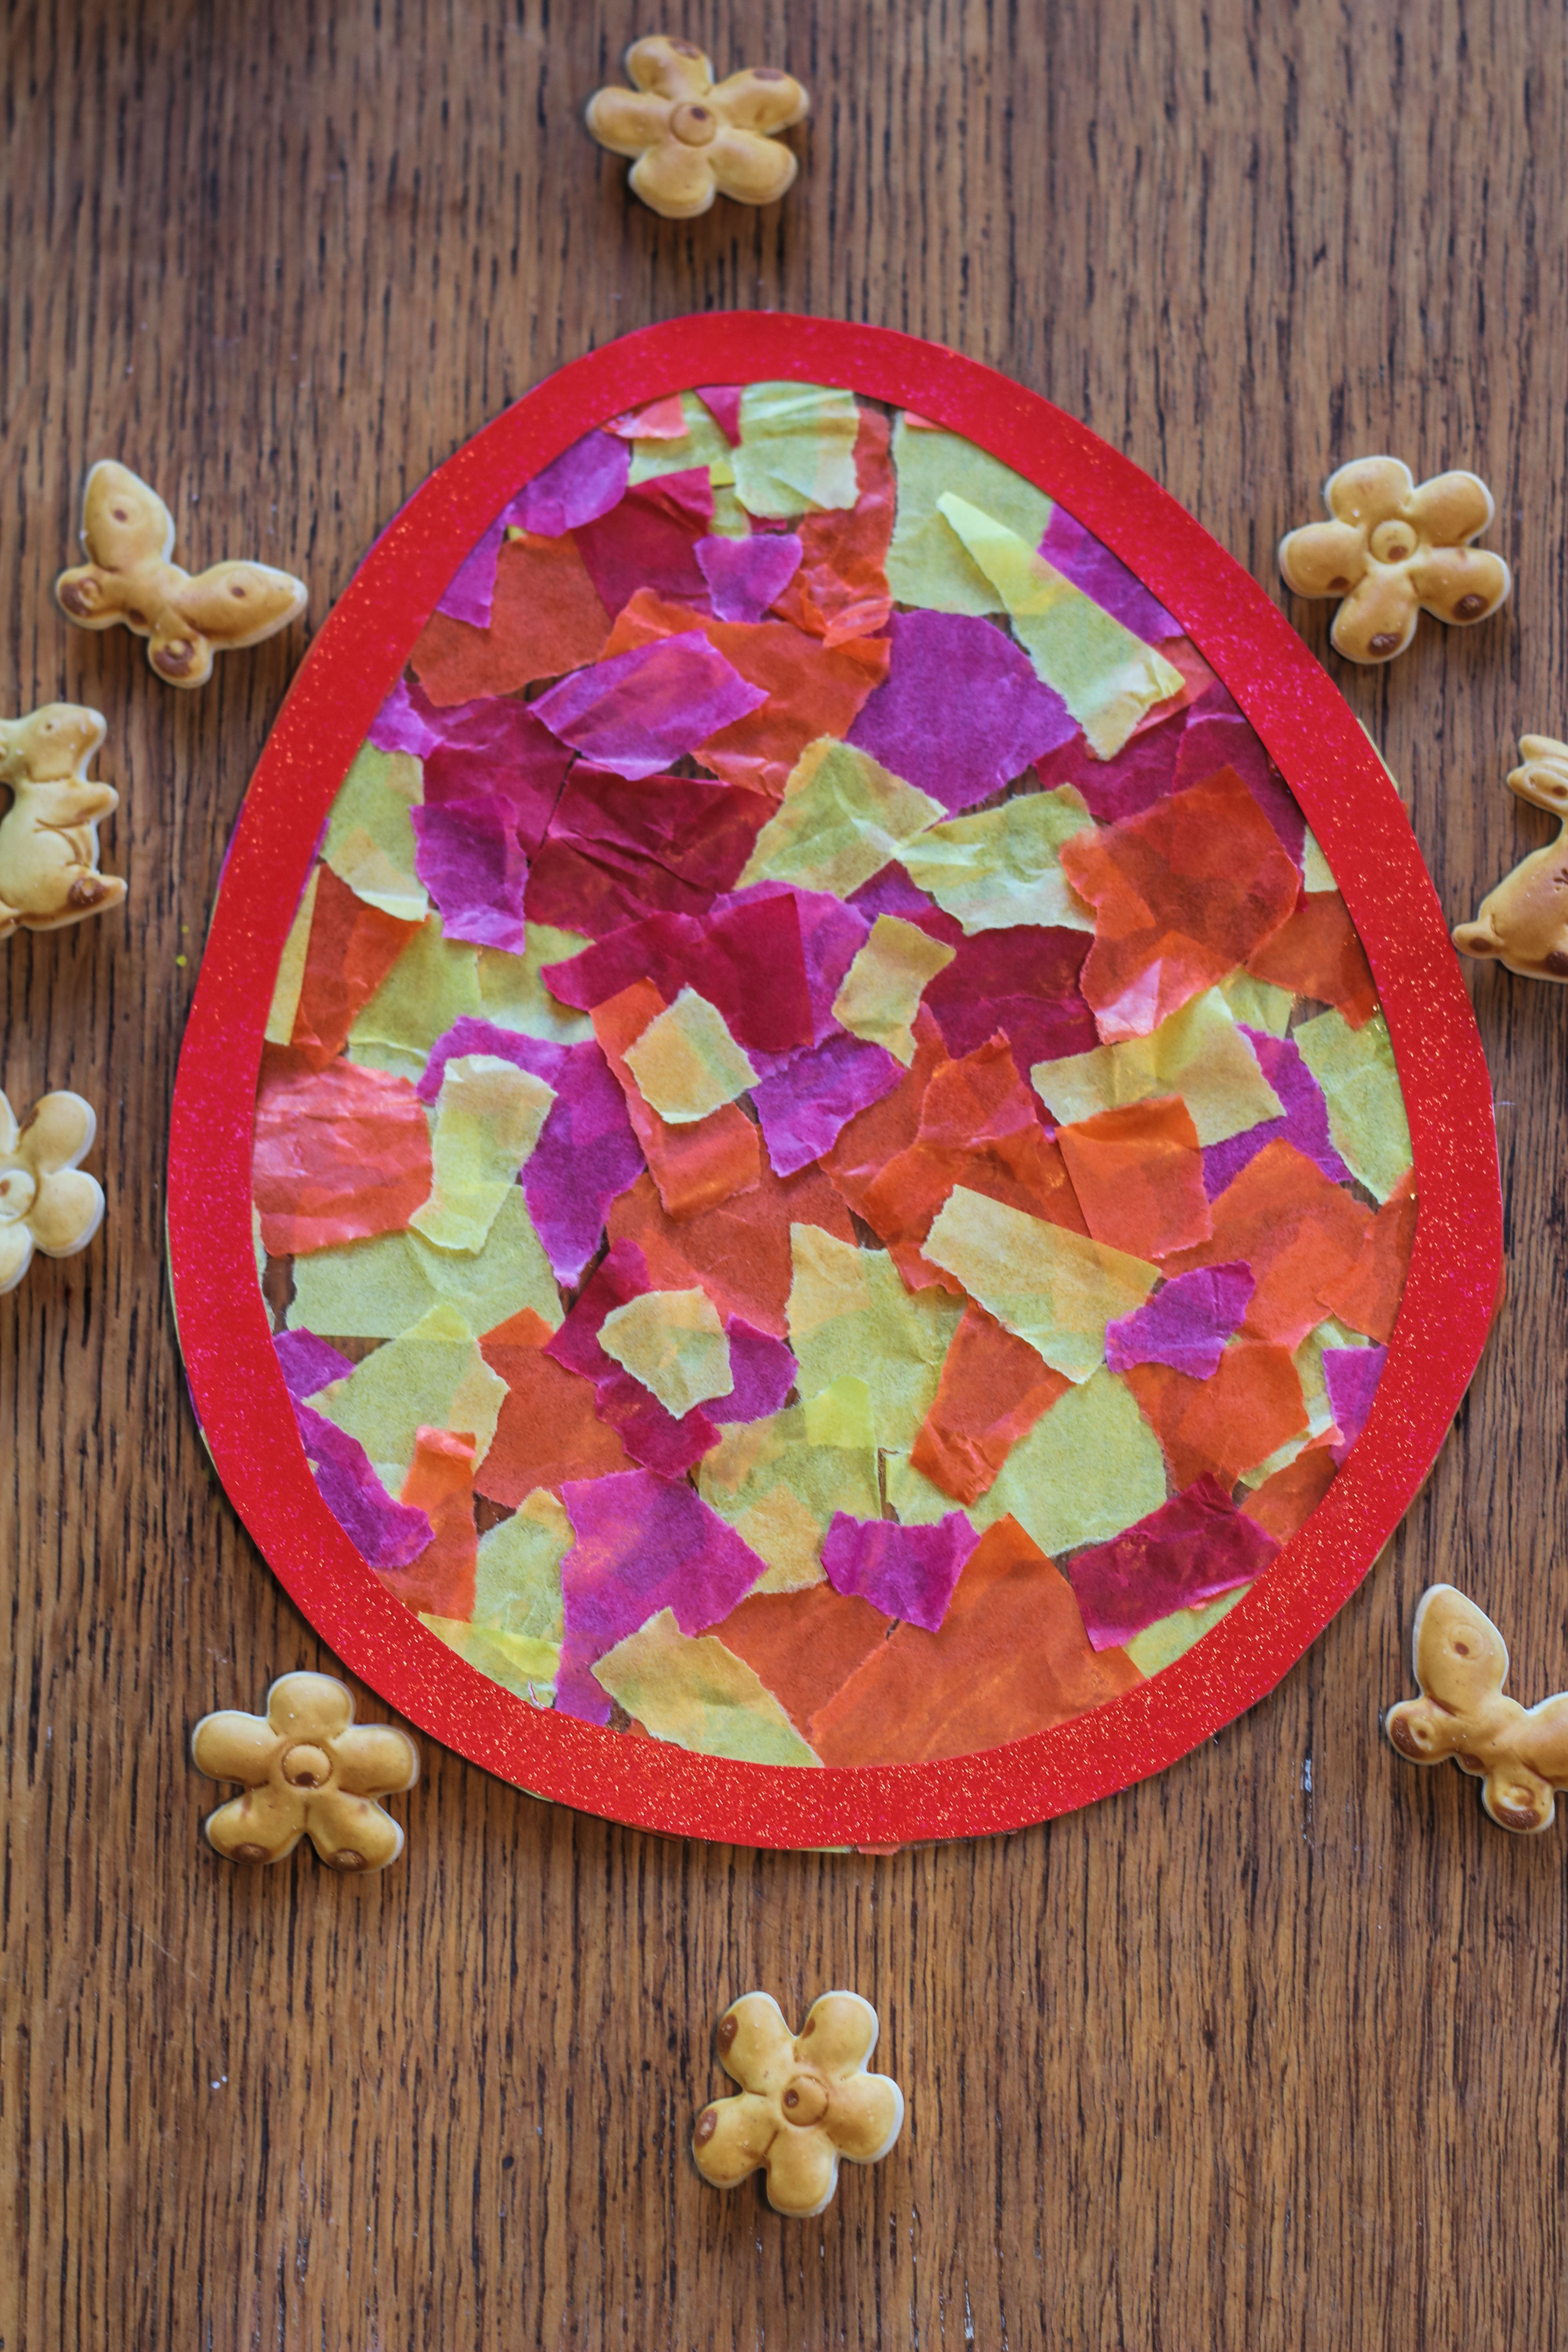
6. Attach the back or frame:
Finally, glue on the frame or the back. For the simple egg, you can then carefully trim off the excess edge.
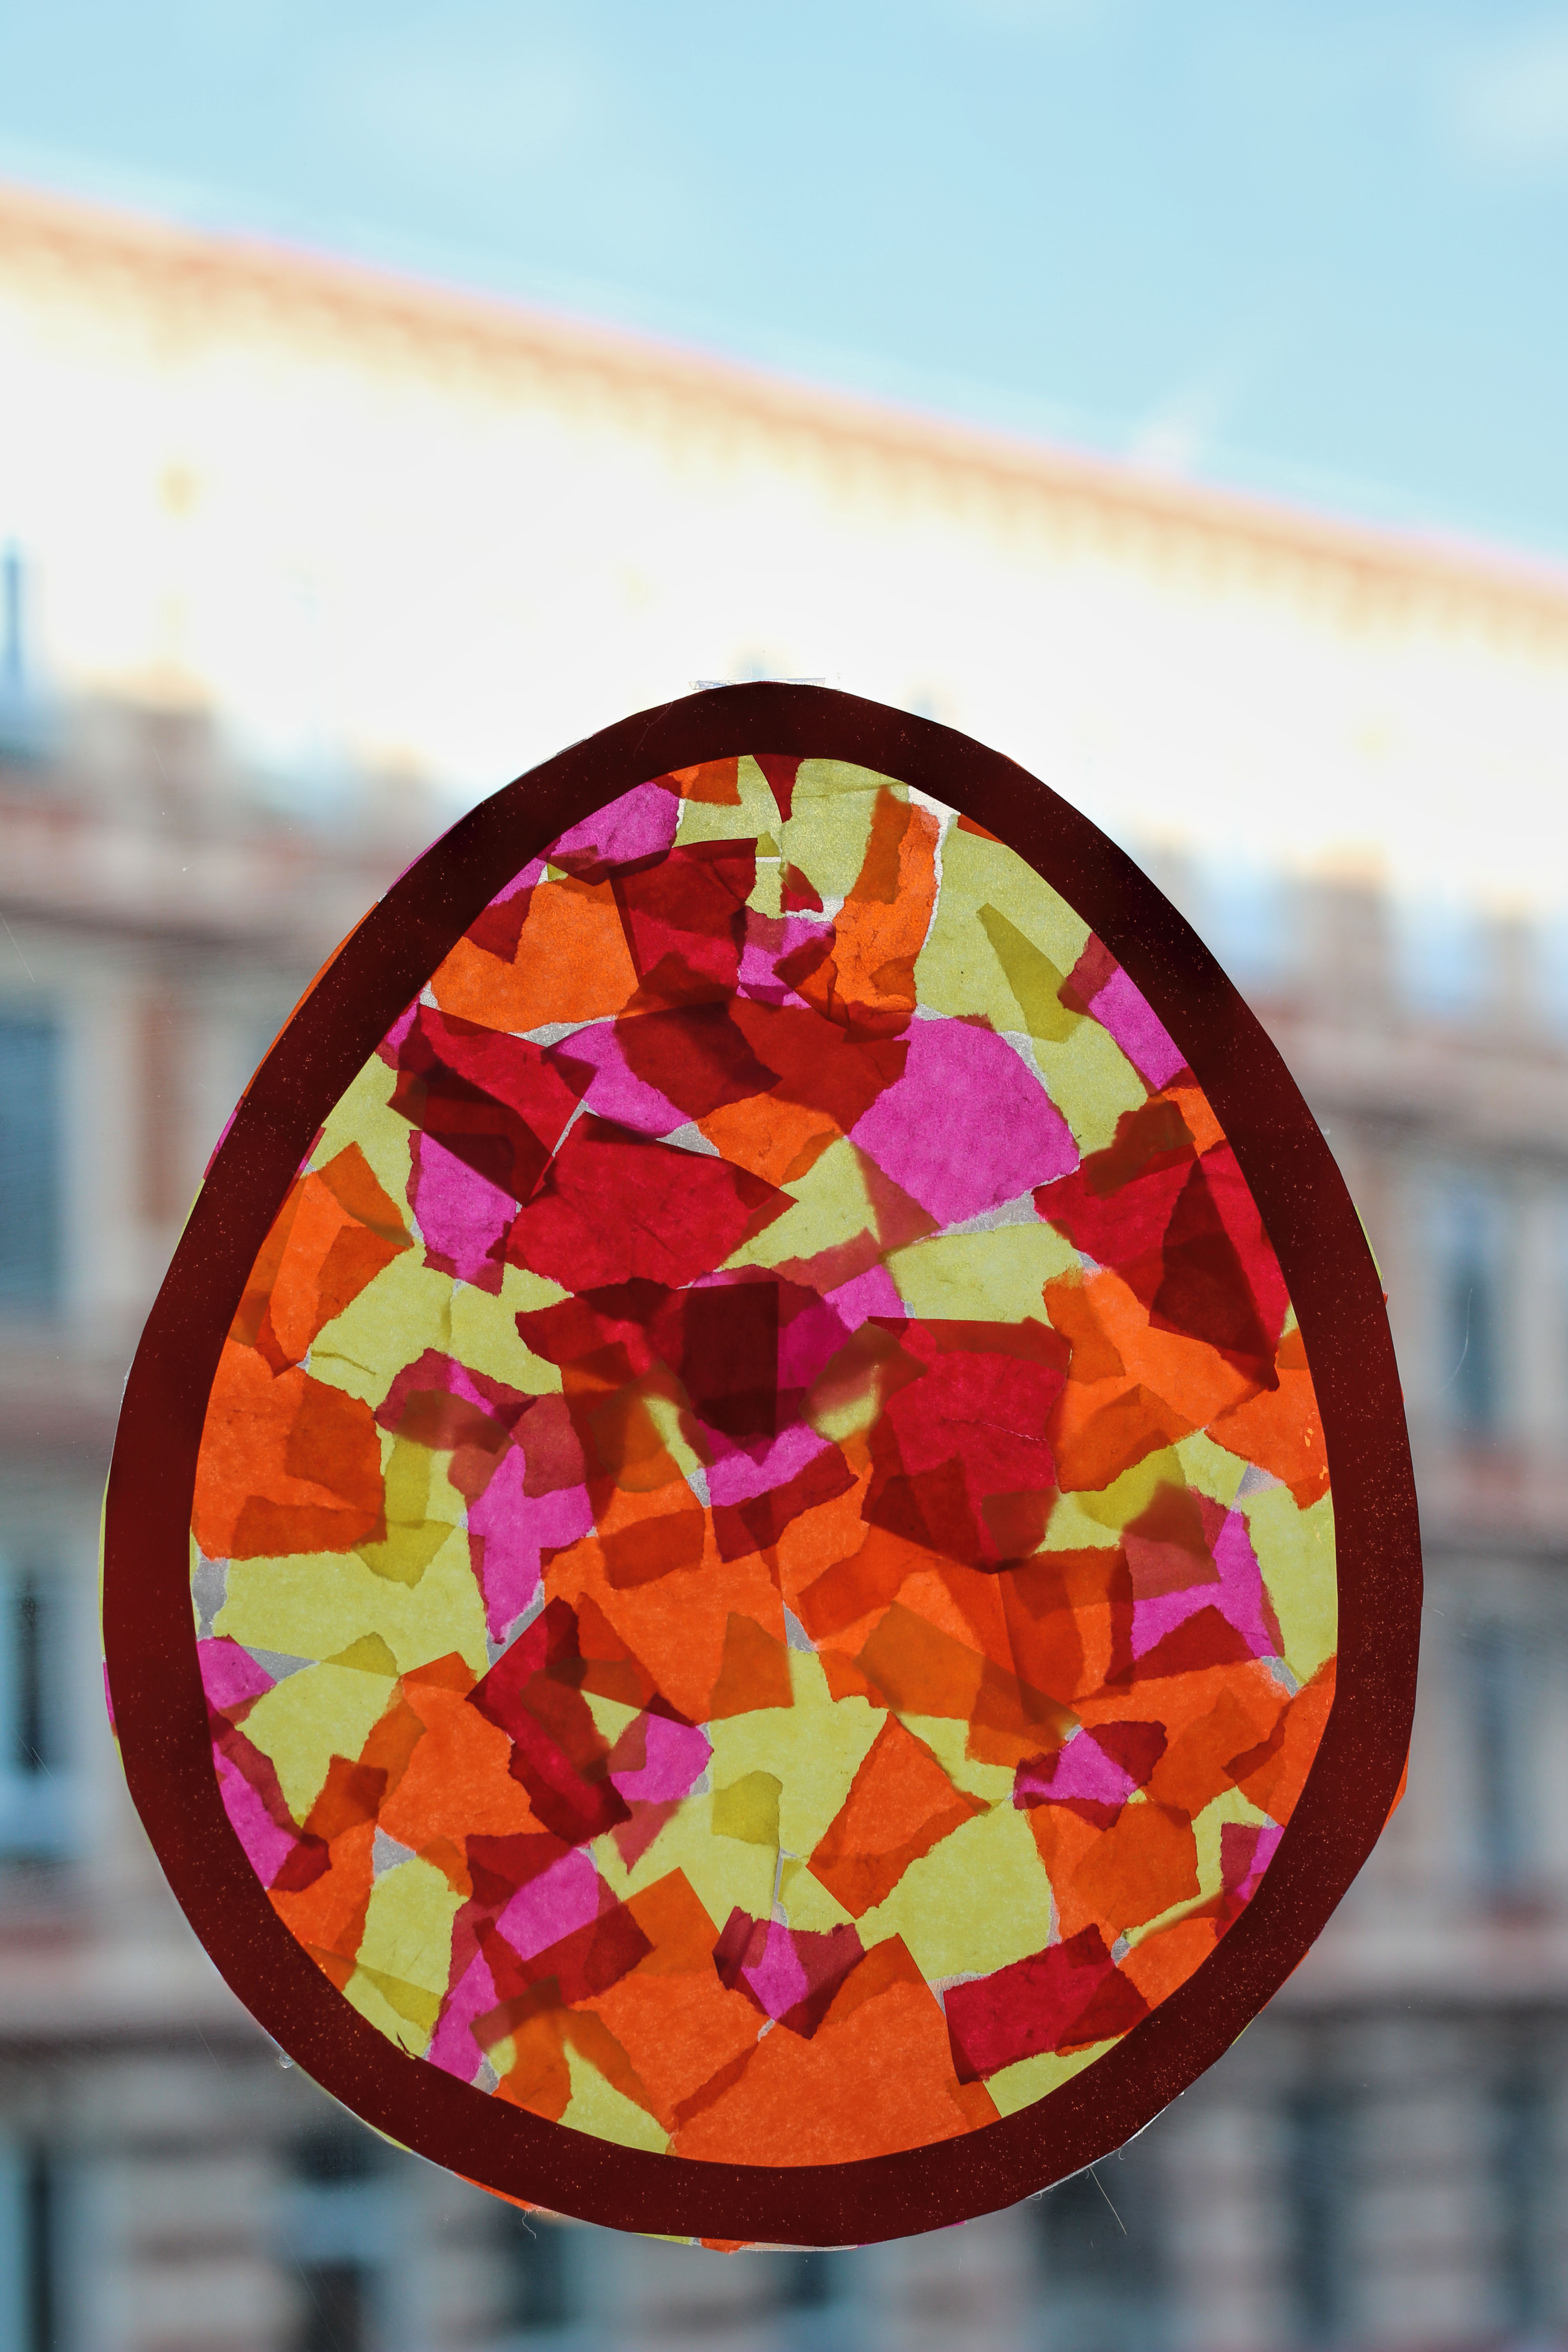
7. Stick it to the window:
The finished window decoration can now be stuck directly to the window. In the light, the colors shine especially beautifully, and the textures really stand out.
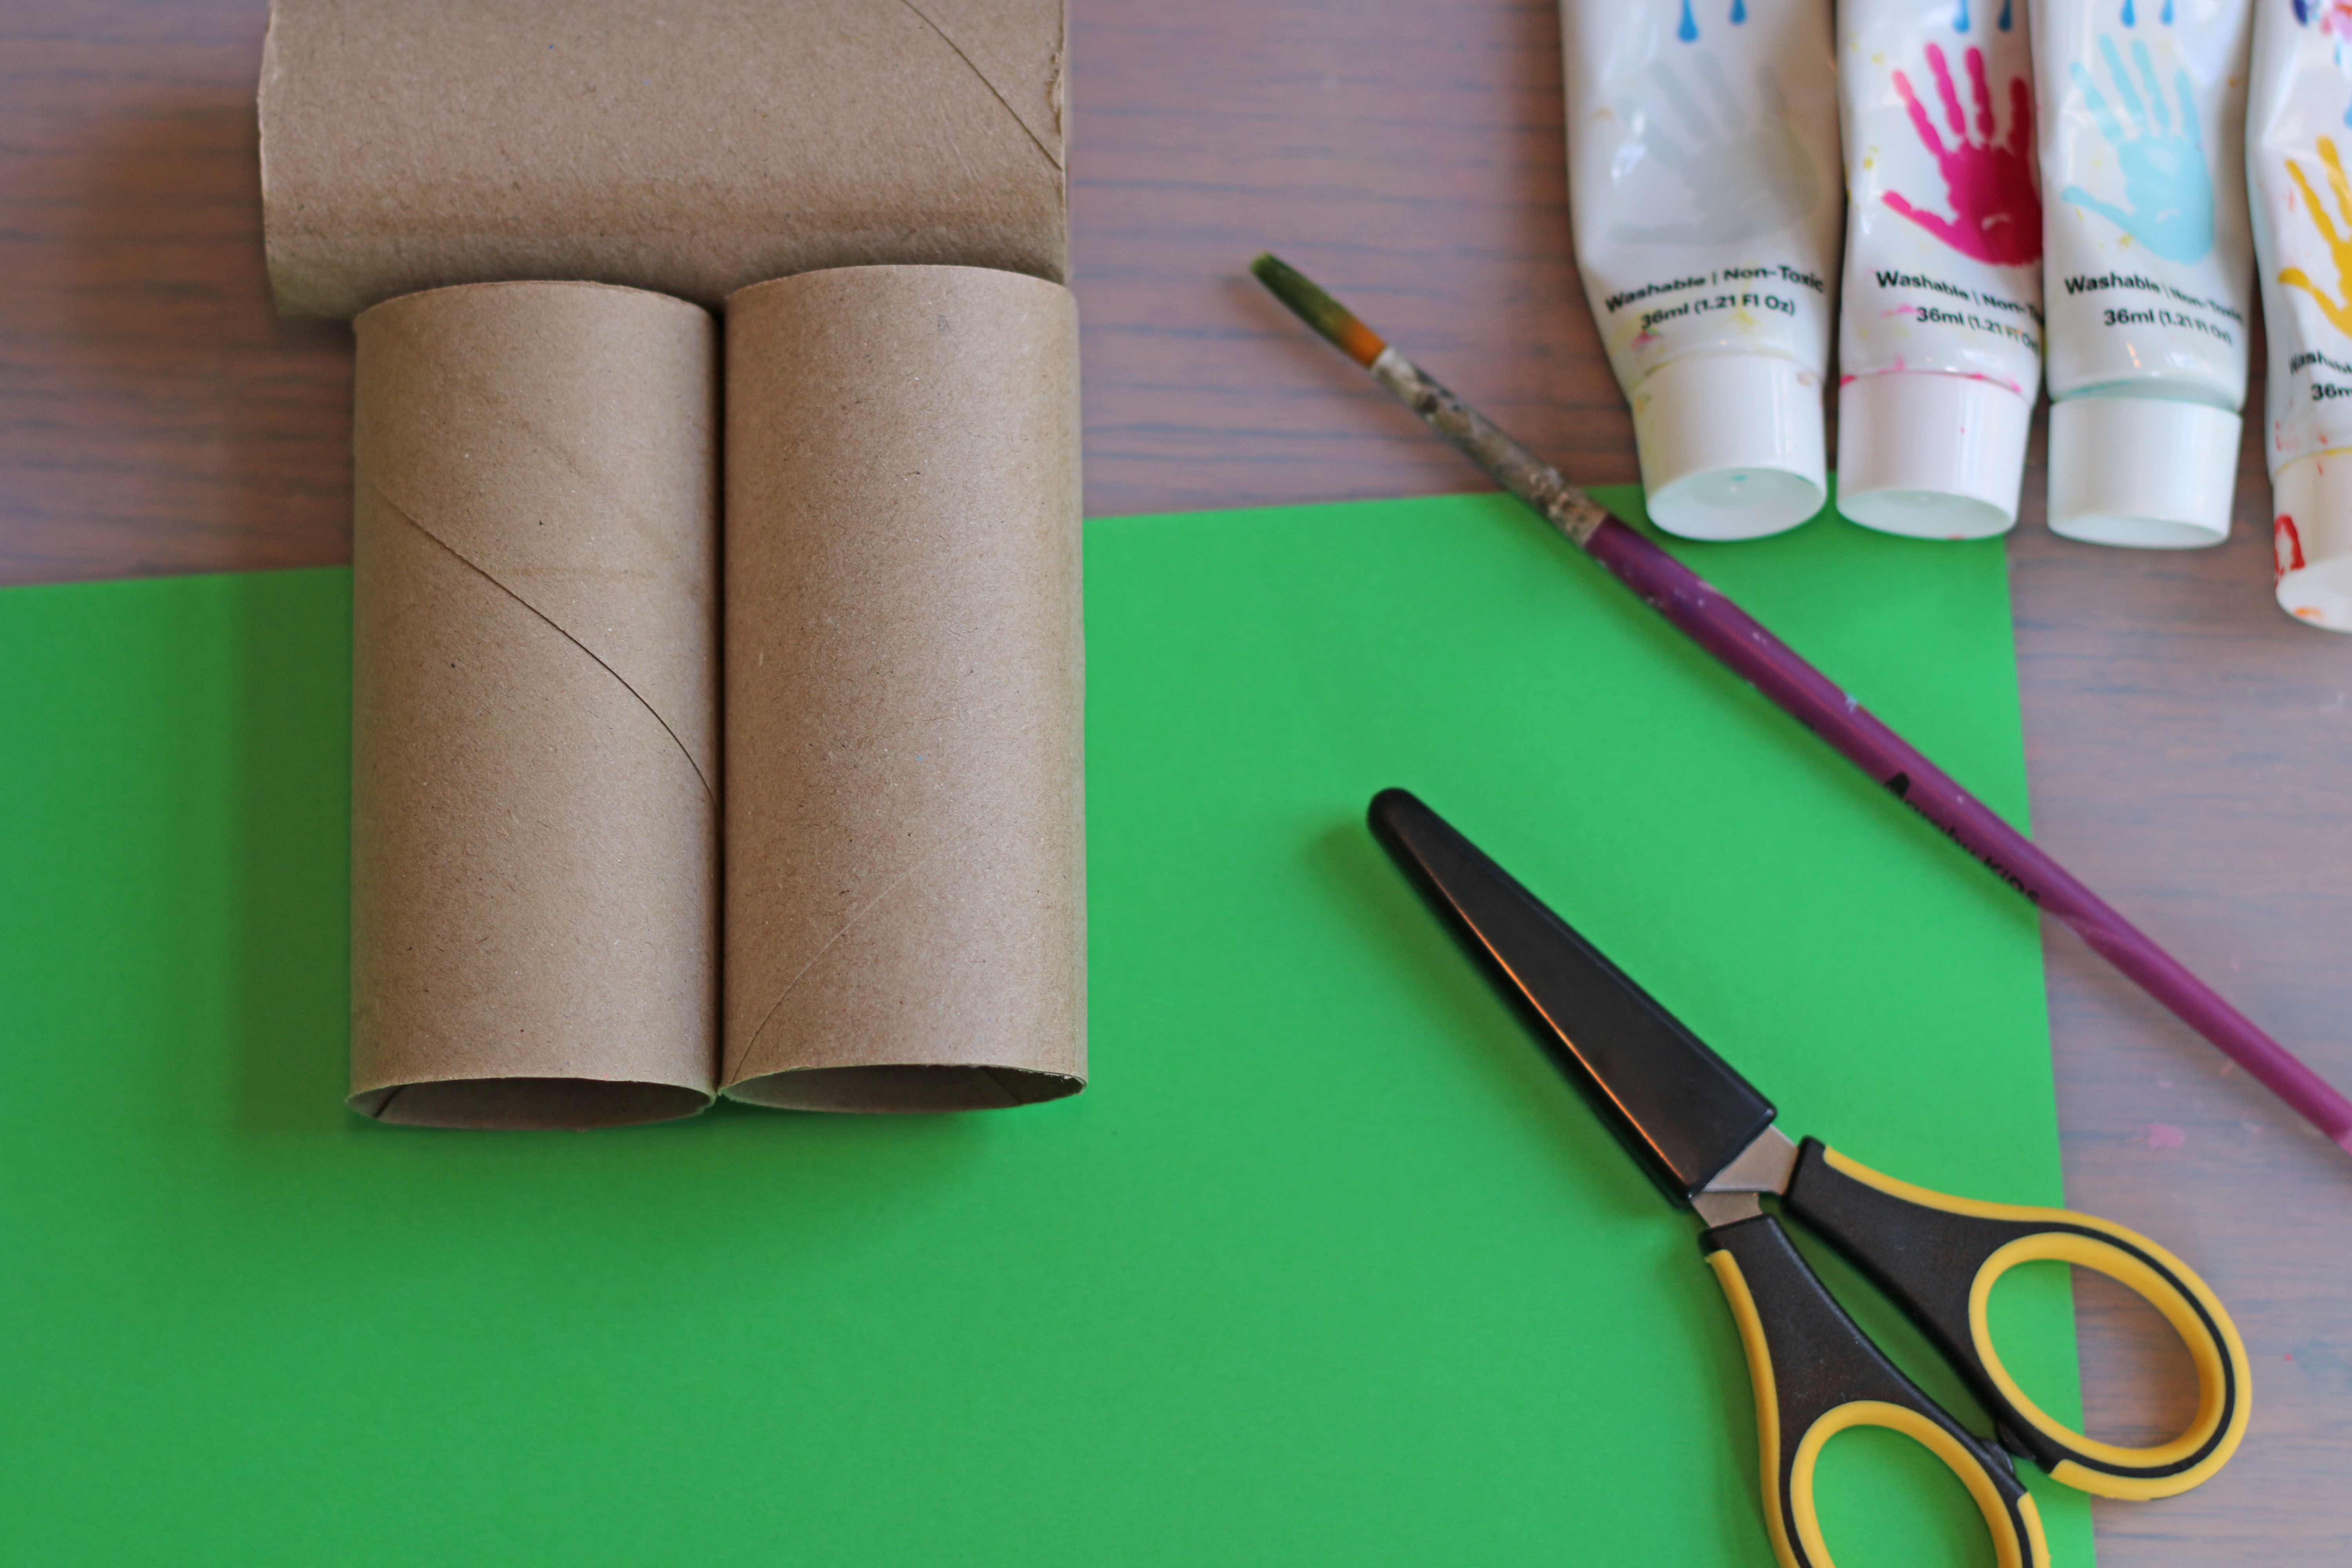
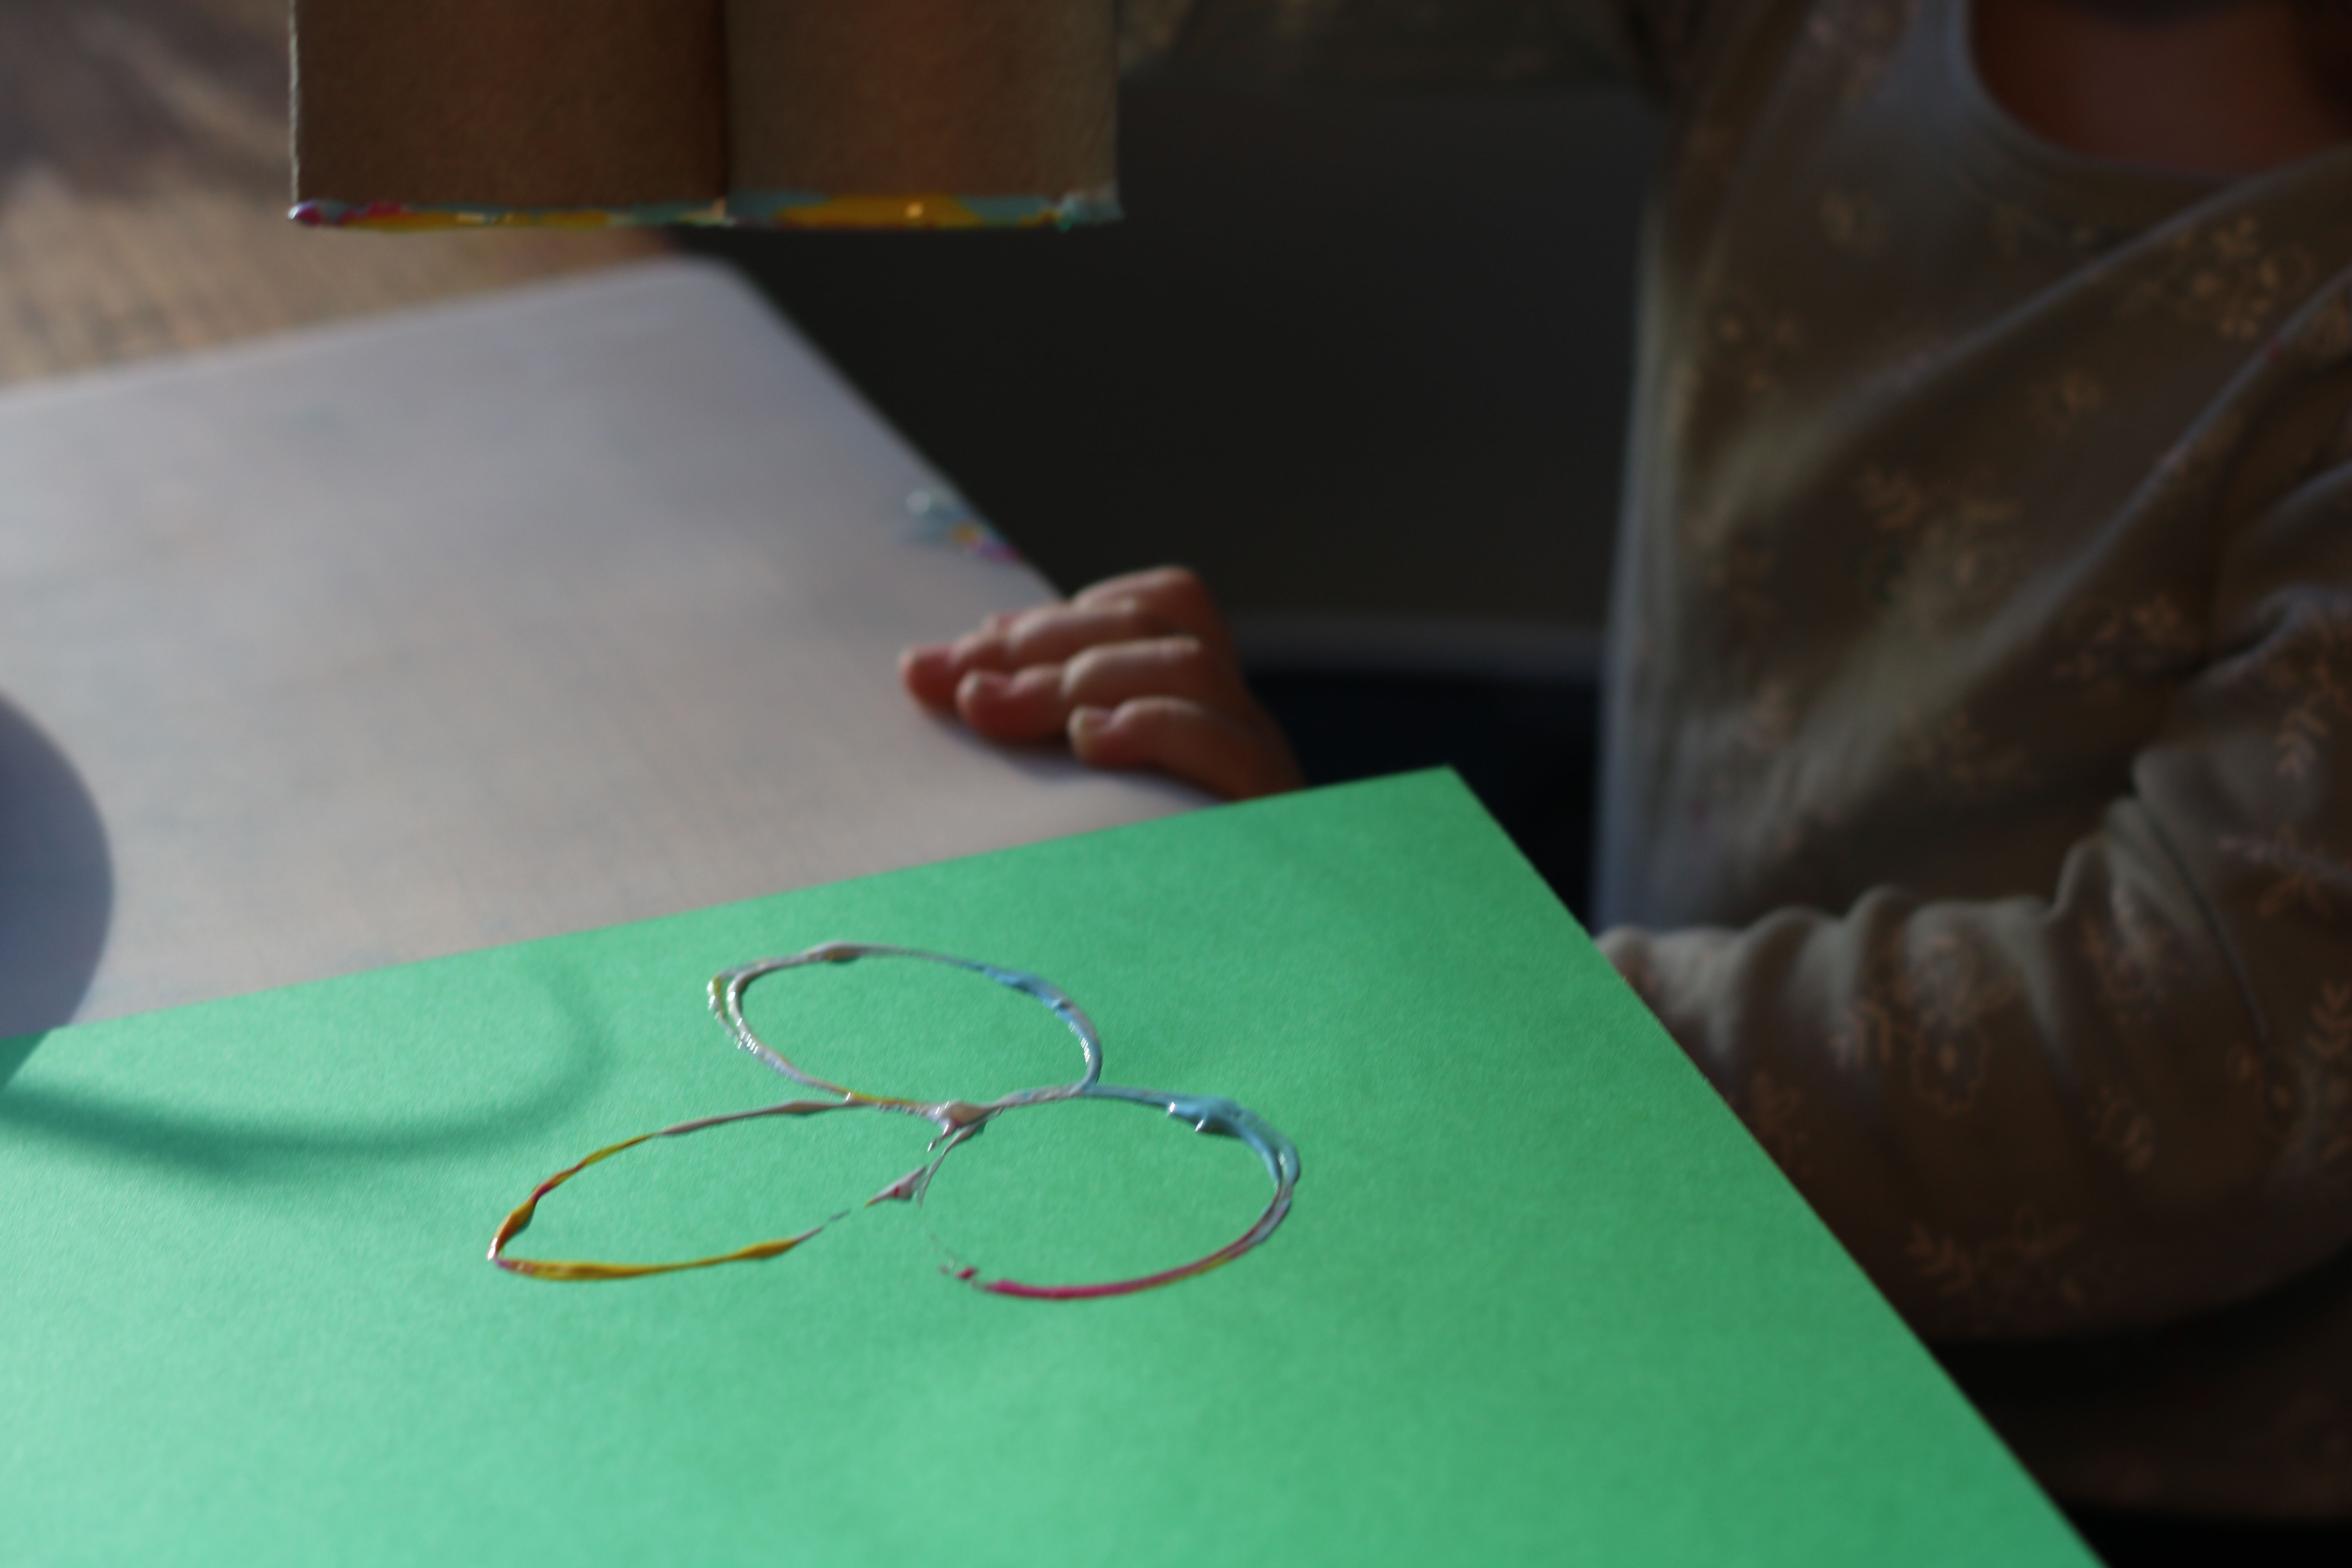
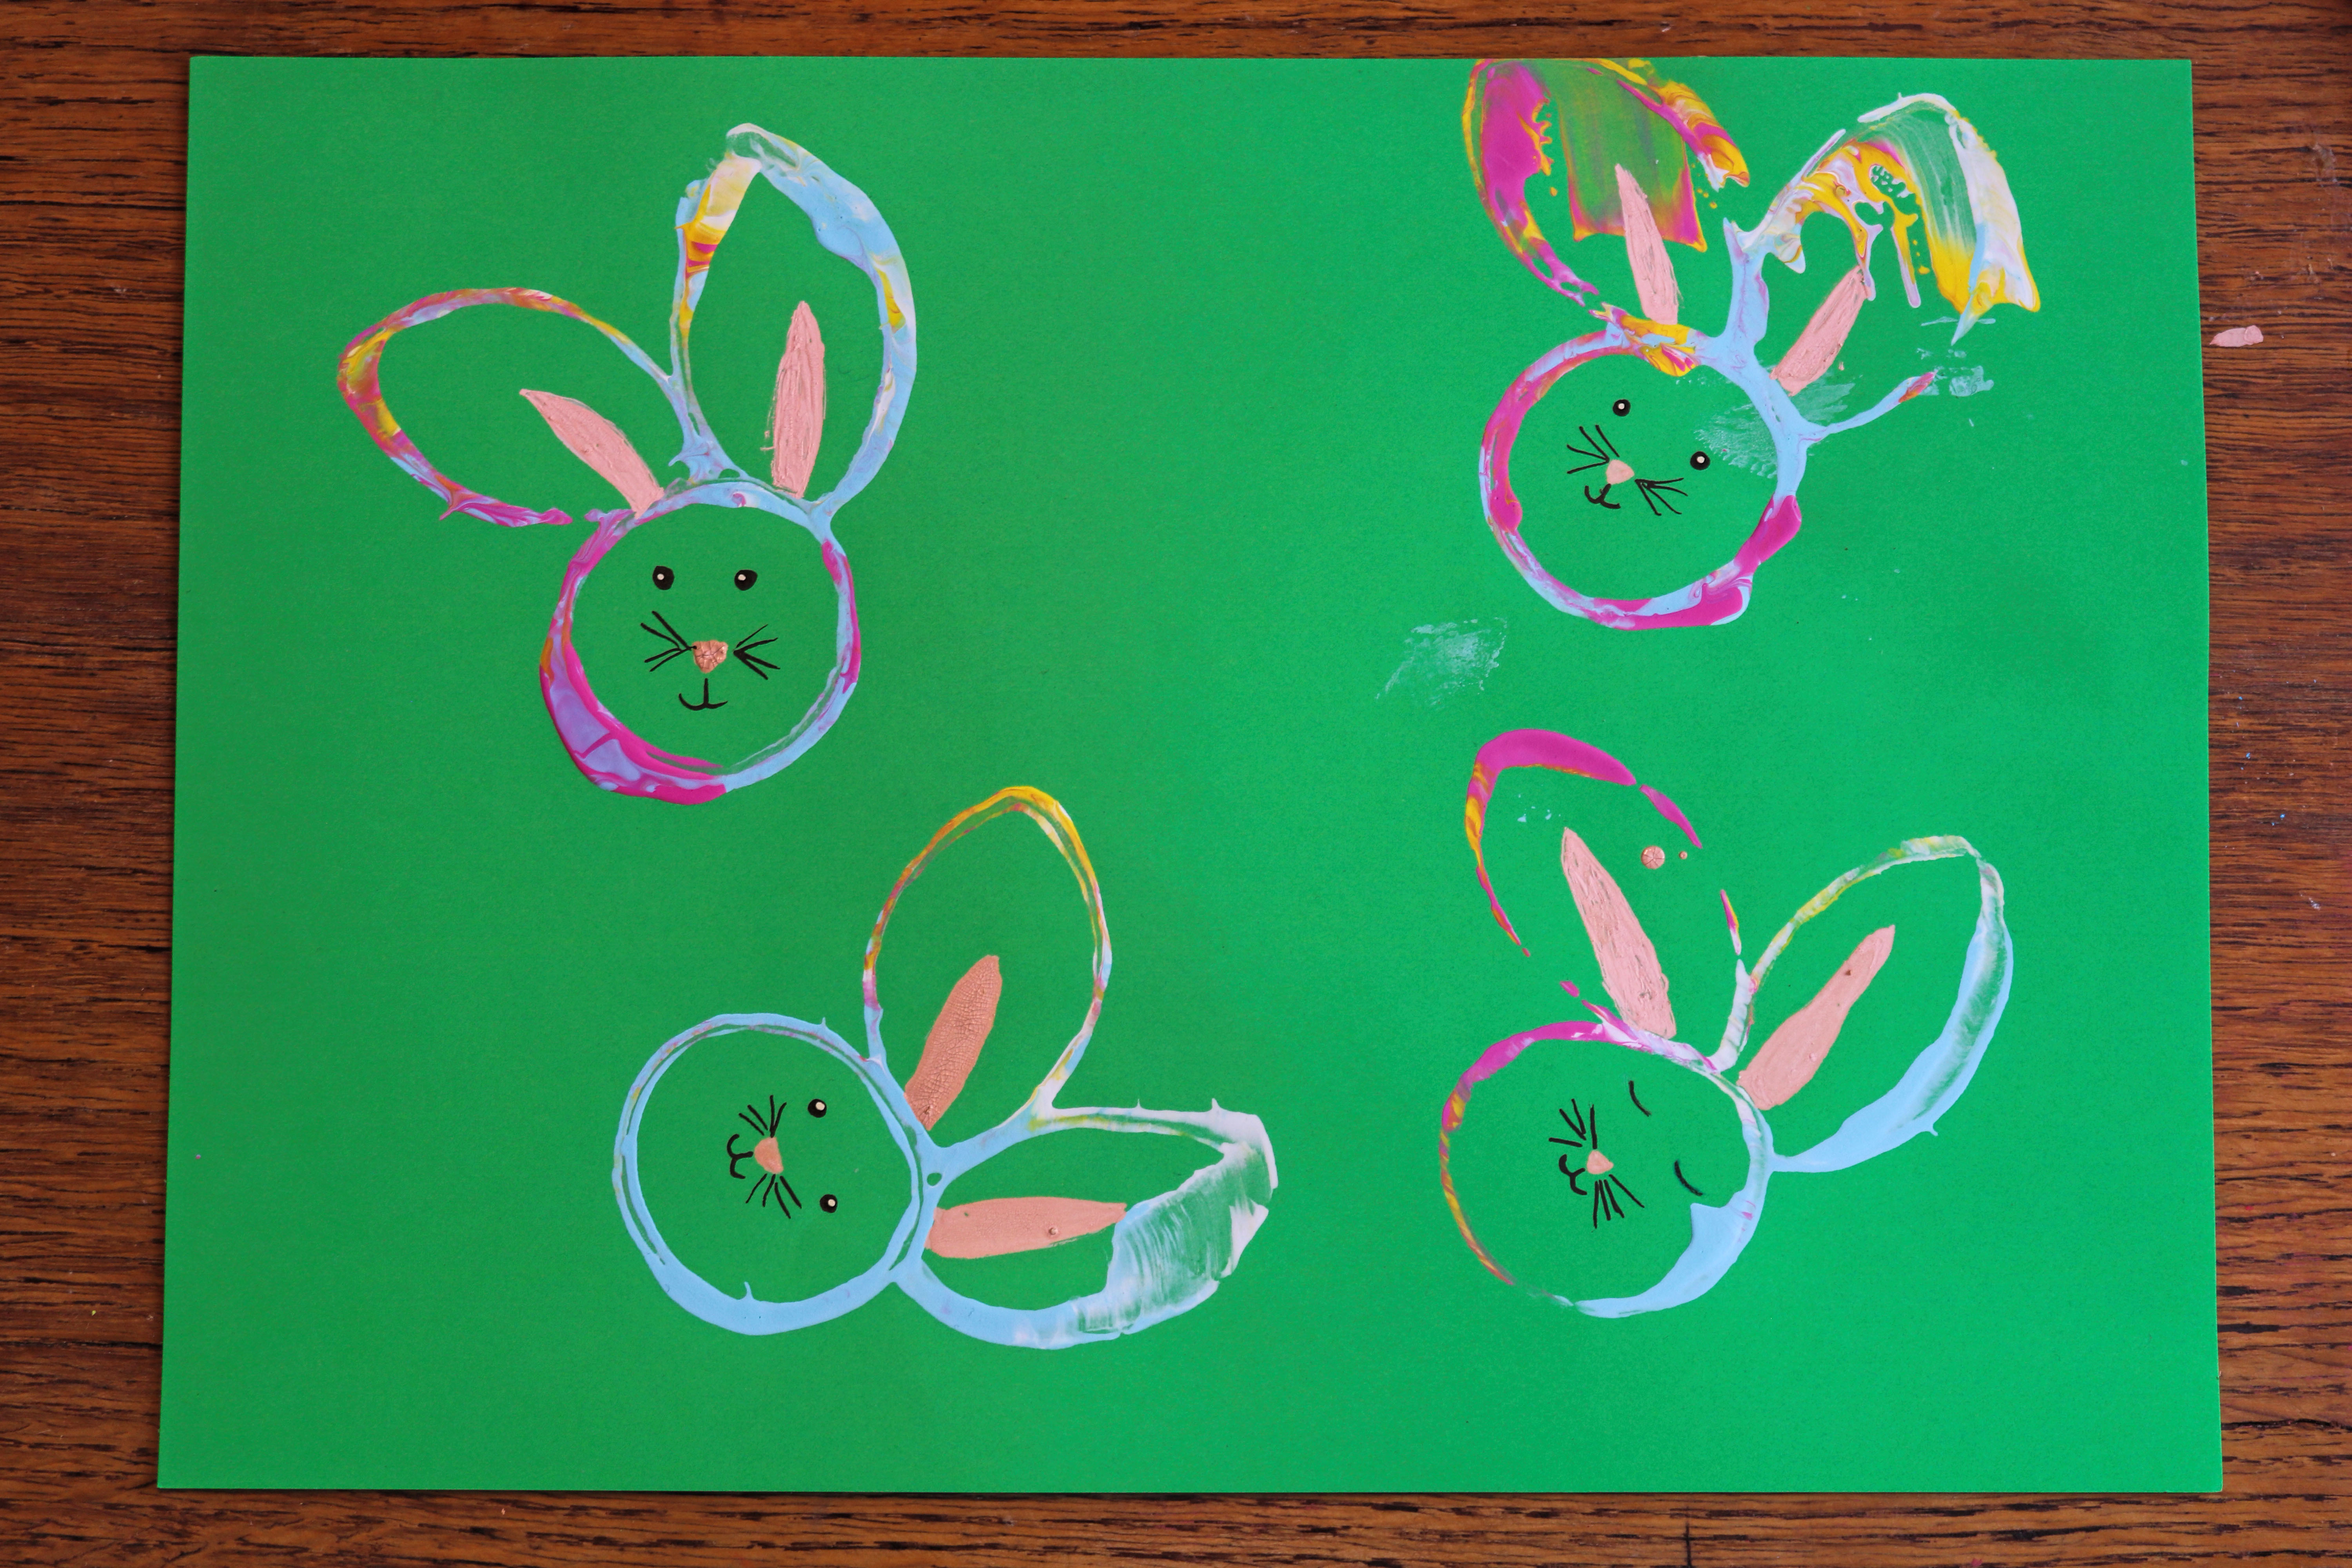
6. Bunny Stamp – Making an Easter Bunny with Toilet Paper Rolls

You can easily make an Easter bunny using toilet paper rolls. The round imprint forms the head, and the ears are shaped from rolled-up toilet paper rolls and glued on. A simple craft idea that’s also well-suited for children under 3 years old.
Here's what you'll need:
- 3 rolls of toilet paper
- Watercolors or finger paints
- from 1 to 2 years
- ages 2 and up most are approved
- Construction paper
- Paintbrush
- craft glue
- Pens for refilling
- We use a food-safe baking mat on the table.
- Protection for your child's clothes
- Wet wipes or water for cleaning
Affiliate links — we may receive a small commission, your price stays the same.

Here's how it works:
1. Prepare the rolls:
Grab three toilet paper rolls. Leave one roll round; it will become the rabbit’s head later.
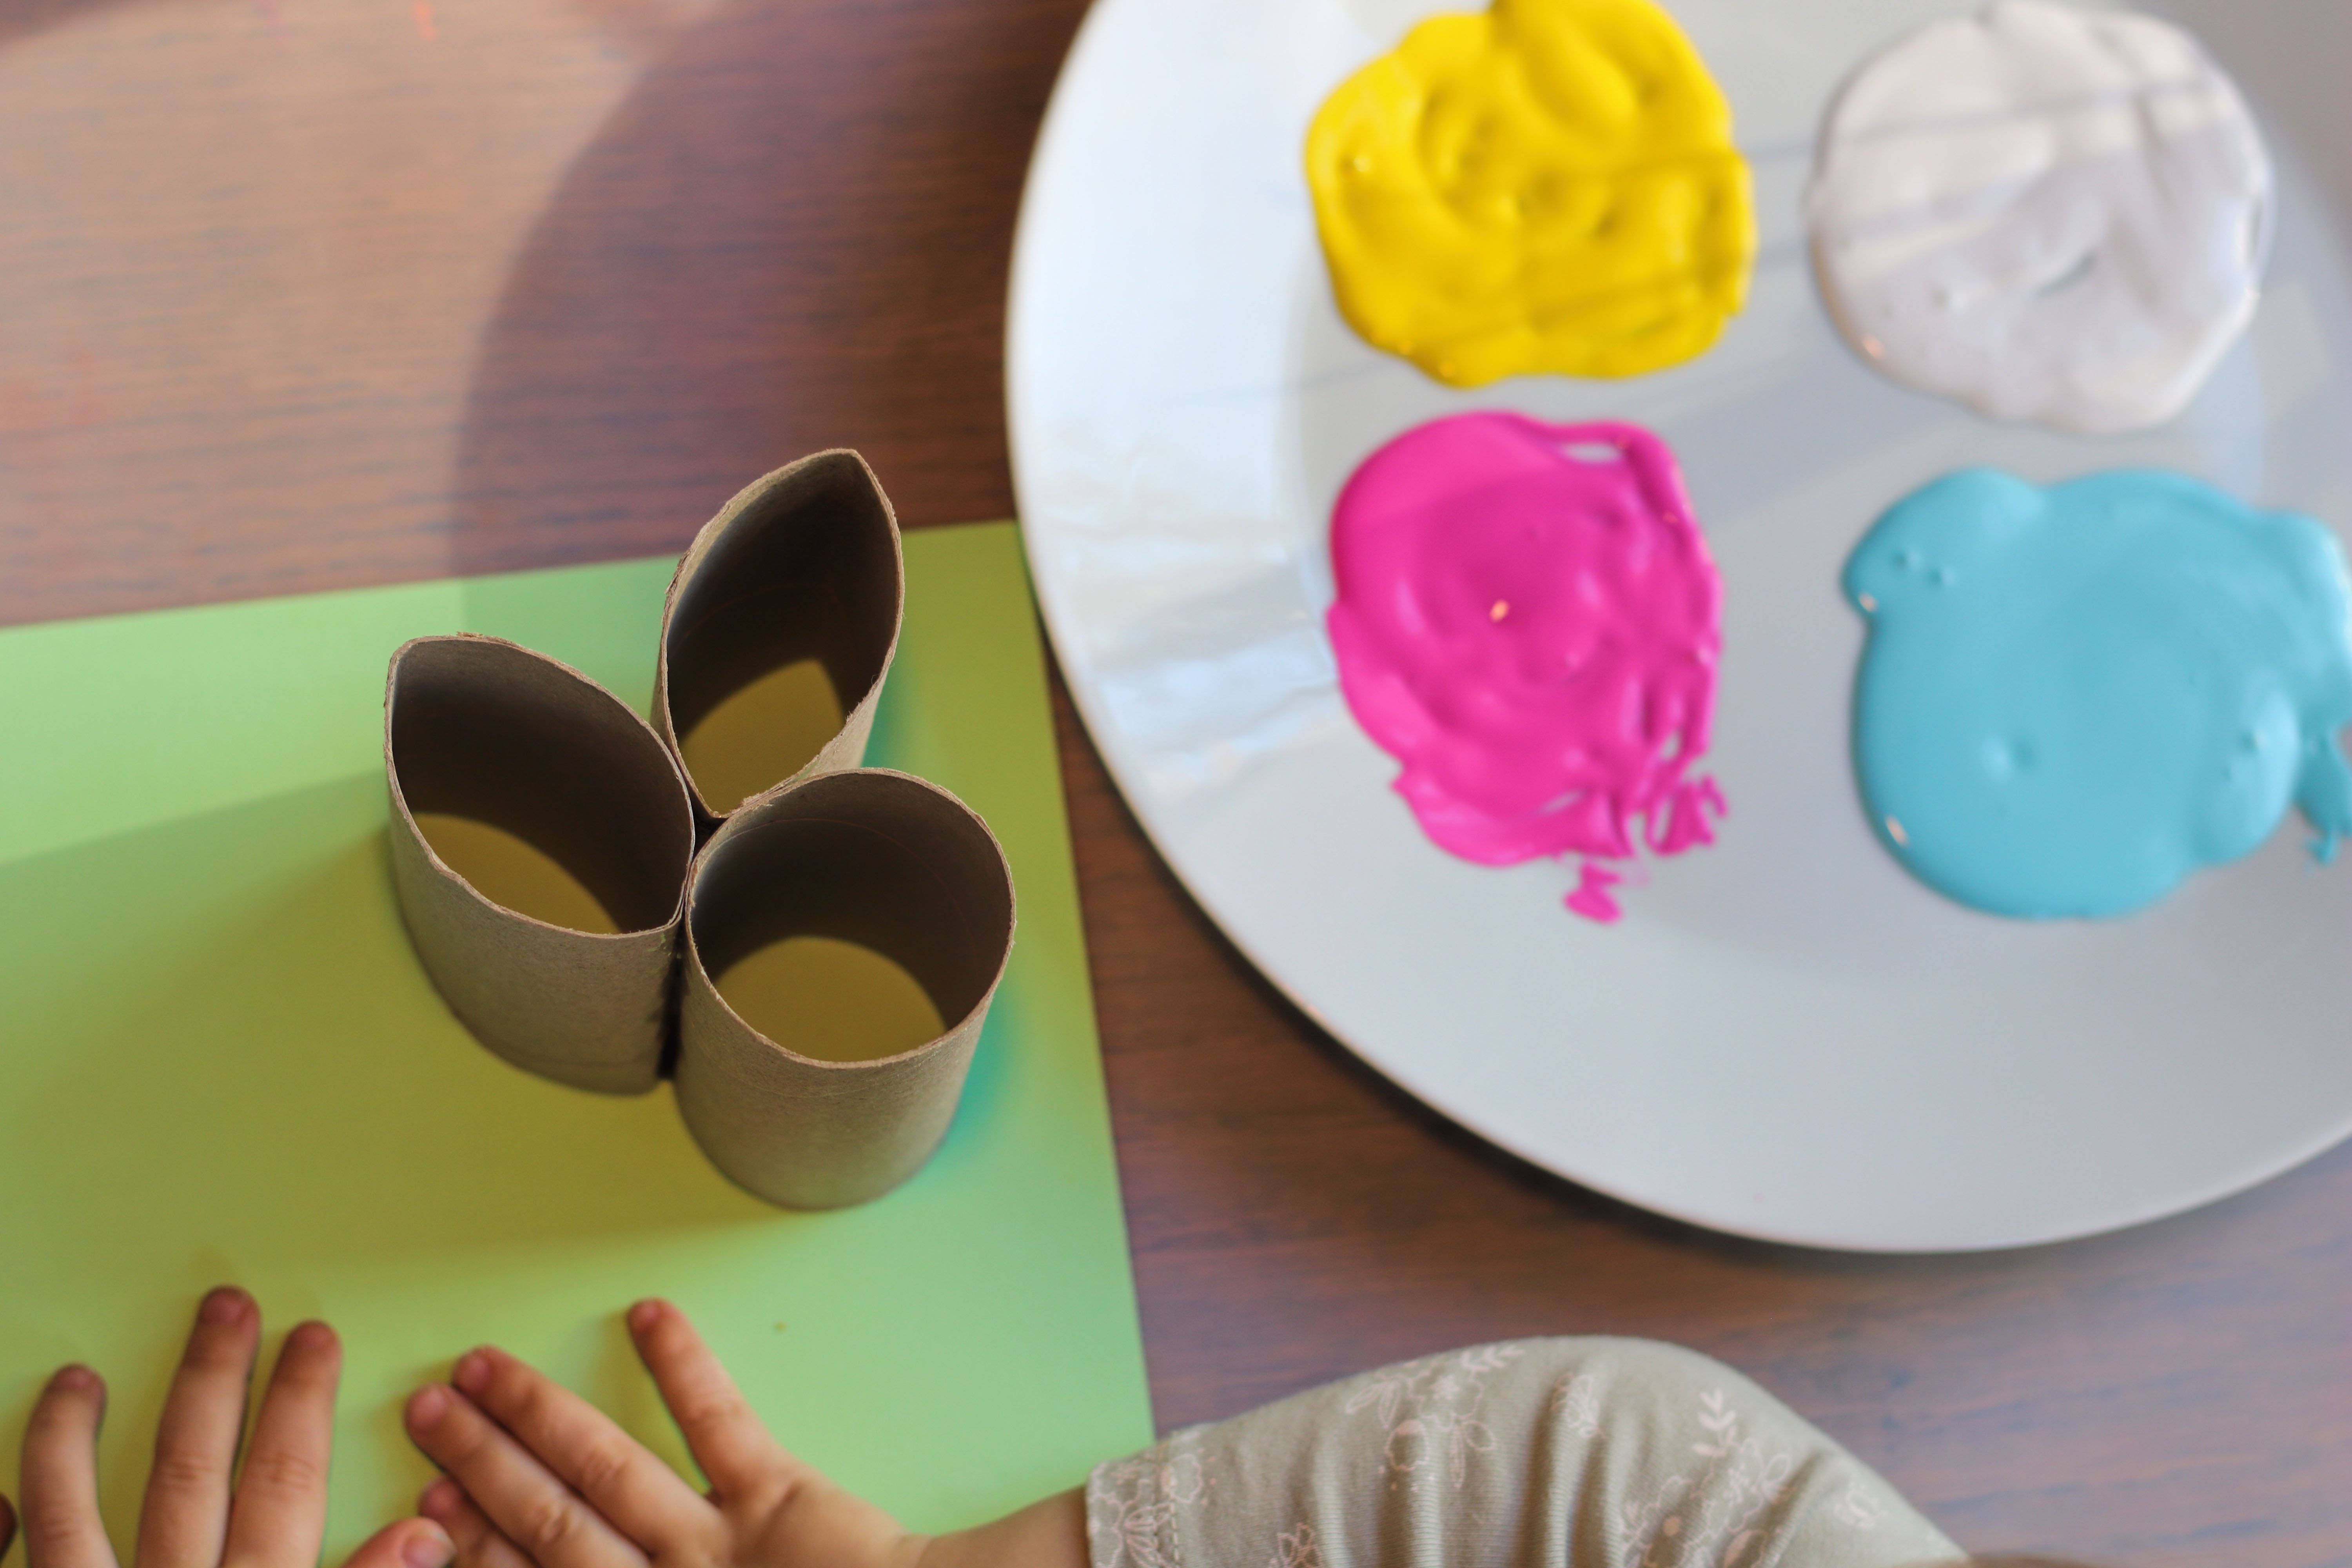
2. Shape the ears:
Carefully squeeze two toilet paper rolls together on one side to create an elongated ear shape.
3. Assemble the bunny head:
Glue the two shaped rolls to the top of the round roll to create a rabbit head with two ears.
4. Let it dry thoroughly:
To ensure the stamp is sturdy, let the glue dry thoroughly first.
5. Prepare the paint:
Put some paint in a shallow bowl or on a plate.
6. Stamp the bunnies:
Dip the homemade bunny stamp into the paint and press it onto the paper. This way, you can create lots of little Easter bunnies with very little effort.
7. Add details as desired:
Once dry, the stamped bunnies can be decorated with eyes, whiskers, or a bow.
💡 Tip:
When crafting with toddlers, the focus is on participation. Small imperfections make the bunny especially charming.
7. Wool Bunny – Laying Threads Instead of Painting
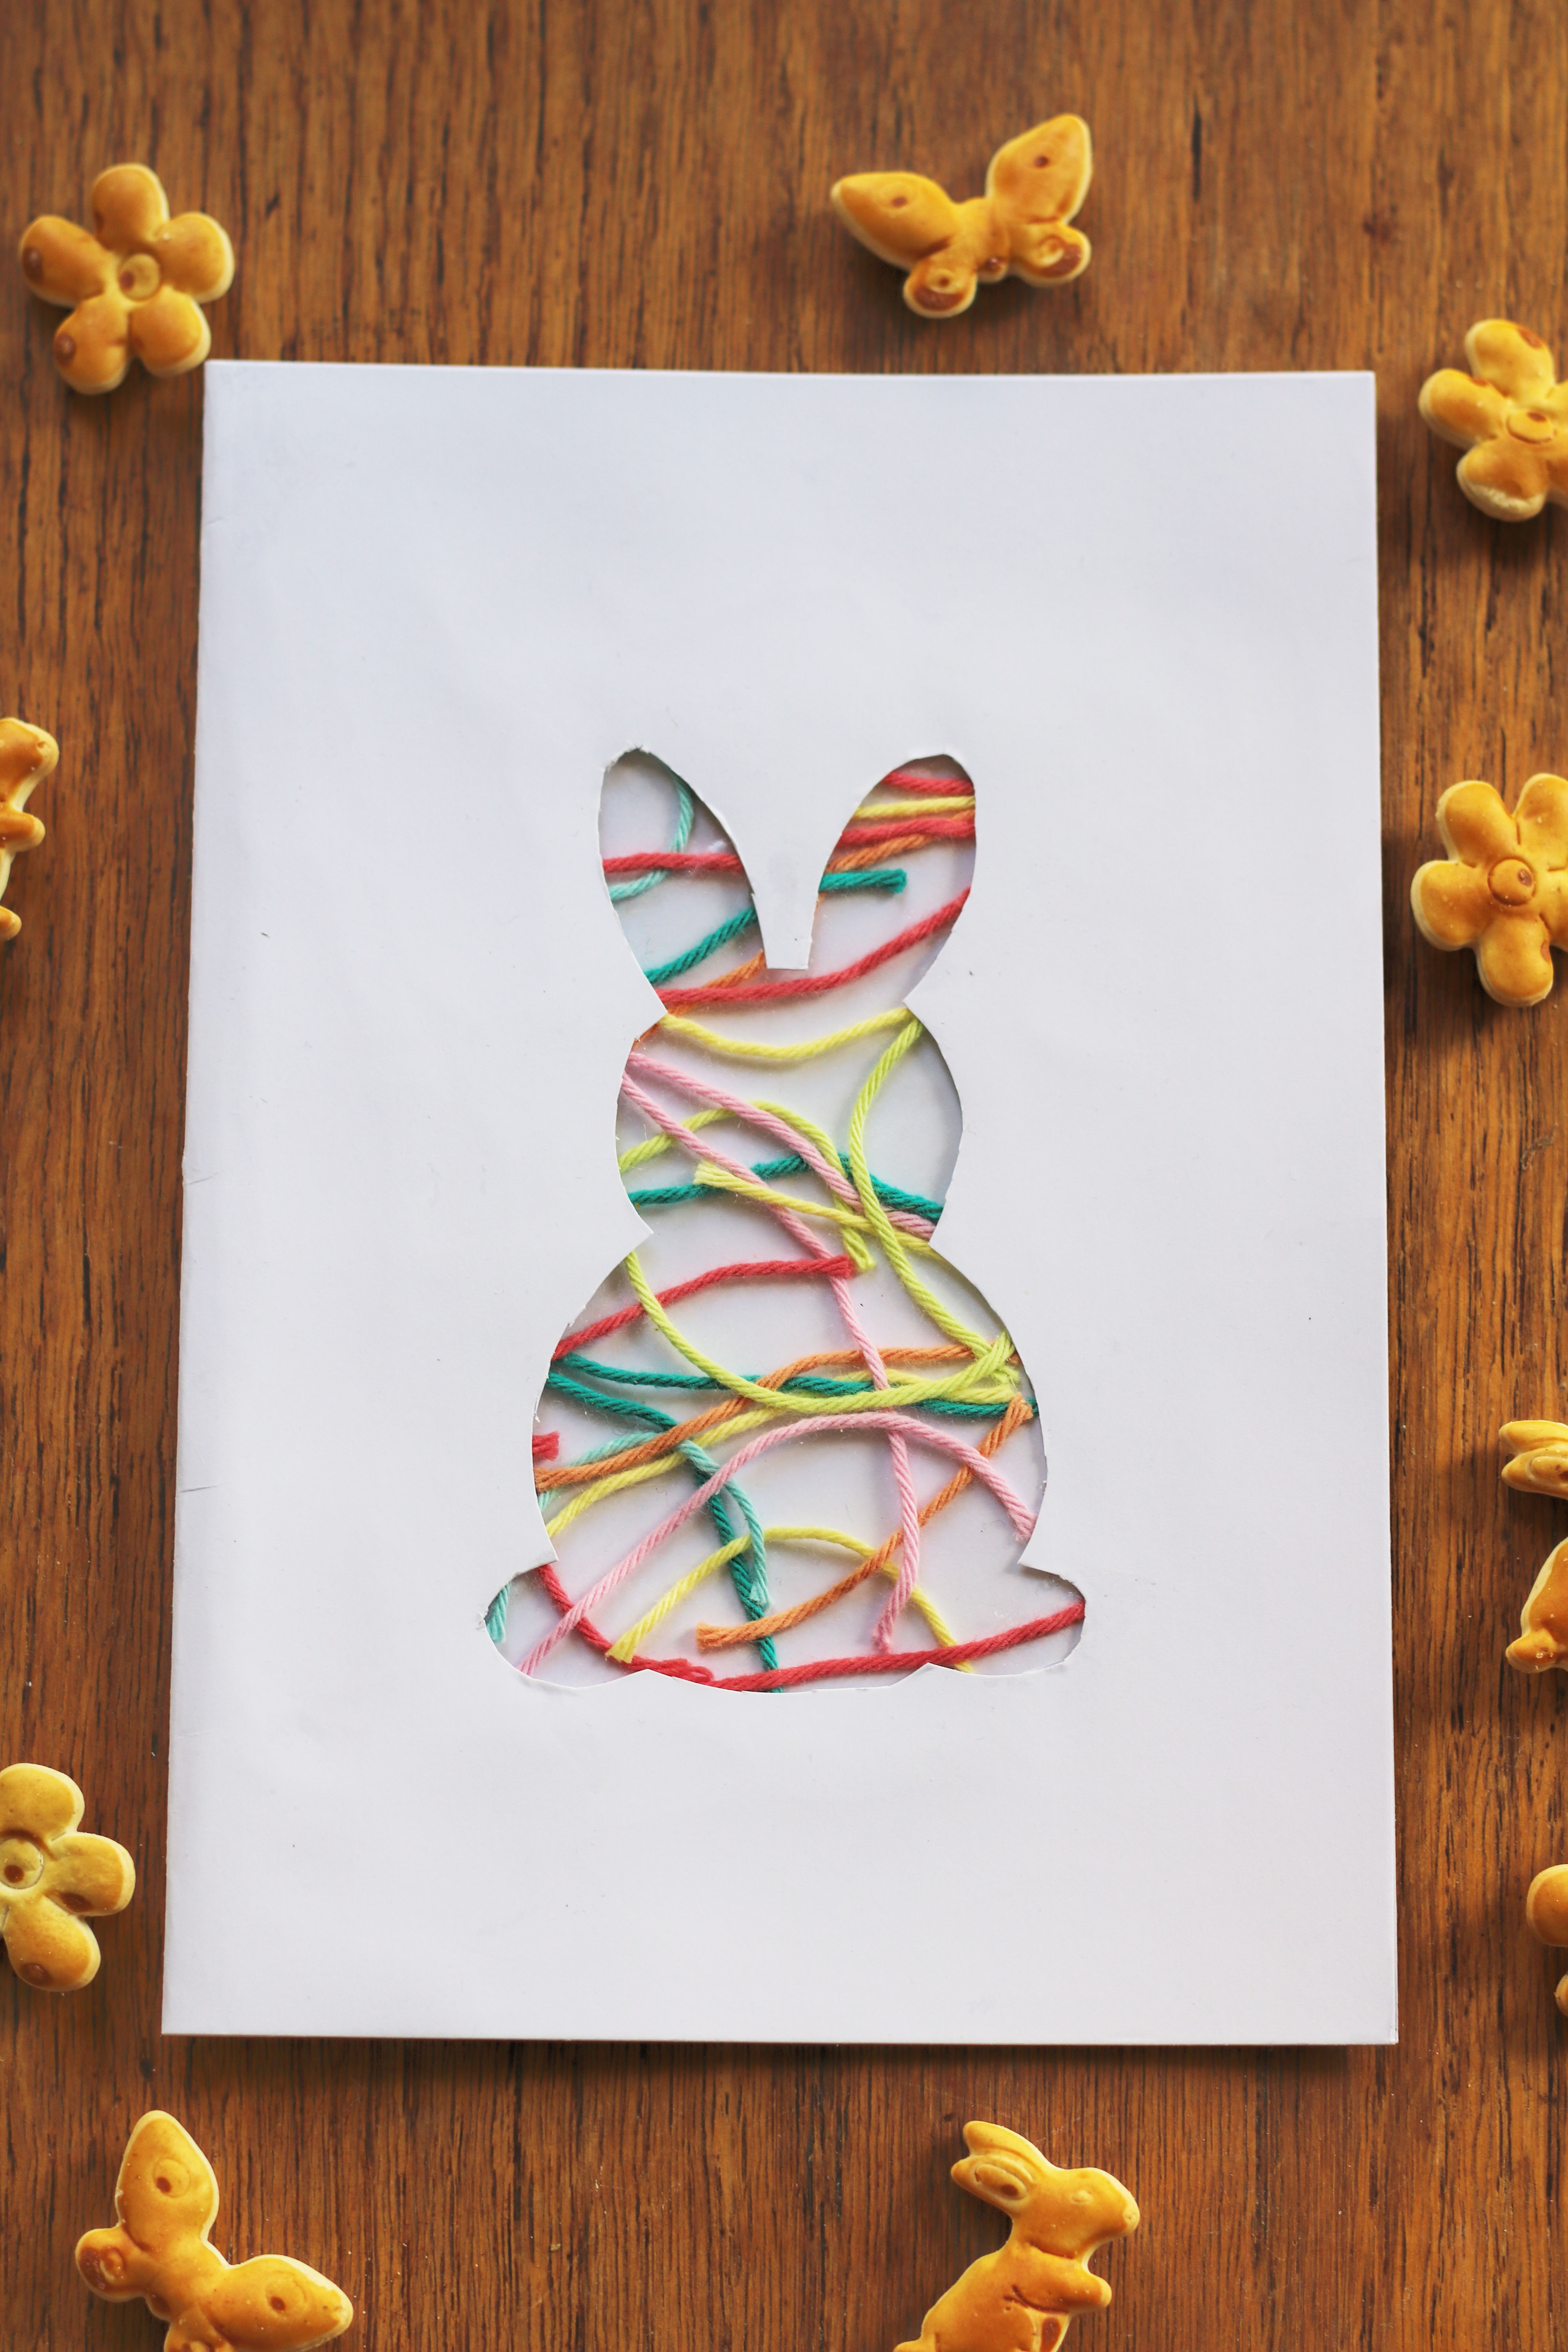
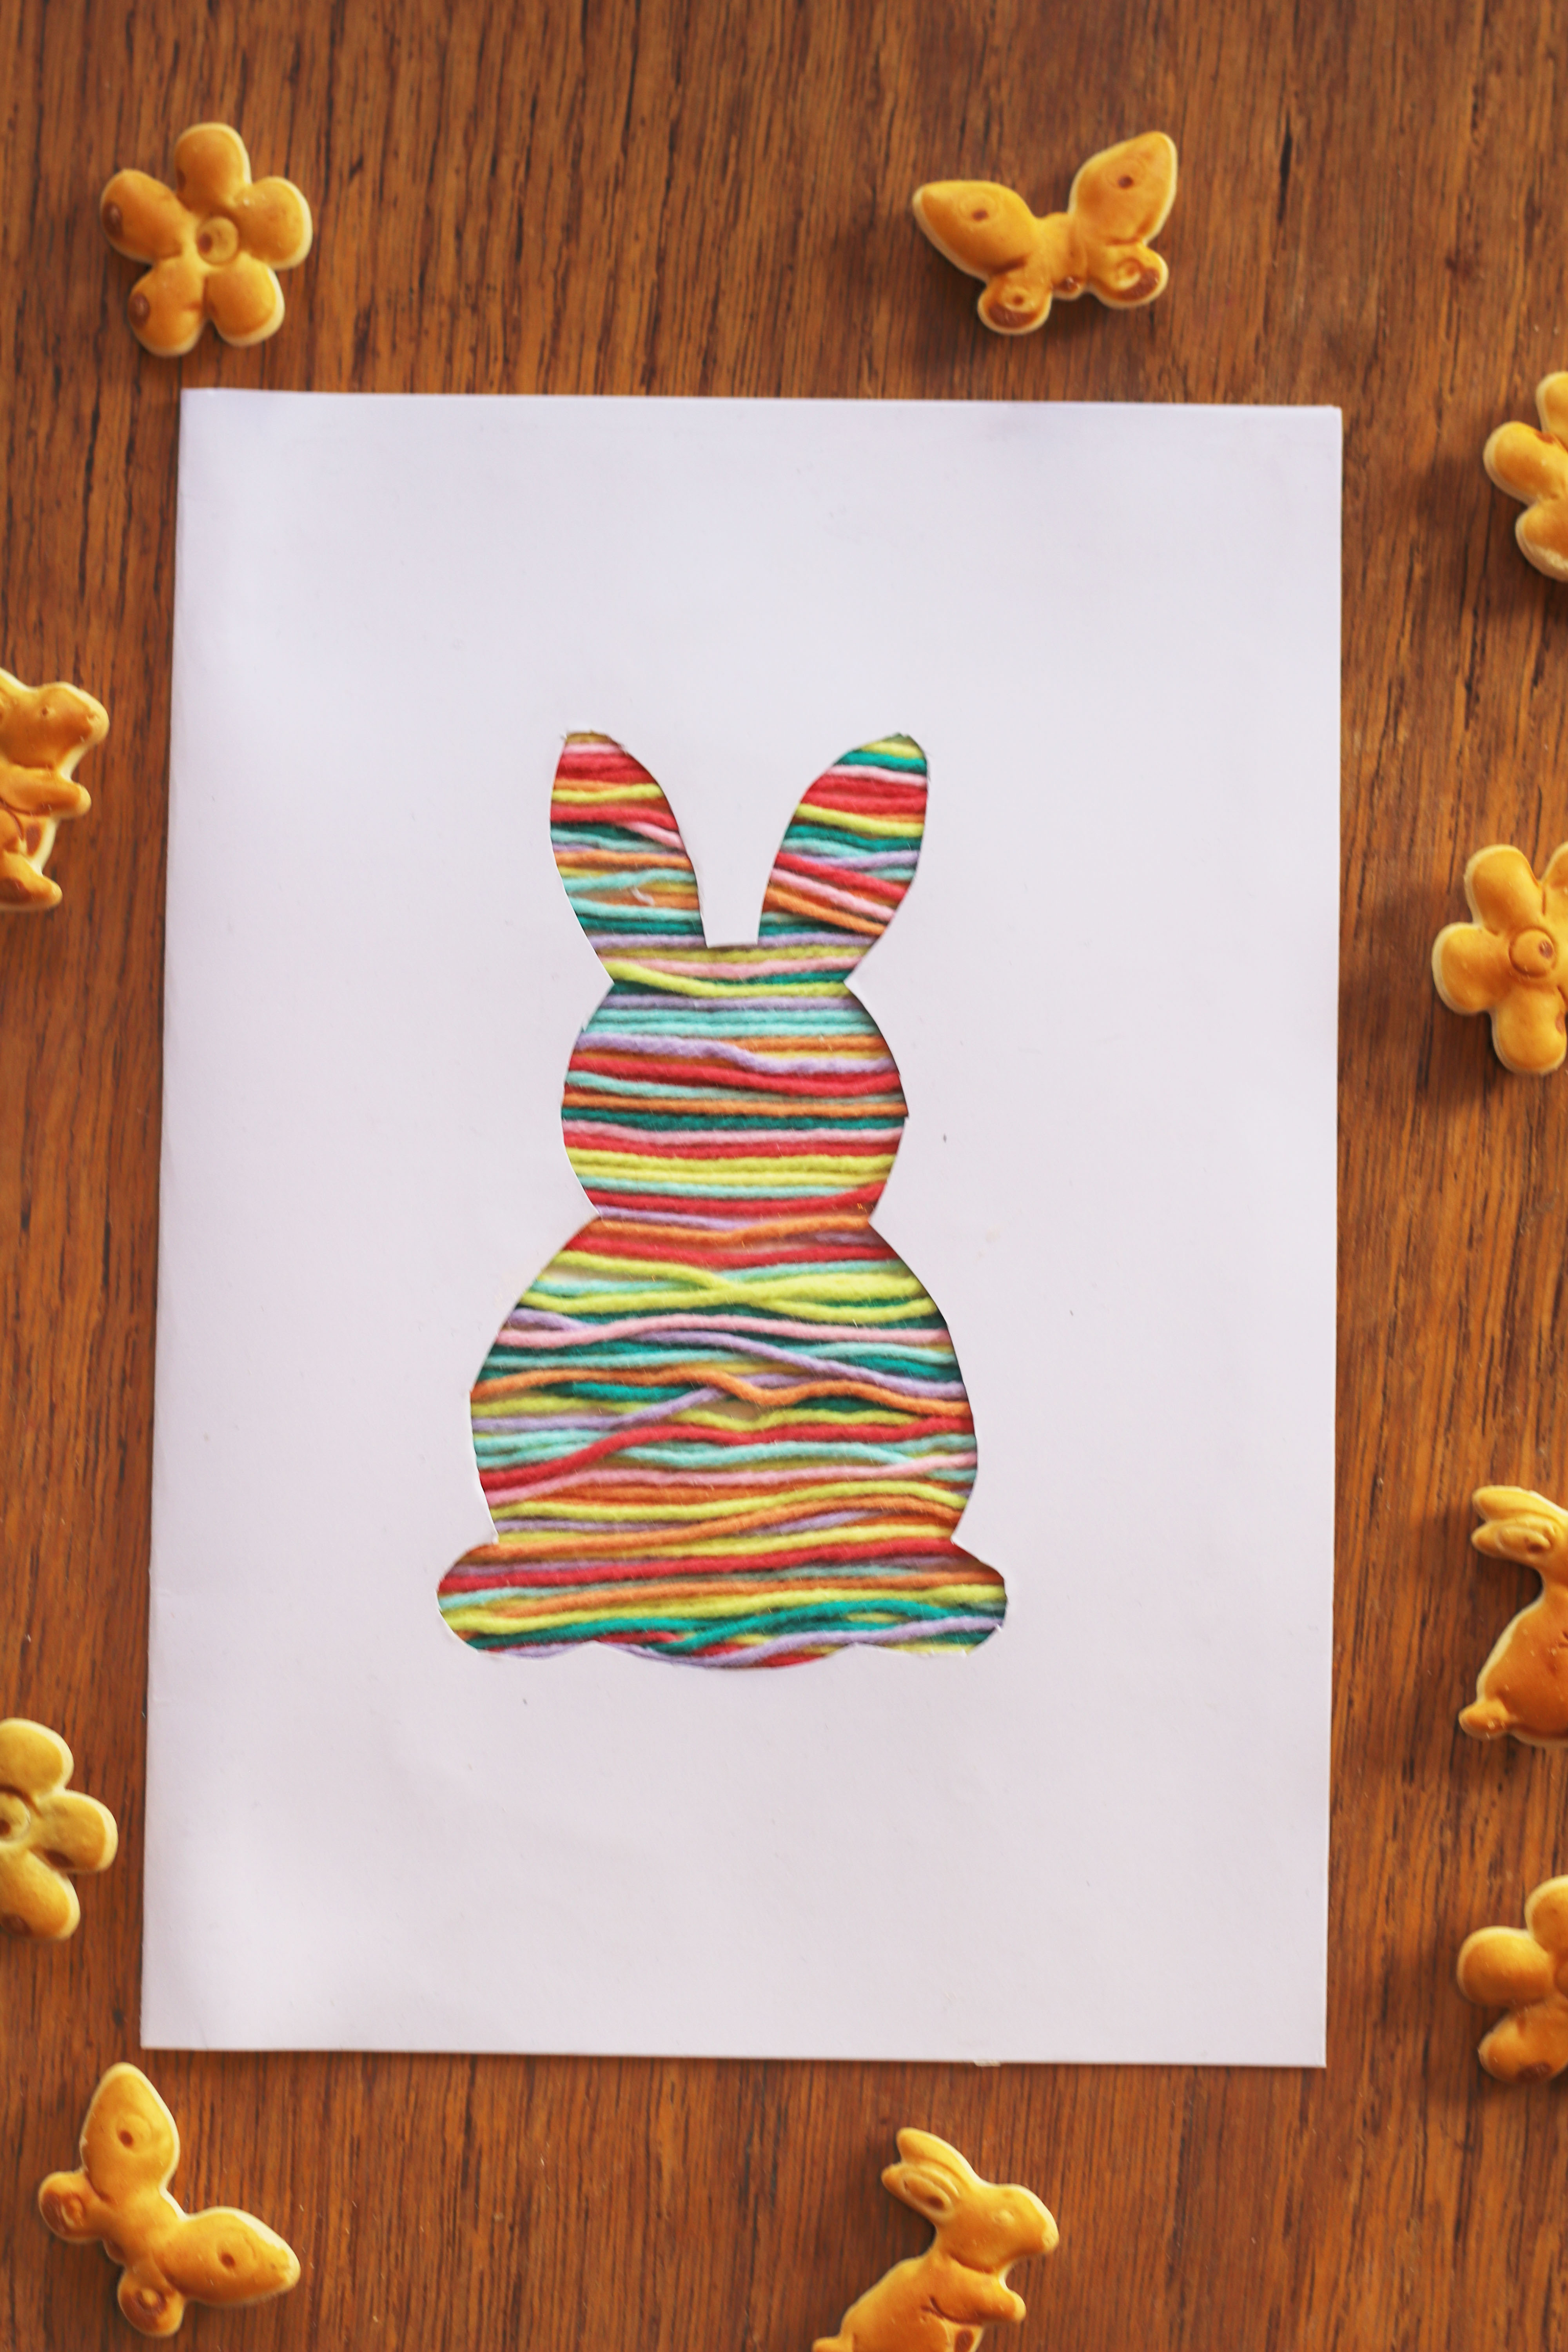
With this Easter bunny, you don’t paint—you create with wool. The colorful wool threads are laid over a bunny shape and secured. This creates a soft, textured design—ideal for young children, too.
You’ll find suitable bunny templates and other cut-out designs in our templates.
Here's what you'll need:
- Wool in various colors
- Construction paper
- an Easter design created using our templates or our generator
- craft scissors for adults Safety scissors cannot cut yarn.
- Bookbinding film optional adhesive strips
- special craft glue for children
Affiliate links — we may receive a small commission, your price stays the same.
Here's how it works:
1. Prepare the template:
Print out a template and cut out the shape.
2. Lay out the wool threads:
Place the wool threads across the rabbit shape.
3. Secure:
The threads can be secured on the right and left with adhesive tape.
Alternative for younger children:
Instead of adhesive tape, the rabbit shape can be covered on the back with self-adhesive book cover film. The wool threads are then simply pressed onto the adhesive surface.
4. Finishing:
Carefully trim any excess threads or fold them back.
💡 Tip:
The wool bunny also makes a wonderful Easter card. Simply glue a sturdy sheet of paper to the back—this creates a sturdy card to give as a gift.
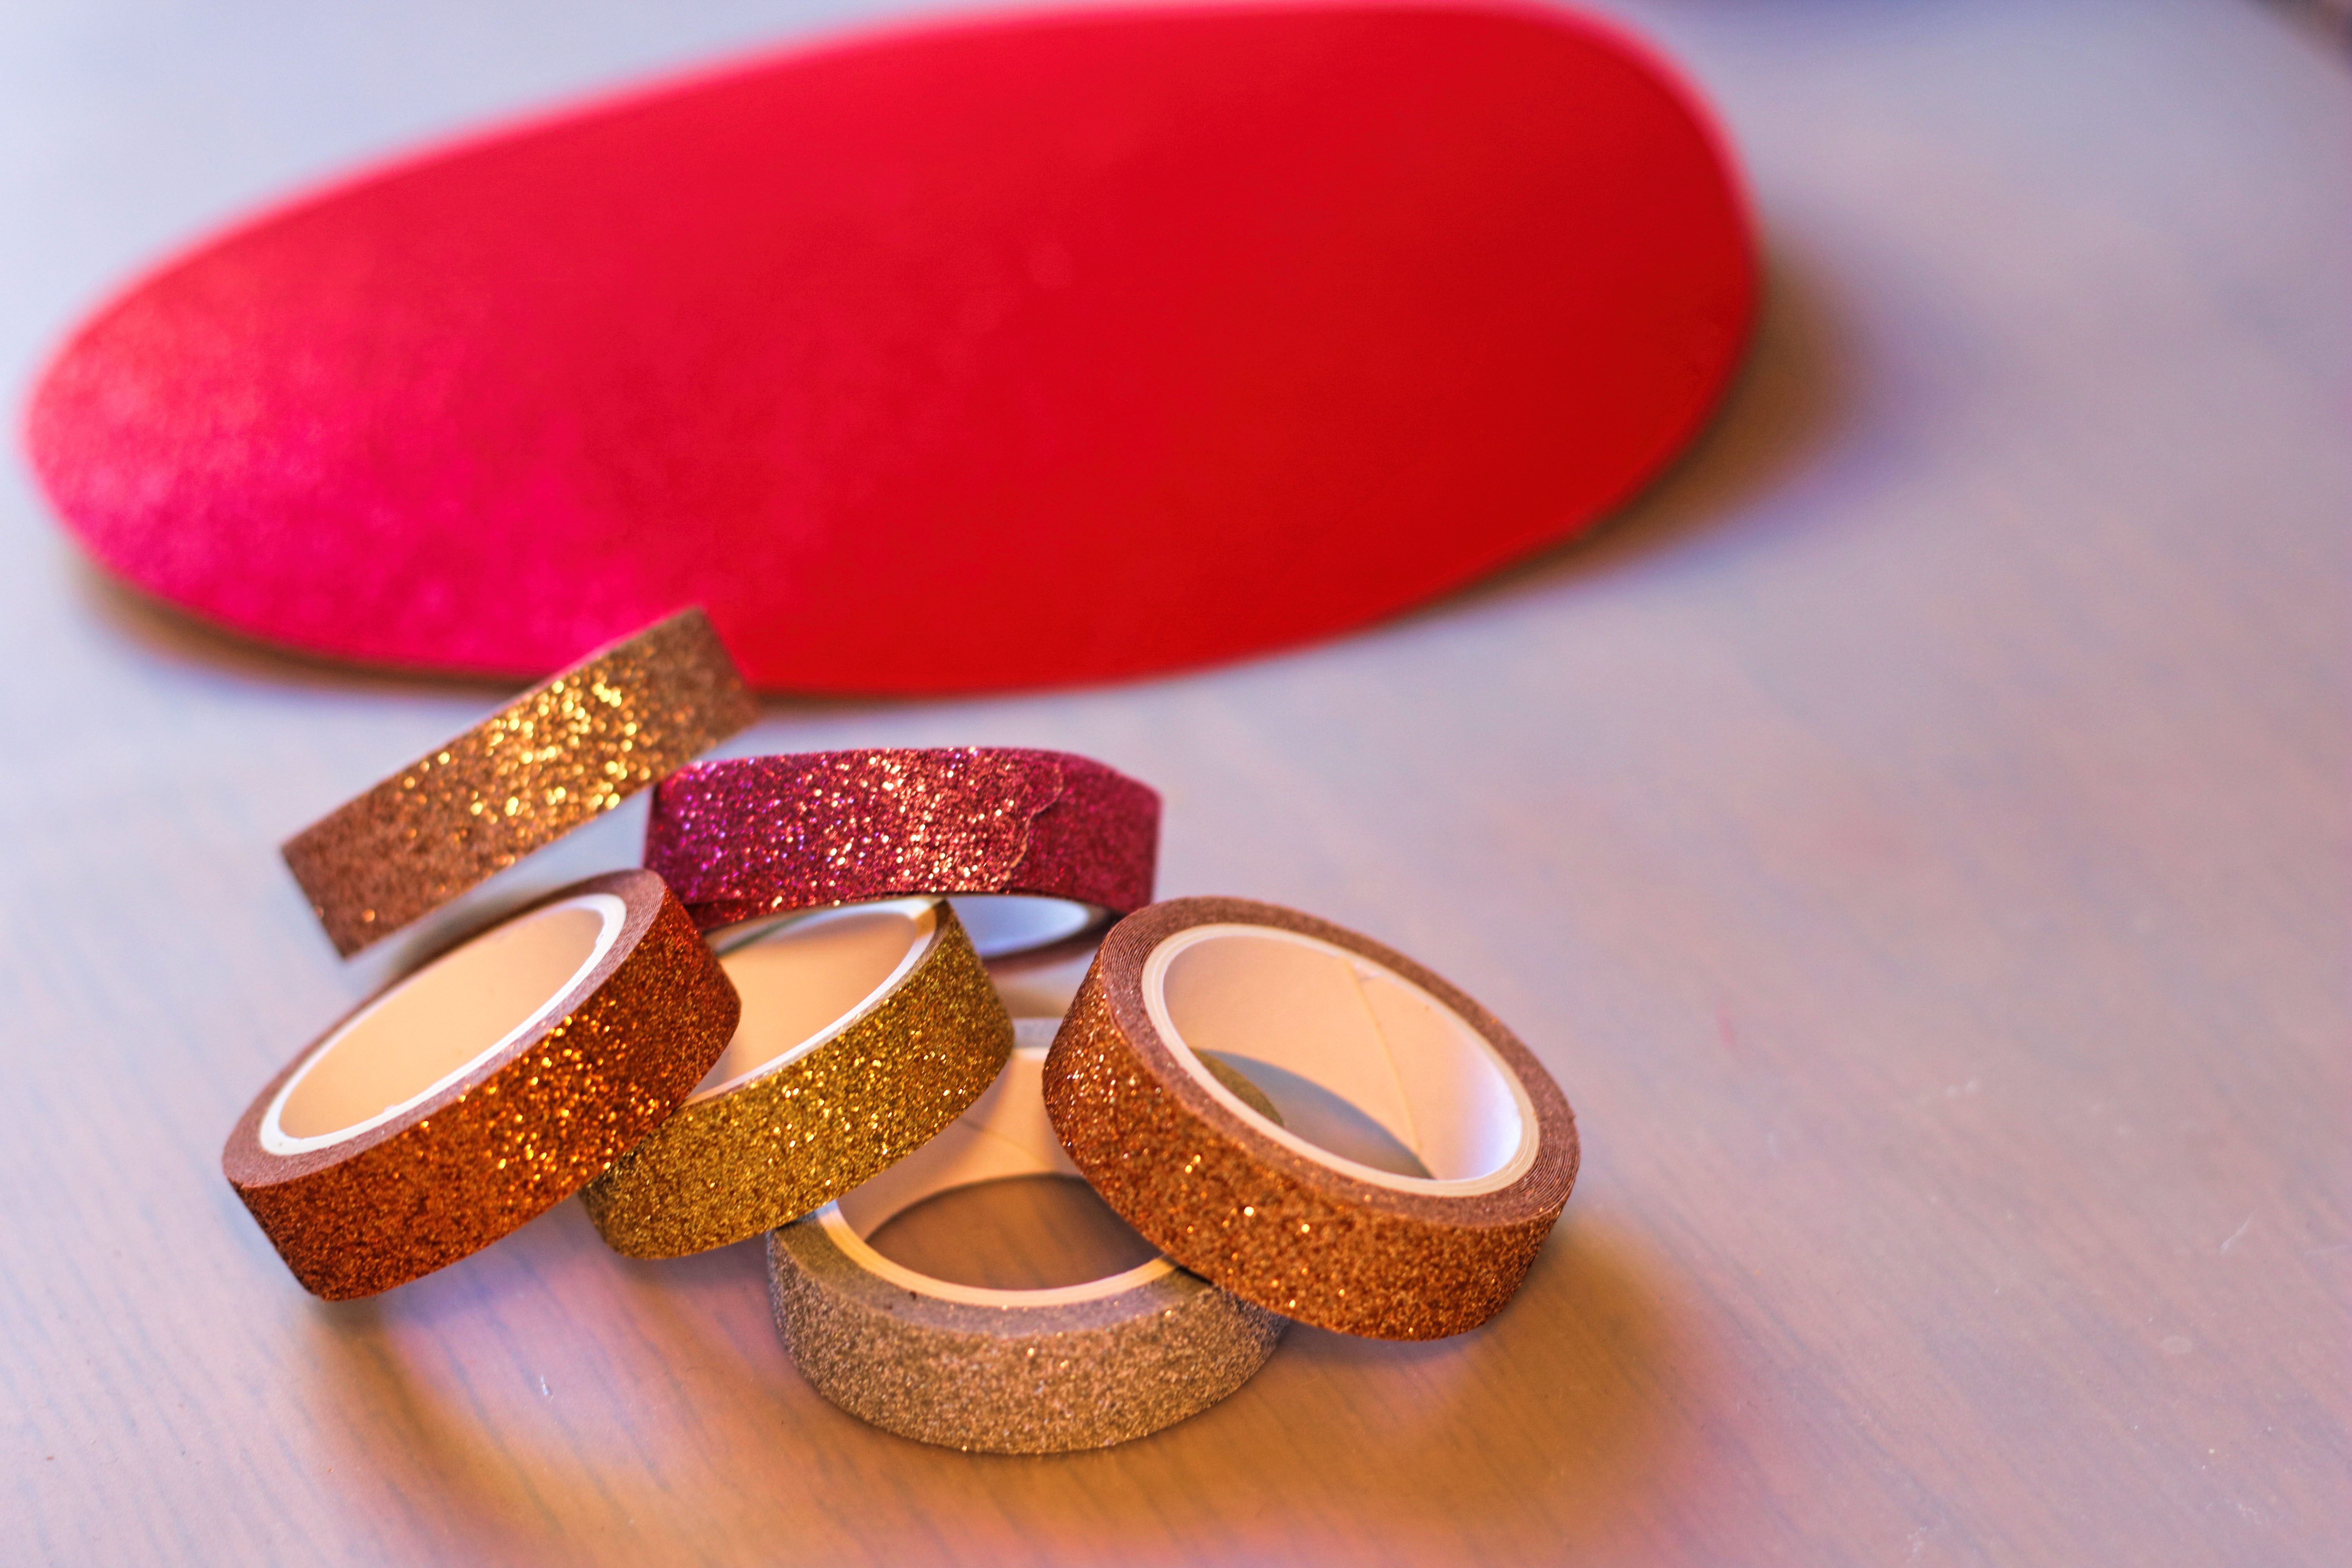
8. Decorate an Easter egg with washi tape

This Easter egg is a simple and beautiful craft idea for children. With just a few materials, you can create a colorful egg that’s perfect for the Easter table, the windowsill, or as a small Easter decoration to hang up. Decorating with washi tapeWashi tape is a decorative adhesive tape made from rice paper or thin paper, often colorful or printed with patterns. It tears easily, can usually be removed again, and does not leave sticky residue. Ideal for decorating, labeling, or holding things in place during crafts.Zum Glossar is lots of fun for even young children and leaves plenty of room for their own ideas.
Here's what you'll need:
- Glitter paper (or construction paper)
- Washi tape in various colors and patterns
- Craft scissors for adults
- security craft scissors for children if needed, for the washi tape, but it can also be torn
- Optional: ribbon or string for hanging
Affiliate links — we may receive a small commission, your price stays the same.

Here's how it works:
1. Prepare the Easter egg:
First, cut out an Easter egg from paper or cardstock.
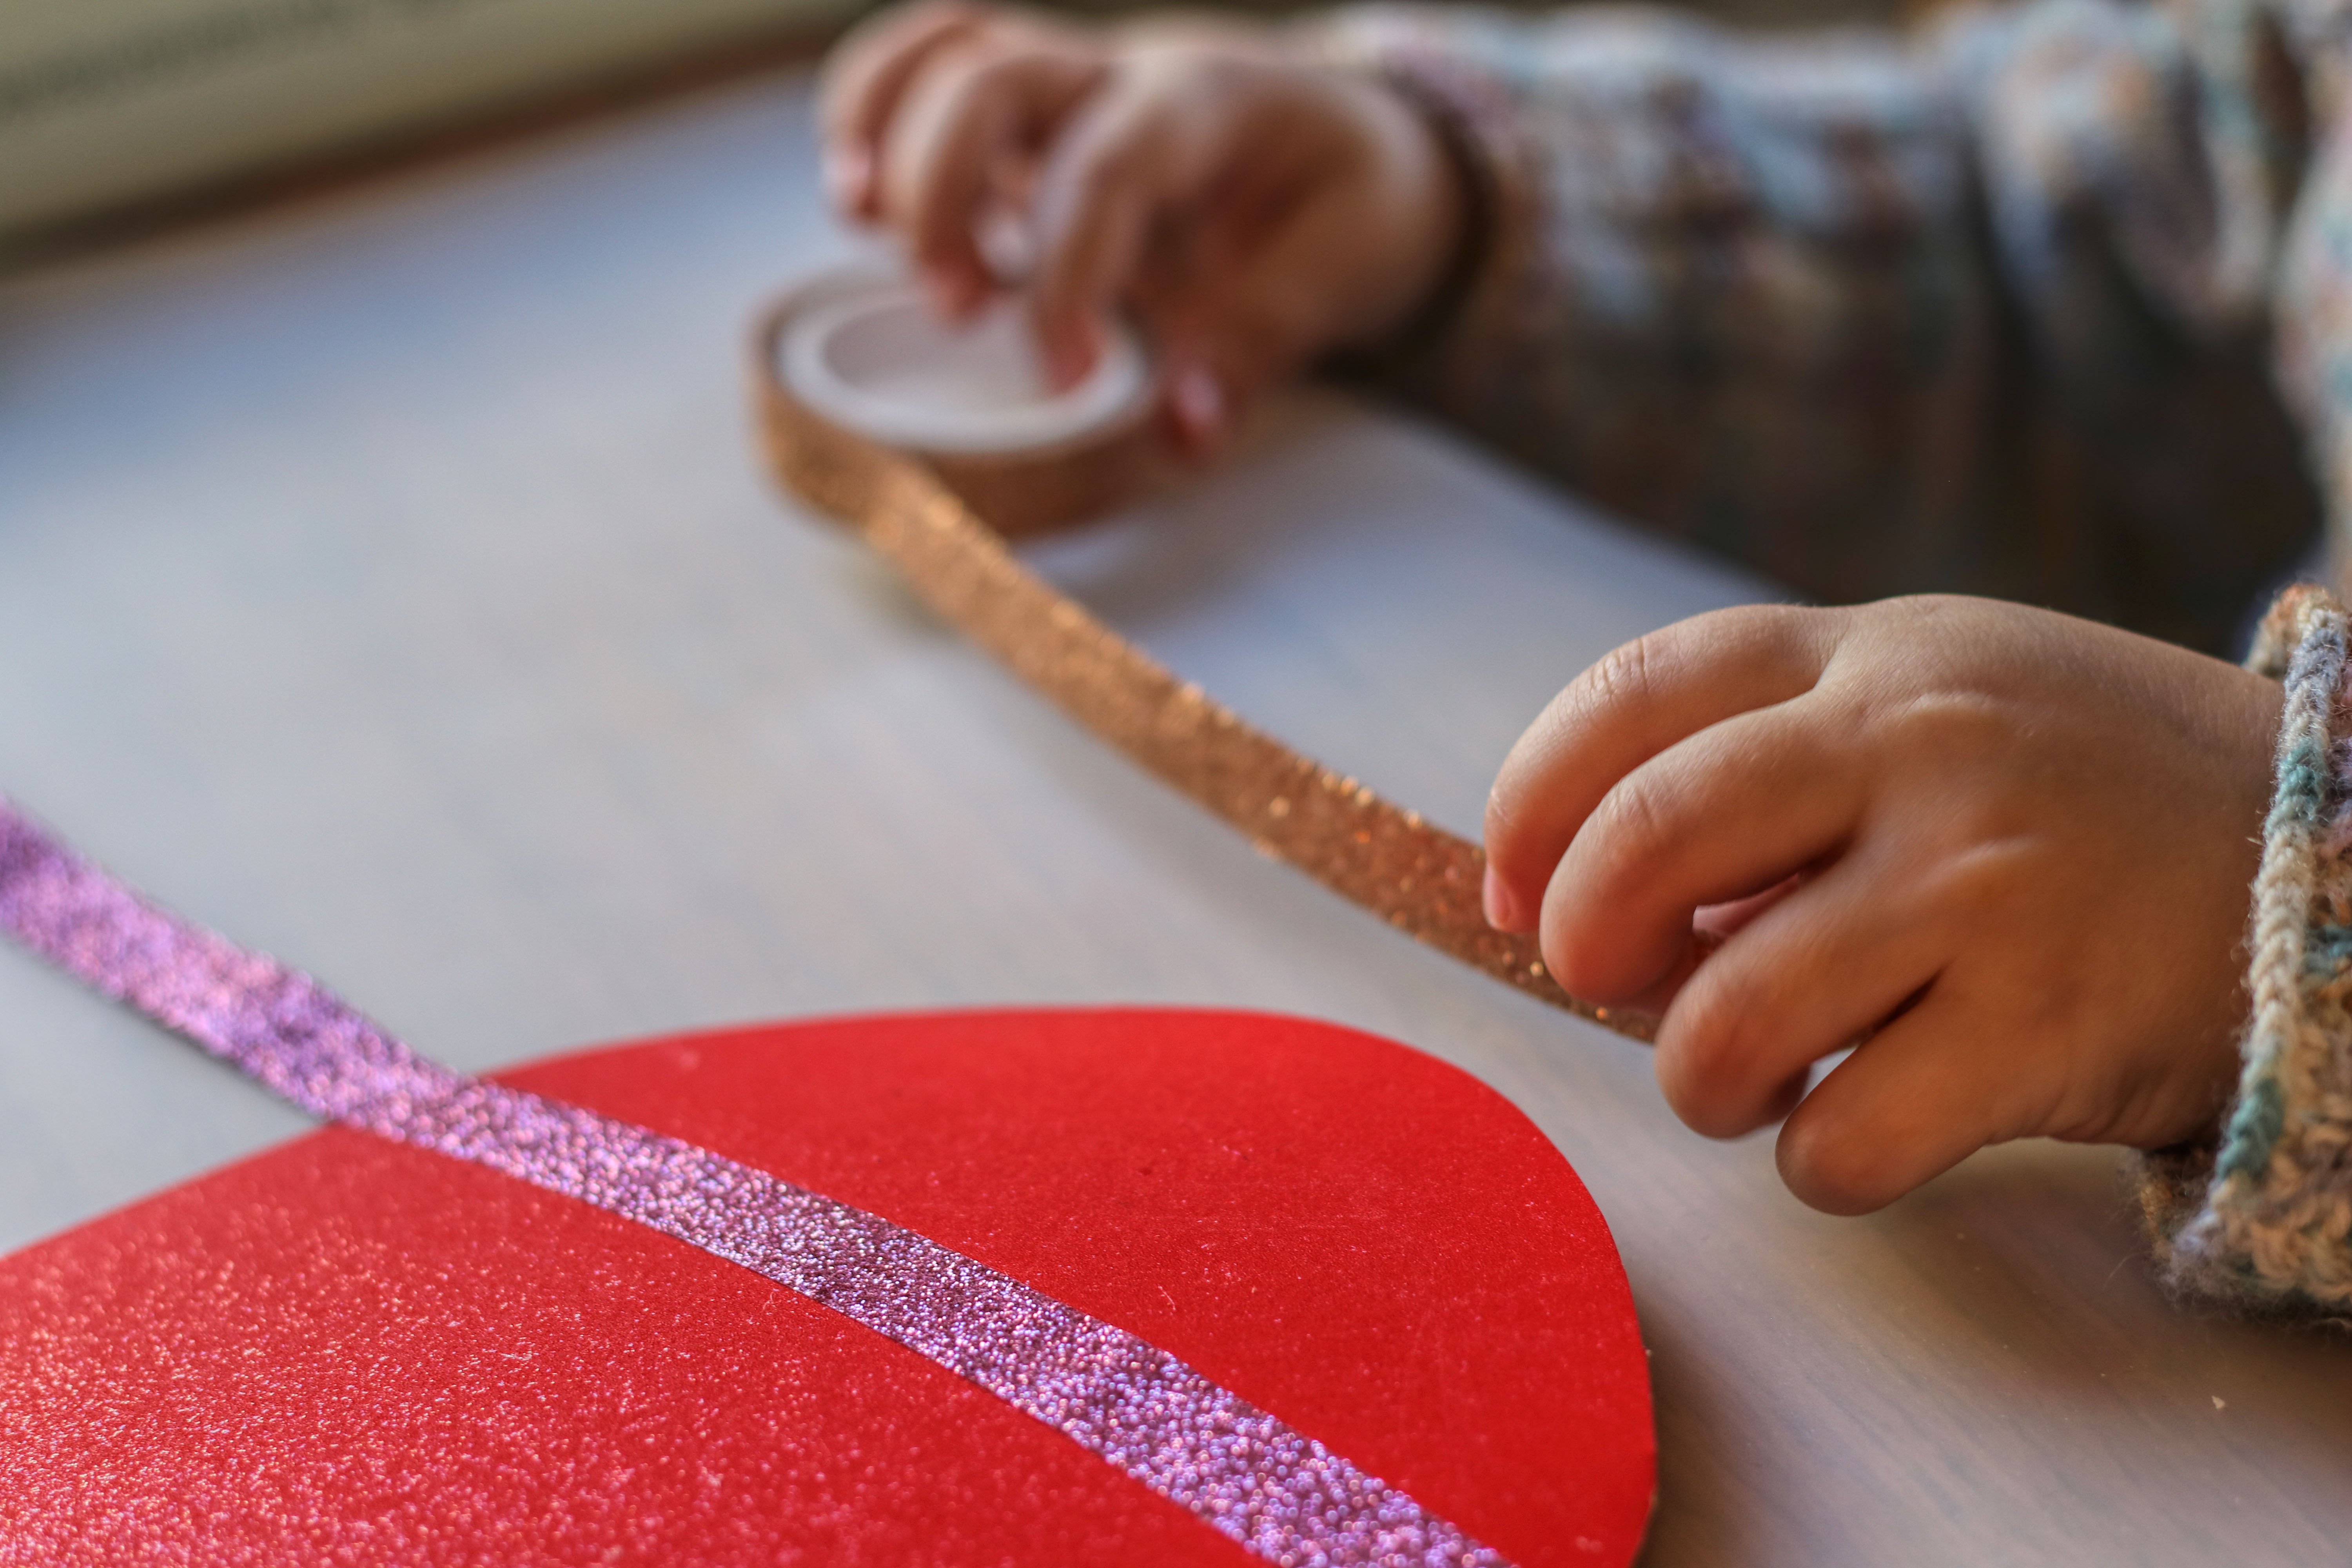
2. Prepare the washi tape:
Now your child can cut the washi tape into small pieces or simply tear it by hand. Both methods work well and look great in the end.
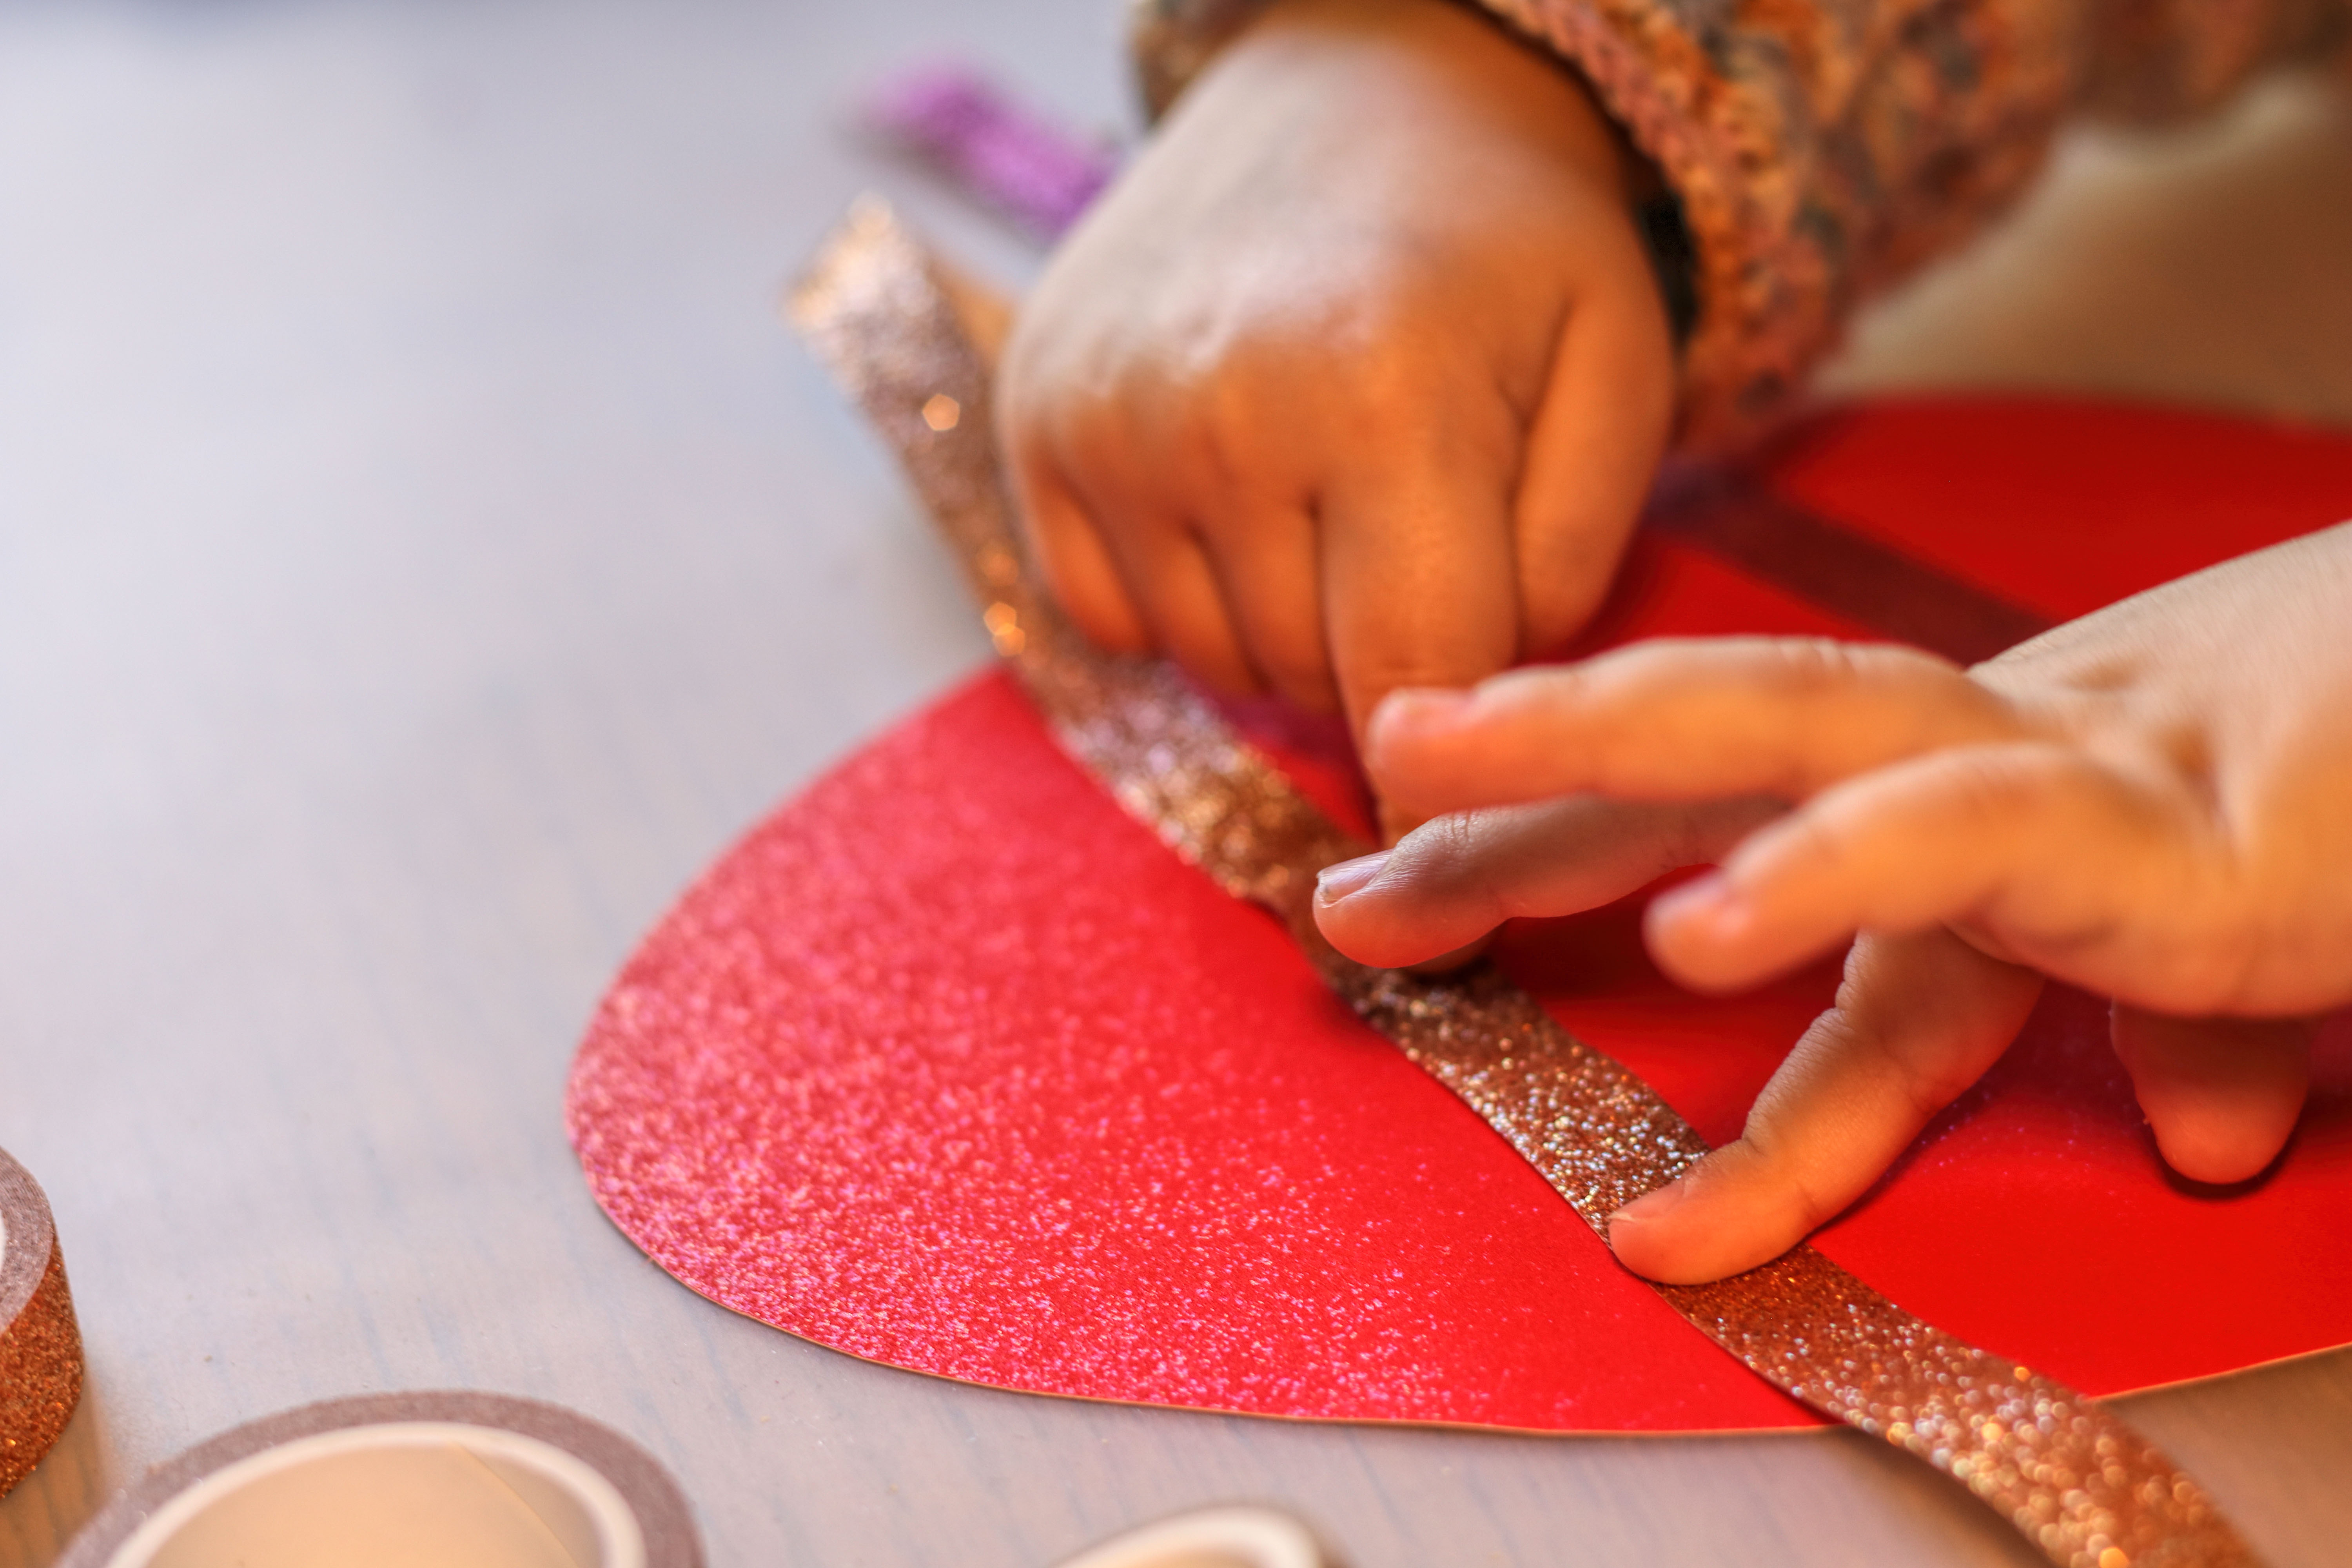
3. Decorate the Easter egg:
The individual pieces of tape are now gradually stuck onto the Easter egg. You can mix everything up in a colorful way or design it using specific colors.
4. Trim the excess:
Once the egg is fully covered, carefully trim any excess edges so the shape is clean and clear again.
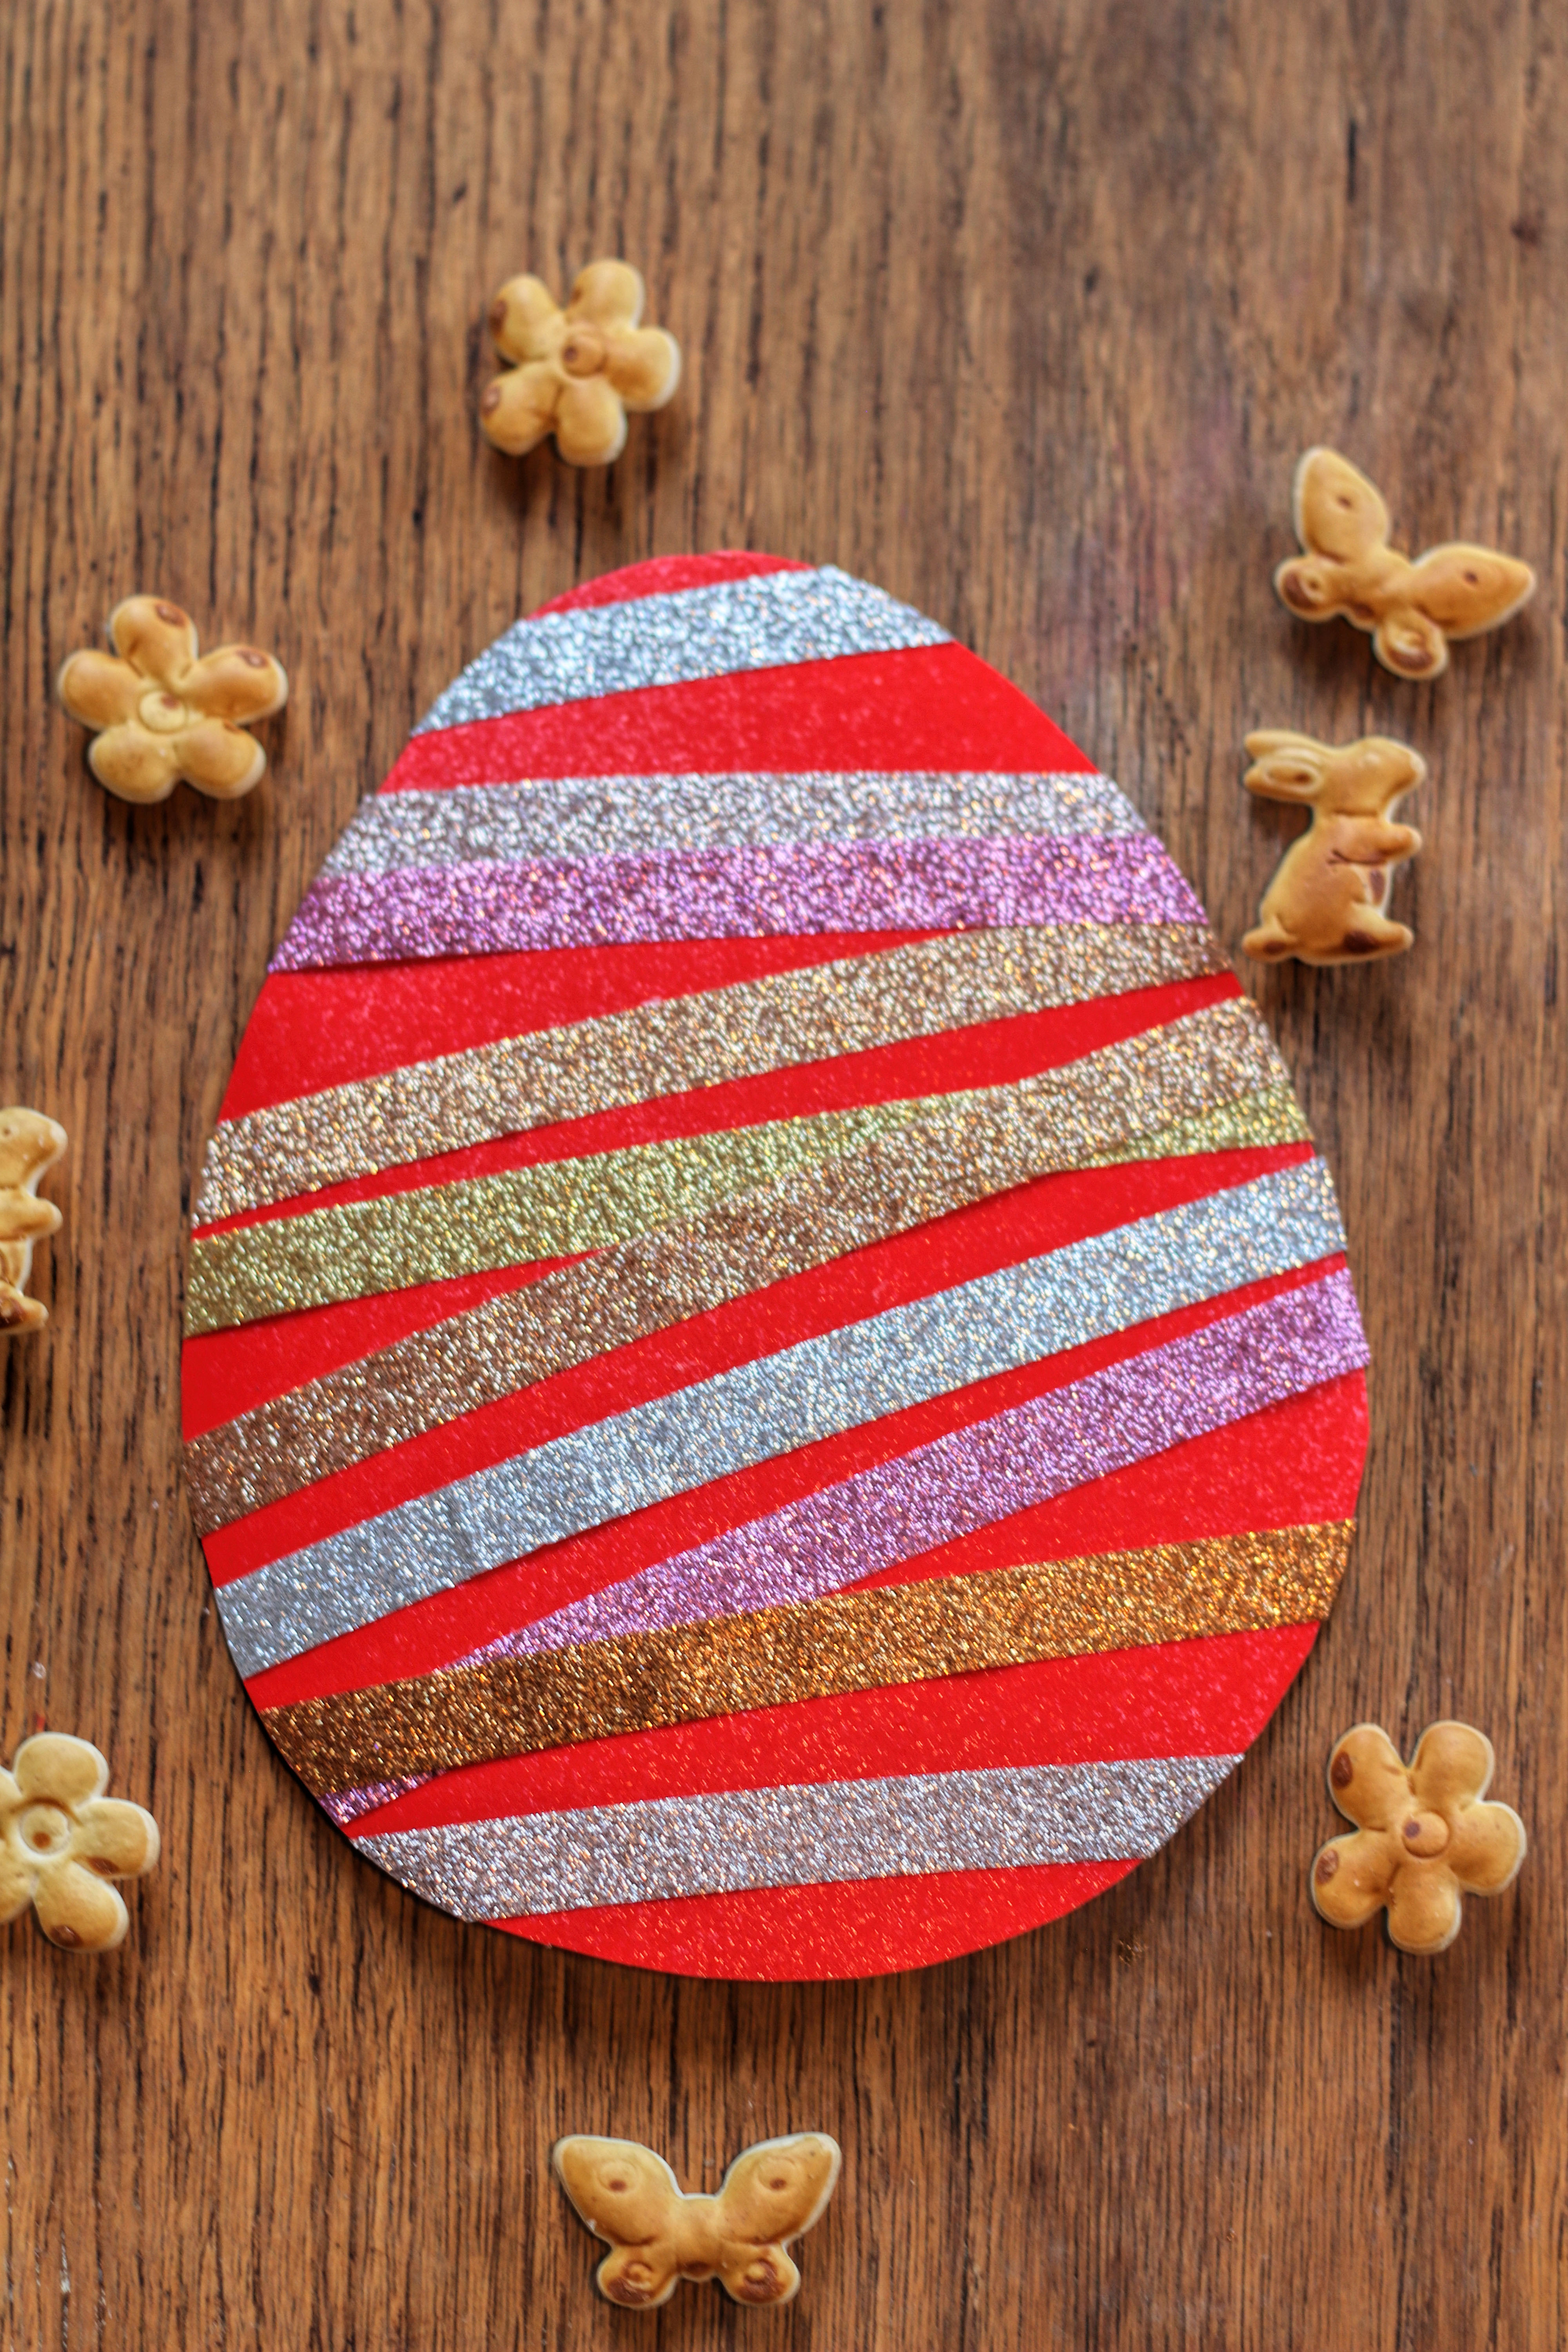
5. Finishing the decoration:
The finished Easter egg can now be displayed, hung up, or given away as a small Easter decoration.
This craft idea is especially great for young children because it’s quick to make and still produces a really great result.
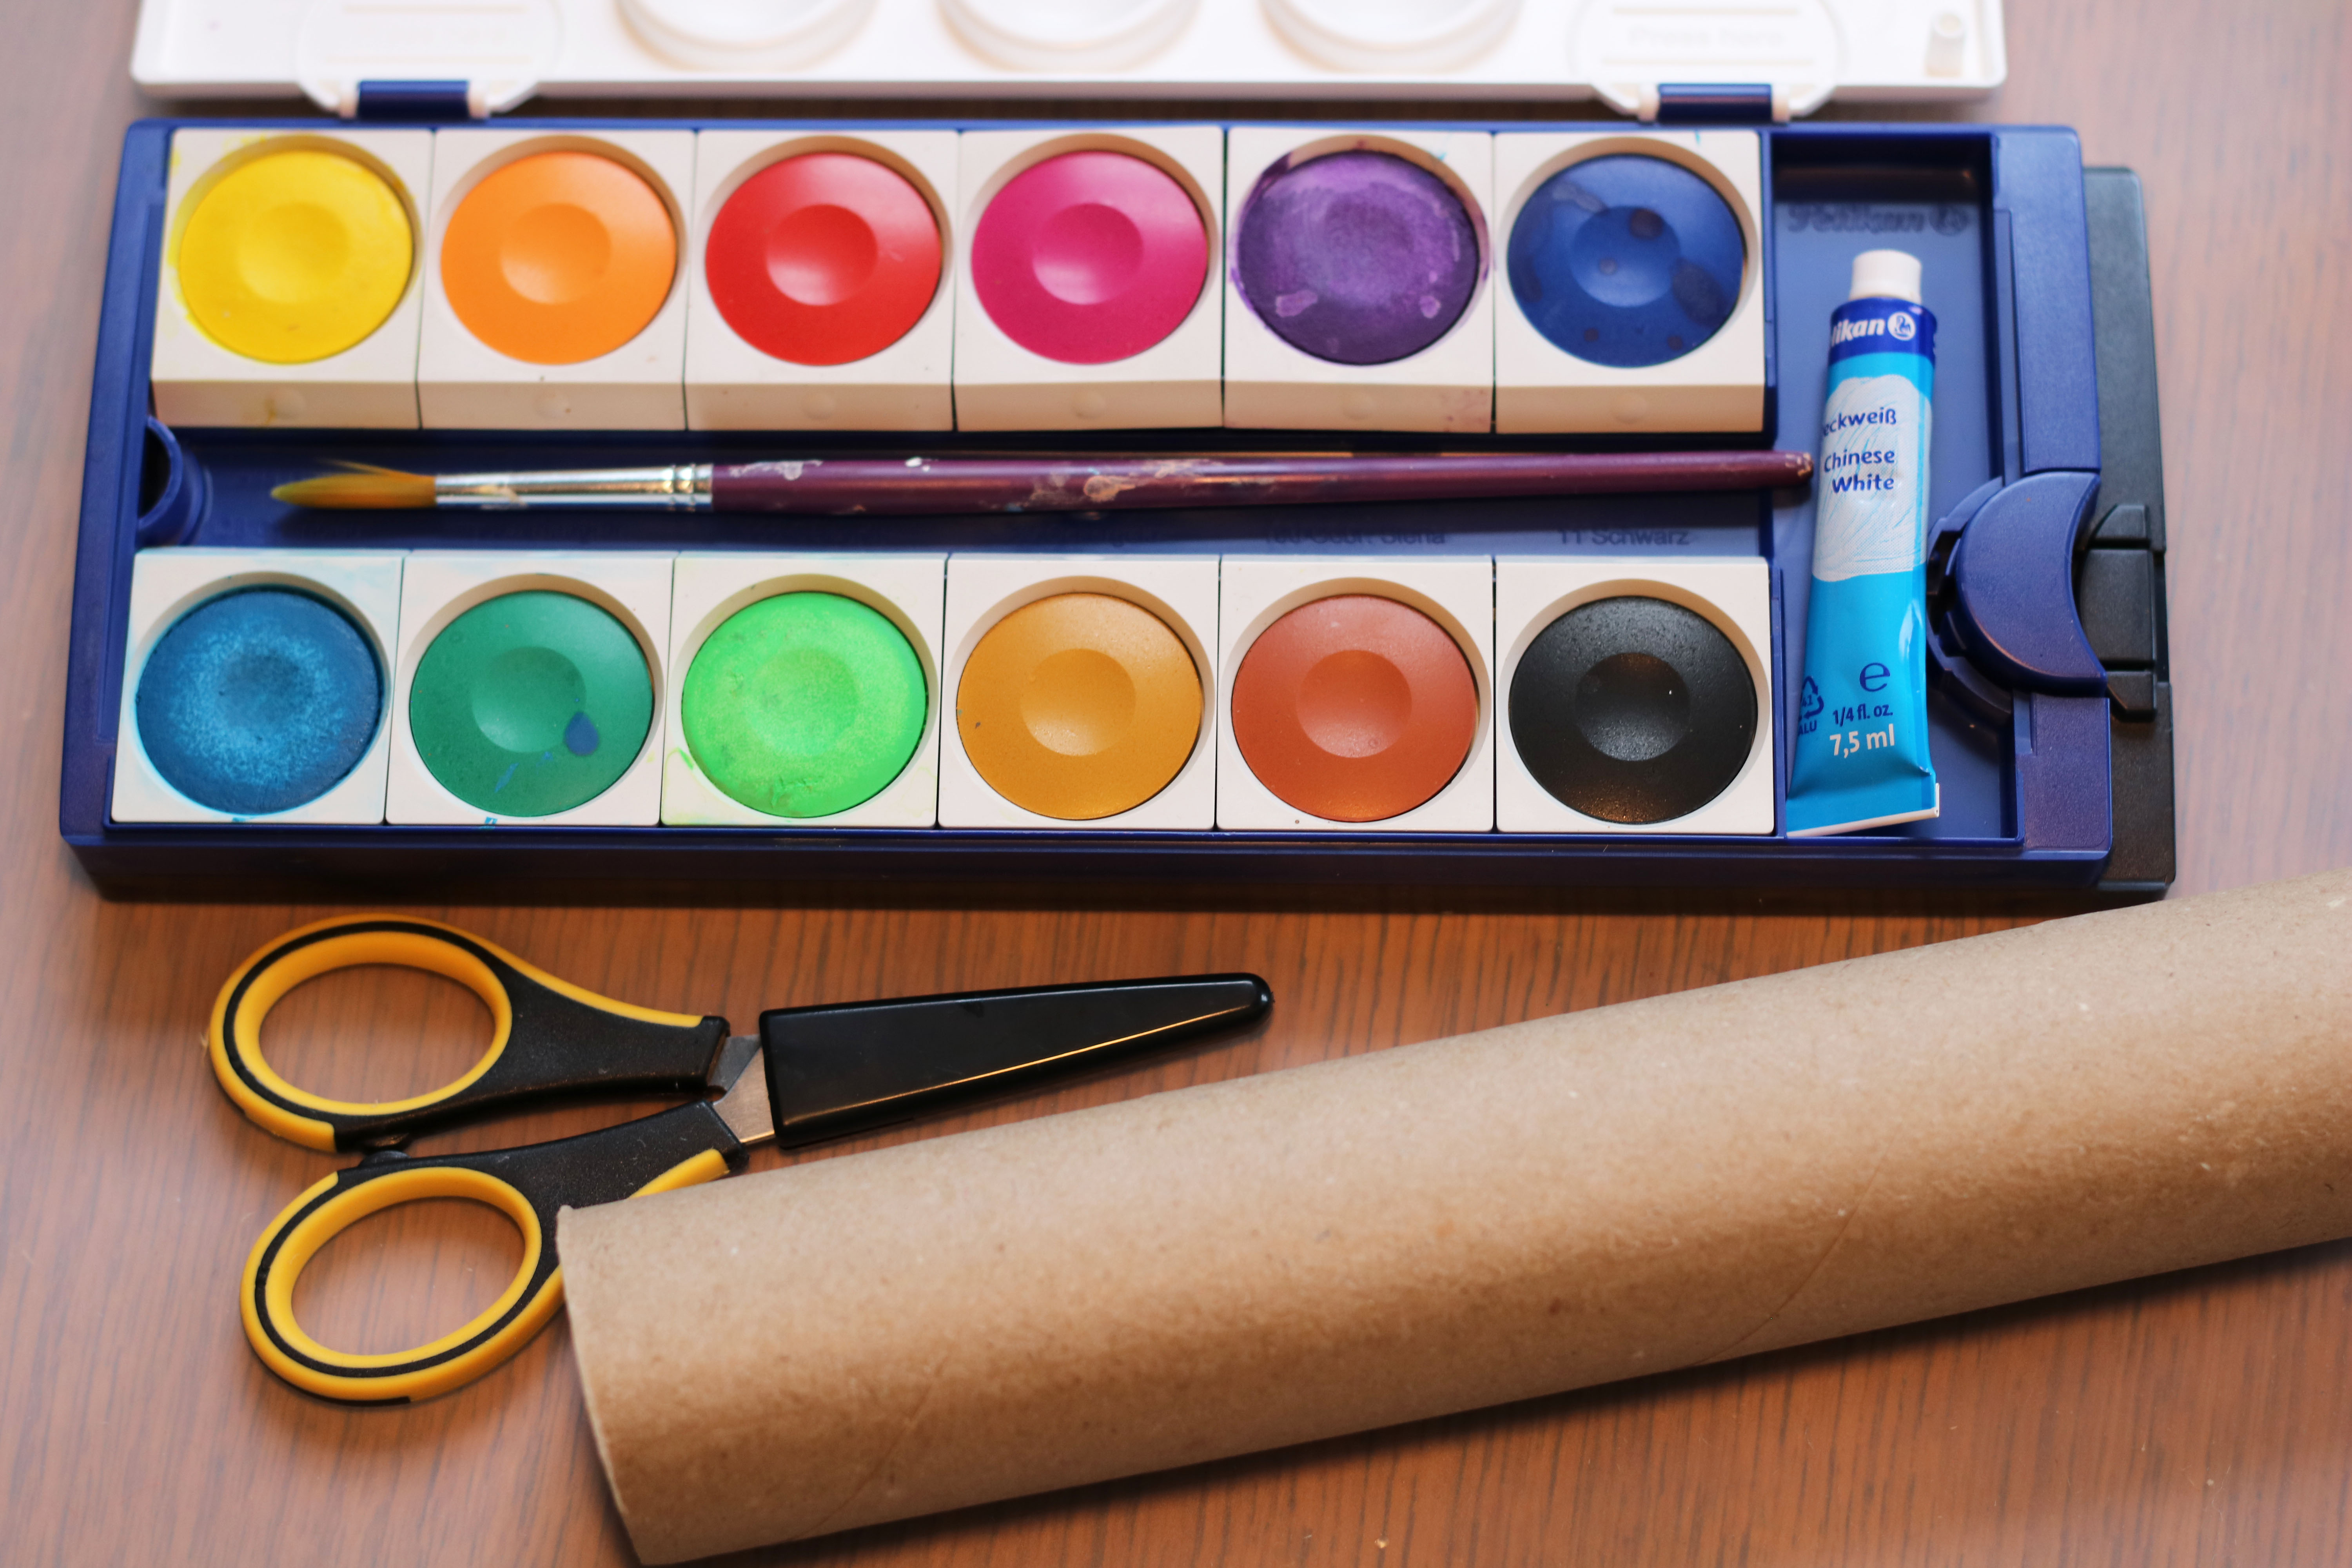
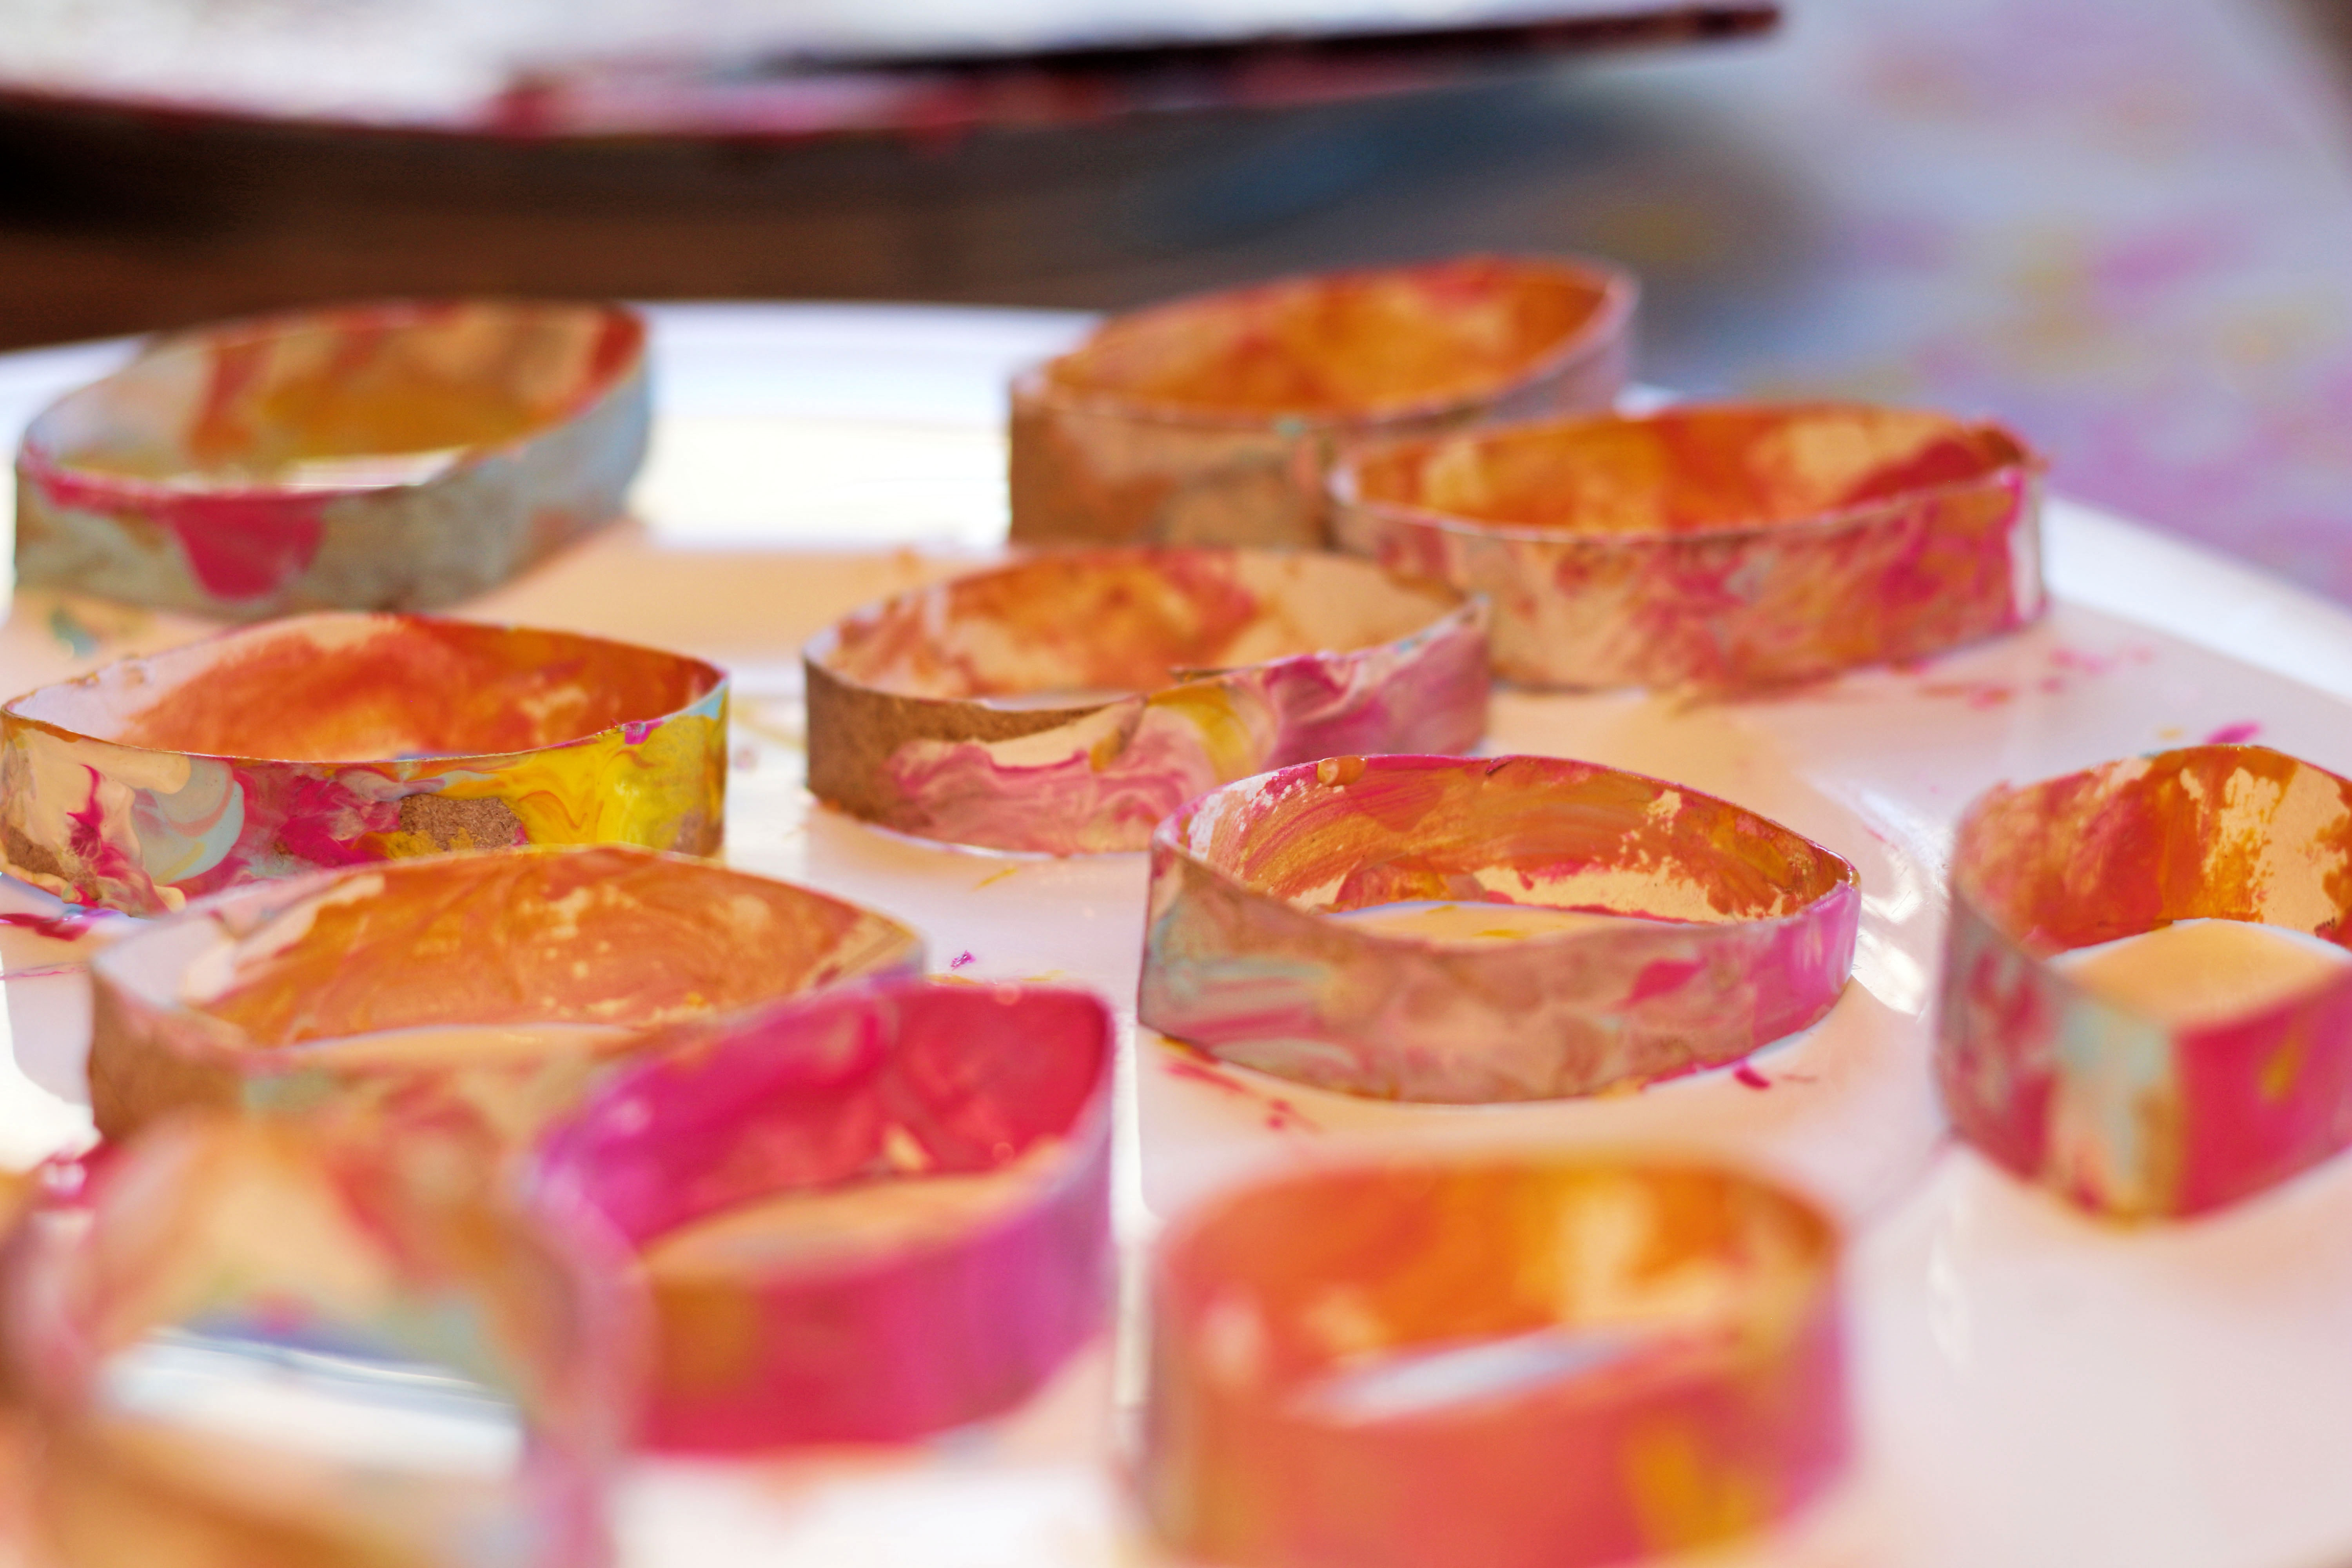
9. Flowers from toilet paper rolls


With just a few materials, you can make colorful flowers out of toilet paper rolls that are perfect for decorating or hanging up. Even young children can join in on the painting and design the flowers exactly as they imagine—whether in a single color, multicolored, with a brush, or simply with their hands.
Here's what you'll need:
- Toilet paper rolls
- Craft scissors for adults
- Finger paint:
- from 1 to 2 years
- ages 2 and up most are approved
- Brush (optional)
- special craft glue for children
- We use a food-safe baking mat
- Protection for the child's clothes (e.g., a smock or an old T-shirt)
- Wet wipes or a bowl of water for washing your hands
- Optional: string or ribbon for hanging the finished flowers
Affiliate links — we may receive a small commission, your price stays the same.

Here's how it works:
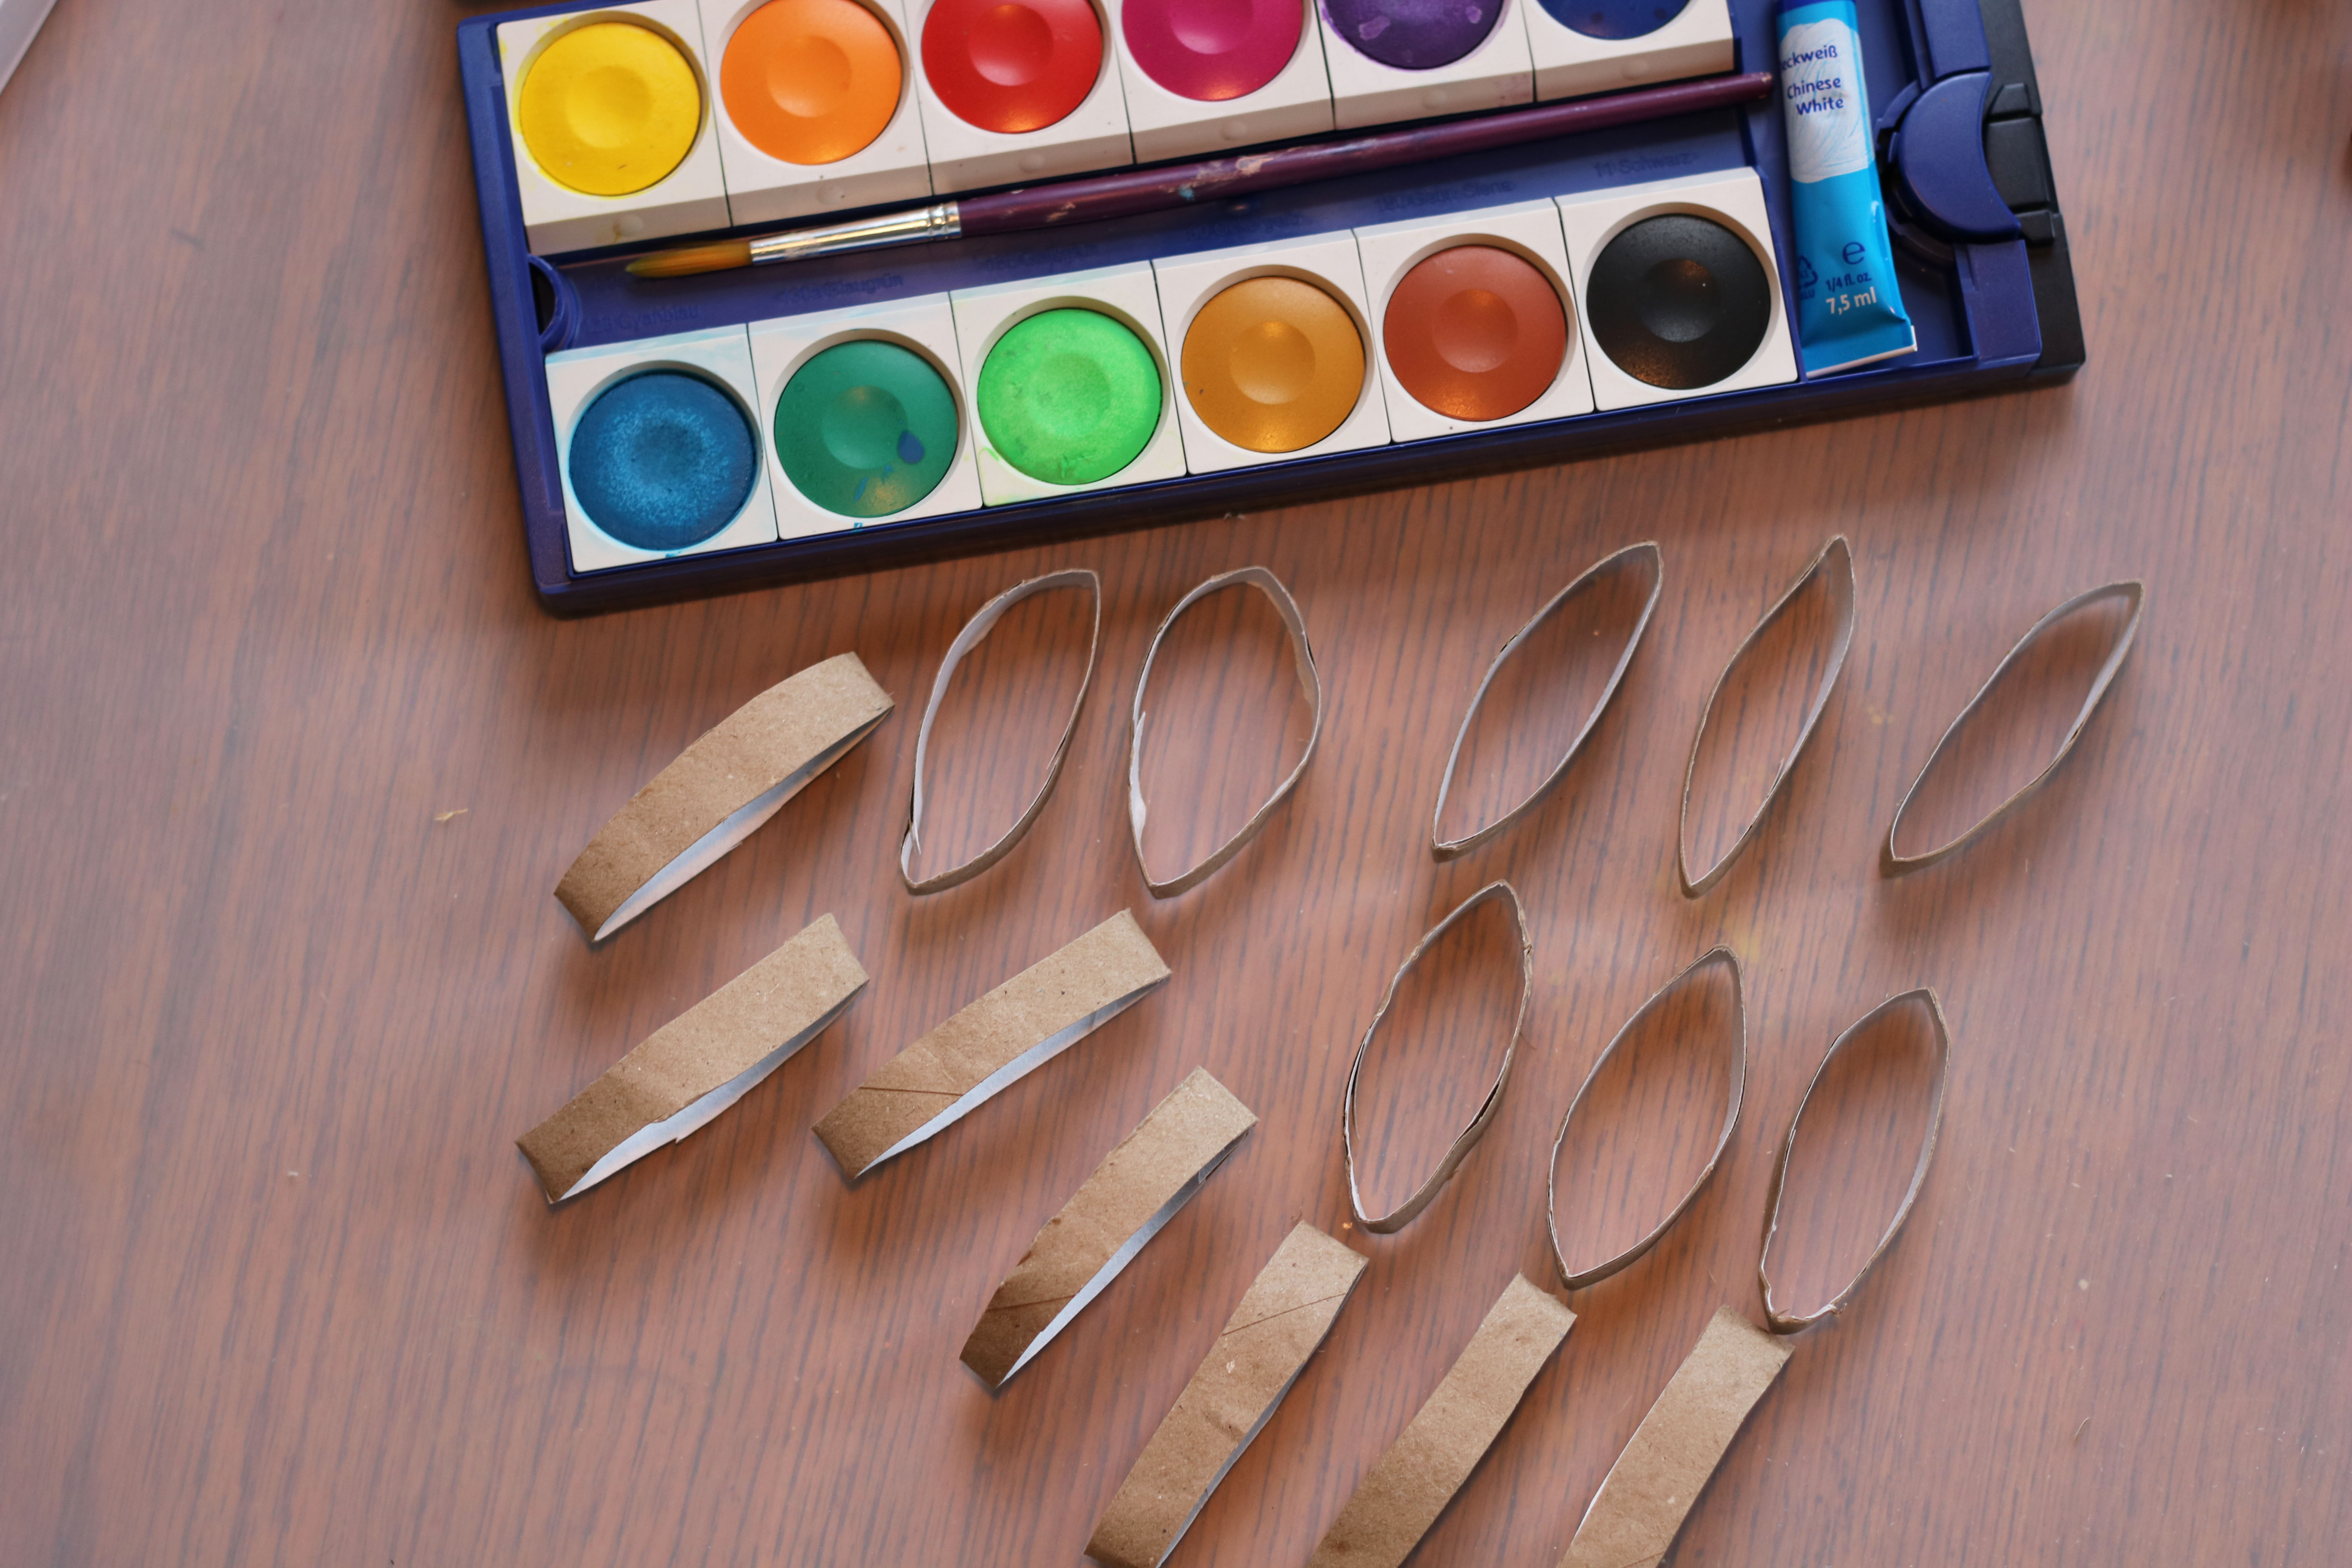
1. Prepare the rolls:
Cut the toilet paper roll into rings of equal width.
2. Shape the petals:
Gently squeeze each ring together at two opposite sides. This easily creates small petals.
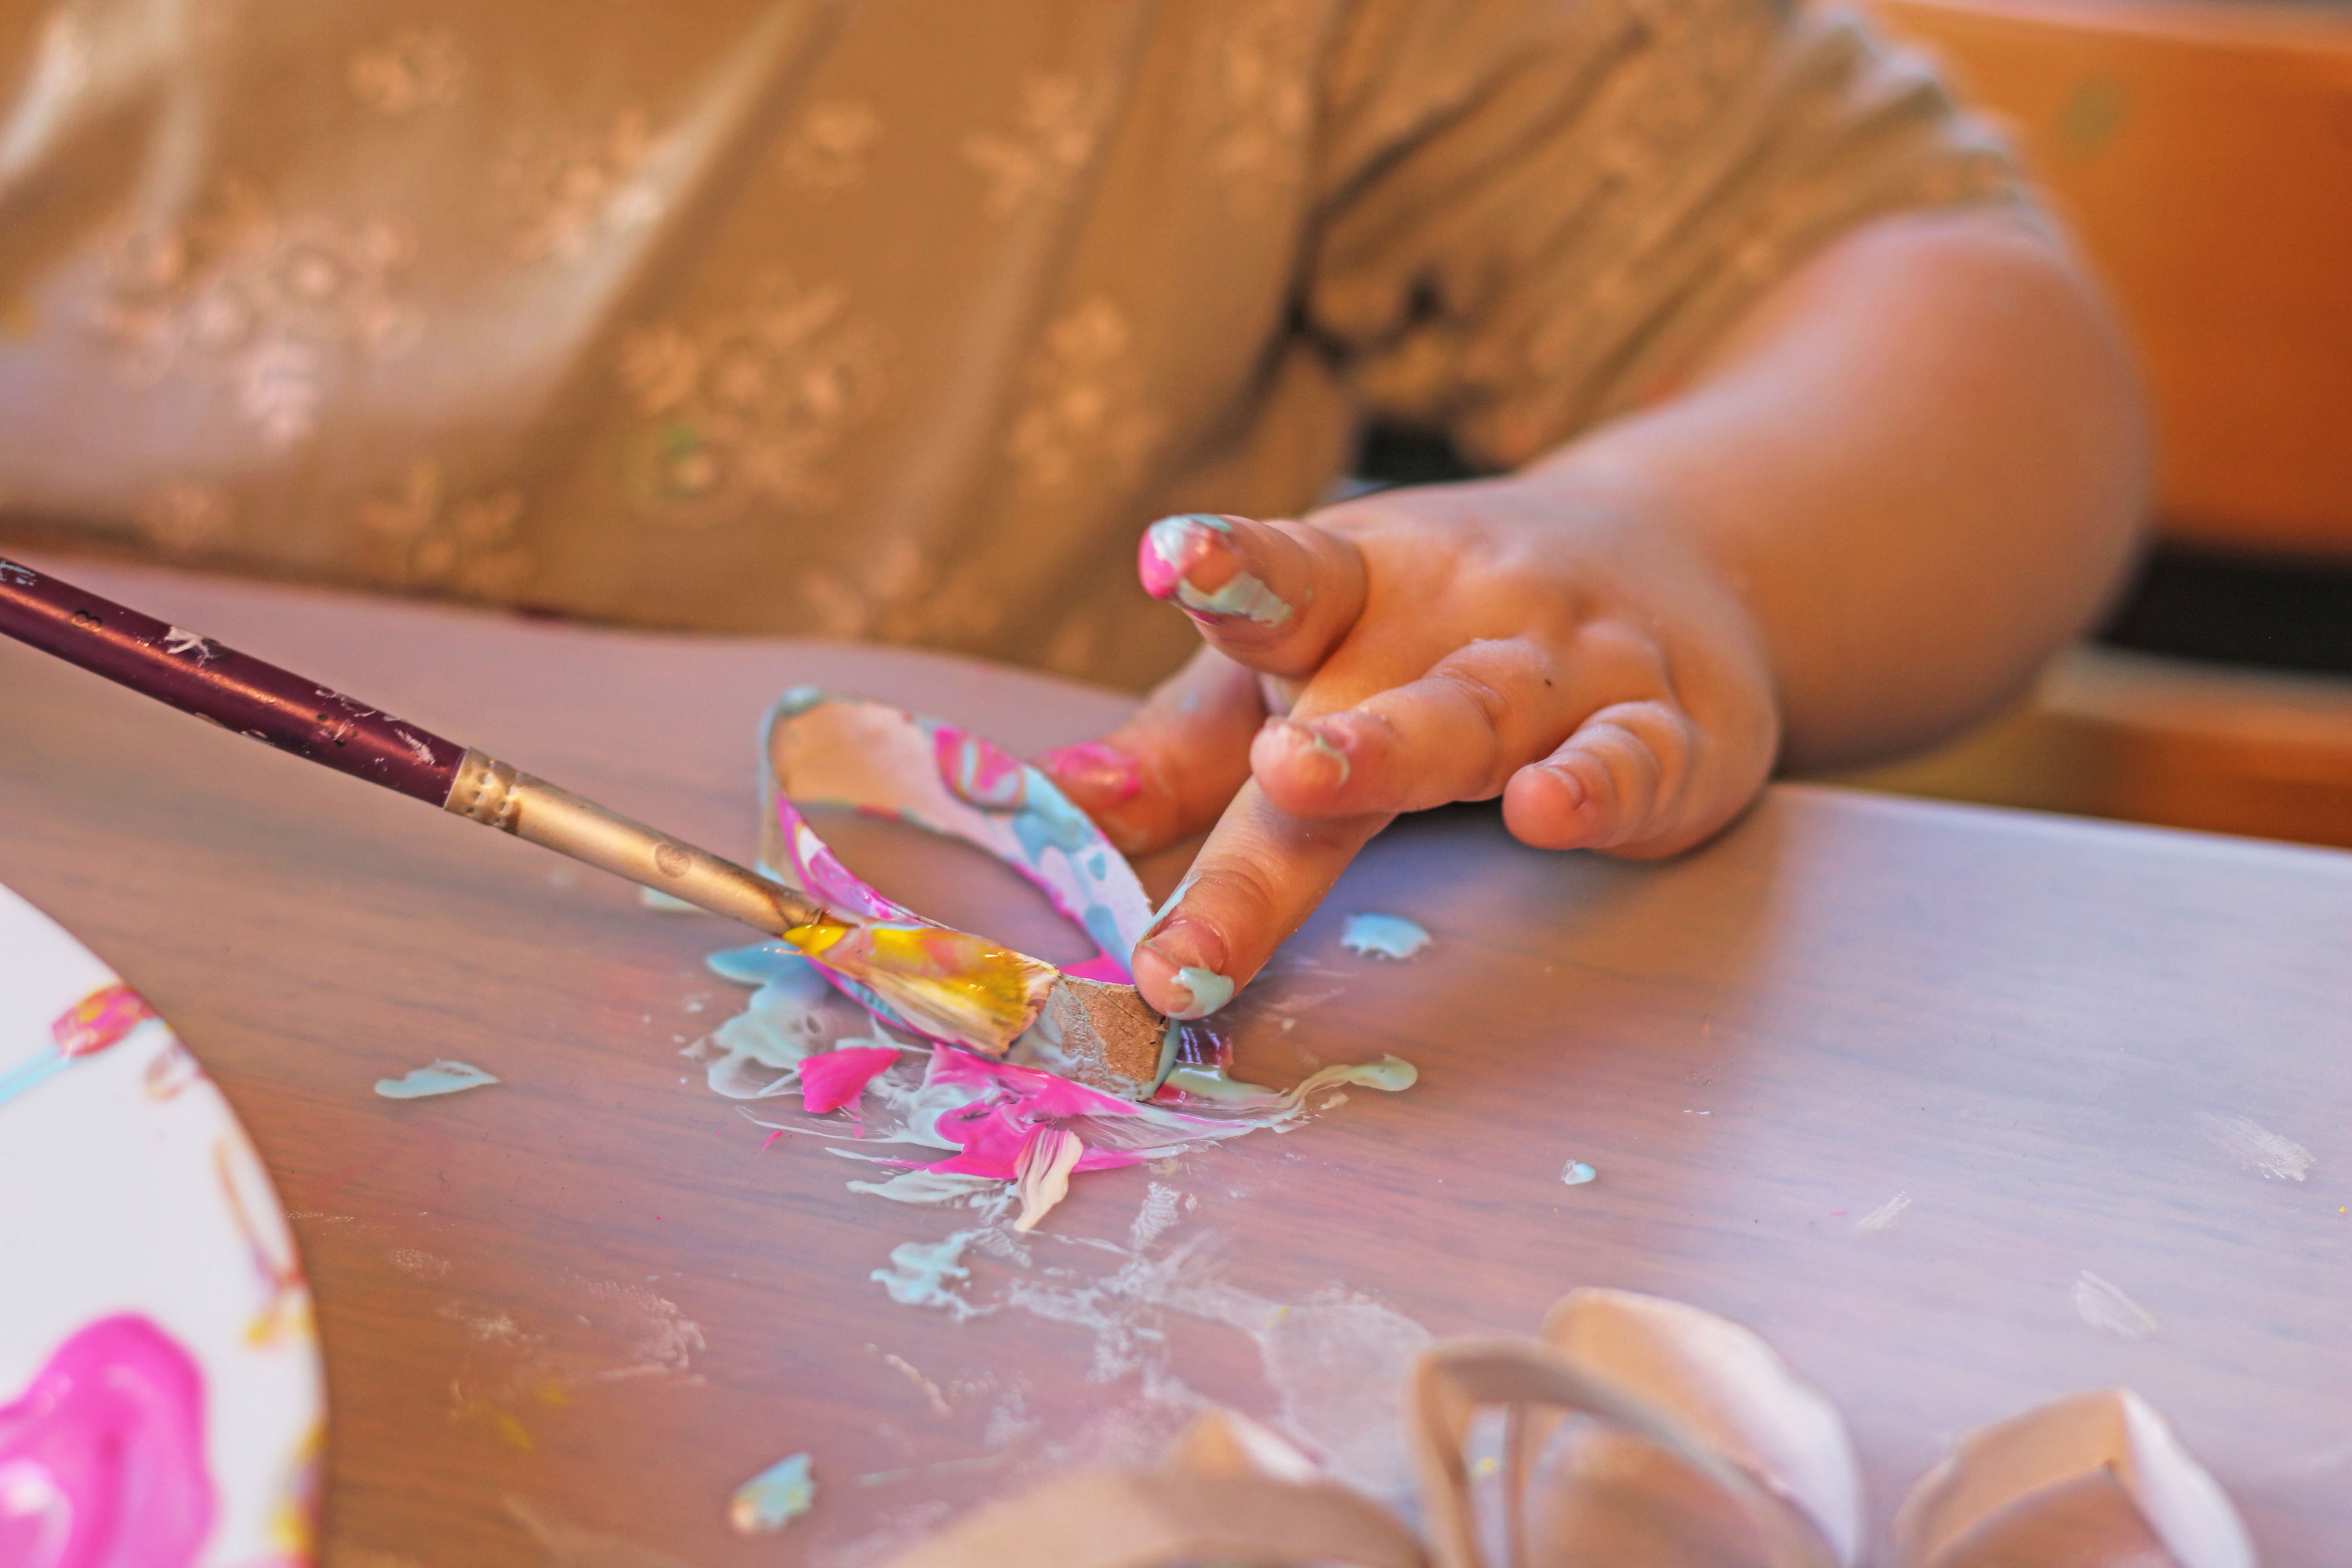
3. Paint the petals:
Now your child can paint the shaped petals with finger paint. Whether using a brush or their hands, mixing colors or using a favorite color—anything goes.
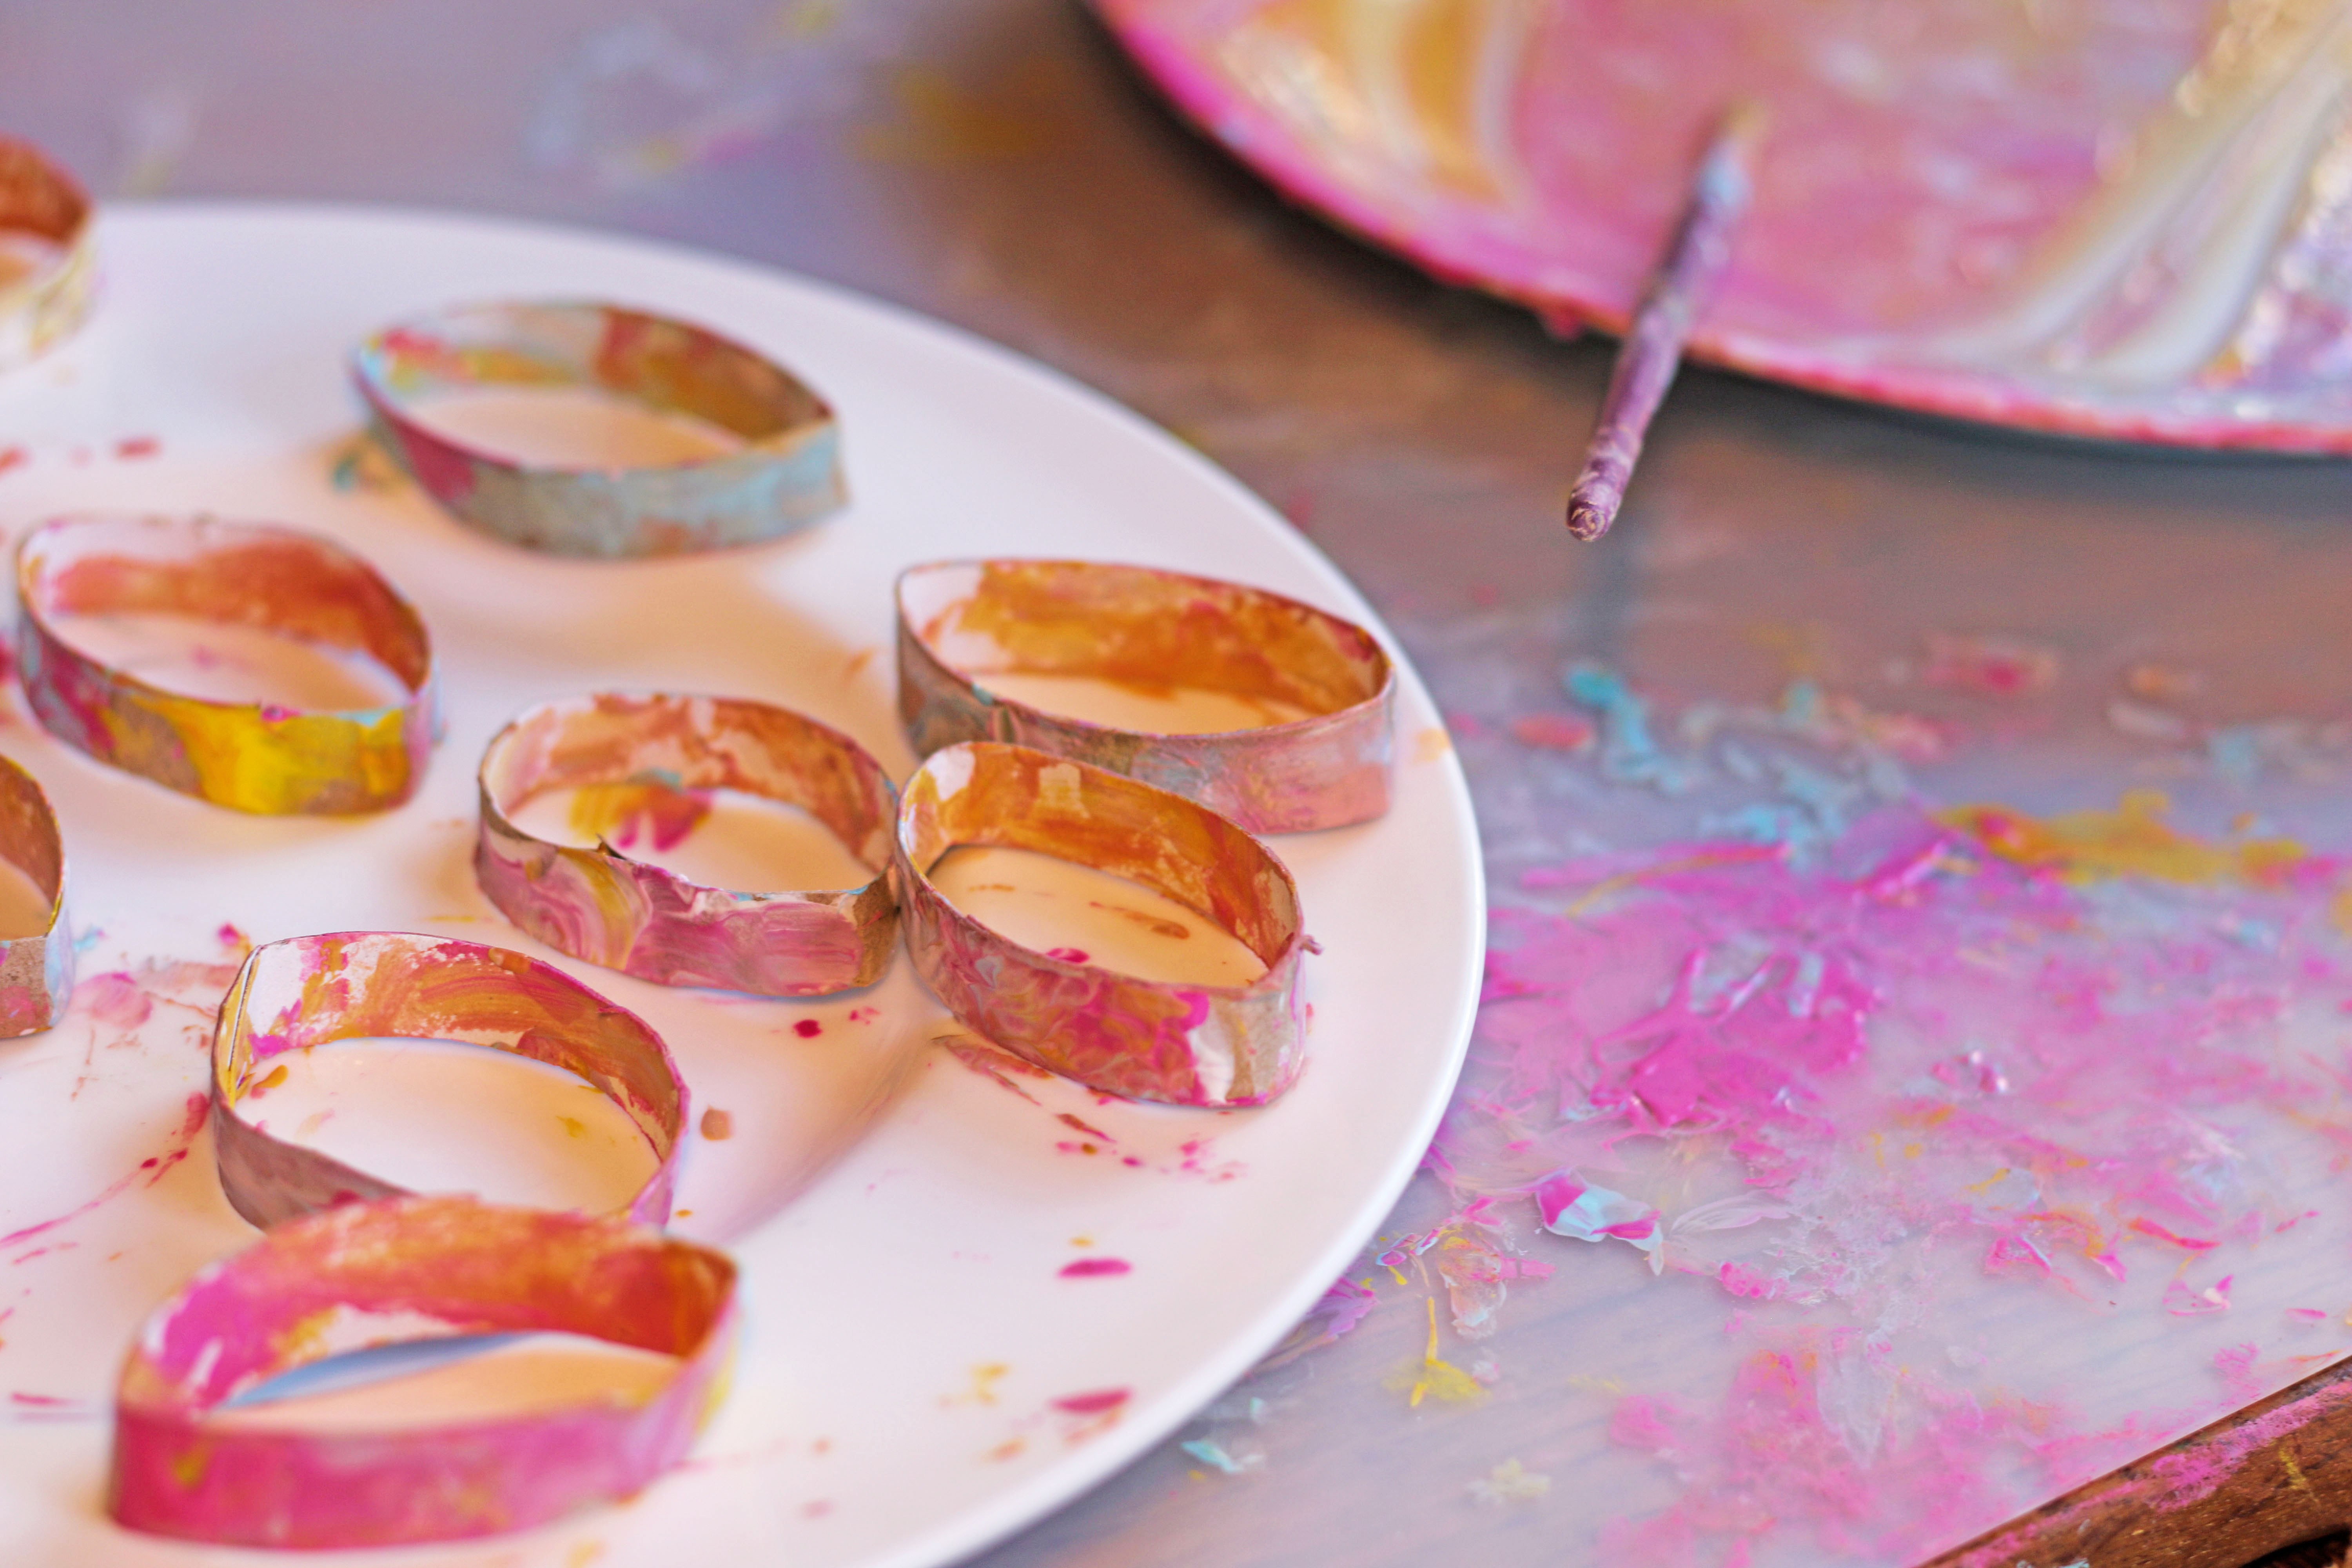
4. Let them dry:
To prevent the paint from smudging later, let the painted petals dry thoroughly first.
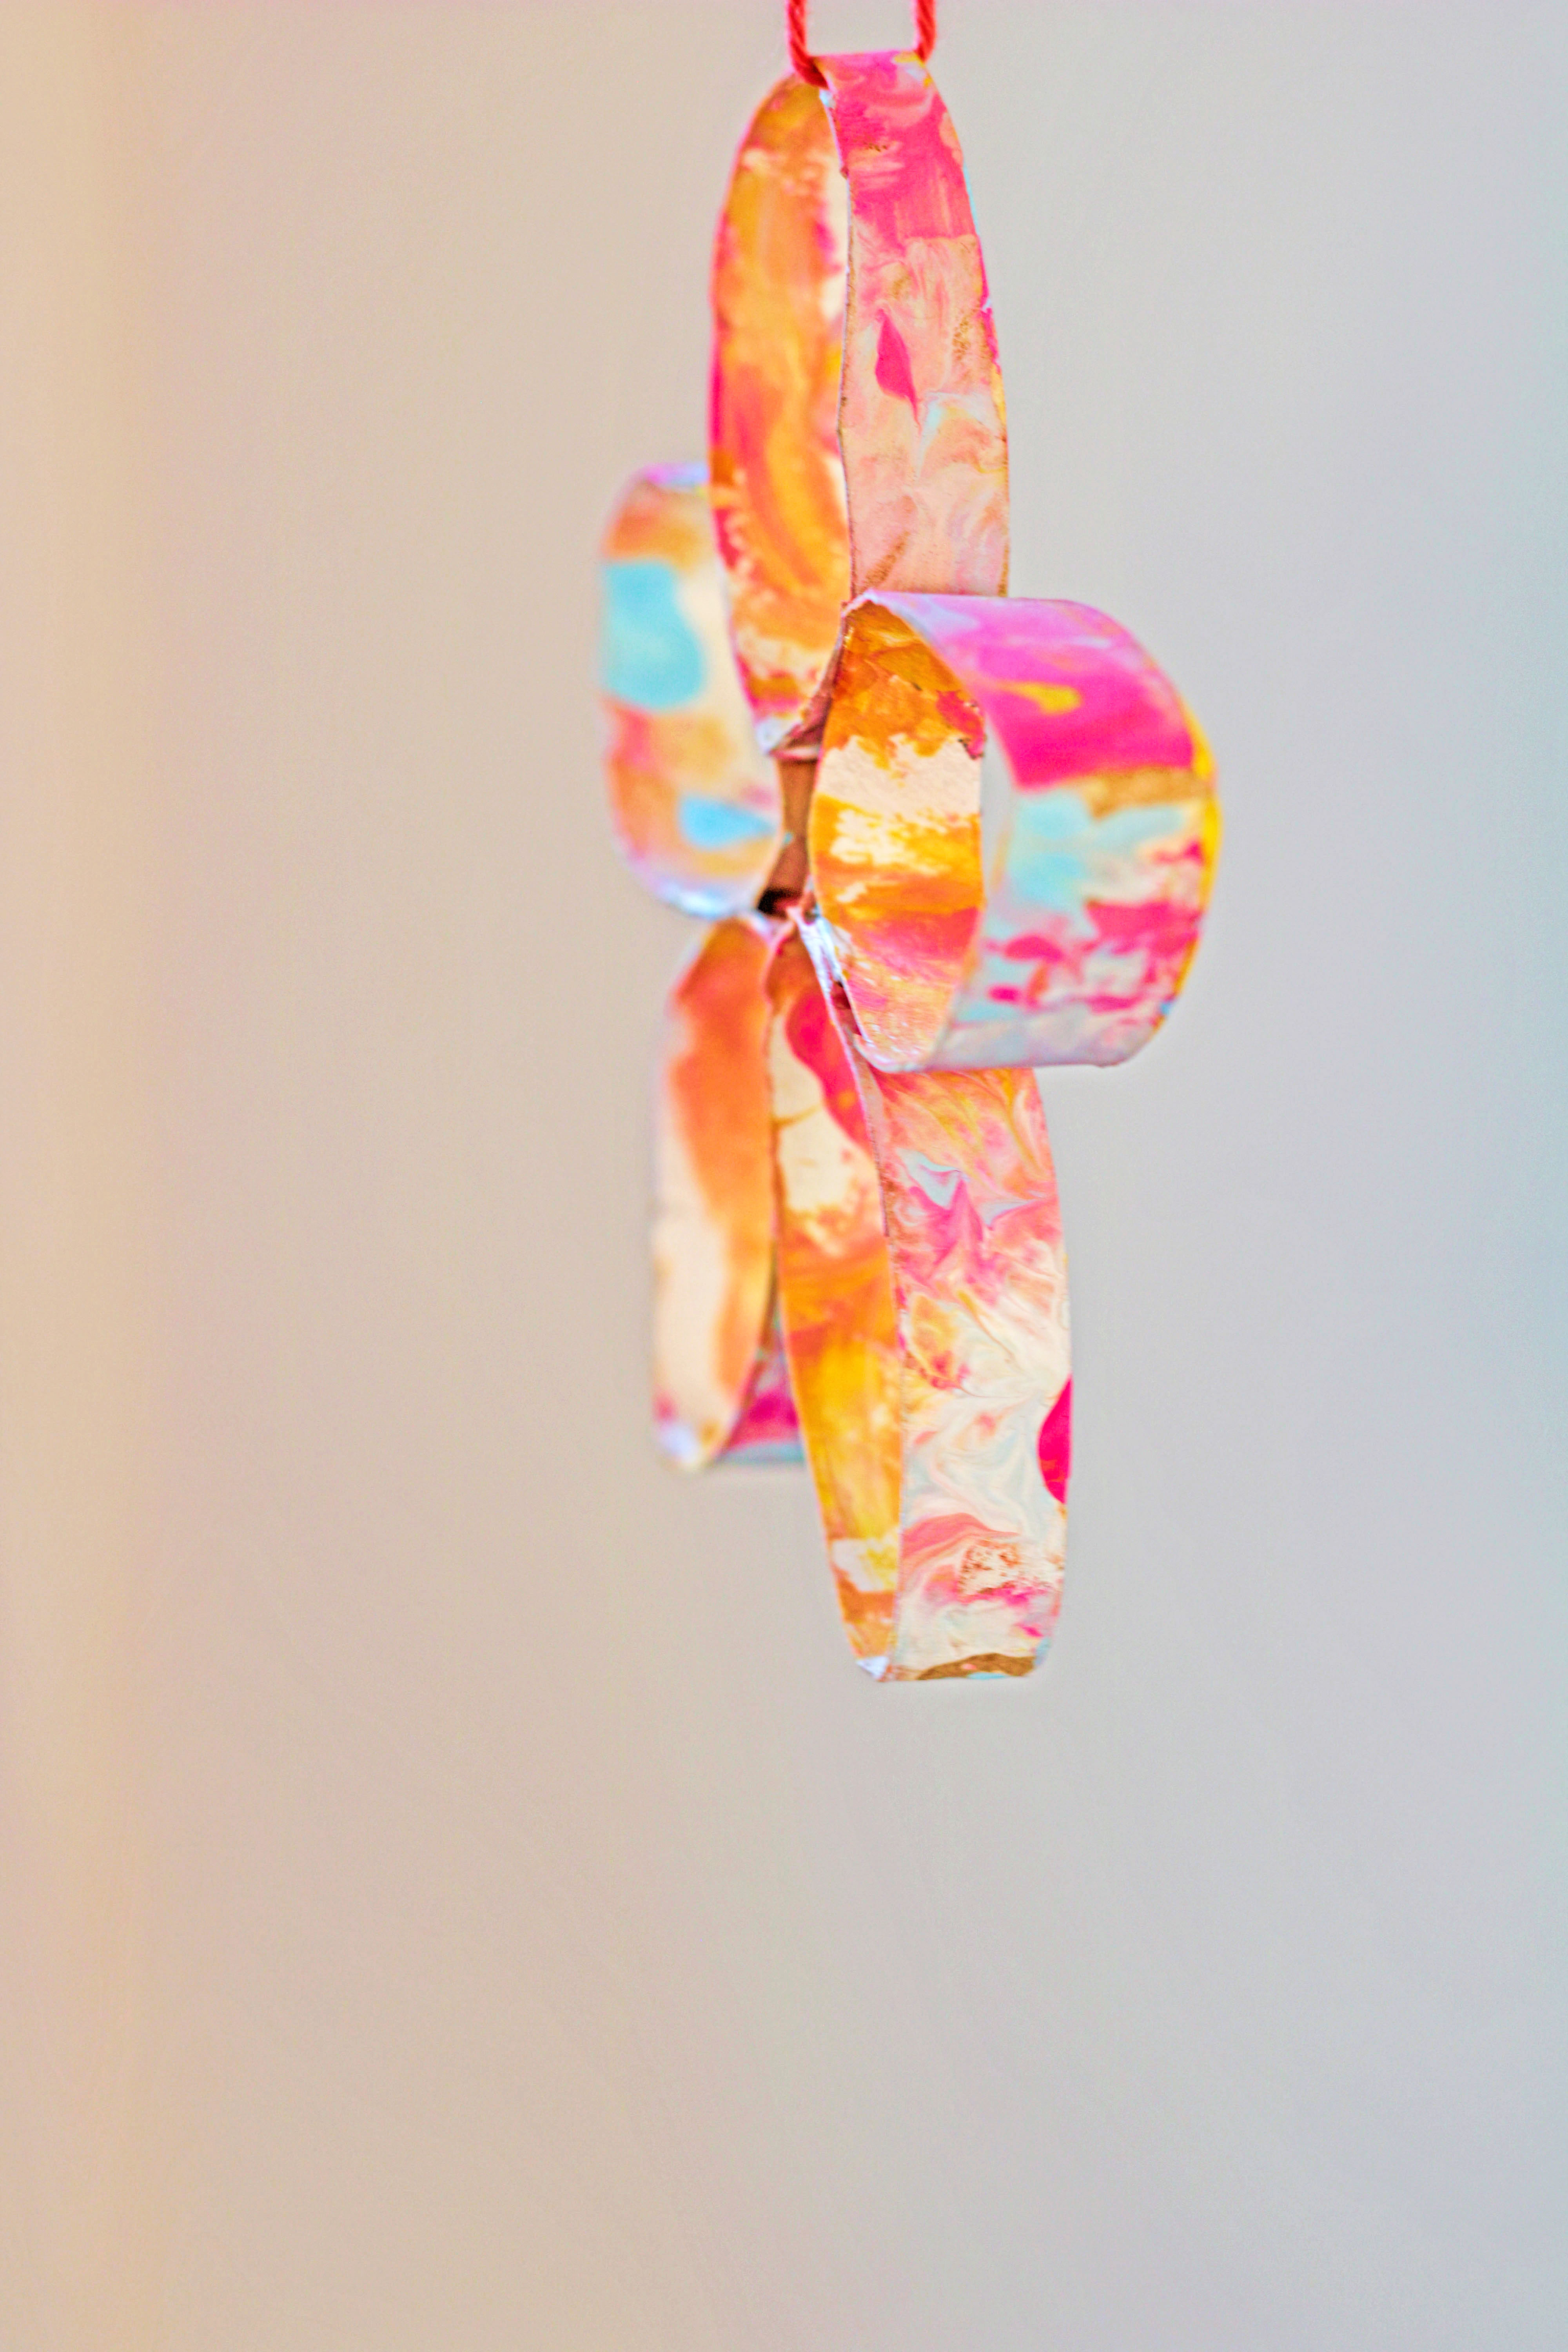
5. Assemble the flower:
To make a flower, glue 5 petals together.
6. Decorate or hang up:
The finished flowers look beautiful as spring decorations and can be hung up or placed wherever you like.
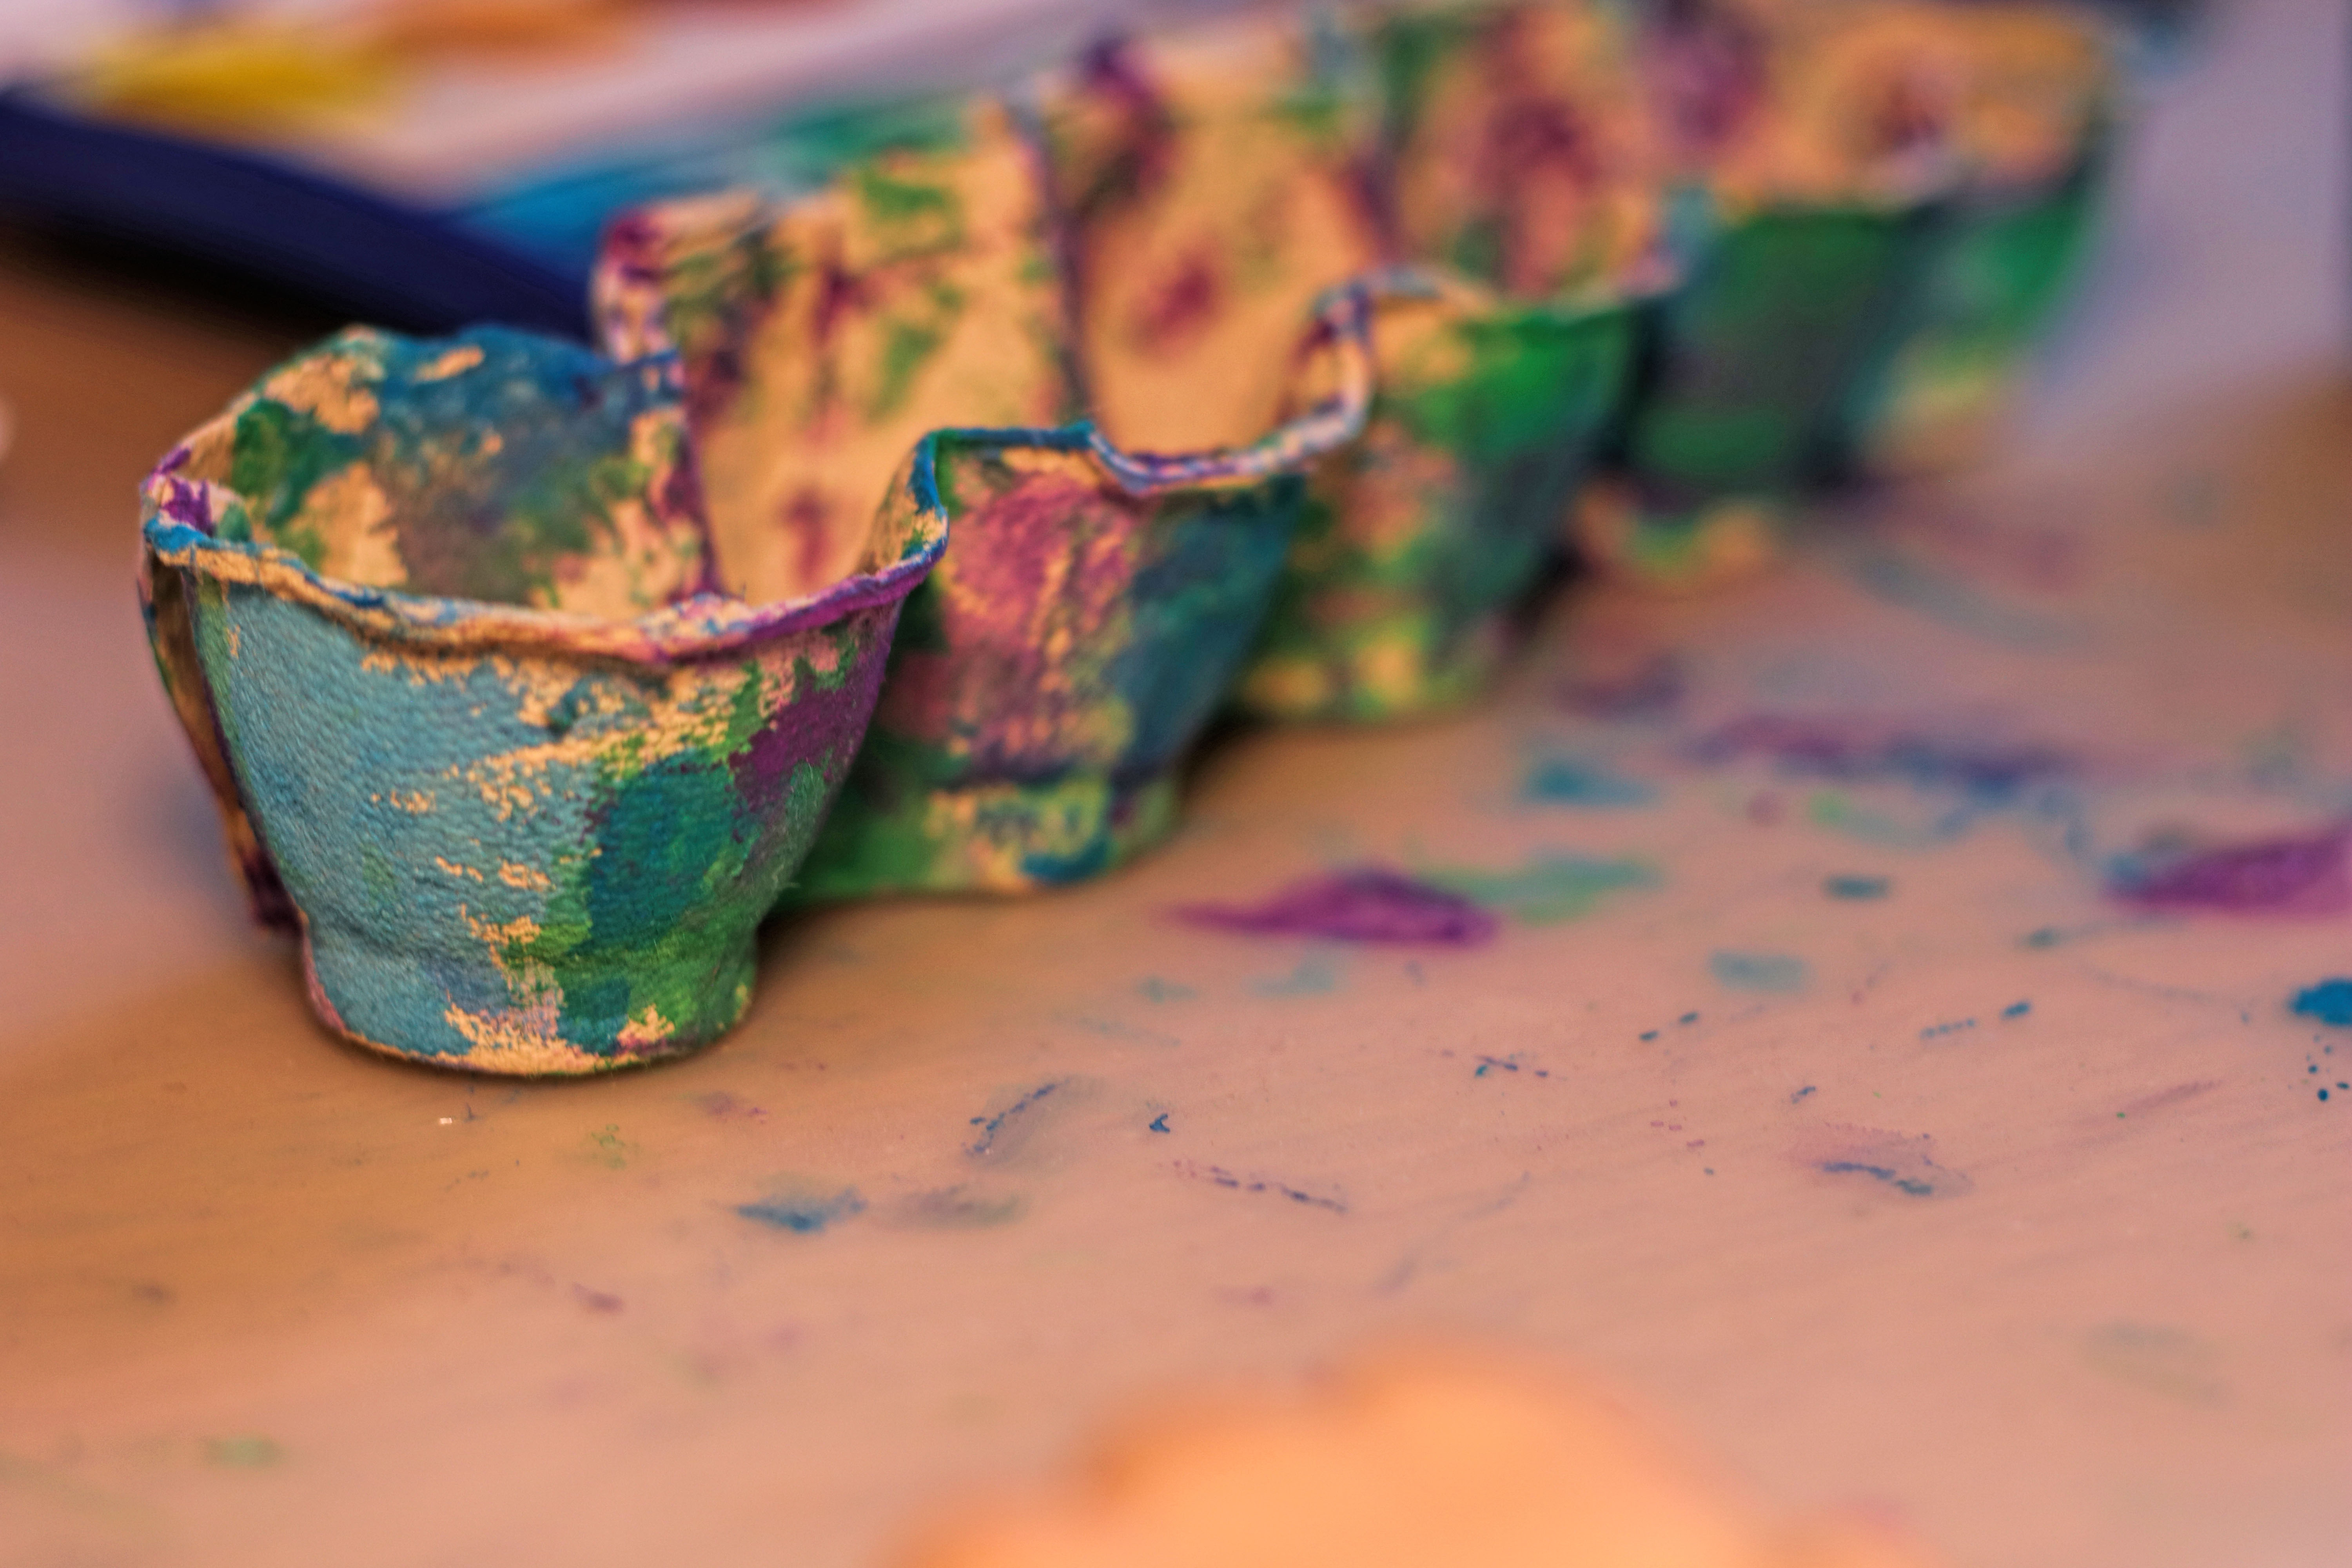
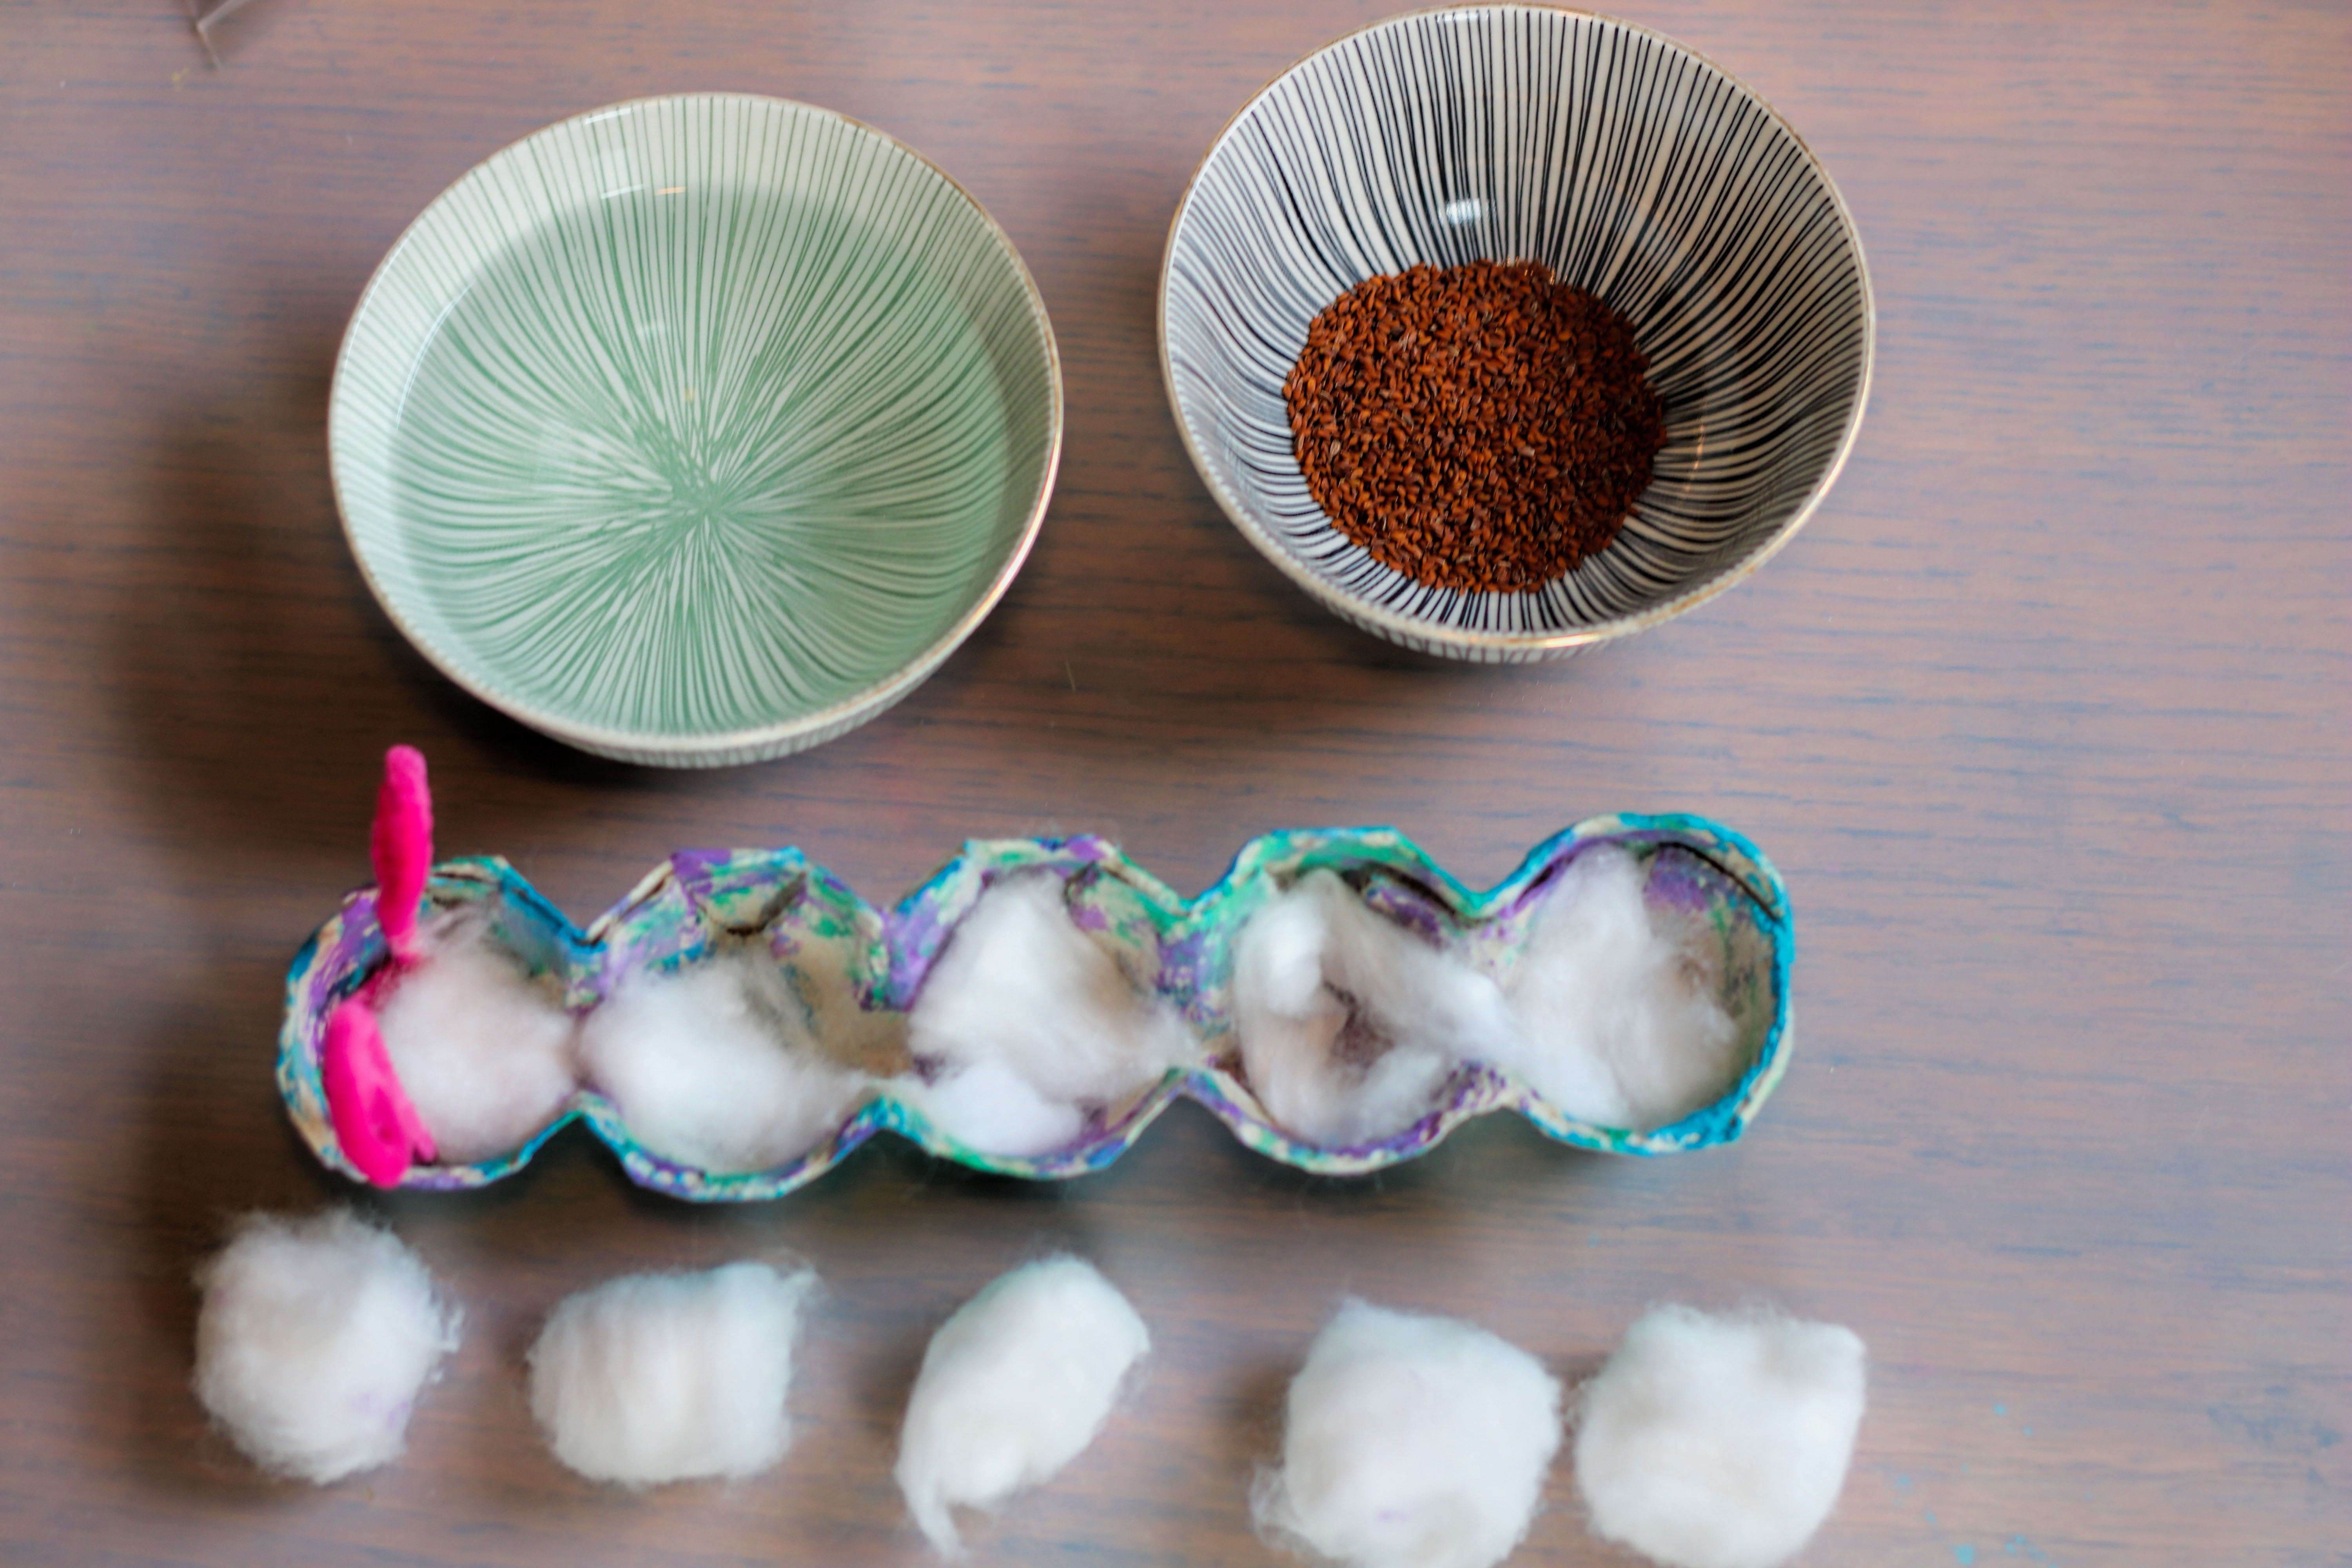
10. Cress Caterpillar from an Egg Carton

You can easily make a little cress caterpillar out of an egg carton—it not only looks cute but also grows green “hair” after just a short time. Painting is a lot of fun for young children, and sprinkling the cress seeds is also a fun part of this craft. Later, your child can watch the caterpillar grow every day.
Here's what you'll need:
- Egg carton
- Watercolors
- Paintbrush
- Craft scissors for adults
- craft glue
- Pipe cleaners and googly eyes (optional) from the large set
- cress seeds
- Cotton wool
- Water
- pen
- We use a food-safe baking mat on the table.
- Protection for the child's clothes (e.g., a smock or an old T-shirt)
- Wet wipes or a bowl of water for washing your hands
Affiliate links — we may receive a small commission, your price stays the same.


Here's how it works:
1. Prepare the egg carton:
Cut a row of several wells out of the egg carton. If you want the caterpillar to be closed on both sides, you can also cut a matching piece from the back of the egg carton (without wells) and glue it to the front from behind.
2. Paint the caterpillar:
Now let your child paint the caterpillar with watercolors. Whether colorful or monochromatic—both look great in the end. Then let it dry thoroughly.
3. Design the face:
Draw a face on the caterpillar or, if you prefer, glue on googly eyes.
4. Attach the antennae:
Shape small antennae out of pipe cleaners and attach them to the front of the caterpillar.
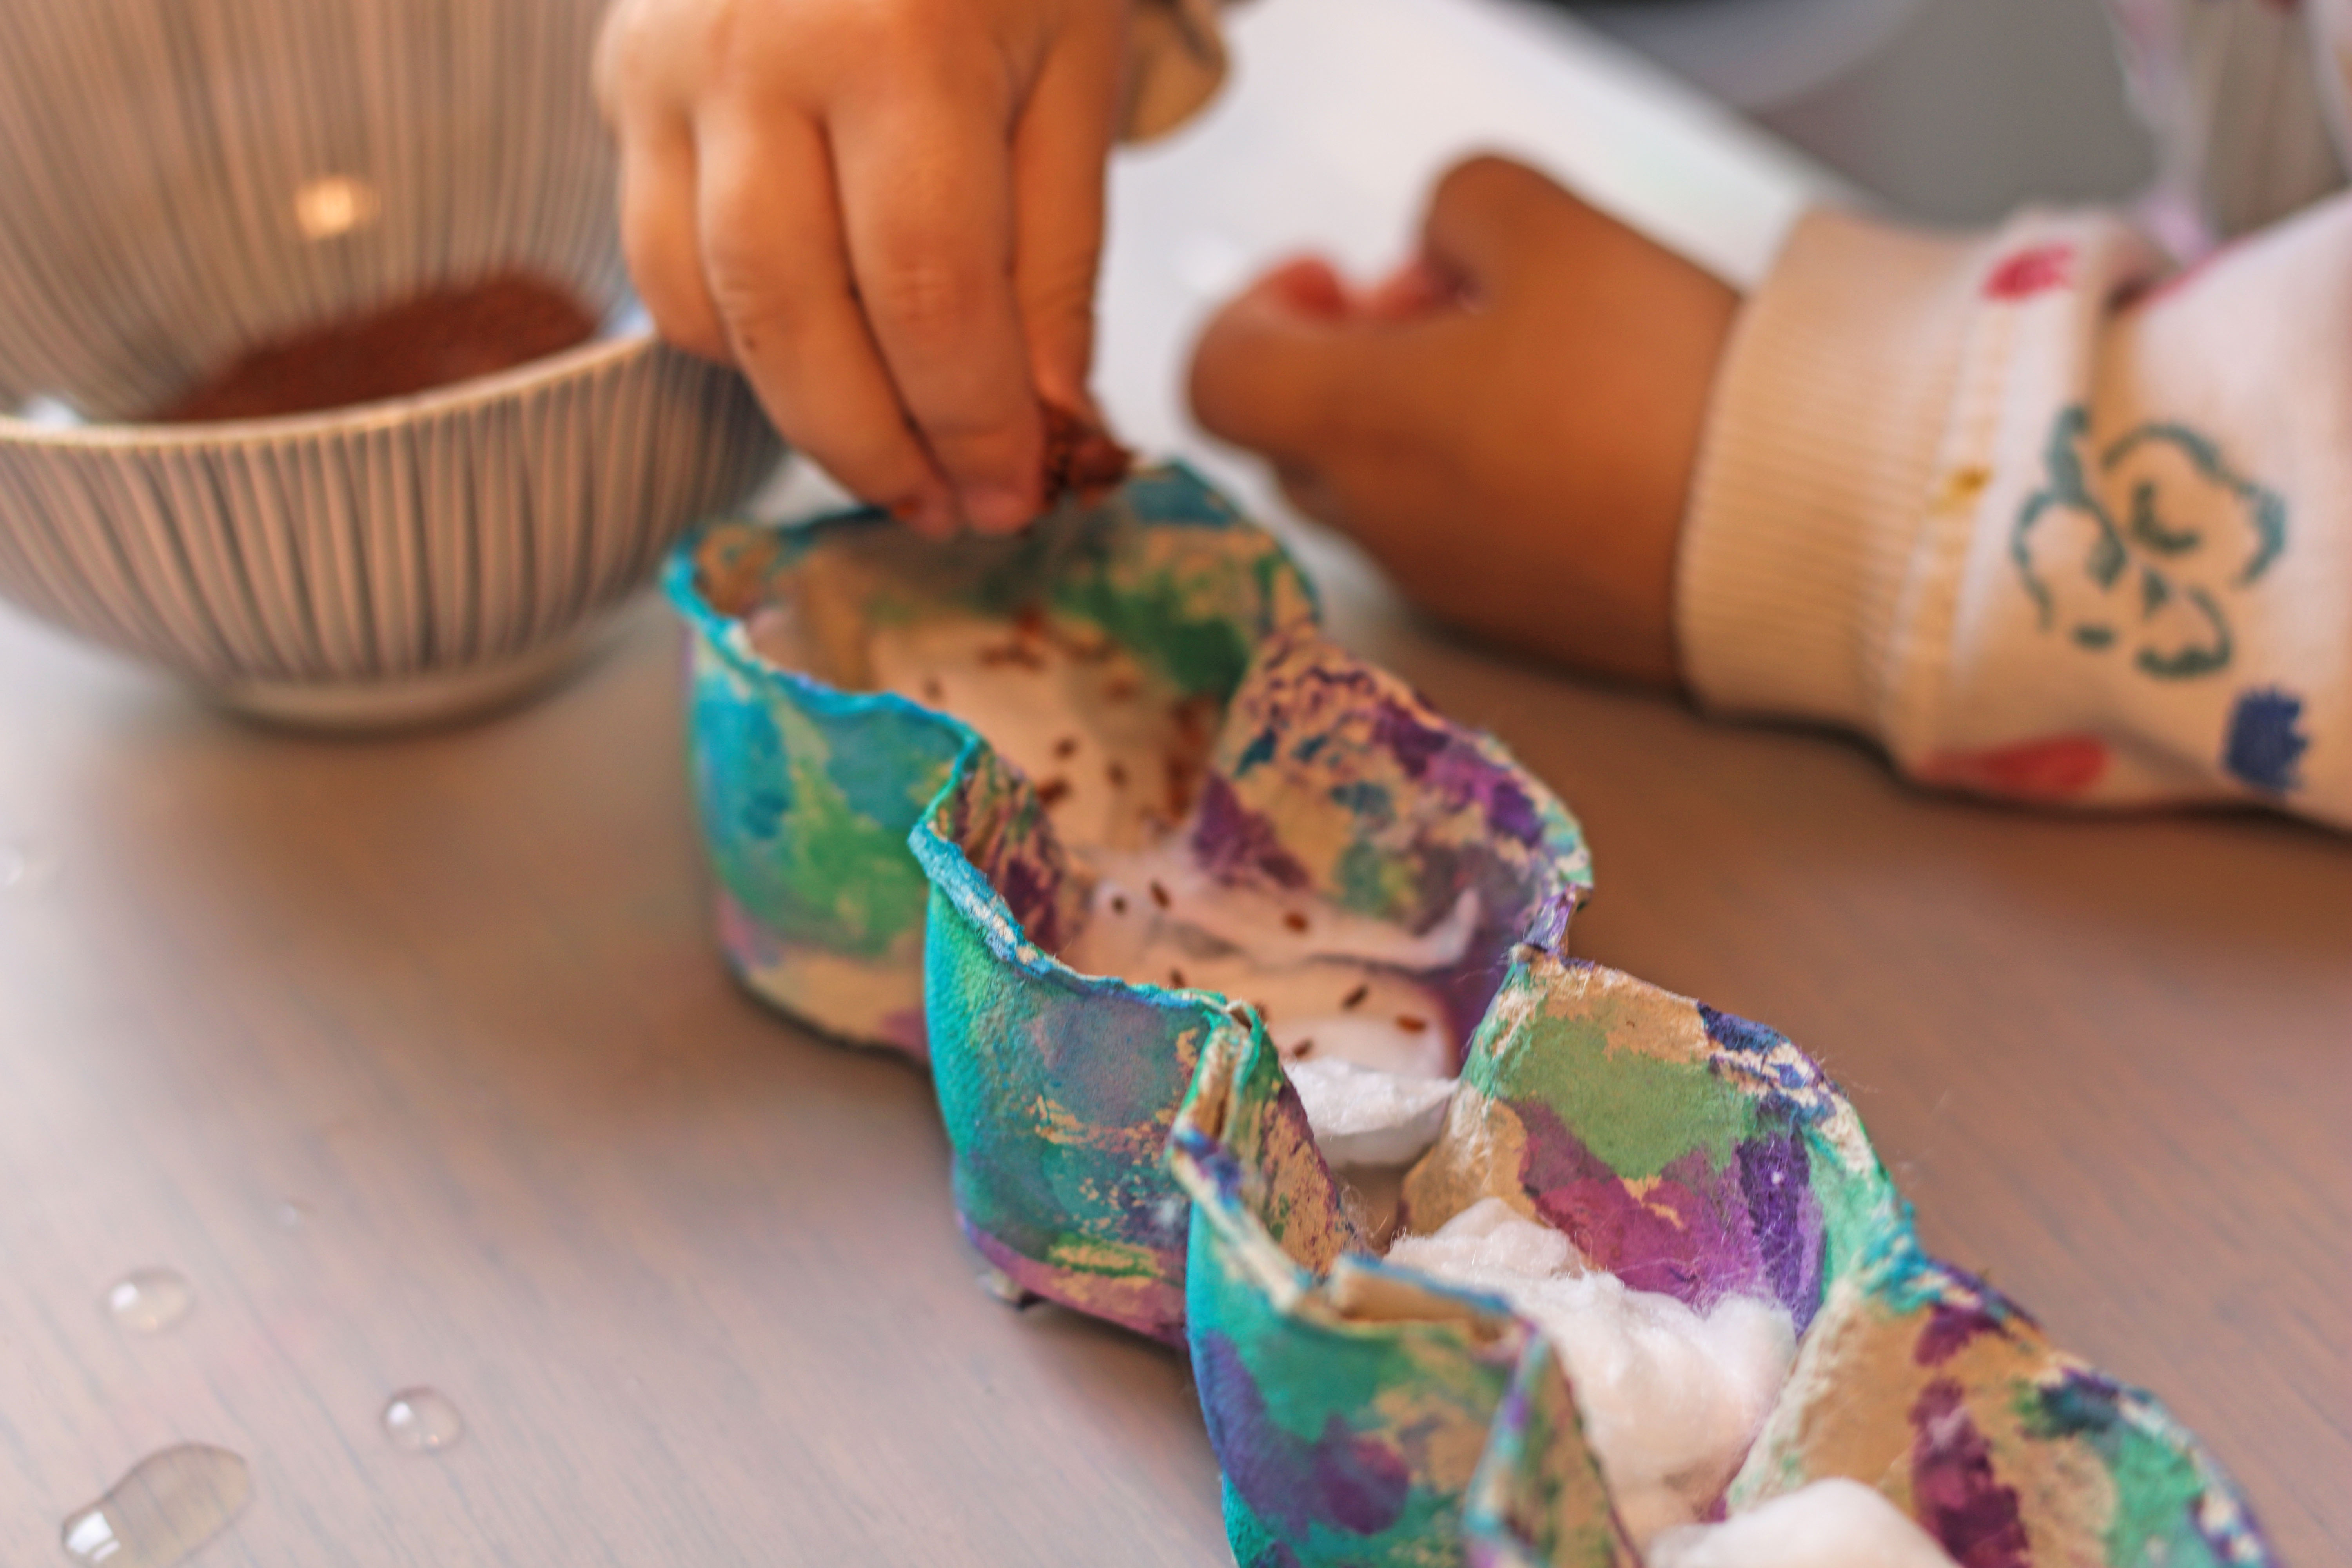
5. Add cotton:
Place some cotton in the indentations and moisten it slightly. It should be nicely moist, but not too wet.
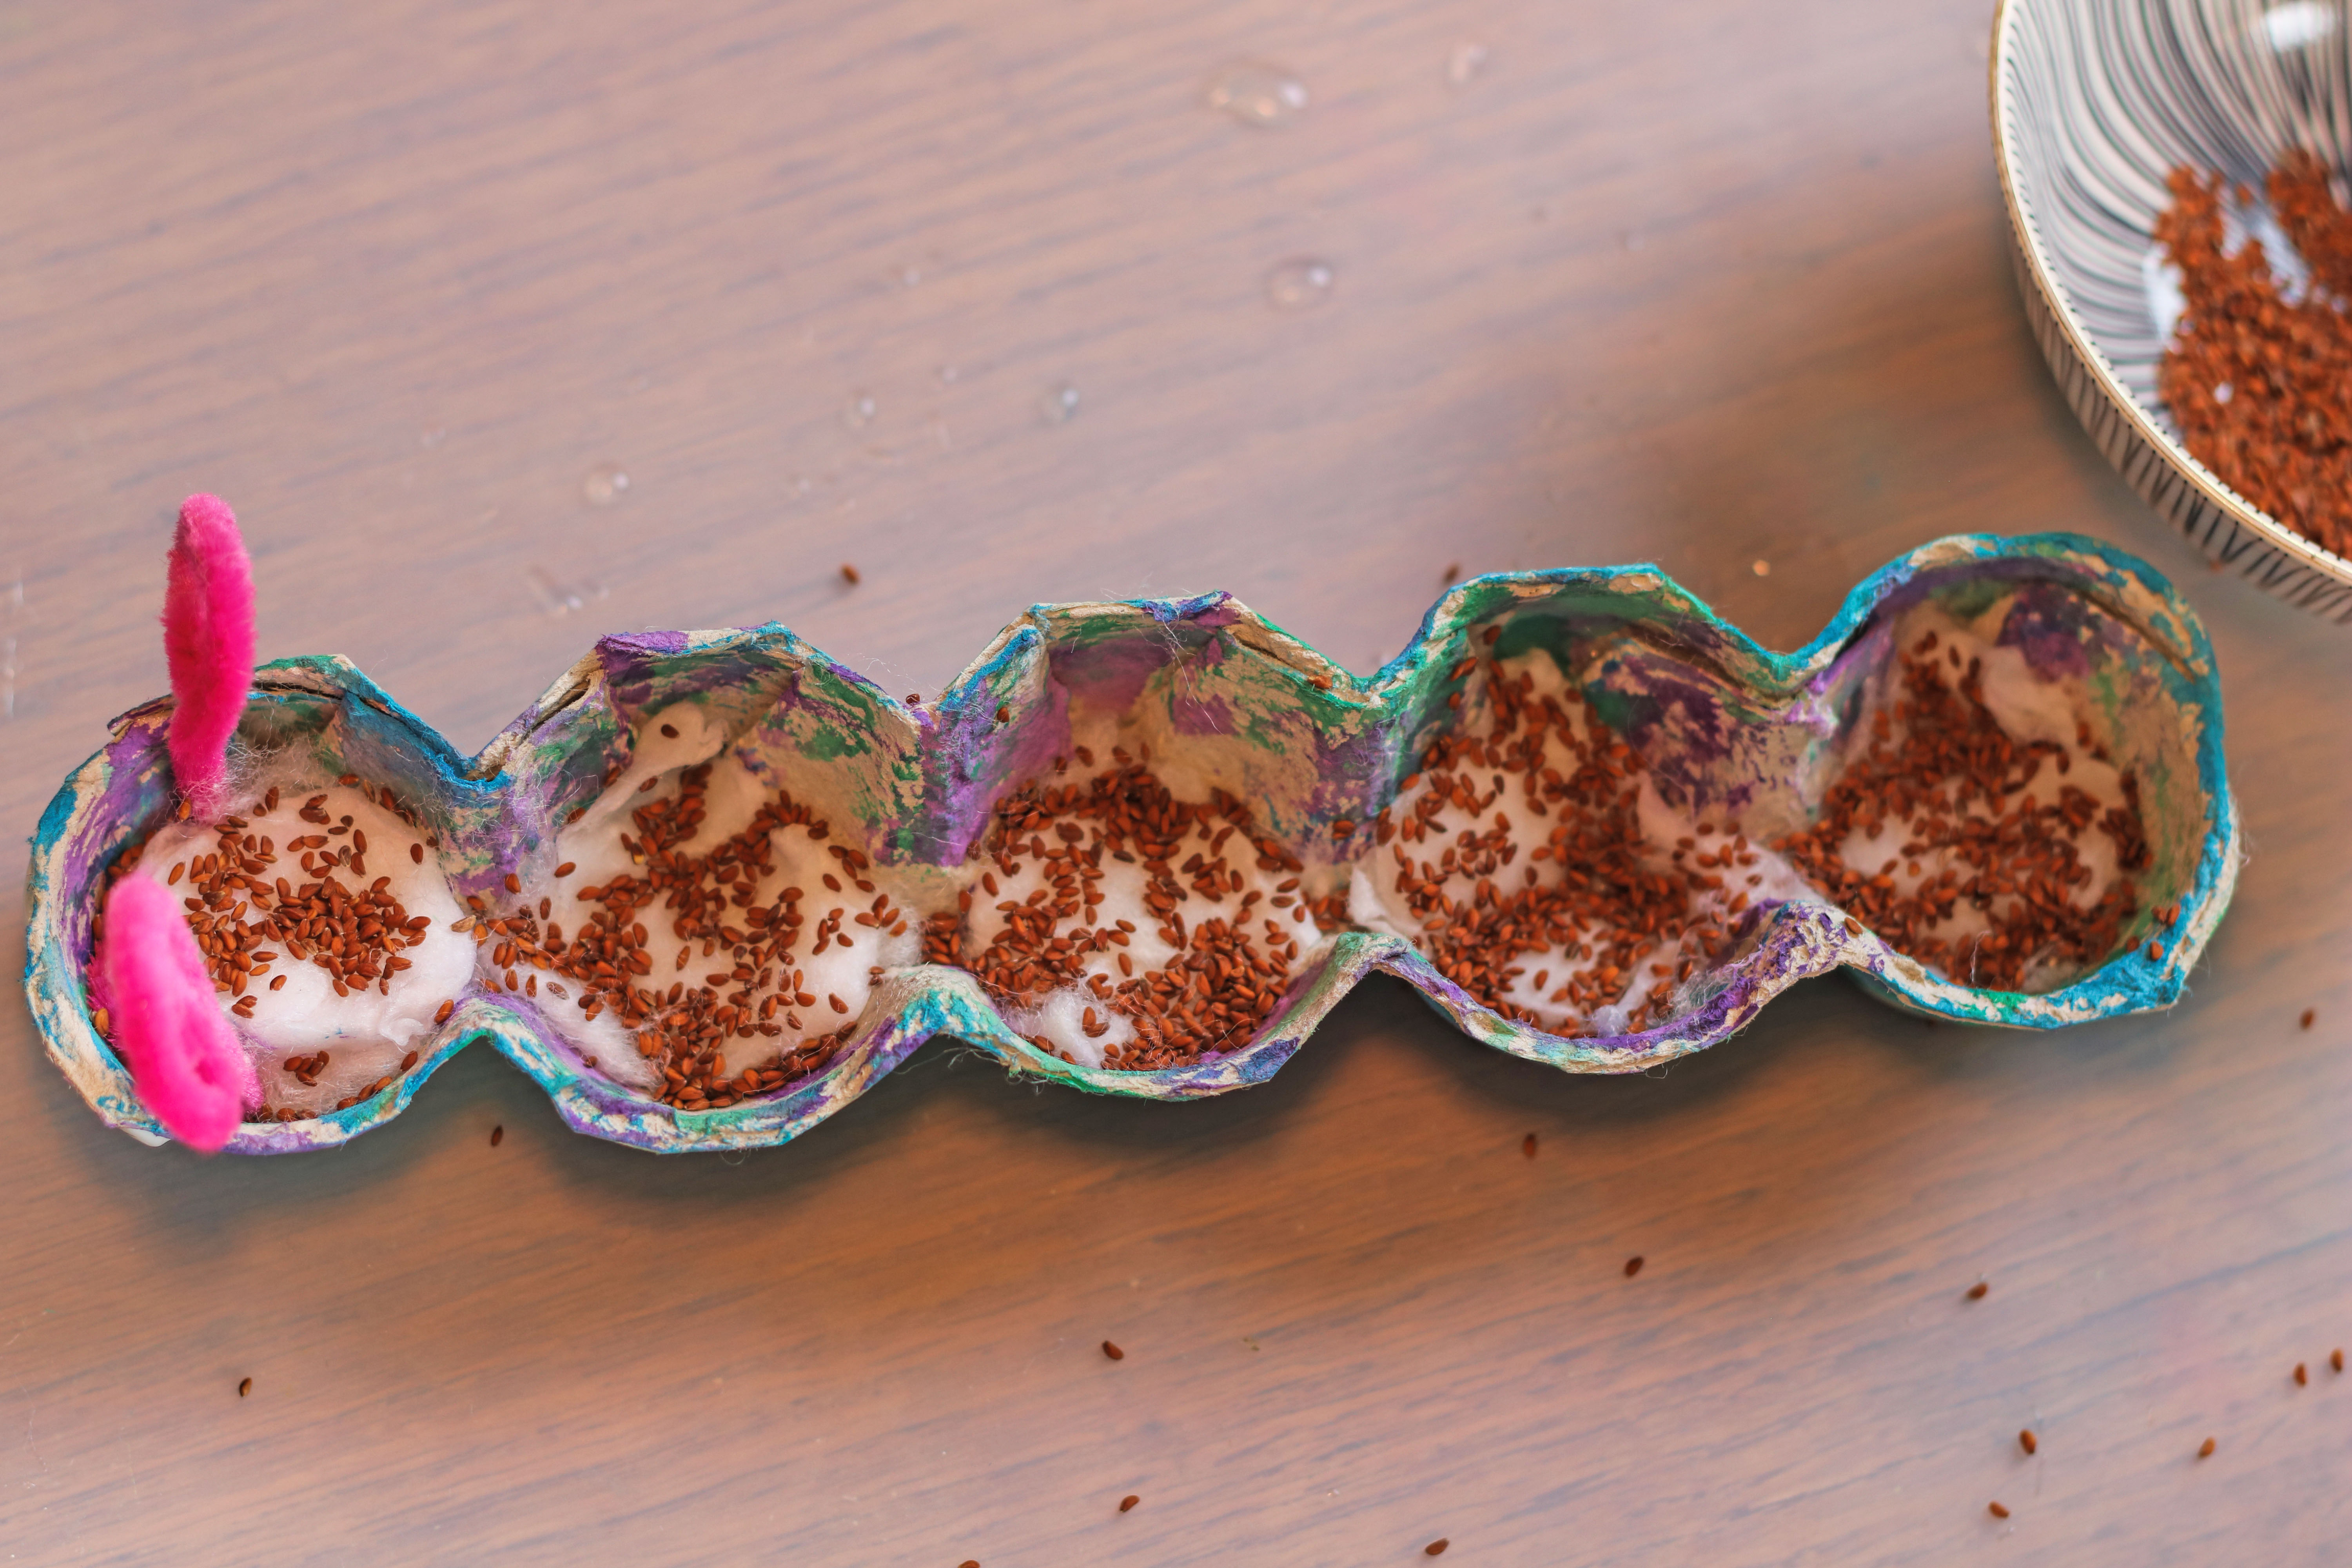
6. Sprinkle cress seeds on top:
Now your child can sprinkle the cress seeds onto the damp cotton wool. Young children usually find this especially fun. Afterward, you can gently spread the seeds out a bit if needed, so they aren’t too crowded together.
7. Keep moist:
Place the container in a bright spot and keep the cotton slightly moist over the next few days.
8. Let it grow and watch:
After just a short time, the cress will begin to sprout and the caterpillar will grow its green “hairs.” This is especially fun for children to watch.
If you’d like, I can write the next set of instructions in exactly the same tone.